Table of Contents
Advertisement
Quick Links
Advertisement
Table of Contents

Summary of Contents for Ronix 8500
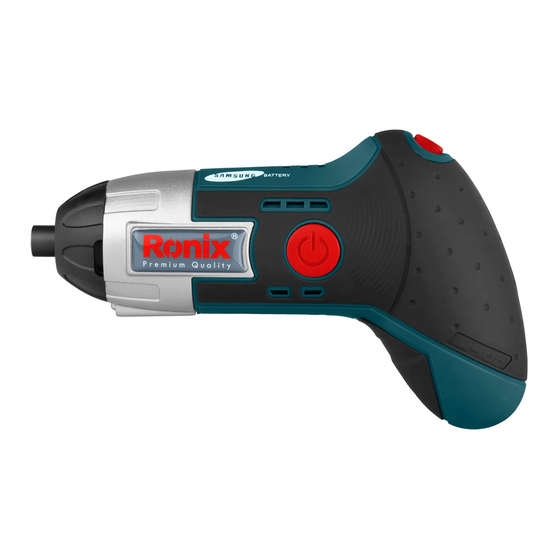
- Page 1 LI-ION CORDLESS SCREWDRIVER 8500...
-
Page 2: Technical Specifications
TECHNICAL SPECIFICATIONS Model 8500 Battery Chemistry Lithium Chuck Capacity 6.25mm-1/4 inch Battery Voltage 3.6V Battery Capacity 1.5Ah Max Torque Charging Time 3-5 Hours No-load RPM 0-200 RPM Weight 600gr 1 fast charger, 102 pcs of Accessories drill bits & sockets... -
Page 3: General Power Tool Safety Warnings
GENERAL POWER TOOL SAFETY WARNINGS WARNING! READ ALL SAFETY WARNINGS AND INSTRUCTIONS. Failure to follow the warnings and instructions may result in electric shock, fire and/or serious injury. SAVE ALL WARNINGS AND INSTRUCTIONS FOR FUTURE REFERENCE The term “power tool” in all of the warnings refers to your mains-operated (corded) power tool or battery-operated (cordless) power tool. -
Page 4: Personal Safety
shock if your body id earthed or graounded. -Do not expose power tools to rain or wet conditions. Water entering a power tool will increase the risk of electric shock. -Do not abuse the cord. Never use the cord for carrying, pulling or unplugging the power tool. - Page 5 protection used for appropriate conditions will reduce personal injuries. PREVENT UNINTENTIONAL STARING. Ensure the switch is in the off-position before connecting to power source and/or battery pack, picking up or carrying the tool. carrying power tools with your finger on the switch or energizing power tools that have the switch on invites accidents.
- Page 6 Do not use the power tool if the switch does not turn in on and off. Any power tool that cannot be controlled with the switch is dangerous and must be repaired. Disconnect the plug from the power source and/or the battery pack from the power tool before making any adjustments, changing accessories, or storing power tools.
- Page 7 with specifically designated battery packs. Use of any other battery packs may create a risk of injury and fire. When battery pack is not in use, keep it away from other metal objects like paper clips, coins, keys, nails, screws, or other small metal objects that can make a connection from one terminal to another.
- Page 8 Holding the work by hand or against your body leaves it unstable and may lead to loss of control. Do not drill, fasten or break into existing wall or other blind areas where electrical wiring may exist. If this situation is unavoidable, disconnect all fuses or circuit breakers feeding this worksite.
-
Page 9: Battery Charger
these chemicals are: - Lead from lead-based paints, - Crystalline silica from bricks and cement And other masonry products, and - Arsenic and chromium from chemically-treated lumber. Your risk from these exposures varies, depending on how often you do this type of work. -
Page 10: Battery Care
do not insert into charger. Battery short or fire may result. Charge battery pack in temperatures above +32 degrees F (0 degrees C) and below +113 degrees F (45 degrees C). store tool and battery pack in locations where temperatures will not exceed 120 degrees F (49 degrees C). -
Page 11: Battery Disposal
WARNING! BATTERY DISPOSAL Do not attempt to disassemble the battery or remove any com ponent projecting from the battery terminals. Fire or injury may result. Prior to disposal, protect exposed terminals with heavy insulating tape to pre- vent shorting. LITHIUM-ION BATTERIES If equipped with a lithium-ion battery, the battery must be collected, recycled or disposed of in an environ mentally sound manner. -
Page 12: Operation
5. Dispose of battery through your local waste removal authority. OPERATION CHARGING THE BATTERY This tool has been shipped in a low charge condition and should be fully charged prior to use. plug the 230V charger adaptor into an appropriate AC power outlet and switch on, Connect the charger plug of the AC adaptor into the charging socket of the screwdriver. -
Page 13: Starting Operation
STARTING OPERATION Switching On and Off To operate on the Driver press the On/Off trigger switch To turn off the Driver, release the On/Off trigger switch INSERTING DRIVER BITS Important! Always unplug the charger and make sure the forward/reverse switch is on the lock position, Refer to the forward/reverse in the coming instructions. - Page 14 To lock the Driver simply ensure that the forward/reverse switch is placed in between forward and reverse position. PRE DRILLING YOUR MATERIAL It is recommended to pre drill holes (pilot hole) in the material you are about to screw into. Pre drilling holes will assist the screwdriver when driving screws and enable your tool to operate efficiently.
-
Page 15: Led Light
the screwdriver. LED LIGHT The Drvier has a built in LED light to illuminate dark areas. MAINTAINANCE O Keep the ventilation vents of the tool clean at all times, if possible, prevent foreign object from entering the vents. O After each using, blow air through the tool housing to ensure it is free from all dust particles which may build up.


Need help?
Do you have a question about the 8500 and is the answer not in the manual?
Questions and answers