Table of Contents
Advertisement
Available languages
Available languages
Quick Links
H-7209, H-7210
H-8575
TOOL CABINETS
TOOLS NEEDED
10 mm Combination Wrench
Tool Cabinet x 1
CAUTION! Do not open more than one loaded
drawer at a time.
• Lock drawers before moving.
• Do not stand on the product. You may fall, which
may cause personal injury.
• Do not mount the product on truck bed or any other
moving object.
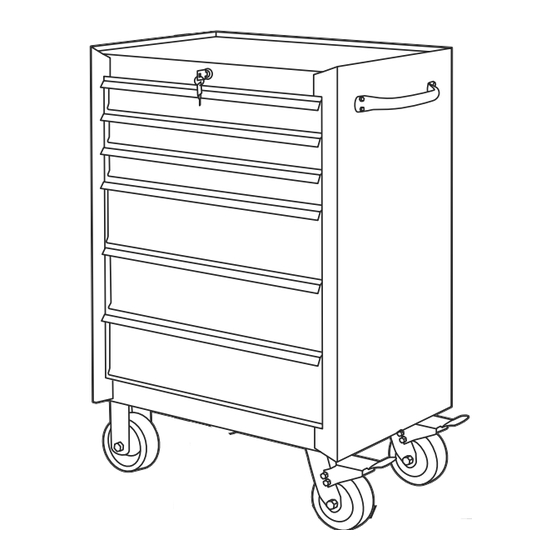
Figure 1
PAGE 1 OF 6
1-800-295-5510
uline.com
14 mm Combination Wrench
PARTS
Swivel Caster x 2
Rigid Caster x 2
M6 x 12 Bolt x 4
(8 for H-7210)
SAFETY
ASSEMBLY
M6 x 12 Bolt
Pour le français, consulter les pages 5-6.
Handle x 1 (2 for H-7210)
M10 x 25 Bolt x 16
• Apply brakes on swivel casters when not moving unit.
• Do not pull. Push to move.
• Do not step in the drawers. You may fall, which may
cause personal injury.
• Lubricate the top and bottom channels of the
drawer slides at least twice a year.
ATTACH HANDLE(S)
1. Align holes on the handle with holes on the side of
tool cabinet. (See Figure 1)
2. Insert four M6 x 12 bolts through the holes in the
handle. Secure using 10 mm combination wrench,
but do not tighten.
3. Once all screws are installed, tighten screws
completely.
4. If tool cabinet came with two handles (H-7210),
repeat above steps on opposite side of tool cabinet.
Para Español, vea páginas 3-4.
Cabinet Key x 2
Drawer Liner x 4
(6 for H-7209)
(11 for H-7210)
0721 IH-7209
Advertisement
Table of Contents

Related Manuals for U-Line H-7209


Summary of Contents for U-Line H-7209
- Page 1 Cabinet Key x 2 Tool Cabinet x 1 Drawer Liner x 4 M6 x 12 Bolt x 4 M10 x 25 Bolt x 16 (6 for H-7209) (8 for H-7210) (11 for H-7210) SAFETY CAUTION! Do not open more than one loaded •...
- Page 2 ASSEMBLY CONTINUED ATTACH CASTERS Lay tool cabinet on its back on a soft surface so the bottom is accessible. 2. Align caster bolt holes with holes on the tool cabinet. (See Figure 2) 3. Thread bolts into holes using 14 mm wrench, but do not tighten completely.
- Page 3 4 Pernos M6 x 12 16 Pernos M10 x 25 4 Cubiertas para Cajón (8 para H-7210) (6 para H-7209) (11 para H-7210) SEGURIDAD ¡PRECAUCIÓN! No abra más de un cajón con • Coloque los frenos en las ruedas giratorias cuando artículos dentro a la vez.
- Page 4 CONTINUACIÓN DE ENSAMBLE COLOQUE LAS RUEDAS 1. Coloque el carrito de herramientas sobre su parte posterior en una superficie suave para que la parte inferior quede accesible. 2. Alinee los orificios para pernos de las llantas con los orificios en el carrito de herramientas. (Vea Diagrama 2) 3.
- Page 5 Boulon M6 x 12 x 4 Boulon M10 x 25 x 16 Doublure de tiroir x 4 (8 pour H-7210) (6 pour H-7209) (11 pour H-7210) SÉCURITÉ AVERTISSEMENT! N'ouvrez pas plus d'un tiroir • Appliquez les freins sur les roulettes pivotantes lorque rempli à...
- Page 6 MONTAGE SUITE FIXATION DES ROULETTES Posez l'armoire à outils sur son dos, sur une surface douce pour accéder au bas. 2. Alignez les trous des roulettes sur ceux de l'armoire à outils. (See Figure 2) 3. Insérez les boulons dans les trous à l'aide d'une clé mixte de 14 mm, mais ne serrez pas complètement.
Need help?
Do you have a question about the H-7209 and is the answer not in the manual?
Questions and answers