Advertisement
π
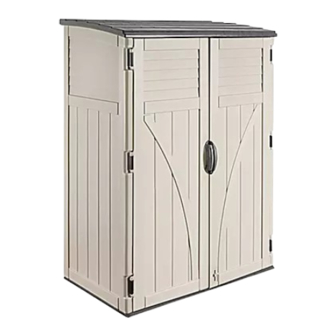
H-1229
JUMBO
STORAGE SHED
TOOLS NEEDED
Phillips Screwdriver
Safety Glasses
Floor Panel (A) x 1
Header (F) x 1
NOTE: Check that all parts are included in
packaging. Select a site with level ground and
good drainage. The doors and roof function
best when the shed is level.
PAGE 1 OF 5
1-800-295-5510
uline.com
Electric Drill
with Phillips Bit
or
Left Side Panel (B) x 1
Left Door Panel (G) x 1
PARTS
Right Side Panel (C) x 1
Right Door Panel (H) x 1
Back Panel (D) x 1
Door Handle x 2
#14 x .75 Screw x 32
Roof Panel (E) x 1
Lock Hasp x 1
0314 IH-1229
Advertisement
Table of Contents

Related Manuals for U-Line H-1229


Summary of Contents for U-Line H-1229
- Page 1 π H-1229 1-800-295-5510 uline.com JUMBO STORAGE SHED TOOLS NEEDED Electric Drill with Phillips Bit Phillips Screwdriver Safety Glasses PARTS Floor Panel (A) x 1 Left Side Panel (B) x 1 Right Side Panel (C) x 1 Back Panel (D) x 1...
- Page 2 ASSEMBLY INSTRUCTIONS Step 1: • With back panel interlock with grooves on side panels, slide down and snap into floor panel. • Snap left side panel (B) into floor panel (A). (See Figure 3) (See Figure 1) Figure 3 Figure 1 Step 2: • Insert header (F) into underside of roof panel (E).
- Page 3 ASSEMBLY INSTRUCTIONS CONTINUED Step 3: Step 4: • Position roof assembly on top of shed walls. • Secure roof assembly to side panels by inserting (See Figure 6) 4 screws into dimples on the interior header (See Figure 7) and 10 screws into the dimples around the • Position the bottom hinge pin of left door panel (G) interior roof perimeter.
- Page 4 ASSEMBLY INSTRUCTIONS CONTINUED Step 4 Continued: Step 5: • Secure side and back panels to the floor panel • Attach each door handle using 4 screws. using 6 screws in the dimples along the bottom (See Figure 10) interior. (See Figure 9) • Snap lock hasp through the back of the left door.
- Page 5 OPTIONAL PEGBOARD INSTALLATION INSTRUCTIONS WARNING! Do not exceed 50 lbs. on any one 3. Attach 2 more wall anchors to the pegboard given wall in the shed structure. vertically in line with and 22" below the top anchors using provided screws. (See Figure 2) 1.
Need help?
Do you have a question about the H-1229 and is the answer not in the manual?
Questions and answers