Table of Contents
Advertisement
Advertisement
Table of Contents

Related Manuals for AVOCOR AVG Series


Summary of Contents for AVOCOR AVG Series
- Page 1 AVG Series User Manual...
-
Page 2: Table Of Contents
AVG Series User Manual | 1 TABLE OF CONTENTS Compliance Information ........................... 3 Declaration of Conformity ..........................3 FCC Part 15................................ 3 Caution ................................. 3 Industry Canada (ICES-003) ..........................4 Product Disposal .............................. 4 Disposal of Old Electrical and Electronic Equipment ..................4 Introduction ............................. - Page 3 AVG Series User Manual | 2 Wall Mount ..............................20 Peripheral Connections ........................... 22 Top-Rear & Side Ports ..........................22 Rear-Side Ports............................23 Bottom-Rear Ports ............................24 OPS Module ..............................25 OPS Installation Step-by-Step ........................25 Remote Control ............................... 28 Remote Control Batteries ...........................
-
Page 4: Compliance Information
AVG Series User Manual | 3 COMPLIANCE INFORMATION Declaration of Conformity Avocor hereby declares that the following Product Model Number: AVG series conforms to the provisions of the following regulations: • FCC: FCC CFR Title 47 Part 15 Subpart B Class A, CISPR22 ANSI C63.4... -
Page 5: Industry Canada (Ices-003)
AVG Series User Manual | 4 Industry Canada (ICES-003) CAN ICES-3 (A)/NMB-3(A) Product Disposal The Product contains small amounts of tin, lead, and/or mercury. Disposal of these materials may be regulated due to environmental considerations. Disposal of Old Electrical and Electronic Equipment... -
Page 6: Introduction
4K@60hz resolution, up to 20 simultaneous touch points, multiple source inputs for your computers and peripheral devices, and our new intuitive UiQ. Our AVG series displays follow our agnostic approach to interactive displays: they are compatible with a wide range of hardware and software, making it a great addition to any interactive meeting-room solution. -
Page 7: Graphic Conventions
AVG Series User Manual | 6 Graphic Conventions The following symbols appear throughout this manual to emphasize key points. Keep these in mind not only to benefit from their advice, but also to avoid problems with the display or personal injury. -
Page 8: What's In The Box
AVG Series User Manual | 7 WHAT'S IN THE BOX? • Avocor AVG series Interactive Display • Quick Start Guide and User Manual QR code • Remote Control & Batteries • (2) Touch Stylus • Power Cables o US Cable 1.8m o UK Cable 1.8m... -
Page 9: Specifications
Display Orientation Landscape Touch System Touch Up to 20 Point Avocor Intelligent Touch – Supports 4 fine tip stylus Glass 3.2 mm AG & AF Coating Tempered Glass Supported OS Windows 7 Pro, 8, 8.1 & 10; Mac OS 10.1 or later; Linux based OS Kernel 3.15 or later... -
Page 10: The Display, At A Glance
AVG Series User Manual | 9 THE DISPLAY, AT A GLANCE The following diagrams depict the front, side, and bottom panels of the display. The physical interface and connections are labeled, and then described in the tables that follow. Front Panel... -
Page 11: Back Panel
AVG Series User Manual | 10 Back Panel AC Output IEC C14 type Main Power Switch A/C Rocker Switch; toggles all power to the display. AC Input IEC C14 type OPS Slot 80 Pin JAE TX24A-80R standard OPS input Rear Source Inputs DisplayPort, HDMI 1, HDMI 2, Touch USB 3.0, USB 3.0, Type-C, Audio Out, IR,... -
Page 12: Front Panel Interface
AVG Series User Manual | 11 Front Panel Interface Turn the display on/off. Power Switch sources. Source Open UiQ Settings. Menu Access the Home screen. Home Short press to reduce one level of volume; Long press, continue to reduce the Volume - volume. -
Page 13: Pr Sensor
AVG Series User Manual | 12 PR SENSOR PR Sensor Detects movement in a scanned area, for angle coverage and detection range, see the PR Sensor image below: Sensing Angle: 120 degrees Sensing Distance: 3.5 ± 0.5 meters... -
Page 14: Rear Source Inputs
AVG Series User Manual | 13 Rear Source Inputs 11 12 USB 3.0 USB 3.0 type A for connecting external media, keyboard, or mouse. USB 3.0 USB 3.0 type A for connecting external media, keyboard, or mouse. Type-C USB Type-C for connecting DP, USB, Power Delivery and Ethernet. -
Page 15: Bottom-Rear Panel Inputs
AVG Series User Manual | 14 Bottom-Rear Panel Inputs For interfacing with a PC or RS232C DB9 Female Input automation/control system. Ethernet Out RJ45 Output Lan Out, 10/100Mbps. Ethernet In RJ45 Input Lan In, 10/100Mbps. Connect a USB stick for firmware... -
Page 16: Ac Power Inputs
AVG Series User Manual | 15 AC Power Inputs AC Output A power output connection. AC Switch Turn the AC power on / off. AC Input A power input connection... -
Page 17: Top-Rear & Side Panel Guest Inputs
AVG Series User Manual | 16 Top-Rear & Side Panel Guest Inputs USB 3.0 USB 3.0 type A for connecting external media, keyboard, or mouse. USB 3.0 USB 3.0 type A for connecting external media, keyboard, or mouse. USB 3.0... -
Page 18: Installation
AVG Series User Manual | 17 INSTALLATION Please read the following precautions carefully before installing your new Avocor AVG series display. Failure to comply may result in damage to the display and equipment and may result in personal injury or death. -
Page 19: Moving And Carrying Notice
AVG Series User Manual | 18 Moving and Carrying Notice • To avoid possible damage to the display like bending of parts, make sure to spread the load evenly for vertical lifting. • The handles are designed for manual lifting only. Please do not use improper tools or equipment to carry the display which will cause damage to the handles. -
Page 20: Ambient Considerations
AVG Series User Manual | 19 Ambient Considerations Environmental and ambient factors play a considerable role in determining your viewing experience and the functional operation of the display. Make sure to follow these guidelines carefully to get the most out of your display. -
Page 21: Mounting The Display
AVG Series User Manual | 20 Mounting the Display You can mount the display on a wall. If you do decide to wall-mount the display, ensure that the wall-mount bracket is installed according to the instructions included with it. The wall must be capable of supporting a redundant weight factor three (3) times the weight of the display, or be reinforced. - Page 22 AVG Series User Manual | 21 Use maximum 15mm/0.59” long screws. 8mm/0.3” Metric NOTE ➢ Use only the approved wall-mount kit designed for the display; talk to the installation experts for their recommendations and advice. ➢ Make sure the tilt degree of the wall does not exceed 2 degrees.
-
Page 23: Peripheral Connections
The below diagrams demonstrate how to connect your peripherals for the best possible results. TOP-REAR & SIDE PORTS This is where you can connect your AVG series with an external media device, a keyboard, a mouse or an accompanying USB 3.0 compatible accessory. -
Page 24: Rear-Side Ports
AVG Series User Manual | 23 REAR-SIDE PORTS The preferred method to properly connect a device to the panel is to connect your device to one of the video inputs via HDMI or DisplayPort and connect your USB-A—USB-B cable to your device and the USB Touch input. -
Page 25: Bottom-Rear Ports
AVG Series User Manual | 24 BOTTOM-REAR PORTS The bottom rear ports on your AVG series display are great for connecting your network, control and update systems. The Service Port is only intended for firmware updates and can only connect via a... -
Page 26: Ops Module
AVG Series User Manual | 25 OPS Module Your Avocor AVG series is compatible with any Open Pluggable Standard (OPS) computer module. Installing an Avocor OPS module is a relatively simple process, but one that still needs a level of care and attention. Improper installation may cause malfunction or even damage the OPS module or the OPS Slot-Connector on the display. - Page 27 AVG Series User Manual | 26 IV. Take off the handle carefully on the display input panel V. Remove the OPS slot shield on the display input panel VI. Install the OPS computer by carefully sliding it into the OPS slot as pictured below.
- Page 28 AVG Series User Manual | 27 VII. Secure the OPS computer into the slot using the screws that were removed earlier That's it! Your OPS should be ready to go. Turn the main power of the display back on and hit the power...
-
Page 29: Remote Control
AVG Series User Manual | 28 Remote Control POWER Power on/off the display HOME Navigate to the selected Favorite Source SOURCE Open the source selection menu OK/ DIRECTION Menu navigation and selection KEYS EXIT Go back to the previous menu VOL. -
Page 30: Remote Control Batteries
AVG Series User Manual | 29 REMOTE CONTROL BATTERIES To install batteries in the remote control: 1. Press down the tab on the cover plate and pull the cover plate up. 2. Insert the included batteries. Ensuring that the polarities correctly match the (+) and (-) markings inside the battery compartment. - Page 31 AVG Series User Manual | 30 Remote Control IR Sensor The effective area of the remote control includes the vertical distance within 3 ± 0.5 metres in front of the display, and the area within an angle of 90 degrees from the vertical point to the left and the right.
-
Page 32: Operation
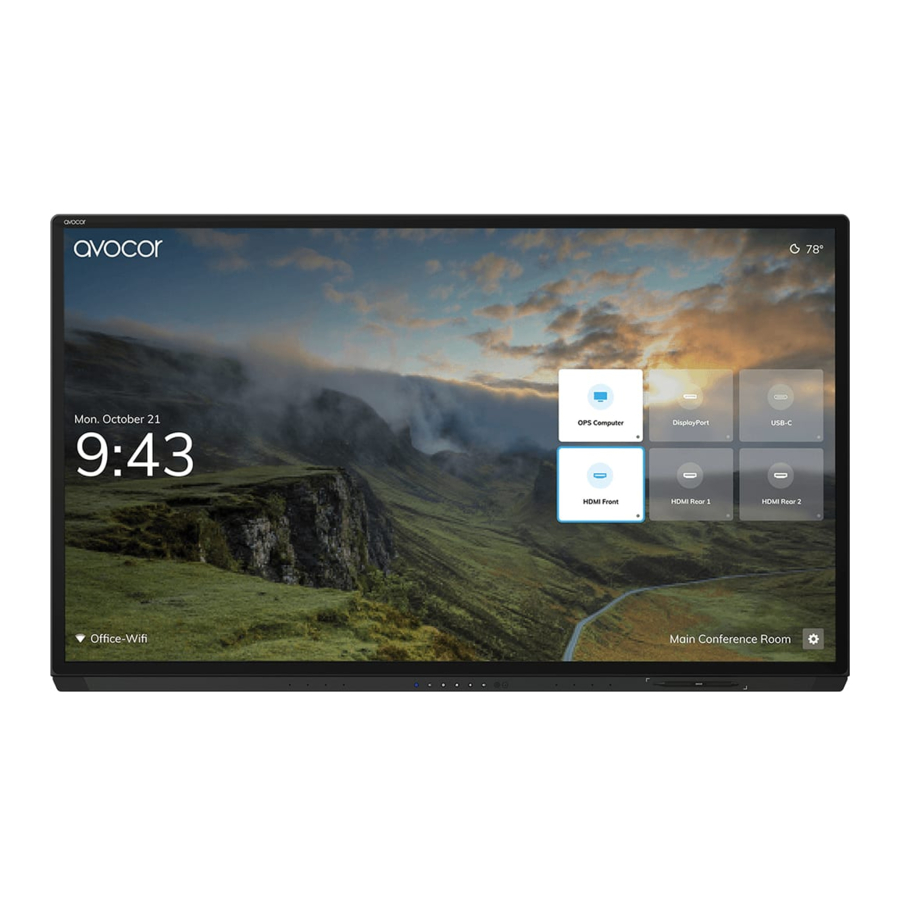
The Home Screen The Home Screen is the default landing page and general hub for the AVG series’ touch interface. Here, you can configure the display's settings via the OSD and select an input source without having to use the remote... -
Page 33: The Uiq
AVG Series User Manual | 32 The UiQ To access the UiQ, touch the gear icon on the home screen, or press the Menu key on your remote control. You can access the various menu settings by touching the icon squares in this interface (see the image above). - Page 34 AVG Series User Manual | 33 Avocor Logo Toggles the presence of the Avocor logo on the Home Screen. Name Changes the name assigned to the display, which is visible on the Home Screen. Wallpaper Set a default or custom User Images for the Home Screen. A Slideshow is selected by default.
-
Page 35: Display Settings Tips
DISPLAY SETTINGS TIPS The Display settings submenu contains configuration options for various picture and audio settings for your AVG series Navigating the menus is straightforward and intuitive, but we'll provide some tips and knowhow to help you get started. Custom Wallpapers The AVG series already comes with some gorgeous high-resolution wallpapers, but you can easily upload your own. - Page 36 W, T, F tiles, then your display will automatically power on at 8:30 AM, Monday thru Friday, while skipping Saturday and Sunday, every week. Utilizing these settings is highly recommended if you expect heavy use and long hours for your AVG series display, as this will help maintain its longevity.
-
Page 37: Network Settings Tips
AVG Series User Manual | 36 Status Shows Network and LAN status (Cable Connected, Not Connected). Set a Static IP or DHCP. Wi-Fi Configure Wi-Fi settings (additional USB device required)); locate the MAC Address. Wake On LAN Toggle Wake On LAN. - Page 38 AVG Series User Manual | 37 Language Set the language for the display's user interface. Support English, French, German, Spanish, Italian and Dutch.
- Page 39 AVG series User Manual | 38 Timezone Set Timezone based on city and region. Auto Date & Time Toggle Auto Date & Time On (internet connection required, see NOTE below) or Off. Set Date Manually set the date. Set Time Manually set the time.
- Page 40 AVG Series User Manual | 39 Favorite Source Set the favorite source (Home Screen, OPS Computer, HDMI 1, HDMI 2, DisplayPort, Type-C). Starting Source Set the default source the display will show automatically upon powering on the display (Home Screen, OPS Computer, HDMI 1, HDMI 2, DisplayPort, Type-C).
- Page 41 AVG Series User Manual | 40 Require Passkey Toggle Require Passkey on/off. Set Passkey Set a custom Passkey to access display settings. Lock Front Button Lock the buttons on the front panel.
- Page 42 AVG Series User Manual | 41 Name The full name and model of the display. Firmware Version The active firmware version number. Serial Number The unique serial number for the display. Model Number The model number of the display. Update System Used to update the display's firmware.
-
Page 43: Update System - Firmware
Connecting through an Ethernet network on your display, the system can automatically detect the updates and enable firmware upgrading within a few steps. The system will check the Avocor website and display the Update Available dialog message if there is new firmware version. - Page 44 AVG Series User Manual | 43 Press Download & Apply Update. A dialogue box shows there is a new firmware available then click the Install button to proceed. After selecting the Install button, a progress bar will appear as the download process begins. When the installation reaches 100%, the display will restart.
- Page 45 AVG Series User Manual | 44 USB Update – Instructions (FW version 1.02 or higher) For your convenience, detailed instructions will appear once you open the USB Update option in the OSD menu. Once a compatible USB Stick has been detected, the...
-
Page 46: External Control
Telnet (Port 23). Command and Response Format Any commands sent from an automation/control system or PC to an Avocor display must have the following format (ASCII is not accepted/used [STX] [IDT] [TYPE] [CMD] [VALUE]/[REPLY] [ETX] •... -
Page 47: Serial Command List
AVG Series User Manual | 46 Serial Command List Main Item Control Item Type Value Reply Content CMD (HEX) (HEX) (HEX) Off (soft power) Power Control 50 4F 57 On (soft power) *NOTE IPC Control 49 50 43 Power Control... - Page 48 AVG Series User Manual | 47 Main Item Control Item Type Value Reply Content CMD (HEX) (HEX) (HEX) 115200 38400 Baudrate Adjustment 42 52 41 19200 9600 MENU Key INFO Key UP Key DOWN Key LEFT Key RIGHT Key ENTER Key...
- Page 49 AVG Series User Manual | 48 Main Item Control Item Type Value Reply Content CMD (HEX) (HEX) (HEX) 13 bytes Read Serial Number 53 45 52 13 bytes Read Model Name 4D 4E 41 6 bytes Read Firmware Version 47 56 45...
- Page 50 AVG Series User Manual | 49 Main Item Control Item Type Value Reply Content CMD (HEX) (HEX) (HEX) 1080P HDMI1 EDID 45 48 31 4K60Hz 1080P HDMI 2 EDID 45 48 32 4K60Hz 1080P OPS EDID 45 48 35 4K60Hz...
- Page 51 AVG Series User Manual | 50 Main Item Control Item Type Value Reply Content CMD (HEX) (HEX) (HEX) 00~FF 00~FF Static IP Address 3 49 50 33 00~FF 00~FF Static IP Address 4 49 50 34 00~FF 00~FF Subnet Mask 1...
-
Page 52: Warranty Information
This warranty does not cover installation, signal reception problems, potential incompatibility with peripheral devices, or acts of nature. Avocor does not warrant nor shall it be liable for Products which have been subject to abuse, including, but not limited to, improper voltage, accident, misuse, negligence, lack of reasonable... - Page 53 If freight was arranged by Avocor, and patent or obvious physical damage to the packaging is not detected but found on the product or product accessories upon inspecting the product, the customer must report the damages to Avocor within 10 calendar days after the delivery date to receive warranty services.
- Page 54 GUIDELINES. CONTACT SUPPORT FOR FURTHER DETAILS. Defective on Arrival (DOA): If the Product is determined by Avocor to be defective within the first 90 days of the initial purchase by the Customer, it is deemed Defective on Arrival (DOA). In the case of a DOA, the Customer will be provided a brand-new equivalent Product.
Need help?
Do you have a question about the AVG Series and is the answer not in the manual?
Questions and answers