
Related Manuals for Hisense HK870 Series


Summary of Contents for Hisense HK870 Series
- Page 1 HK870 Series All-in-One Point of Sale System System Integration Manual Document version 1.0...
- Page 2 Copyright Statement © 2015 Hisense Company Ltd. All Rights Reserved. All material in this System Integration Manual is the property of Hisense Company Ltd. and its subsidiaries, and is protected under US, CANADA, MEXICO and International copyright and/or other intellectual property laws. Reproduction or transmission of the materials, in whole or in part, in any manner, electronic, print, or otherwise, without the prior written consent of Hisense Company Ltd.
- Page 3 Incorrectly replacing a battery can result in an explosion. Make sure to only replace the battery with the same or equivalent type as recommended by the manufacturer (Hisense). Discard used batteries according to the manufacturer’s instructions. Do not remove the peripheral device before you turn off the system.
-
Page 4: Table Of Contents
List of Tables.............................7 Section 1. Introduction......................... 8 Welcome to the Hisense family! ......................8 Overview of the Hisense HK870 Series All-in-one POS System............8 Section 2. Understanding the HK870 Series POS..................9 Understanding the HK870 Series POS ....................9 Controls and other Exterior Components..................9 HK870 POS System dimensions and angles................... - Page 5 HK870 series Specifications....................... 35 Appendix A. Basic Input and Output System (BIOS) Set Up Information ..........38 Understanding BIOS........................... 38 Entering the Setup for HK870 series....................38 Scenarios of when to use a BIOS Setup ..................38 Appendix B. Input/Output Information....................39 Input/Output information for the HK870 series................39...
-
Page 6: List Of Figures
List of Figures Figure 1. Front view of the HK870 series POS System................9 Figure 2. Back view of the HK870 Series POS System................9 Figure 3. POS dimensions at a fixed angle and with an LCD at a slanted angle........10 Figure 4 Built-in ports of the POS system.................... -
Page 7: List Of Tables
Table 19. HK870E Mini-PCIE description....................29 Table 20. HK870E Cash Drawer Description..................29 Table 21. HK870E PS/2 Description....................... 30 Table 22. HK870E Power connector description..................30 Table 23. HK870 series Specifications....................35 Hisense HK870 Series All-in-One POS System Integration ManualPage 7 of 41... -
Page 8: Section 1. Introduction
Power adapter (in the base) Power cord Contact information for questions If any items are missing from the carton box or you have questions, contact Hisense via phone, email or postal mail. Phone (86) 532 5575 -1252 (International): Monday through Friday between 9 a.m. to 6 p.m. -
Page 9: Section 2. Understanding The Hk870 Series Pos
Controls and other Exterior Components Figure 1. Front view of the HK870 Series POS System Figure 2. Back view of the HK870 Series POS System Disclaimer: The exterior design and specifications for this product may be changed without prior notice in order to improve quality. -
Page 10: Hk870 Pos System Dimensions And Angles
HK870 POS System dimensions and angles Figure 3. POS dimensions at a fixed angle and with an LCD at a slanted angle Ports HK870 (D2550 motherboard) POS system has 16 built-in ports. Hisense HK870 Series All-in-One POS System Integration ManualPage 10 of 41... -
Page 11: Figure 4 Built-In Ports Of The Pos System
HK870E (Baytrail J1900 motherboard) POS system has 15 built-in ports. Figure 4 Built-in ports of the POS system Hisense HK870 Series All-in-One POS System Integration ManualPage 11 of 41... -
Page 12: Section 3. Installing The Pos System
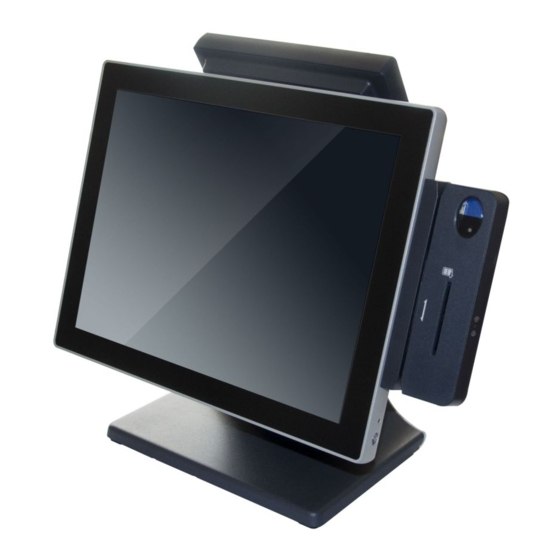
The socket-outlet should be installed near the equipment and easy to access Figure 5. Angle view of the POS system Hisense HK870 Series All-in-One POS System Integration ManualPage 12 of 41... -
Page 13: Connecting Peripherals
Note: You can use a 100V - 240V adapter with this POS system. You should only use the manufacturer (Hisense) adapter with this POS system. Hisense will not be held liable for any damages caused by using products made by other manufacturers. -
Page 14: Figure 7. Dc Power Supply Cable
HK870E (Baytrail J1900 motherboard) Figure 7. DC power supply cable Hisense HK870 Series All-in-One POS System Integration ManualPage 14 of 41... -
Page 15: Section 4. Installing Utility Software
Install the Chipset , Graphics, LAN, Audio in proper sequence on the HK870 system. To install the software on the HK870E(Baytrail J1900) Mainboard: Mainboard Figure 8. USB3.0 Driver files Touch Panel Hisense HK870 Series All-in-One POS System Integration ManualPage 15 of 41... -
Page 16: Using A Dual Monitor With The Pos System
You can use a dual monitor (which is two monitors for one system) with the POS system. You can connect the additional monitor to the [VGA] port. The screen for the sub-monitor can be displayed as a duplication of the main monitor or as an extended screen. Hisense HK870 Series All-in-One POS System Integration ManualPage 16 of 41... -
Page 17: Figure 11. Screen Resolution Feature
If you want to change to an extended screen, set the Multiple displays option to ‘Extend these displays’ and click “OK”. Figure 13 shows where two different extended screen monitors are being used. Hisense HK870 Series All-in-One POS System Integration ManualPage 17 of 41... -
Page 18: Figure 13. Extend These Displays Option
6. If the configuration is finished, click the OK button to close the Change the appearance of your displays dialog window. Figure 15. Change the appearance of your displays window Hisense HK870 Series All-in-One POS System Integration ManualPage 18 of 41... -
Page 19: Section 5. Getting Familiar With The Hk870 Motherboard
Section 5. Getting familiar with the HK870 motherboards The HK870 Series is comprised of two different motherboards: HK870 and HK870E. HK870 (D2550) Motherboard Layout Figure 16. HK870 Motherboard Figure 17. HK870 Connectors HK870 Connectors and Functions Table 1. HK870 Connectors and Functions... -
Page 20: Hk870 Common Jumpers And Functions
Debug Header 26. SO_DIMM SO-DIMM socket 27. SATA SATA connector 28. MINIPCIE MINIPCIE socket 29. SIM SIM card socket HK870 Common Jumpers and functions Table 2. Common Jumper Descriptions Hisense HK870 Series All-in-One POS System Integration ManualPage 20 of 41... -
Page 21: Hk870 Display Description
LVDS VCC Selection Jumper (3*2 Pin 2.00mm) Notes: Only one jumper can be installed at once, otherwise, the LVDS device or the motherboard will get damaged. VGA Header(12*1 Pin 2.00mm) Hisense HK870 Series All-in-One POS System Integration ManualPage 21 of 41... -
Page 22: Hk870 Audio Description
Table 4. HK870 Audio description HK870 LAN Description Table 5. HK870 LAN Description Description LAN IC RTL811E 10M/100M/1000M PIN TYPE RJ45 HK870 USB Description Table 6. HK870 USB Description HK870 COM Description Hisense HK870 Series All-in-One POS System Integration ManualPage 22 of 41... -
Page 23: Hk870 Mini-Pcie Description
Pin 9 of J_COM3 and J_COM4 are “N/C”(default),and 5V or 12V selectable. COM1 Control Jumper (3*1 Pin 2.00mm) COM2 Control Jumper (3*1 Pin 2.00mm) COM3 Control Jumper (3*1 Pin 2.00mm) COM4 Control Jumper (3*1 Pin 2.00mm) Hisense HK870 Series All-in-One POS System Integration ManualPage 23 of 41... -
Page 24: Hk870 Cash Drawer Description
RJ11 +24V PIN defined 1.GND 2.CD_OPEN 3.CD_SENSE 4.+24V 5.NC 6.GND HK870 PS/2 Description Table 10. HK870 PS/2 Description HK870 Power connector description Table 11. HK870 Power connector description SATA PWR Hisense HK870 Series All-in-One POS System Integration ManualPage 24 of 41... -
Page 25: Hk870E Motherboard Layout
HK870E (Baytrail J1900) Motherboard Layout Figure 16. HK870E Motherboard Figure 17. HK870E Connectors HK870E Connectors and Functions Table 12. HK870E Connectors and Functions Hisense HK870 Series All-in-One POS System Integration ManualPage 25 of 41... -
Page 26: Hk870E Common Jumpers And Functions
USB connector 28. HP Headphone connector 29.Thermal Thermal module HK870E Common Jumpers and functions Table 13. Common Jumper Descriptions Jumper Function Setting Normal Clear CMOS JBAT 3-pin 2-3 Clear CMOS Hisense HK870 Series All-in-One POS System Integration ManualPage 26 of 41... -
Page 27: Hk870E Display Description
Pin No. Function Pin No. Function LVDS0_P2 LVDS1_P2 LVDS0_CLKN LVDS1_CLKN LVDS0_N0 LVDS0_CLKP LVDS1_N0 LVDS1_CLKP LVDS0_P0 Interface defined LVDS1_P0 DDC_CLK DDC_DATA LVDS0_N1 LVDS1_N1 LVDS0_P1 LVDS0_N3 LVDS1_P1 LVDS1_N3 LVDS0_P3 LVDS1_P3 LVDS0_N2 LVDS1_N2 Hisense HK870 Series All-in-One POS System Integration ManualPage 27 of 41... -
Page 28: Hk870E Audio Description
1■ 2● 3● 4● MIC-L PIN Type 1*4Pin 2.0mm wafer box HK870E LAN Description Table 16. HK870 LAN Description Description RTL811E 10M/100M/1000M LAN IC PIN TYPE RJ45 HK870E USB Description Hisense HK870 Series All-in-One POS System Integration ManualPage 28 of 41... -
Page 29: Hk870E Mini-Pcie Description
3● 4● 5● 6● HK870E MINI-PCIE Description Table 19. HK870E Mini-PCIE description MINI-PCIE Description Connector type 1*Mini PCIE Port HK870E Cash Drawer Description Table 20. HK870E Cash Drawer Description Hisense HK870 Series All-in-One POS System Integration ManualPage 29 of 41... -
Page 30: Hk870E Ps/2 Description
1▇ 2● 1. GND 2. GND 3● 4● 3. 24V 4. 24V SATA PWR 1.12V 2.GND 3.GND 4.5V DC-OUT 12V/2.5A (1*3Pin Power Jack outside radius 5.5mm, inside radius 2.0mm) Hisense HK870 Series All-in-One POS System Integration ManualPage 30 of 41... -
Page 31: Section 6. Assembling And Disassembling The Pos System
A. To disassemble the POS, first remove the screw of the [HDD cover] and take off the cover. B. Pull out the hard disk assembly. Figure 18. HDD cover to remove 2 Remove the cable cover A. Press the switch. Figure 19. Cable cover Hisense HK870 Series All-in-One POS System Integration ManualPage 31 of 41... -
Page 32: Figure 20. Cable Cover That's Detached
B. Pull off the cable terminal and remove the multifunction card reader. Figure 21. Multi-function card reader 4 Remove the customer display A. Rotate the customer display to the horizontal position. Hisense HK870 Series All-in-One POS System Integration ManualPage 32 of 41... -
Page 33: Figure 22. Rotated Customer Display
C. Pull off the cable terminal and remove the customer display. Figure 23. Second display 5 Remove the second display A. Press the switch and pull out the cable cover. Hisense HK870 Series All-in-One POS System Integration ManualPage 33 of 41... -
Page 34: Figure 24. Switch To Pull Out The Cable Cover
Figure 24. Switch to pull out the cable cover B. Release the two tool-less screws. C. Rotate and pull the second display. Figure 25. Second display that's rotated Hisense HK870 Series All-in-One POS System Integration ManualPage 34 of 41... -
Page 35: Section 7. Product Specifications
1 * RJ-45 (1000Mbps Gigabit LAN) Audio 1 Line-out +1MIC Cash Drawer 1 * RJ-11 24V for cash drawer PS/2 DC 12V out Power Power Adapter Adapter (DC 12V, 7A) Peripheral 3 Tracks (USB) Hisense HK870 Series All-in-One POS System Integration ManualPage 35 of 41... - Page 36 COM3 is alternative to 5V power(COM3 without power default) I/O Ports 6 * USB 2.0 (2 Front,4 Rear) 1 * VGA reserved for 2nd display 1 * RJ-45 (1000Mbps Gigabit LAN) Audio 1 Line-out Hisense HK870 Series All-in-One POS System Integration ManualPage 36 of 41...
- Page 37 RFID Reader (USB, option) Peripheral IC Card Smart Card Reader (USB, option) 2×20 characters VFD Customer Display 15” TFT LCD display Operating 5℃ - 40℃ Environment Temperature Operating Humidity 40% - 90% Hisense HK870 Series All-in-One POS System Integration ManualPage 37 of 41...
-
Page 38: Appendix A. Basic Input And Output System (Bios) Set Up Information
Use the BIOS setup software utility when: Checking HDD type and capacity after HDD replacement Changing the booting sequence Reflecting the users need on the setup Hisense HK870 Series All-in-One POS System Integration ManualPage 38 of 41... -
Page 39: Appendix B. Input/Output Information
= HSInp( 0x538); HSOutp( 0x538, 0x40 | by ); //status1:Drawer closed;0:Drawer open; bool GetDrwStatus() //GPI22 2PIN Bit6 if( HSInp( 0x50E ) & 0x40) return 1; else return 0; Hisense HK870 Series All-in-One POS System Integration ManualPage 39 of 41... -
Page 40: Super I/O Information (Bios Default Settings)
@brief : Set CD_OPEN power level @Input : Level-- 0:Low 1: High ------------------------------------------------*/ void Set_CD_OPEN(int Level) int t; if(Level) { outportb(CDO_PORT,inportb(CDO_PORT)|BIT0); printf(" CD_OPEN is High \n"); else outportb(CDO_PORT,inportb(CDO_PORT) &~BIT0); printf("CD_OPEN is Low\n"); Hisense HK870 Series All-in-One POS System Integration ManualPage 40 of 41... - Page 41 Low level stability.\n"); return 1; else printf("CD_SENSE is High level\n"); return 0; main() printf("System ready\n "); /*Set_CD_OPEN High */ Set_CD_OPEN(1); /*Set_CD_OPEN Low */ Set_CD_OPEN(0); while(1) Get_CD_SENSE_Status(); Hisense HK870 Series All-in-One POS System Integration ManualPage 41 of 41...
Need help?
Do you have a question about the HK870 Series and is the answer not in the manual?
Questions and answers