Table of Contents
Advertisement
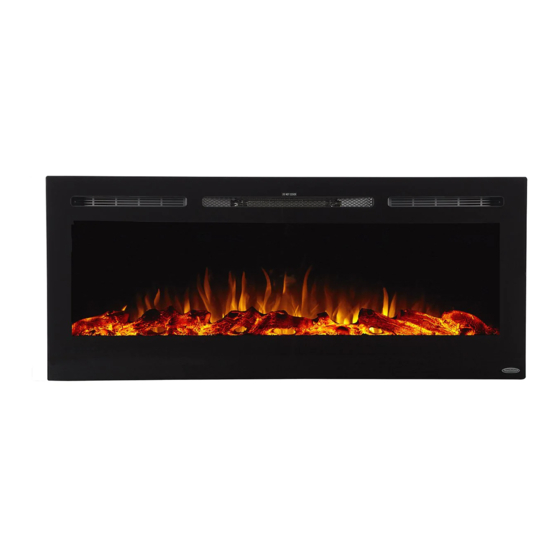
28" / 36" / 40" / 45" / 50" / 60" / 72" / 84" / 100"
Sideline® Series Recessed Electric Fireplace
AC 110-120V
Model #: 80004 / 80011 / 80013 / 80014 / 80015 / 80025 / 80027 / 80028 / 80029 / 80032 / 80043
800.215.1990
Si deli ne® Seri es
Electri c Fi replace Heater
OWNER'S MANUAL
60Hz
1500W
sales@thpus.com
touchstonehomeproducts.com
Advertisement
Table of Contents

Related Manuals for Touchstone Sideline Series


Summary of Contents for Touchstone Sideline Series
- Page 1 Si deli ne® Seri es Electri c Fi replace Heater OWNER’S MANUAL 28” / 36” / 40” / 45” / 50” / 60” / 72” / 84” / 100” Sideline® Series Recessed Electric Fireplace AC 110-120V 60Hz 1500W Model #: 80004 / 80011 / 80013 / 80014 / 80015 / 80025 / 80027 / 80028 / 80029 / 80032 / 80043 800.215.1990 sales@thpus.com touchstonehomeproducts.com...
-
Page 2: Table Of Contents
27 Operating Your Fireplace • Power • Methods of Operation A. Control Panel B. Remote Control Functions • Remote Control Operation • Replacing Remote Control Battery • Temperature Limiting Control 29 Care and Maintenance • Cleaning • Maintenance 30 Warranty Touchstone Home Products... - Page 3 Important Safety Information Warning • THIS FIREPLACE IS HOT WHEN IN OPERATION AND CAN CAUSE INJURY • Ensure clearances to combustibles are maintained when building a mantel or shelves above • the fireplace. Elevated temperatures on the wall or in the air above the fireplace can cause melting, •...
- Page 4 150 lb 160 lb Model Number 80032 Description Sideline® 100 Voltage 120v AC Watts Max 1500W Amps 12 AMP Fireplace Width 100” Fireplace Height 21 1/2” Fireplace Depth 5 1/2” Net Weight 150 lb Gross Weight 175 lb Touchstone Home Products...
- Page 5 Sideline® 28” Recessed Fireplace | PN: 80028 FRONT VIEW TOP VIEW REAR VIEW SIDE VIEW 80028 - Sideline 28” Recessed Fireplace FEATURES SPECIFICATIONS - 2 heat settings (high and low) - Frame color: Black - Designed for recessed mounting in wall - Watts: 1100 - Remote control for heat and flame setting - BTU’s: 3753...
- Page 6 - Amps: 12 - Built in timer mode for shut off in 30 minutes - Rough Opening: 32 3/4”W x 20 1/2”H x 5 3/4”D to 7.5 hours - Faux Fire Log and Glass Crystal Media Options Touchstone Home Products...
- Page 7 Sideline® 40” Recessed Fireplace | PN: 80027 FRONT VIEW TOP VIEW BACK VIEW SIDE VIEW 80027 - Sideline 40” Recessed Fireplace FEATURES SPECIFICATIONS - 2 heat settings (high and low) - Frame color: Black - Designed for recessed mounting in wall - Watts: 1500 - Remote control for heat and flame setting - BTU’s: 5000...
- Page 8 - Amps: 12 - Built in timer mode for shut off in 30 minutes - Rough Opening: 40 1/8”W x 20 1/2”H x 5 3/4”D to 7.5 hours - Faux Fire Log and Glass Crystal Media Options Touchstone Home Products...
- Page 9 Sideline® 50” Recessed Fireplace | PN: 80004 / 80029 FRONT VIEW TOP VIEW REAR VIEW SIDE VIEW 80004 - Sideline 50” Recessed Fireplace - Black 80029 - Sideline 50“ Recessed Fireplace - White FEATURES SPECIFICATIONS - 2 heat settings (high and low) - Frame color: 80004 - Black / 80029 - White - Designed for recessed mounting in wall - Watts: 1500...
- Page 10 - Amps: 12 - Built in timer mode for shut off in 30 minutes - Rough Opening: 47 1/8”W x 20 1/2”H x 5 3/4”W to 7.5 hours - Faux Fire Log and Glass Crystal Media Options Touchstone Home Products...
- Page 11 Sideline® 60” Recessed Fireplace | PN: 80011 FRONT VIEW TOP VIEW REAR VIEW SIDE VIEW 80011 - Sideline 60” Recessed Fireplace - Black FEATURES SPECIFICATIONS - 2 heat settings (high and low) - Frame color: Black - Designed for recessed mounting in wall - Watts: 1500 - Remote control for heat and flame setting - BTU’s: 5000...
- Page 12 - Amps: 12 - Built in timer mode for shut off in 30 minutes - Rough Opening: 68 3/4”W x 20 1/2”H x 5 3/4”D to 7.5 hours - Faux Fire Log and Glass Crystal Media Options Touchstone Home Products...
- Page 13 Sideline® 84” Recessed Fireplace | PN: 80043 FRONT VIEW TOP VIEW BACK VIEW SIDE VIEW 80043 - Sideline 84” Recessed Fireplace FEATURES SPECIFICATIONS - 2 heat settings (high and low) - Frame color: Black - Designed for recessed mounting in wall - Watts: 1500 - Remote control for heat and flame setting - BTU’s: 5000...
- Page 14 - Amps: 12 - Built in timer mode for shut off in 30 minutes - Rough Opening: 96 3/4”W x 20 1/2”H x 5 3/4”D to 7.5 hours - Faux Fire Log and Glass Crystal Media Options Touchstone Home Products...
-
Page 15: Unpacking Your Fireplace
Unpacking Your Fireplace Parts and Hardware Tools Required • Phillips screwdriver • Tape measure • Stud finder • Electric drill • Level • 1/4” wood drill bit What’s in the Box Wood Screws - 6 Drywall Anchors - 6 (Wall mount install use) Fireplace - 1 Wall Bracket* - 1 Remote Control - 1... -
Page 16: Wiring
(ground). If a 3-slot receptacle is not available, an adapter MUST be used. The adapter • MUST be properly grounded to the outlet box (see figure below). GROUNDING PIN ADAPTER METAL GROUNDING SCREW NOTE: Adapter NOT INCLUDED Touchstone Home Products... -
Page 17: Hard Wire Connection
Hard Wire Connection If it is necessary to hard wire this appliance, a qualified electrician must remove the cord connection, and wire the appliance directly to the household wiring. Note, the Sideline 28 is not hard wire compatible. This appliance must be electrically connected and grounded in accordance with local codes, if hard wired. -
Page 18: Installation
• exposed insulation. • Do not expose the fireplace to the elements (rain, etc.). For more detailed instructions, visit our website or Touchstone Home Products YouTube channel for the product support videos. Choosing Wall Location • Measure wall location to ensure that fireplace will fit on desired wall location. -
Page 19: Removing The Glass Panel
REMOVING THE GLASS PANEL Prior to installation, remove the glass panel. Please remove glass panel as per instructions below: Instructions 1. There are 2 screws in the top vent opening, one on the far left and one on the far right. Remove both screws from the glass panel. -
Page 20: Removing The Steel Panel (80013 Sideline Steel Only)
2. After removing screws, lift glass panel UP and STRAIGHT OUT toward you to remove from fireplace. Place front panel in a soft, dry place. CAUTION: It is recommended that 2 people remove the front panel to minimize chance of breakage. Touchstone Home Products... -
Page 21: Recessed Installation
RECESSED INSTALLATION • Due to many different finish materials used on walls, it is highly recommended that you consult • a professional before you install this fireplace in the wall. • Select a location that is not prone to moisture and is located at least 36” away from materials •... -
Page 22: Crystal Ember Installation
Apply an even layer from side to side. Note, the Sideline 28 ships with the log secured in place. Simply unscrew the log on either side to remove and replace with crystal embers. Touchstone Home Products... -
Page 23: Fire Log Installation
RECESSED INSTALLATION - Continued A. Fire Log Installation 1. Place fire log in fireplace as illustated below. Note, the Sideline 28 ships with the log fastened in place. 3. Once completed installing crystal embers or fire log, reinstall glass panel. The hooks on the back of the glass panels fit into the slots on the side of the firebox. -
Page 24: Wall Mounted Installation
fireplace. 80004 / 80011 / 80014 / 80025 / 80027 / 80013 / 80029 / 80028 - Wall Bracket Removal (1 bracket) 80015 / 80032 / 80043 - Wall Bracket Removal (2 brackets) Touchstone Home Products... - Page 25 WALL MOUNTED INSTALLATION - Continued 3. Mark location of bracket on wall and then mount the bracket to the wall using the supplied screws and dry wall anchors. The hooks in the bracket MUST be pointed away from the wall, upward, and level. Note: Mount bracket to at least 2 studs.
- Page 26 Mounting bracket installed on wall Hang fireplace on mounting bracket hooks 5. Check the fireplace for stability, ensuring that the bracket will not pull free from the wall. Once satisfied, install crystal embers/fire log and reinstall glass panel. Touchstone Home Products...
-
Page 27: Operating Your Fireplace
Operating Your Fireplace Once the fireplace has been plugged into a grounded outlet, the fireplace is now ready for operation. Ensure that the house circuit breakers for the power supply are turned on. Power Plug the power cable into a 110v 15 amp grounded outlet. Make sure the outlet is in good condition and that the plug is not loose. -
Page 28: Remote Control Operation
4. With the POWER switch in the OFF position, plug the power cord back into the outlet. 5. If the problem continues, have your outlet and wiring inspected by a professional. If the outlet is OK, please contact our customer support department at 800-215-1990. Touchstone Home Products... -
Page 29: Cleaning
CLEANING • ALWAYS turn the heater OFF and unplug the power cord from the outlet before cleaning. • NEVER immerse in water or spray with water. Doing so could result in electric shock, fire, • or personal injury. Metal: • Buff using a soft cloth, slightly dampened with citrus oil-based product. •... -
Page 30: Warranty
Warranty Touchstone Home Products, Inc warrants our electric fireplaces to be free of defects in material and workmanship for one year from date of purchase. Touchstone will repair or replace any fireplace or fireplace part that is deemed defective or becomes defective during normal use within one year after the date of purchase. - Page 31 Touchstone® TV Lift Mechanisms Touchstone® TV Lift Cabinets Visit our website to see the full Touchstone® product line. Questions? We are here to help. You can reach our team by phone, email or live chat. You may also fill out the contact form on our website and we will respond to your inquiry.
- Page 32 CALL US FIRST! DO NOT RETURN TO STORE. For immediate help with assembly, product information or if your product arrives damaged, call our toll free number or email us at customerservice@thpus.com. Our staff is ready to provide assistance. Read and understand this entire owner’s manual, including all safety WARNING information, before plugging in or using this product.
Need help?
Do you have a question about the Sideline Series and is the answer not in the manual?
Questions and answers