Table of Contents
Advertisement
Advertisement
Table of Contents

Related Manuals for Touchstone Sideline Series


Summary of Contents for Touchstone Sideline Series
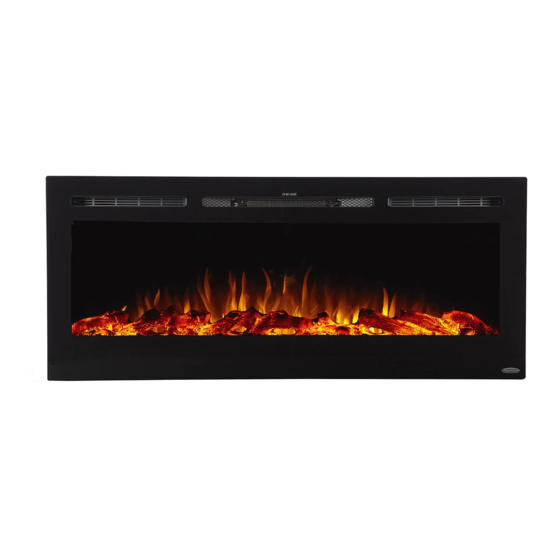
- Page 1 Sideline ® Series Electric Fireplace Heater OWNER’S MANUAL 28” / 36” / 40” / 45” / 50” / 60” / 72” / 84” / 100” Sideline ® Series Recessed Electric Fireplace AC 110-120V 60Hz 1500W Model#: 80004, 80011, 80014, 80015, 80025, 80027, 80028, 80029, 80032, 80043...
-
Page 2: Table Of Contents
IMPORTANT SAFETY INFORMATION CSA Approval Listing Information Fireplace Specifications Serial Number Label DIMENSIONAL DRAWINGS 80004 – Sideline ® 50” Dimensions 80011 – Sideline ® 60” Dimensions 80014 – Sideline 36” Dimensions ® 80015 – Sideline 72” Dimensions ® 80025 – Sideline ®... -
Page 3: Important Safety Information
Important Safety Information PLEASE READ CAREFULLY FOR SAFE OPERATION § THIS FIREPLACE IS HOT WHEN IN OPERATION AND CAN CAUSE SEVERE INJURY. § Do not operate fireplace before reading and understanding operating instructions. Failure to operate fireplace according to operating instructions could cause fire or injury. §... -
Page 4: Csa Approval Listing Information
CSA Approval Listing Information This fireplace has been tested in accordance with the CSA Standards for fixed and location-dedicated electric room appliances in the United States and Canada. If you need assistance during installation, please contact our technical support department at 800-215-1990. Note: This fireplace must be electrically wired and grounded in accordance with local codes or, in the absence of local codes, with National Electric Code ANSI/NFPA 70-latest edition in the United States or the Canadian Electric Code, CSA C22.1 in Canada. -
Page 5: Serial Number Label
Serial Number Label Each Touchstone Home Products Electric Fireplace contains a serial number label on the shipping box. Please remove the shipping label and place the label on the back page of this manual for future reference. 800.215.1990 touchstonehomeproducts.com rev.011723... -
Page 6: Dimensional Drawings
Dimensional Drawings ® 80004 – Sideline 50” Dimensions 800.215.1990 touchstonehomeproducts.com rev.011723... -
Page 7: 80011 - Sideline 60" Dimensions
80011 – Sideline ® 60” Dimensions 800.215.1990 touchstonehomeproducts.com rev.011723... -
Page 8: 80014 - Sideline 36" Dimensions
80014 – Sideline ® 36” Dimensions 800.215.1990 touchstonehomeproducts.com rev.011723... -
Page 9: 80015 - Sideline 72" Dimensions
80015 – Sideline ® 72” Dimensions 800.215.1990 touchstonehomeproducts.com rev.011723... -
Page 10: 80025 - Sideline 45" Dimensions
80025 – Sideline ® 45” Dimensions 800.215.1990 touchstonehomeproducts.com rev.011723... -
Page 11: 80027 - Sideline 40" Dimensions
80027 – Sideline ® 40” Dimensions 800.215.1990 touchstonehomeproducts.com rev.011723... -
Page 12: 80028 - Sideline 28" Dimensions
80028 – Sideline ® 28” Dimensions 800.215.1990 touchstonehomeproducts.com rev.011723... -
Page 13: 80029 - Sideline 50" White Dimensions
80029 – Sideline ® 50” White Dimensions 800.215.1990 touchstonehomeproducts.com rev.011723... -
Page 14: 80032 - Sideline 100" Dimensions
80032 – Sideline ® 100” Dimensions 800.215.1990 touchstonehomeproducts.com rev.011723... -
Page 15: 80043 - Sideline 84" Dimensions
80043 – Sideline ® 84” Dimensions 800.215.1990 touchstonehomeproducts.com rev.011723... -
Page 16: Unpacking Your Fireplace
Unpacking Your Fireplace Parts and Hardware Tools Required § Phillips screwdriver § Stud finder § Level § Tape measure § Electric drill § 1/4” wood drill bit What’s in the Box Wood Screws - 6 Drywall anchors - 6 Fireplace - 1 Remote Control - 1 Metal Bracket - 2 Wall Bracket - 1... -
Page 17: Testing The Fireplace Prior To Installation
Testing the Fireplace Prior to Installation § Before installing the fireplace, test the fireplace to make sure that it operates properly. § Plug fireplace into approved outlet and power on fireplace. Once fireplace is tested, continue with installation. § If you have any problems, please contact technical support at 800-215-1990. 3-prong Outlet Installation §... -
Page 18: Hard Wire Connection
Hard Wire Connection If it is necessary to hard wire this appliance, a qualified electrician must remove the cord connection, and wire the appliance directly to the household wiring. This appliance must be electrically connected and grounded in accordance with local codes, if hard wired. In the absence of local codes, use the current ANSI/NFPA 70 NATIONAL ELECTRICAL CODE in the United States or the current CSA C22.1 CANADIAN ELECTRICAL CODE in Canada. -
Page 19: Installation
Installation WARNINGS § Due to high temperatures, keep the fireplace out of high traffic locations. § Keep combustible materials, such as furniture, pillows, bedding, papers, clothes, and curtains at least 36” away from the front of the fireplace. § Never install the fireplace where it may fall into a bathtub or other body of water. §... -
Page 20: Removing The Glass Panel
Removing the Glass Panel Remove the glass panel prior to installation. Please remove glass panel as per instructions below: Instructions: 1. There are 2 screws in the top vent opening, one on the far left and one on the far right, that secure the left and right trim pieces in place. -
Page 21: Recessed Installation
Recessed Installation § Due to many different finish materials used on walls, it is highly recommended that you consult your local builder before you install this fireplace in the wall. § Select a location that is not prone to moisture and is located at least 36” away from combustible materials such as curtains, drapes, furniture, bedding. - Page 22 Recessed Installation – continued Firebox Dimensions Model Width Height Depth 80004 46 7/8” 20 ¼” 5 ¼” 80011 46 7/8” 20 ¼” 5 ¼” 80014 32 ½” 20 ¼” 5 ¼” 80015 68 3/8” 20 ¼” 5 ¼” 80025 39 7/8” 20 ¼”...
-
Page 23: Crystal Embers And Fire Log Installation
Recessed Installation – continued 3. With the help of a second person, insert fireplace into wall opening and secure with the provided mounting screws. 4. Once the fireplace is installed in the wall, place crystal embers or fire log in the fireplace. Crystal Embers and Fire Log Installation Crystal Ember Installation 1. -
Page 24: Re-Installing The Glass Panel
Fire Log Installation 3. Place the fire log in fireplace as shown above. Re-installing the Glass Panel Once you have installed the crystal embers or fire log, you are ready to reinstall the glass panel The hooks on the back of the glass panels fit into the slots on the side of the firebox. Once fitted in the slots, the glass panel goes down and locks into place. -
Page 25: Wall Mounted Installation
Wall Mounted Installation § Due to many different finish materials used on walls, it is highly recommended that you consult your local builder before you install this fireplace on the wall. § Select a location that is not prone to moisture and is located at least 36” away from combustible materials such as curtains, drapes, furniture, bedding. - Page 26 Wall Mounted Installation – continued 4. Mark location of bracket on wall and then mount the bracket to the wall using the supplied screws and dry wall anchors. The hooks in the bracket MUST be pointed away from the wall, upward, and level. Note: Mount bracket to at least 2 studs.
- Page 27 Wall Mounted Installation – continued 5. With the wall mounting bracket installed, have 2 people lift the fireplace up and insert the 2 hooks on the bracket into the back of the fireplace. The 2 hooks on the mounting bracket will line up with the 2 holes on the back of the fireplace.
-
Page 28: Operating The Fireplace
Operating the Fireplace Once the fireplace has been plugged into a grounded outlet, the fireplace is now ready for operation. Ensure that the house circuit breakers for the power supply are turned on. Power Plug the power cable into a 110v 15 amp grounded outlet. Make sure the outlet is in good condition and that the plug is not loose. -
Page 29: Remote Control Operation
HEATER button: Turns heater on and off. 1. Press once. Indicator lights up. Fan blows cool air for 10 seconds NOTE: The heater only works when the flame and 750W heater turns on and blows effect is on. warm air. HEATER 2. -
Page 30: Care, Cleaning And Maintenance
Care, Cleaning and Maintenance Cleaning ALWAYS turn the heater OFF and unplug the power cord from the outlet before cleaning, performing maintenance, or moving the fireplace. Failure to do so could result in electric shock, fire, or personal injury. NEVER immerse in water or spray with water. Doing so could result in electric shock, fire, or personal injury. Metal: Buff using a soft cloth, slightly dampened with citrus oil-based product. -
Page 31: Warranty
Electrical components, such as fan motor, heater motor, control board, remote control, and control panel are covered under warranty for one year from date of purchase. Touchstone Home Products® will provide replacement parts free of charge during the first year of the warranty. - Page 32 Affix Serial Number Label Here Read and understand this entire owner’s manual, including all safety information, before plugging in or using this product. Failure to do so could result in fire, electric WARNING shock, or serious personal injury. Keep this owner’s manual for future reference. If you sell or give this product away, CAUTION make sure this manual accompanies this product.
Need help?
Do you have a question about the Sideline Series and is the answer not in the manual?
Questions and answers