Table of Contents

Related Manuals for Brita TITAN PERFOMANCE


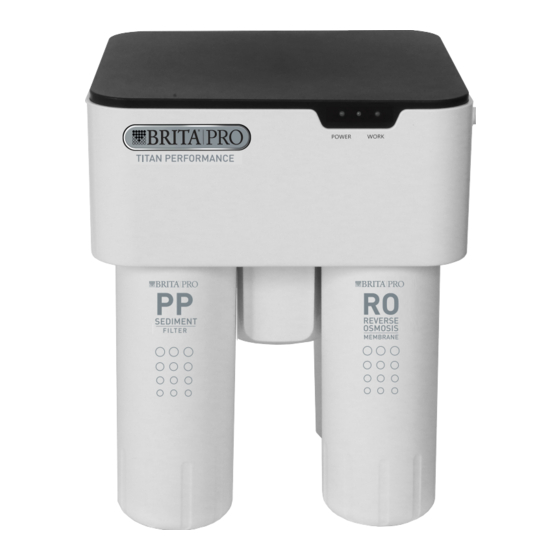
Summary of Contents for Brita TITAN PERFOMANCE
- Page 1 TITAN PLATINUM PERFORMANCE SERIES PERFORMANCE SERIES REVERSE OSMOSIS DRINKING WATER SYSTEM Line Pressure Model # BPUSS400 Booster Pump Model # BPUSS400BP MANUAL Professional OWNERS MANUAL Installation Version V1.0L 55112...
- Page 2 58 for nitrate/nitrite and total dissolved solids. BRITA ® 828.449.2536 420 3rd Avenue NW www.britapro.com Hickory, NC 28601 EMAIL : hello@britapro.com The BRITA PRO trademark and logo are registered trademarks of Brita LP and are used under license by Protect Plus, LLC. All rights reserved.
-
Page 3: Table Of Contents
READ THIS PAGE FIRST BEFORE STARTING INSTALLATION BASICS RO SYSTEM BASICS COMPONENTS & SPECIFICATIONS RO SYSTEM SPECIFICATIONS RO SYSTEM DIMENSIONS INSTALLATION UNPACK & INSPECT CHECK SYSTEM SERIAL NUMBER TOOLS REQUIRED FOR INSTALLATION DETERMINE THE CORRECT LOCATION OVERVIEW OF COMPONENTS (LINE PRESSURE MODEL) OVERVIEW OF COMPONENTS (BOOSTER PUMP MODEL) TUBING CONNECTIONS INSTALL TANK SHUT-OFF VALVE... -
Page 4: Read This
READ THIS PAGE FIRST BEFORE STARTING INSTALLATION Precautions: DO NOT DRILL THROUGH AN ALL-PORCELAIN OR for cold water use only. CAST IRON SINK. If installing on an all-porcelain or Please comply with all state and local regulations cast iron sink, the faucet must be mounted in a pre- regarding the installation of water treatment devices. -
Page 5: Basics
BASICS RO SYSTEM BASICS IRON The performance of the RO System can be characterized and judged by the quality and quantity of the water produced by the Iron is another common membrane foulant. There are a variety system. By measuring the contaminant removal performance of types of iron, some of which cannot be removed by an iron and flow rates of the system, its operating status can be easily filter. -
Page 6: Components & Specifications
COMPONENTS & SPECIFICATIONS RO SYSTEM SPECIFICATIONS BPUSF400S BPUSF400C BPUSF400M BPUSF400C FAUCET MODEL # PART # STORAGE TANK STAGE 1 STAGE 2 STAGE 3 STAGE 4 Chrome - Titan Metal Tank-3.2 Gallons BPUSS400 Activated Reverse Osmosis Activated Carbon Sediment AirGap (included) Carbon Filter Membrane Polish Filter... -
Page 7: Installation
INSTALLATION UNPACK & INSPECT RO Manifold with Flow Control Sediment Filter Carbon Block Filter RO Membrane Carbon Block Filter Metal Storage Tank Tank Base (Optional) NOTE Drain Saddle (1/4” or 3/8”) Tank Shut-off Valve Inlet 3-way Valve Extra care should Faucet Adapter be taken when 1/4”... -
Page 8: Check System Serial Number
BRITA®PRO Trademark and logo are registered trademarks of Date of Serial NSF/ANSI Standard 58 for the reduction Brita LP and are used under license by Protect Plus, LLC. Do not remove or of Nitrate/Nitrite and Total Dissolved Solids. All rights reserved. -
Page 9: Tools Required For Installation
TOOLS REQUIRED FOR DETERMINE THE INSTALLATION: CORRECT LOCATION Utility Knife • AIRGAP FAUCET – The faucet is designed Flathead Screwdriver to be mounted on the rear lip of the sink. Phillips Screwdriver It may be installed in an existing sprayer Center Punch attachment hole or in a hole drilled at the time 7/8”... -
Page 10: Overview Of Components (Line Pressure Model)
PRE-INSTALLATION CONTINUED OVERVIEW OF THE TITAN RO SYSTEM COMPONENTS LINE PRESSURE MODEL - BPUSS400 1. MANIFOLD ASSEMBLY 5. POLISHING FILTER The manifold assembly serves as the functional hub by The polishing filter adsorbs any residual tastes and directing the flow through each of the system’s main components. -
Page 11: Overview Of Components (Booster Pump Model)
PRE-INSTALLATION CONTINUED OVERVIEW OF THE TITAN RO SYSTEM COMPONENTS BOOSTER PUMP - BPUSS400BP 1. MANIFOLD ASSEMBLY 5. POLISHING FILTER The manifold assembly serves as the functional hub by The polishing filter adsorbs any residual tastes and odors directing the flow through each of the system’s main just before the water is delivered through the faucet. -
Page 12: Tubing Connections
INSTALLATION QUICK-CONNECT FILLING TUBING CONNECTIONS Insertion & Removal or Plastic or Copper Tubing The system features reliable and convenient Simply push in tube to attach. push-to-connect tubing connectors. Tubing is easily connected and disconnected from these fittings as follows. CONNECT: Cut the tubing squarely with a sharp knife. -
Page 13: With Air Gap Faucet
INSTALLATION (WITH AIRGAP FAUCET) The exact placement of the components will vary by installation. Although shown beneath a sink, it may be installed in a basement, crawl space, or in an adjacent cabinet. Regardless of where the system is installed, the flow sequence must be observed. The Titan RO system is designed to be mounted near a sink for easy access to cold water and drain lines. -
Page 14: With Standard Faucet
INSTALLATION (WITH STANDARD FAUCET) The exact placement of the components will vary by installation. Although shown beneath a sink, it may be installed in a basement, crawl space, or in an adjacent cabinet. Regardless of where the system is installed, the flow sequence must be observed. The Titan RO system is designed to be mounted near a sink for easy access to cold water and drain lines. -
Page 15: Step 1 Faucet Installation
STEP 1 - FAUCET INSTALLATION To simplify its access and installation, we suggest you install the faucet on the rear lip of the sink. It should be evenly positioned with the sink faucet and spray attachment. Should the spray faucet hole not be available for the installation, the sink must be drilled. -
Page 16: Step 1 Faucet Installation, Air Gap Faucet (Standard)
FAUCET INSTALLATION - STEP 1 AIR GAP FAUCET (INCLUDED) 3/8” Tubing 1/4” Tubing Faucet Base (Remove white protective film.) Rubber Washer Split Washer Lock Washer Spacer (Optional) Drain Line from Faucet (3/8” Tubing) Drinking Water Line Drain Line from RO Manifold to Faucet (3/8”... -
Page 17: Step 1 Faucet Installation, Non-Air Gap Faucet (Optional)
FAUCET INSTALLATION - STEP 1 STANDARD FAUCET (OPTIONAL) Faucet NOTE An air gap faucet is recommended with this system. Small Rubber Washer Base (Remove white Large Rubber Washer protective film) Plastic Washer Lock Washer Faucet Adaptor Drinking Water Line to Faucet (3/8”... - Page 18 FAUCET INSTALLATION - STEP 1 Remove white protective film from faucet base. Verify faucet body, metal base, and rubber base washer are in place above sink. CAUTION Lower faucet into mounting hole and place faucet over hole. Install slotted washer, spacer, faucet washer, and nut onto faucet nipple Plastic Parts will break below sink and snug them up.
-
Page 19: Step 2 T Adapter Valve On Water Supply
INSTALLATION - STEP 2 T ADAPTER VALVE ON WATER SUPPLY T-ADAPTER CAUTION The Adapter valve should be connected to cold water supply only. Connection to hot water supply will damage the system and will void all warranty. NOTE Extra care should be taken when entering drains near dishwashers or food water disposals, as backflow may... -
Page 20: Step 3 Drain Saddle
INSTALLATION - STEP 3 DRAIN SADDLE Drain Saddle Install the drain saddle valve on Tighten the clamps with the help of the to the drain pipe. Also install the two bolts. elbow fitting provided with the drain saddle. WARNING Do not drill through both side of pipe! Drill a 1/4”... - Page 21 INSTALLATION - STEP 3 DRAIN SADDLE - CONTINUED DOUBLE BASIN SINK WITH DISPOSAL, SINGLE Many homes are equipped with disposals and dishwashers. TRAP Special care must be taken when these appliances are present to prevent improper air gap performance. Home drain plumbing •...
-
Page 22: Filter Cartridges
System Certified by IAPMO R&T against BRITA®PRO Trademark and logo are registered trademarks of NSF/ANSI Standard 58 for the reduction Brita LP and are used under license by Protect Plus, LLC. shelf life of the RO of Nitrate/Nitrite and Total Dissolved Solids. -
Page 23: Operation
OPERATION STARTUP PROCEDURES Sanitize the storage tank (see page 25 for sanitization procedure). Check system to verify all components are correctly installed NOTE Open inlet valve and tank valve. Check system thoroughly for leaks. If any are found, shut off both inlet and It is normal if the air tank valves and correct the issue. - Page 24 FILTER REPLACEMENT SCHEDULE Clean the faucet with a soft cloth, avoid abrasive cleaners. AT LEAST ONCE IN 6 MONTHS REPLACE • Stage 1 Sediment Filter - BPUSF400S • Stage 2 Carbon Block Filter - BPUSF400C AT LEAST ONCE IN 12 MONTHS CHECK REPLACE •...
-
Page 25: Maintenance
MAINTENANCE INSTRUCTIONS SANITIZATION PROCEDURE 1. Turn off water supply to your RO system by turning off the adapter valve. Open the faucet to drain the storage tank. 2. Once the tank has emptied. Disconnect the tube from the ball valve on the storage tank. 3. -
Page 26: Parts Breakdown: Line Pressure & Booster Pump
LINE PRESSURE -BPUSS400 PART # DESCRIPTION BPUSS400 Brita PRO TITAN RO Line Pressure BPUSF400S Brita PRO TITAN RO Sediment Filter Cartridge BPUSF400M Brita PRO TITAN RO Membrane Cartridge BPUSF400C Brita PRO TITAN RO CTO Filter Cartridge BPUSF400C Brita PRO TITAN RO CTO Filter Cartridge... -
Page 27: Parts Breakdown: Booster Pump
PARTS BOOSTER PUMP - BPUSS400BP PART # DESCRIPTION BPUSS400BP Brita PRO TITAN RO with Booster Pump BPUSF400S Brita PRO TITAN RO Sediment Filter Cartridge BPUSF400M Brita PRO TITAN RO Membrane Cartridge BPUSF400C Brita PRO TITAN RO CTO Filter Cartridge BPUSF400C... -
Page 28: Performance Data Sheet
TROUBLE SHOOTING GUIDE PROBLEM POSSIBLE CAUSE REMEDY A. Service greater than unit’s A. Use optional large tank for more storage Insufficient quantity of product water available specified output. capacity. to service. B. Insufficient Feed Water Flow B. 1. Clogged shut-off valve or feed tubing; C. - Page 29 PROBLEM POSSIBLE CAUSE REMEDY A. Polishing filter exhausted. A. Replace polishing filter. Bad smell from product water. B. Prefilter element. B. Replace filter element. C. Unit needs disinfection. C. Sanitize unit. A. Defective flow control assembly. A. Replace flow control assembly. Fast flow to drain A.
- Page 30 THIS PAGE INTENTIONALLY LEFT BLANK...
- Page 31 PERFORMANCE DATA STATEMENT BRITA®PRO REVERSE OSMOSIS DRINKING WATER SYSTEM MODELS BPUSS400 AND BPUSS400BP WITH BPUSF400S, BPUSF400C AND BPUSF400M FILTERS This filtration system has been certified according to NSF/ANSI Standard 58 by IAPMO for the reduction of the substances listed below, as verified and substantiated by test data. The...
-
Page 32: Warranty
PRO. If any part is found defective, BRITA PRO also ® ® reserves the right to replace the drinking water appliance with a comparable BRITA PRO drinking ® water system of equal or greater quality. You pay only freight for repaired or replaced parts from our factory.
Need help?
Do you have a question about the TITAN PERFOMANCE and is the answer not in the manual?
Questions and answers
Where c n I buy replacement filters, 2BPUSF400SBrita PRO TITAN RO Sediment Filter Cartridge3BPUSF400MBrita PRO TITAN RO Membrane Cartridge4BPUSF400CBrita PRO TITAN RO CTO Filter Cartridge5BPUSF400CBrita PRO TITAN RO CTO Filter Cartridge