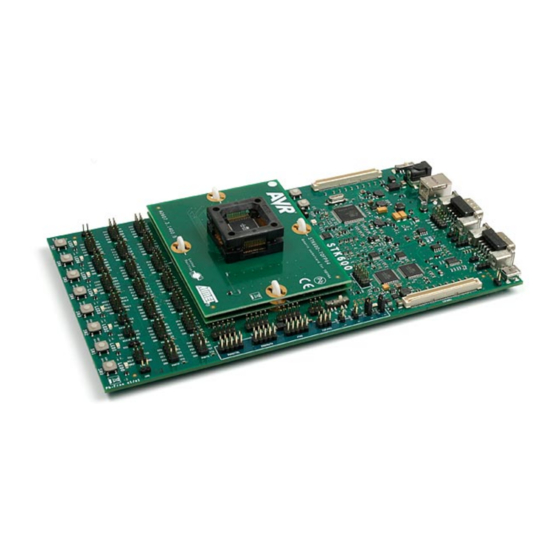
Microchip Technology STK600 User Manual
Hide thumbs
Also See for STK600:
- User manual (114 pages) ,
- User manual (120 pages) ,
- User manual (121 pages)
Advertisement
Quick Links
STK600 User Guide
STK600 User Guide
1. Introduction
Overview
Features
What's New
Known Issues
Device Support
2. Getting Started
Kit Contents
System Requirements
Quick Start
Connecting the Hardware
Example Application: Using LEDs and Switches
3. Target Socket System
Socket System
Socket Card and Routing Card
Selecting the correct routing and socket cards
Mounting the cards
Signal integrity
4. Hardware Description
STK600 Block Diagram
Target Voltage VTG
Analog Reference Voltages
RESET Control
Port Connectors
AVR32 Pin Mapping
LEDs and Switches
Clock Settings
User RS232 Interface
DataFlash Non-Volatile Memory
Expansion Connectors
User USB connector
CAN transceiver
LIN transceiver
Miscellaneous
5. Programming
ISP Programming
Parallel High Voltage Programming
Serial High Voltage Programming
JTAG Programming
PDI Programming
In-System Programming of an External Target System
6. Troubleshooting and Support
Troubleshooting Guide
Technical Support
Manual Firmware Upgrade
Chapter 1. Introduction
Overview
Congratulation with your STK600 AVR® Flash MCU Starter Kit. The STK600 is a complete starter kit and development system for the AVR and
AVR®32 flash microcontrollers from ATMEL® Corporation. It is designed to give designers a quick start to develop code on the AVR, combined
with advanced features for using the starter kit to prototype and test new designs.
New firmware releases for STK600 are embedded with the releases of AVR Studio®. The upgrade process will start when you connect to the
STK600 board (you will be asked to perform the procedure). If for some reason the automatic upgrade fails, please try the manual upgrade
procedure.
file://C:\Documents and Settings\PAWEL\Ustawienia lokalne\Temp\~hhE369.htm
Page 1 of 35
2008-06-20
Advertisement

Related Manuals for Microchip Technology STK600


Summary of Contents for Microchip Technology STK600
- Page 1 Overview Congratulation with your STK600 AVR® Flash MCU Starter Kit. The STK600 is a complete starter kit and development system for the AVR and AVR®32 flash microcontrollers from ATMEL® Corporation. It is designed to give designers a quick start to develop code on the AVR, combined with advanced features for using the starter kit to prototype and test new designs.
- Page 2 STK600 firmware versions 02.04, 02.00, 02.00 Known Issues There are at the moment no known issues with the STK600. Device Support AVR Studio and AVR32 Studio has support for a range of devices in all speed grades. Support for new AVR devices may be added in new versions file://C:\Documents and Settings\PAWEL\Ustawienia lokalne\Temp\~hhE369.htm...
- Page 3 ATmega645 STK600-RC064M-10 STK600-TQFP64 HVPP, ISP, JTAG ATmega649 STK600-RC064M-10 STK600-TQFP64 HVPP, ISP, JTAG ATmega640 STK600-RC100M-11 STK600-TQFP100 HVPP, ISP, JTAG ATmega1280 STK600-RC100M-11 STK600-TQFP100 HVPP, ISP, JTAG ATmega2560 STK600-RC100M-11 STK600-TQFP100 HVPP, ISP, JTAG ATmega2560 STK600-ATMEGA2560 HVPP, ISP, JTAG file://C:\Documents and Settings\PAWEL\Ustawienia lokalne\Temp\~hhE369.htm 2008-06-20...
- Page 4 JTAG Chapter 2. Getting Started Kit Contents The box contains: STK600 starter kit evaluation board Cables for STK600: Two 10-wire cables for I/O ports and Parallel mode programming One 6-wire cable for In-System Programming Four 2-wire cable for UART and dataflash connections...
- Page 5 The external power supply should be 9-15V DC with positive center connector. The power switch turns the STK600 main power on and off. The red LED is lit when power is on, and the status LED will turn green. The green LED beside the VTG jumper indicates that the target voltage is present.
- Page 6 Connecting the Hardware The STK600 must be connected to a host PC with a USB cable. Connect the cable to a free USB port on the PC or on a USB hub. The USB port must be capable of supplying 500mA. If using a USB hub, make sure it has an external power supply.
- Page 7 A set of spring loaded connectors make the connection between the motherboard, routing card and socket card. Clips or screws hold the stack of cards together. In addition to the socket and routing cards included in the kit, there are several add-on packs available to expand the part support for the STK600. See the Device Support page to get an overview over the different socket and routing cards.
- Page 8 Align the clips with the white lines on the motherboard. The routing card could now be placed above the four clips. Make sure that the routing card has the correct orientation, i.e. the text should face upwards, and the white dot in the corner should match the one on the STK600. Press down the routing card (i.e.
- Page 9 Using screws and nuts Motherboard Insert the nuts into the STK600 motherboard from the bottom side. When properly installed the two locking springs should hold the nut in place. Routing and socket card Place the routing card above the mother board, make sure that the whit spot in the corner matches the white spot on the motherboard. The small plastic taps on the ends of the spring loaded connectors should mate with the holes in the routing card.
- Page 10 STK600 is designed to support a wide range of devices with different packages and pinouts. Many compromises has been taken to make this possible with one motherboard. The signal integrity is not optimised due to this. STK600 is not a reference design in any way, but a kit that serves as socket programmer with some additional peripheral hardware to get started with the AVR.
- Page 11 Analog Reference Voltages The AVR's A/D converter needs a reference voltage to set its converting range. STK600 can supply two of these voltages, AREF0 and AREF1. For all tinyAVR and megaAVR devices, only the AREF0 is connected trough the routing card, whilst for xmegaAVR devices, AREF0 is connected to the positive reference input and AREF1 is connected to the negative reference input on reference 0.
- Page 12 MCU if a short circuit is detected on VTarget (in addition to shutting down VTarget). In this case, the status LED will blink red. RESET Control The STK600 controls the RESET signal to the target AVR. Under normal operation, the RESET line is held in an inactive, high state (pull-up to VTG).
- Page 13 Port Connectors All I/O port pins on the target AVR mounted on the STK600 are available on port pin connectors. These are labeled PORTA, PORTB, PORTC etc. Depending to the AVR in use, different ports will be available.
- Page 14 STK600 User Guide Page 14 of 35 AVR32 Pin Mapping The AVR32 pin mapping is described in the tables below. STK600-RCuC3A100-28 (100-pin AT32UC3A devices) Device Pin Name STK600 Signal Name PA00 PA01 PA02 PA03 PA04 PA05 PA06 PA07 PA08 PA09...
- Page 15 TOSC1 PC01 TOSC2 PC02 XTAL1 PC03 XTAL2 VBUS VBUS VDDIN AREF0 AREF0 VDDANA STK600-RCuC3B0-21 (64-pin AT32UC3B devices) Device Pin Name STK600 Signal Name PA10 PA11 PB3, TOSC1 PA12 PB4, TOSC2 PA13 PA14 PB6, MOSI PA15 PB7, SCK PA16 PA17 PA18...
- Page 16 Page 16 of 35 PB10 PB11 RESET RESET VBUS VBUS VDDIN AREF0 AREF0 VDDANA STK600-RCuC3B48-27 (48-pin AT32UC3B devices) Device Pin Name STK600 Signal Name PA10 PA11 PB3, TOSC1 PA12 PB4, TOSC2 PA13 PA14 PB6, MOSI PA15 PB7, SCK PA16 PA17...
- Page 17 STK600 User Guide Page 17 of 35 Device Pin Name STK600 Signal Name PA10 PA11 PB3, MISO PA12 PB4, MOSI PA13 PB5, SCK PA14 PA15 PA16 PA17 PA18 PA19 PA20 PA21 PA22 PA23 PA24 PA25 PD1, PP0 PA26 PD2, PL4...
- Page 18 STK600 User Guide Page 18 of 35 PB28 PB29 PB30 PB31 PH7, PP6 PX10 PX11 PX12 PX13 PX14 PX15 PX16 PX17 PX18 PX19 PX20 PX21 PX22 PX23 PX24 PX25 PX26 PX27 PX28 PX29 PX30 PX31 PX32 PX33 PX34 PX35 PX36...
- Page 19 Note: On most AVR pins configured as input, you can enable an internal pull-up, removing the need for an external pull-up on the push button. In the STK600 design, an external 10K pull-up is present to give all users a logical '1' on SWn when the push button is not pressed, even if the internal pull-up is not enabled.
- Page 20 Real Time Clock The STK600 also features a 32768 Hz oscillator, which can be used to make a real time clock. The output from the oscillator is available on the 32KHz pin on the AUX header. This clock can be routed to the TOSC1 pin on the target AVR by placing a jumper between the 32KHz and TOSC1 pin on the AUX header.
- Page 21 Some AVR devices have a XTAL1 pin which also can be used as a regular I/O port pin. The routing card for these devices will connect the device pin to both the XTAL1 net and a port pin header on the STK600. Hence, to use the pin as a I/O port the clock selection switch must be set to position INT to disconnect the clock drivers on STK600 from the pin.
- Page 22 The dataflash can be connected to the I/O pins of the microcontroller sockets. The 4-pin header marked "DATAFLASH" can be used for connecting the SPI interface of the dataflash to the I/O pins on the target AVR microcontroller in the socket. 2-wire cables are included with STK600 for connecting the dataflash to the I/O pins.
- Page 23 STK600 User Guide Page 23 of 35 The connectors to be used on an expansion board is manufactured by FCI and has P/N: 61082-101402LF. See also www.fciconnect.com for more information. The connectors must be placed with exactly 119mm between center to center. The expansion board must have a maximum width of 55mm to avoid collision with components on the mainboard.
- Page 24 User USB connector STK600 has a USB connector that target AVR devices with USB interface can utilize. The connector is a mini-AB connector that supports On-the- go functionality. The routing card for the device connects the USB connector to the appropriate pins on the AVR.
- Page 25 Mount a jumper to either side of 'SLOPE CTRL' to prevent AT6660 from going to standby. The CAN transceiver is connected to the MCU trough the two-pin (rx and tx) 'CAN' header near the switches on STK600. The target MCU can be any AVR (bit banging or USART), but is more typically one of the AT90CAN series which support the CAN protocol in hardware.
- Page 26 Future versions of AVR Studio may upgrade the master MCU on STK600. AVR Studio will then detect old software versions of STK600 and update the Flash program memory of the master MCU. To do this the user is required to push the PROGRAM button when powering on STK600.
- Page 27 EEPROM, fuses, lockbits and calibration bytes. Note that the ISP frequency (SCK) must be less than 1/4 of the target clock. The ISP frequency is set by the STK600 programming dialog in AVR Studio.
- Page 28 1. Mount the routing and socket card and the target device. See the Socket System section on how to do this. 2. Use the two 10-wire cables supplied with the STK600 to connect the PROG DATA and the PROG CTRL to the target device, as shown in the picture below.
- Page 29 1. Mount the routing and socket card and the target device. See the Socket System section on how to do this. 2. Use the a 10-wire cable supplied with the STK600 to connect the PROG DATA to the target device, shown in the picture below.
- Page 30 1. Mount the routing and socket card and the target device. See the Socket System section on how to do this. 2. Connect a 10-wire cable between the two 10-pins JTAG headers on the STK600. See picture below. 3. Ensure that the VTARGET jumper is mounted, and that the voltage is the within the operating range for the target device.
- Page 31 All ATxmega devices has the new PDI programming and debugging interface. It can, in-system, download code into the flash application and boot memories, EEPROM memory, fuses, lockbits and signature information. The PDI interface requires two of the device's pins, PDI_DATA and PDI_CLOCK. On STK600, they are found on the ISP/PDI connector. Hardware setup for On-board programming 1.
- Page 32 The STK600 can be used as a programmer to program AVR devices in other applications. There are two different ISP connector pin-outs available, a 6-pin and a 10-pin version. Both are supported by STK600. The 6-pin header is a combined ISP and PDI connector. In addition STK600 can be used as a JTAG programmer for AVR devices with a JTAG interface.
- Page 33 Reset Line The Reset line on any target board connected to STK600 should have a pull-up resistor. This pull-up should not be stronger than 2.2k ohm (i.e. it should not be below 2.2kohm). If the pull-up resistor on the reset line is to strong, the short circuit protection will trigger when the reset is forced low by the STK600.
- Page 34 Jumper settings A detailed description of the problem Manual Firmware Upgrade If an automatic firmware upgrade fails, or for some other reason connection to STK600 cannot be established, a manual firmware upgrade may resolve the problem. file://C:\Documents and Settings\PAWEL\Ustawienia lokalne\Temp\~hhE369.htm...
- Page 35 Before starting this procedure, make sure the latest AVR Studio release is installed on the computer. 1. Turn off STK600 and connect it to the PC using the USB cable 2. Press and hold the PROGRAM button when turning on the STK600 power switch. The status LED will flash red and orange, indicating upgrade mode.
Need help?
Do you have a question about the STK600 and is the answer not in the manual?
Questions and answers