Table of Contents
Advertisement
Quick Links
Advertisement
Table of Contents

Related Manuals for NewLine TT-6519PTC


Summary of Contents for NewLine TT-6519PTC
- Page 1 Unified Collaboration Display TT-6519PTC/ TT-7519PTC/ TT-8619PTC User’s Manual V2.2 – Firmware version v2.8.9 Please keep this Manual properly for future reference! This manual is a general manual, the pictures are for reference only, please refer to the real product.
- Page 2 Welcome: Thanks for purchasing this machine. Please read the instructions carefully before using this machine. This symbol of the crossed out wheeled bin indicates this machine should not be placed in municipal waste. Instead, dispose of waste equipment by taking it to a designated collection point for electrical and electronic equipment recycling.
-
Page 3: Table Of Contents
4.3.1 Task Management Sidebar ........................266 4.4 Bottom Toolbar ..............................28 4.4.1 View and Hide Bottom Toolbar ......................29 4.4.2 Edit Bottom Toolbar..........................29 4.5 More – App List Interface ..........................31 4.5.1 Newline Assistant ........................... 41 4.6 Screen Off ................................ 55... - Page 4 5 Applications ......................... 35 5.1 Floating Bar and Bottom Toolbar – Default Applications ................55 5.1.1 Whiteboard & Screen Annotation ......................36 5.1.1.1 Whiteboard ..........................36 5.1.1.2 Screen Annotation ........................39 5.1.2 Source ..............................67 5.1.2.1 Wired Projection ........................41 5.1.2.2 Wireless Screen Sharing ......................
- Page 5 6 Serial Port Control ........................ 92 7 Signal Input Specifications ....................94 7.1 VGA Signal Input Specifications ........................94 7.2 HDMI/OPS Signal Input Specifications ......................94 7.3 HDMI outputs TIMING that can be supported ....................95 7.4 Type-C Port............................... 95 8 Formats Supported by Multi-media ..................996 9 Troubleshooting ........................
-
Page 6: Symbol Convention
Symbol Convention Symbols are used in this document to indicate operations that require special attention. The symbols are defined as follows: Indicates a hazard with the risk that, if not avoided, could result in death or injury. Indicates a potentially hazardous situation that, if not avoided, could result in equipment damage, data loss, performance deterioration, or unanticipated results. -
Page 7: Safety Instructions
Safety Instructions For your safety, please read the following instruction before you use the machine. Serious injury or property damage may be caused by improper operations. Do not try to repair the machine on your own. Disconnect the machine from the power supply immediately if major failures occur. Major failures include the following: Smoke, peculiar smell, or abnormal sound is discharged from the machine. - Page 8 Clean the power plug regularly Continued use of this machine may cause fire or electric shock if the plug is not clean for a long time. Pull out the power plug before cleaning it with a dried cloth Do not put items on the top of the machine Do not put items, such as a container for liquid (a vase, flowerpot, cosmetics, or liquid medicine) on the top of the machine.
- Page 9 Before you move the machine, disconnect all external connections, and separate all topple preventing machines. Move the machine carefully to prevent it from being hit or squeezed, especially the screen, which may cause injury if broken Do not cover or block up any vents on the machine Any overheated components may cause fire, damage the machine, and shorten the service life.
- Page 10 Keep sufficient distance from the machine to protect your eyes and prevent eyestrain. Adjust the volume to an appropriate level, especially at night. Use amplifier equipment as the audio input source with caution. If you must use amplifier equipment, the input power should not exceed the maximum speaker power. Otherwise, the speaker can become overpowered and damaged :...
-
Page 11: Product Overview
Product Overview 1.1 Product Introduction This machine is a multi-functional device that integrates interactive conference, digital presentation, multimedia presentation, touch operation, and handwriting input. From design to production, we have fully considered the application characteristics of business conferences to ensure easy and intuitive operation. Through full digital intelligent control, it allows writing, editing, and deleting on the screen using fingers, stylus. -
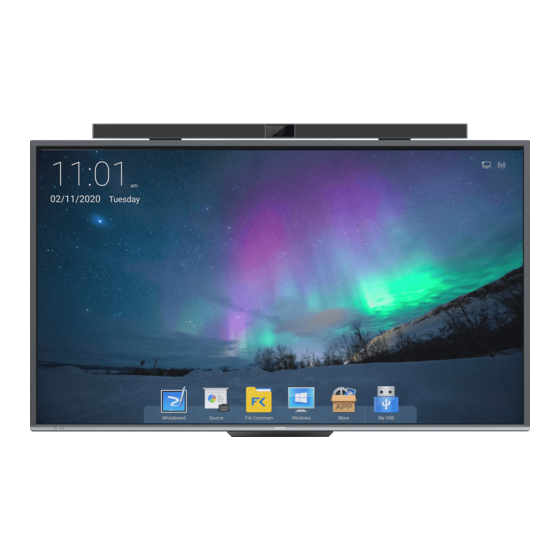
Page 12: Appearance Introduction
Do not hit the bottom plastic part of the plate. Do not place heavy objects on the bottom plastic part of the plate Do not place the bottom plastic part on the ground. Please avoid bumping the bottom plastic part of the plate. Front View TT-6519PTC/ TT-7519PTC / TT-8619PTC... -
Page 13: Rear View
Rear View TT-6519PTC/ TT-7519PTC / TT-8619PTC Soundbar Camera Soundbar Port Soundbar Speaker Built-in computer ports (ops) Touch Border Rear connecting port 1 Screen Rear connecting port 2 Power Button Power switch IR Receiver Power socket Light Sensor Soundbar Rear Port... -
Page 14: Front Control Panel
1.3 Front Control Panel Front Button Button Function on/off: If the power is on, press it to enter sleep mode. Press and hold for 2 seconds to shut down. If the power is off, press it to turn on the power. -
Page 15: Rear Port
1.4 Rear Port TT-6519PTC/ TT-7519PTC / TT-8619PTC... - Page 16 Rear Ports Introduction: Name Function Microphone input port Audio In Audio input port, used in combination with “VGA In” VGA signal input port. VGA In Used in combination with “Touch USB 3.0” to operate the PC in touch mode. HD signal input port 1. HDMI 1 In Used in combination with “Touch USB 3.0”...
-
Page 17: Soundbar Top Button
Soundbar Rear Ports Introduction: Ports Function Type -c Contact the port of the machine. USB3.0 The port for output video source. SPDIF Digital audio input interface. LINE IN Audio input interface. Power port. When using Soundbar’s with the UCD, connect Soundbar to the Type C interface and soundbar port of the panel. The rest of the interfaces are used when Soundbar is not used with the UCD. -
Page 18: Remote Control
Front USB 2.0 ports and rear USB 3.0/USB 2.0 ports switch connections based on signal sources. If the current signal source is reading the data from external storage connecting to the port, please don’t switch the signal source until the data reading is complete. Otherwise, the data or product may be damaged. USB2.0/USB3.0 ports output: 5V/500mA (Max.). - Page 19 Buttons Functions Turn on/off. Standby Enter/exit the screen off mode. Mute or unmute. Microphone switch. Up/Down/Left/Right selection button. Confirmation button. Press once to return to the previous page; Press twice to exit the current program. Note: In the settings page, press once to exit. Return to the homepage.
-
Page 20: Range Of Remote Control
1.6.1 Range of Remote Control Use the remote control within the range of about 5 meters in front of the remote control receiver of this machine and about 30 degrees on both sides. -
Page 21: Installation Guide
Installation Guide 2.1 Safety Precautions Installation Environment Installation Direction... -
Page 22: Weight Loading
2.2 Weight Loading Net weight of the machine(65",75",86"): 40kg(±2kg), 50kg(±2kg), 61kg(±2kg). When using a mobile stand, ensure that the weight of the machine is less than the loading capacity of the mobile stand. When using the wall-mount bracket, ensure that the wall can support the weight of the machine. We recommend that the wall surface be reinforced and have a loading capacity 4 times the weight of the machine. -
Page 23: Ventilation
2.3 Ventilation Distance from mounting surface (mm) Left and right Bottom Rear sides In addition to the above requirements, the area of the bottom, side, and top vents should not be less than 50% of the sealing area and good air circulation must be maintained when the machine is embedded in the wall and a cabinet. -
Page 24: Installing The Built-In Computer
2.4 Installing the Built-in Computer The built-in computer does not support hot-plugging. Therefore, you must insert or remove the built-in computer when the display is powered off. Otherwise, the display or built-in computer may be damaged. Perform the following steps to install the built-in computer: Step1 Unscrew the screws by hand to remove the built-in computer shielding cover. -
Page 25: Installing The Soundbar
2.5 Installing the Soundbar Perform the following steps to install the Soundbar: Step 1 Loosen the hex screws on the back panel, place the Soundbar bracket in the designated position and fix it on the plate with hex screws Step 2 Place the Soundbar on the bracket, adjust the left and right sides in parallel, and fix it on the bracket with hex screws. - Page 26 Step 3 Connect the soundbar with the Type C port (Soundbar) and Soundbar Connection port (UCD).
-
Page 27: Turning On /Off
Turning On /Off 3.1 Power On Step 1 Use AC power (100V~240V, 50Hz/60Hz) as the machine power source. Make sure the power plug is fully inserted and that the ground wire of the outlet is properly connected. Step 2 Turn on the rocker switch (on the rear side of the machine, next to the power socket), after a power source has been connected. -
Page 28: Power Off
3.2 Power Off Step 1 Press the “ ” button on the remote control or long-press the “ ” button on the front panel to turn the machine power off. The indicator light turns red. Step 2 If you want to completely turn off the machine, turn off the rocker switch on the rear of the machine (next to the power socket) and unplug the power cord. -
Page 29: Basic Operation
Basic Operation 4.1 Home The machine will automatically enter the home page after starting up. In any interface, press the "Home" button on the remote control or floating bar to enter the home page. The home page is shown below: Name Function Time &... -
Page 30: Status Bar
The bottom toolbar can be customized (default icons can’t be modified). Details please refer to section 4.4.2. If any external storage device is connected, the storage device icon will appear in the bottom toolbar. When the built-in computer is properly installed, the “Windows” icon will appear in the bottom toolbar. Most of the functions of the machine require a network connection. -
Page 31: Task Management Sidebar
4.3.1 Task Management Sidebar Tap the “ ” icon in the floating bar to enter the task management sidebar, which consists of the task management bar, toolbar, and notification bar. As shown below: Task Management Bar The user can perform the following operations using the task management bar: 1. - Page 32 Tool The user can perform the following operations on the toolbar: 1. Tool / Notification switch: • You can view the notification content in the notification, swipe left to delete a notification, and tap the × icon in the upper right corner to clear all notifications. 2.
-
Page 33: Bottom Toolbar
Notification The user can view the notification content in the notification bar, swipe left to delete a notification, and tap the “ “icon in the upper right corner to clear all notifications. 4.4 Bottom Toolbar Tap the icon to enter the corresponding app interface. The default app icons include Whiteboard, Source, File Commander, and More. -
Page 34: View And Hide Bottom Toolbar
4.4.1 View and Hide Bottom Toolbar Two fingers swipe vertically upward from the black border below the display area to call out the bottom toolbar, as shown below: • To call out through gesture, make sure that the bottom toolbar is shown. This setting can be customized under “Settings > Display >... - Page 35 • Delete the app icon: Tap “ ” in the upper right corner of the icon, and then tap the “Completed” in the interface to delete the app icon the user has added, as shown below: The default applications in the bottom toolbar (Whiteboard, Source, File Commander, More, Windows (if OPS Plugged in), and My USB (If USB Flash drive plugged in)) are not editable.
-
Page 36: More - App List Interface
4.5 More – App List Interface Tap the “ ” icon on the bottom toolbar to enter the app list interface, as shown below: Hold any app icon until the icons begin to jiggle to enter the app editing mode. While under the app editing mode, the user can perform the following operations: •... -
Page 37: Newline Assistant
4.5.1 Newline Assistant (OPS Pluggable PC Needed) Users can add Windows software in the OPS pluggable PC as shortcut in the “More” interface 1. Install “Newline Assistant” in OPS Windows. 2. Restart the UCD after install... - Page 38 3. Tap “Add Windows Application” and you will see all the Windows application in the OPS 4. Choose the Windows Software you need for shortcut and tap “Add”...
-
Page 39: Screen Off
4.6 Screen Off In response to energy conservation and environmental protection policies, we have provided the machine with a screen off function. When only audio is required, the user can turn off the screen. While the audio or video clip is being played, the screen is turned off, and the power indicator is green. -
Page 40: Applications
Applications 5.1 Floating Bar and Bottom Toolbar - Default Applications Buttons Functions Screen Annotation: Enter annotation mode Whiteboard: Enter Whiteboard application Source: Enter projection toolbar including – Wireless Screen Sharing, HDMI 1, HDMI 2, VGA and Type C File Commander: Enter File Commander application Windows: Enter Windows interface (Only shown if OPS PC plugged in) More: Enter apps list interface My USB: Enter USB Flash Drive (Only shown if USB flash drive plugged... -
Page 41: Whiteboard & Screen Annotation
5.1.1 Whiteboard & Screen Annotation 5.1.1.1 Whiteboard Tap the “ ” icon in the bottom toolbar to enter the “Whiteboard” The whiteboard function is designed to present conference writing to attendees quickly and easily. Users can write, draw, and take screenshots on the whiteboard page. The Whiteboard support 1 –... - Page 42 Whiteboard toolbar Name Function Move “ ” to the other side for easier Toggle Button user operation. Tap the icon to select and edit the whiteboard content. When a written text is selected, the user can save the text as an image which supports Select zooming, and press for move ;...
- Page 43 Name Function Tap the icon, select the desired icon from the icon Icon menu, and drag it to the whiteboard. Undo Tap the icon to return to the previous step. Tap the icon to restore the action that was canceled Redo in the previous step.
-
Page 44: Screen Annotation
Insert: Insert pictures, videos, and PDF files into the whiteboard, in video and PDF file, tap “ ” to insert the current page into the whiteboard as an image for edit and annotation. Search: Enter Google homepage by default. In the search page, tap “ ”... - Page 45 Name Function Tap this icon to return to the current interface from the annotation Select mode to control the application or interface. Tap the icon to enter the writing state. Tap again to set the pen color and thickness. Tap the icon to enter the highlighter writing state. Tap again to set Highlighter the highlighter color and thickness.
-
Page 46: Source
5.1.2 Source 5.1.2.1 Wired Projection Tap the “ ” icon on the toolbar at the bottom of the homepage to show the projection toolbar (Wireless Projection, HDMI 1, HDMI 2, VGA, and Type C), and tap the port corresponding to the external device to enter the projection screen, as shown below. -
Page 47: Wireless Screen Sharing
5.1.2.2 Wireless Screen Sharing The machine is pre-installed with a wireless screen sharing feature. With this app, the documents, Word, Excel, audio, and video files of the mobile phone, tablet computer, and laptop can be wirelessly transmitted to the machine. No matter which method, the projection device and the machine must be on the UCD hotspot network. Follow the instructions on the Wireless Screen Sharing page to cast devices from Windows, Android, Mac, and IOS platforms. - Page 48 Step 2 After you have successfully downloaded Transcreen mirroring app, connect your device to the machine hotspot access point. Step 3 Click Transcreen Client icon “ ” on your Window or Mac to open the Wireless projection page. If your computer has successfully connected to the machine’s hotspot access point, the hotspot’s name and IP address will be shown on “Device List”.
- Page 49 The PC has successfully projected onto the machine. The number “ ” icon on the screen shows the number of devices that are simultaneously connected to the machine. The machine supports up to 16 concurrent devices connection and up to 4 concurrent devices projection. The user can switch between the projected devices as needed.
- Page 50 Android Projection Step 1 Turn on “Wireless Screen Sharing” page. For first-time users follow the Android projection guide and scan the QR code to download the APP and complete the installation. Step 2 Connect your android device to the machine hotspot access point...
- Page 51 Step 3 Open Transcreen app and tap “Select Devices” to bring up the “Select for device” menu and select the access point name and tap “confirm”. The Android device will connect to the machine. Step 4 Tap the Mirror Icon to start wireless projection.
- Page 52 The android device has successfully projected onto the machine. The audio will not transfer to the UCD during the projection of the Android device due to Android system limitations. IOS Projection Step 1 Turn on the “Wireless Screen Sharing” page and follow the IOS projection guide.
- Page 53 Step 2 Connect your IOS device to the machine hotspot access point. Step 3 Enter the shortcut setting of your IOS device and tap on “Screen Mirroring” to start mirroring.
- Page 54 Step 4 Click on the machine’s hotspot access point name to connect to the machine initiate the projection. A checkmark indicates a successful connection. Wireless Screen Sharing Settings On the “Wireless Screen Sharing” page, tap the “Setting” button in the lower right corner to enter the setting page, as shown below:...
- Page 55 The user can perform the following operations: tap on the > icon for more information or action. Update check: see if there is a newer version for the upgrade. Activation Information: See relative information regarding the license activation. (Your machine should already come with commercial activation.) Device name: See the default device name.
- Page 56 Full Screen of horizontal image: When enabled will stretch a horizontal image to occupy the entire screen (IPAD only) Display PPT slide change icon: To enable and disable a toolbar for control slide changes for PPT (PC Only) Display control bar under multi split-screen mode: To enable and disable the control bar on top of each split screen.
-
Page 57: File Commander
5.1.3 File Commander Tap the “ ” icon in the bottom toolbar to enter the File Commander. The interface displays the content of local files of the current system. If any external mobile devices (such as USB storage devices, removable hard disk, etc.) are connected, the file content of the mobile device will be displayed at the same time. - Page 58 File Filtering You can click the menu at the left side to display files by types, for example: Documents, Pictures, Music, Videos, Archives, and Downloads. You can also click “ ” at the top right corner to filter files by View mode, Sort by, show only.
- Page 59 File Search Enter the Files application, and click “ ” in the dialog box that is displayed, enter keywords in the search box according to requirements. The system will display a list of files that match the keywords. File Operation Enter the Files application.
-
Page 60: Windows
5.1.4 Windows (OPS Pluggable PC Needed) After the OPS (built-in computer) is successfully installed on the machine, the Windows icon will appear on the bottom toolbar. The user can tap the Windows icon to enter the Windows interface, as shown below: 5.1.5 More Tap the “... -
Page 61: My Usb
5.1.6 My USB (USB flash drive needed) After the USB flash drive is successfully plugged into the machine USB port, the “My USB” icon will appear on the bottom toolbar. The user can tap the “My USB” icon to enter the “File Commander” and quick access with the file in the USB flash drive as shown below:... -
Page 62: More (App List Interface) - Default Application
5.2 “More” (App List Interface) - Default Applications Tap the “ ” icon on the bottom toolbar to enter the app list interface, as shown below: The default application included: Camera, Calculator, Signage, Sign in, Vote, Setting, Browser, Whiteboard, Wireless Screen Sharing, Meeting Minutes, Office Suite, Clock, Aquamail, Calendar & File Commander. 5.2.1 Camera Tap the “... - Page 63 Swipe right to access the menu for the picture or video taking. When taking a video, audio will automatically be recorded • Video recording cannot be used at the same time as Screen Recording. If Screen recording is already activated, video recording will not be turned on.
-
Page 64: Calculator
5.2.2 Calculator Tap the “ ” icon to enter “Calculator”:... -
Page 65: Signage
5.2.3 Signage Tap the “ ” icon to enter “Signage”: The “Select Template” page will pop up. In this page, the user can select the desired template style and customize welcome words under “Default” or “Save File” mode, as shown below:... - Page 66 After selecting a template, enter the template editing interface: After editing the template, the user can tap the “Apply” icon in the lower right corner to save into “Save Files”, or tap the “ ” icon in the lower left corner to perform the following operations: Tap “Restore”: Restore the template to the default mode prior to editing.
-
Page 67: Sign In
5.2.4 Sign In Tap the “ ” icon to enter the “Sign In”: Users can be acquired by scanning with third party QR scanner software under your mobile device. After the participants have signed in, the relevant information is synchronized to the sign-in form in real-time: Scan the QR code with your mobile devices “Sign In”... - Page 68 Your devices will be directed to a website for you to input your name, company name, and department name. After the user tap submits from their mobile devices, their input will be shown on the Sign-in list. The meeting host can tap “Complete” to finish the signing process.
- Page 69 After the meeting host tap “Complete”, users can use their mobile device to scan the QR code to download the Sign-in List onto their mobile devices. The user can also select the “Signature” button to enter the signature interface. Handwritten sign-in can be done by hand or with a stylus.
-
Page 70: Vote
5.2.5 Vote Tap the “ ” icon to enter “Vote”: Users can input a topic (not required) and input options (2 options minimum, 10 options maximum.) After tapping “Complete”, a QR code is generated for users to scan with their mobile devices. “Vote”... - Page 71 User will see the voting topic and options on the mobile device after the QR code is scanned. After making the selection, tap “submit” to cast vote. In the voting process, the number of voters is displayed in real-time under the QR code. The user can tap the “Result”...
-
Page 72: Settings
The voting results can be displayed in both the “Pie chart“ or “Bar chart” form. The user can tap “Insert into whiteboard” to insert the current voting results into the whiteboard. 5.2.6 Settings Tap the “ ” icon to enter the settings page. The user can set Network, Application Notification, Display, Volume, Scheduled Power-on/off and Personal settings, etc. -
Page 73: Browser
5.2.7 Browser Tap the “ ” icon to enter the “Browser”: “Browser” only works when the machine are connected to the internet. 5.2.8 Whiteboard Tap the “ ” icon to enter the “Whiteboard”, for more detail, please refer to section 5.1.1 5.2.9 Wireless Screen Sharing Tap the “... -
Page 74: Meeting Minutes
5.2.10 Meeting Minutes Tap the “ ” icon to enter the “Meeting Minutes”: The user can filter the viewing mode and tap the “ ”... - Page 75 Filter all the files in “Meeting minutes” by file type if you do not wish to view them all at once by tapping on the filter icon on the top left. Tap on the corresponding checkmark to select individual files, groups of files or all files. Tap on the image file thumbnail to open the image.
-
Page 76: Officesuite
• File type “Source” is the whiteboard native file format, which can be reopened to access the previously saved whiteboard session. • “Share” by QR Code only works when both the machine and the mobile device are connected to the internet. •... - Page 77 OfficeSuite able to View, Edit and Save Word, Excel, PowerPoint and PDF document Press to start edit of the document...
- Page 78 Press “ ” to save the edit document OfficeSuite provide various mode for document...
-
Page 79: Clock
5.2.12 Clock Tap the “ ” icon to enter “Clock”: The clock allows user to set alarm (DeskClock), use stopwatch and count down. -
Page 80: Aquamail
5.2.13 Aquamail Tap the “ ” icon to enter “Aquamail”: “Aquamail” app only works when the machine are connected to the internet. Aquamail gives users the convenience to access their emails on the machine. Simply follow the instruction when connecting Aquamail to the target email service. -
Page 81: Calendar
5.2.14 Calendar Tap the “ ” icon to enter “Calendar”: Press “Start” to start using Calendar... -
Page 82: File Commander
Users can add events on the calendar, and set reminders on the event. Reminder notification will pop-up on any page 5.2.15 File Commander Tap the “ ” icon to enter the “File Commander”. For more detail, please refer to section 5.1.3. -
Page 83: Task Management Sidebar Tool - Default Application
5.3 Task Management Sidebar Tool – Default Application Tap the “ ” icon in the floating bar to enter the task management sidebar, which app shortcut for quick access: • “Screenshot”, “Record”, “Screen Recording” can only access by the Task management sidebar tool. •... -
Page 84: Screenshot
Buttons Functions Settings: Details at section 5.4 Calculator: Details at section 5.2.2 Screenshot: Details at section 5.3.1 Record: Voice recording, details at section 5.3.2 Camera: Details at section 5.2.1 Screen Recording: Details at section 5.3.3 Wireless Screen Sharing: Details at section 5.1.2.2 Vote: Details at section 5.2.5 Sign in: Details at section 5.2.4 5.3.1 Screenshot... - Page 85 Press the “Screen Capture” button on the remote control. After entering the screenshot mode, press and hold the bright box interface with your finger to move on the screen, and the bright box will follow your finger to the position where you need to take the screen. Use your finger to press the bright border inward or outward to narrow or enlarge the screenshot range.
-
Page 86: Record (Voice Recording)
Screenshot Menu Tap the “ ” icon on the screenshot menu to insert the current screenshot into the whiteboard. Tap the “ ” icon to select full screen. Tap the “ ” icon to exit the screenshot. Tap the “ ”... - Page 87 Record the voice via the built-in microphone array. Voice meeting minutes made ease. • When the bottom toolbar is closed, the toolbar will not be displayed at the bottom but on the side toolbar. The user can set it via “Settings > Display > Close the bottom toolbar”. •...
-
Page 88: Screen Recording
5.3.3 Screen Recording Users can tap the “Screen Recording” icon in the task management sidebar User can choose to screen record with or without external audio (Microphone) sound. - Page 89 Users can press the to stop the screen recording, and press to start another screen recording, press to exit screen recording. The recording will be saved in subsequent 45 minutes long sessions. For example: if a recording is 90 minutes long, the record will be separated into two 45 minutes sessions.
-
Page 90: Settings
5.4 Settings Tap the “ ” icon in the “More” interface or “Setting” in the Task Management sidebar to enter the settings page. The user can set Network, Application Notification, Display, Volume, Scheduled Power-on/off and Personal settings, etc. -
Page 91: Network
5.4.1 Network Enter the “Network” submenu to set settings for Wi-Fi, Ethernet, Hotspot Setting, and Other Settings. Wi-Fi: View the MAC address and turn on/off Wi-Fi. Ethernet: View the MAC address, IP address, gateway, subnet mask, and DNS information. The user can customize settings to automatically obtain an IP address of the LAN or set a static IP address as needed. -
Page 92: Display
5.4.3 Display Enter the “Display” submenu to set the screen backlight brightness, close bottom toolbar. Brightness: The user can set the screen to automatically or manually adjust the brightness between 0-100. Close the bottom toolbar: When this function is turned on, the bottom toolbar icons will be displayed in the sidebar. -
Page 93: Scheduled Power-On/Off
5.4.5 Scheduled Power-on/off The “Scheduled Power-On/Off” submenu allows the user to set the automatic power on/off, or customize power on/off time. -
Page 94: Personal Settings
5.4.6 Personal Settings The “Personal Settings” menu allows the user to customize USB device system host, camera, microphone, and touch for wakeup, etc. settings. USB Device System Host: To Control the equipment on the UCD (Camera, Microphone, USB Ports) to pair with which system, options include Windows, Android, and Follow the system. -
Page 95: System Space
5.4.7 System Space The “System Space” submenu allows the user to view the memory capacity and storage space distribution. 5.4.8 System Settings The “System Settings” submenu allows the user to view device information and set time, date, language, and input method. About the Device: Update System (firmware), View device name (customizable), Android version, and firmware version. -
Page 96: Restore Fatory Settings
5.4.9 Restore Factory Settings The “Restore Factory Settings” submenu allows the user to restore factory settings. Restore factory settings will erase all data within the device. -
Page 97: Serial Port Control
Serial Port Control RS232 communication cable (please use cross data cables) This Device Computer RXD0 TXD0 TXD0 RXD0 Cover Connect the RS-232 port to a computer or central control device, turn on the RS-232 serial port connection, and customize settings as follows Port No.: COM1 (set according to the port number of the computer or the central control device) Bit rate... - Page 98 The button control code is assigned as follows: (TV issues the return code to the serial port after receiving the serial port command, and returns to the host computer) Function Control Code Return Code Turn-On 7F 08 99 A2 B3 C4 02 FF 01 00 CF 7F 09 99 A2 B3 C4 02 FF 01 00 01 CF 00 Turn-Off 7F 08 99 A2 B3 C4 02 FF 01 01 CF...
-
Page 99: Signal Input Specifications
1360 x 768 60.02 Hz 7.2 HDMI/OPS Signal Input Specifications (1) HDMI CTS Ver2.0 1.4B standard specifications (2) EDID: newline (3) HDCP: Ver. 1.1;1.3;2.2 (4) RECEPTACLE: Type-A connector (5) TMDS: Single Link (6)Video pixel encoding: RGB 4:4:4, Y/Cb/Cr 4:4:4, Y/Cb/Cr 4:2:2... -
Page 100: Hdmi Outputs Timing That Can Be Supported
1920x1080 @ 60Hz 800 x 600 @ 60Hz 1280 x 1024 @60Hz 1024 x 768 @60Hz Monitor Name: newline HDMI-Video Mode 1920 x 1080 I 59.94/60Hz 16:9 (Not support) 1280 x 720 P 59.94/60Hz 16:9 Native Mode 720 x 480 P 59.94/60Hz 16:9 640 x 480 P 59.94/60Hz 4:3... -
Page 101: Formats Supported By Multi-Media
Formats Supported by Multi-media Multimedia Format type JPEG、PNG、BMP、GIF Photo MPEG1、MPEG2、MPEG4、H.263、H264、H265、AVS、AVS+、 Video AVS2.0、VC1、Motion JPEG、VP6、VP8、VP9 MPEG、AAC、VORBIS、PCM、MID、FLAC、DRA、APE Audio... -
Page 102: Troubleshooting
Troubleshooting Before contacting a service technician, please conduct an inspection according to the following table. If the problem can’t be solved by following the suggested steps, please contact your local dealer. For your safety, do not repair the machine on your own. Issue Solution Check whether the power socket is connected to the power source. - Page 103 Issue Solution Check whether the HDMI cable is connected properly. Image color is abnormal Check whether the VGA cable is connected properly. Try switching between different external sources. There is no touch Make sure that the USB cable is connected to the correct interface. For details, control under external see the “Connecting Panel”...
- Page 104 The following conditions are not failures: Since the LCD panels require precise production technology, there may be very few pixels that are bright or dark, such as tiny red, blue and green spots (bright spots) on the screen, or dark spots on some screens. This isn’t a malfunction and will not affect the overall performance of the machine.
-
Page 105: Maintenance
Maintenance Daily Maintenance: To keep the machine in good condition. Do not install or place the machine near a heat source, or place it in direct sunlight, in a dusty or humid environment, or where there is mechanical vibration or shock. To ensure performance, keep it away from high voltage, transmission grid, large metal objects, radar stations, and other equipment. -
Page 106: Technical Parameter
Technical Parameter Specification Parameter Model TT-6519PTC TT-7519PTC TT-8619PTC Display Backlight Type 16:9 Aspect Ratio 3840 x 2160 Pixel Physical Resolution 8 Bit + FRC 8 Bit + FRC 10 Bit Degree of color Soundbar Front Location Power Dissipation Camera Front Location 3840x2160 Pixel (Top);... - Page 107 Specification Parameter Model TT-6519PTC TT-7519PTC TT-8619PTC Max 3A Max 4A Rated Current Max 4.5A 1428.48×803.52mm 1650.24×928.26 mm Display Area 1895.04×1065.96 mm length×width(mm) 1509*865*86mm/98mm 1731*1010*86mm/109mm/ Boundary Dimension(length 1977*1150*86mm/109mm × width × the thickness of the /104mm 121mm /121mm bare / With hanging)(mm)
- Page 108 For more machine information, please visit: https://newline-interactive.com/apac/technical-support/ The company is committed to machine updates and technical improvements. The technical parameters and specifications are subject to change without prior notice. The pictures in this manual are for reference only. 29306-TUNL-001080...
Need help?
Do you have a question about the TT-6519PTC and is the answer not in the manual?
Questions and answers