
Related Manuals for NewLine Elara Pro Series


Summary of Contents for NewLine Elara Pro Series
- Page 1 Elara Pro Series Interactive Flat Panel Display User Manual v ers io n 1 7 0 6 2 0 2 4...
-
Page 2: Table Of Contents
2.4 Installing the OPS (Optional) ............................. 22 2.5 Installing the Wi-Fi Module ............................23 2.6 Installing the Camera(Optional) ..........................24 2.7 Installing the SDM-S (Not included) .......................... 25 2.8 Installing Newline Assistant ............................26 2.8.1 Introduction................................26 2.8.2 Installation ................................26 3 Getting Started ..........................27 3.1 Power On .................................. - Page 3 4.4.3 Newline Cast+ ................................. 54 4.4.4 Files ..................................55 4.4.5 Visualizer ................................. 55 4.4.6 Vote ..................................56 4.5 Extended Functions ..............................58 4.5.1 Capture ..................................59 4.5.2 Sources ..................................60 4.5.3 Quick Setting Menu ..............................60 4.5.4 Automatically Power Off ............................62 4.6 Settings ..................................
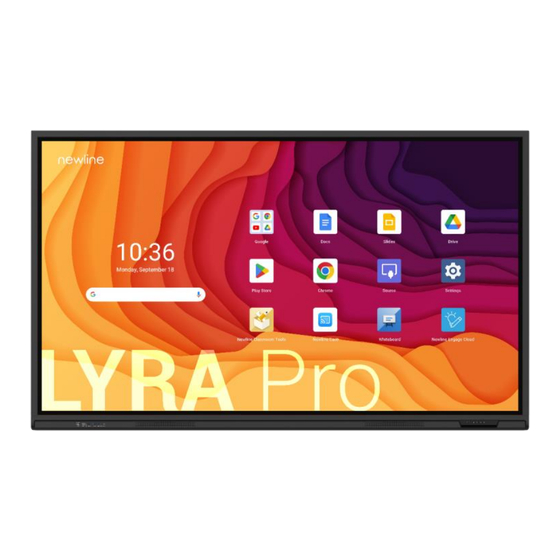
- Page 4 Welcome to the world of Newline. Thank you for choosing the Lyra Pro series Interactive Flat panel display. Please use this document to get the most out of your screen. This device complies with part 15 of the FCC Rules. Operation is subject to the following two conditions: (1) This device may not cause harmful interference, and (2) this device must accept any interference received, including interference that may cause undesired operation.
- Page 5 Energy Star Compliance. Signage Displays with Plug-in Module. As an ENERGY STAR Partner, Newline Interactive Inc., has followed the EPA’s enhanced Product qualification and certification process to ensure that the products marked with the ENERGY STAR logo are ENERGY STAR qualified per the applicable ENERGY STAR guidelines for energy efficiency.
-
Page 6: About This Document
About This Document This document describes multiple functions, instructions, and notes about the product. Symbols are used in this document to indicate operations that need particular attention. The symbols are defined as follows: Provides additional information to supplement operation in the main text. Provides tips for operation. -
Page 7: Safety Instruction
Safety Instruction For your safety, please read the following instruction before you use the product. Serious injury or property damage may be caused by improper operations. Do not try to repair the product on your own. Disconnect the product from the power supply immediately if major failures occur. Major failures include the following: ⚫... - Page 8 WARNING Do not install the product in an improper place. ⚫ Do not install the product in humid places, such as the bathroom, the shower room, near windows, or outdoor environments that experience rain, snow, or other harsh weather. Avoid installation near hot spring vapor.
- Page 9 ⚫ Adjust the direction of the radio antenna to avoid the interference from the product. ⚫ Keep the radio away from the product. If the screen glass is broken or falls off: ⚫ Keep all personnel 10 feet away from the screen to ensure safety. ⚫...
- Page 10 About USB port. Front USB ports and rear USB 3.0/USB 2.0 ports switch connections based on signal sources. If the current signal source is reading the data from an external product connecting to the port, please switch the signal source after the data reading is complete. Otherwise, the data or product may be damaged.
-
Page 11: Overview
The newline's 4K Ultra High-Definition LED screen also provides a fluid writing experience. Annotate over anything on the screen, whether in the embedded whiteboard or while using any other device. - Page 12 Rear View 55inch: 65/75/86inch:...
- Page 13 98inch: Front Ports Power Output Plug Speakers Power Supply Plug Power On/Off Power Switch Front Buttons SDM-S Slot Remote Control Receiver Rear Ports Light Sensor Wi-Fi Module Camera Port OPS Port Notes: SDM-S is Smart Display Module Small. ⚫ The product images shown are for illustration purposes only and may not be an exact representation ⚫...
-
Page 14: Ports
While HDMI and Display Port offer support for cables of varying lengths, the maximum cable length that Newline recommends for optimal performance is 3 meters (10 feet) for HDMI and 1.8 meters (around 6 feet) for Display Port. Using cable longer than recommended length may cause data loss and a negative impact to display quality. -
Page 15: Front Buttons
1.4 Front Buttons Buttons Operations Functions Short press Power on ⚫ Solid white color : Display is on and working Sleep mode The red and white lights flicker alternately: Display ⚫ enter Sleep mode. Long press for more Power off than 2 seconds ⚫... -
Page 16: Remote Control
Buttons Operations Functions Short press Adjust the Brightness Short press Go to the home page Short press Open the Quick Setting menu Long press for 5 Activate/Exit the power button Lock Function seconds Notes: Press Volume + >Volume + >Volume - >Volume - > Left > Left > Right > Right buttons on the Remote control to turn on/off the touch function. - Page 17 Buttons Operations Power On/Off Go to the Home Page Directional Pad Confirm/OK Press once to freeze the current screen. Press again to exit freeze function Enter the Source Selection Page Return to Previous/Exit App switcher Open the Quick Setting menu on the embedded operating system.
-
Page 18: Installation Guide
Installation Guide 2.1 Safety Precautions Installation Environment... -
Page 19: Installation Precautions
Installation Direction 2.2 Installation Precautions Weight Loading Weight of the product: 55 inch: 31.5 kg 65 inch: 39 kg 75 inch: 52 kg 86 inch: 65 kg 98 inch: 108 kg When using a mobile stand, ensure that the weight of the product is less than the loading ⚫... - Page 20 For any problem, please contact our support desk. Our company is not responsible for any damage or losses incurred by users if the users fails to follow the instructions. Ventilation Ensure adequate ventilation and/or an air conditioned environment. We recommend keeping certain distances from the side of the product to the wall or panels.
-
Page 21: Installation
2.3 Installation The dimensions of the four bracket mounting holes on the back panel are VESA MIS-F compliant: 98 INCH: 800 x 600 mm/31.50 x 23.62 in; 86INCH or 75INCH: 800 x 400 mm/31.50 x 15.75 in; 65INCH: 600 x 400 mm/23.62 x 15.75 in; 55INCH: 400 x 400 mm/15.75 x 15.75 in. - Page 22 75 " /86 " : 65 " : 55 " :...
-
Page 23: Installing The Ops (Optional)
2.4 Installing the OPS (Optional) The OPS does not support hot plugging. Therefore, you must insert or remove the OPS when the display is powered off. Otherwise, the display or OPS may be damaged. You will need to purchase the OPS separately. Perform the following steps to install the OPS. Step 1 Unscrew the M4 screws by hand to remove the OPS protective cover. -
Page 24: Installing The Wi-Fi Module
2.5 Installing the Wi-Fi Module Wi-Fi Module does not support hot plugging. Therefore, you must insert or remove the Wi-Fi Module when the display is powered off. Otherwise, the display or Wi-Fi Module may be damaged. Perform the following steps to install the Wi-Fi Module. Step 1 Unscrew the 2 screws on the Wi-Fi Module port and remove the shielding cover. -
Page 25: Installing The Camera(Optional)
2.6 Installing the Camera(Optional) The camera is put in accessary box with an independent package, please install it onto panel referring to following steps. Use two screws along with the camera to fix it. Remove the silicone cover from the middle port on the top of the panel display, then insert the camera. -
Page 26: Installing The Sdm-S (Not Included)
2.7 Installing the SDM-S (Not included) The SDM-S does not support hot plugging. Therefore, you must insert or remove the SDM-S when the display is powered off. Otherwise, the display or SDM-S may be damaged. Currently we don't provide SDM-S, but if you have a SDM-S to use, please install refering to the following steps. -
Page 27: Installing Newline Assistant
2.8 Installing Newline Assistant 2.8.1 Introduction The Newline Assistant agent is a tool used as a bridge between the embedded operating system and the OPS. It helps add Windows software shortcut to the Home Page, as well as to protect USB data when switching between sources. -
Page 28: Getting Started
Getting Started 3.1 Power On Step 1 Ensure the power cable is fully seated into the panel and wall outlet before powering on the panel. Please confirm your wall outlet supports a power range of 100V to 240V with frequency at 50 Hz/60 Hz ± 5% and is fully grounded. The power outlet should be installed near the equipment and should be easily accessible. -
Page 29: Calibration
Step 3 In the Warning dialog box, tap Cancel to return to working mode. Tap Turn off to turn off the panel, and the power indicator will turn to red. Step 4 If you want to completely turn off the product, turn off the rocker switch behind the panel (next to the power socket) and unplug the power cord. - Page 30 Step 4 Select in the Tablet PC Settings window.
- Page 31 Step 5 Select Touch input from the option and start calibration. Step 6 Use your finger or a pencil to click and hold the center of the flickering cross . Do not release until moves to the next positioning point. Complete the calibration process as instructed.
-
Page 32: Operating
Operating 4.1 Profile Logon When you set the screen lock in Settings>Security>Screen Lock, you need to verify the lock screen code after each boot. Method Operation Swipe Swipe the screen to unlock Pattern Draw an unlock pattern, the pattern need connect at least 4 dots. Enter the pin code, the pin must be at least 4 digits. -
Page 33: Home
4.2 Home Once logged into the system, the user will be taken to the Home page as shown in the following figure: 1: Status Bar 2: Clock & Date and Week 3: Toolbar 4: Google Search Bar 5: Home button 6: Application Gestures Gesture... - Page 34 Toolbar OPS, Home, Annotation Mode, Whiteboard, Quick access bar, Dashboard, Task manager and Return icons are displayed by default in the toolbar on both sides of the screen. You may hide toolbar in the Settings or move it on the screen, shrink or expand by using touch gestures. The functions of the toolbar are as follows: Icon Functions...
- Page 35 Shrink Expand Quick Access Bar Dashboard: Menu Function 1 Option includes standard, meeting, classroom, custom mode, standard mode is default; Sound 2 After selecting customization, the interface displays bass, treble and balance, and the default values are 0, 0 and 50. 1 Includes standard, bright, soft, custom four options, standard mode is default;...
- Page 36 Toolbar > Compass floating bar Press the toolbar and drag it out, the toolbar can be transformed into a Compass floating bar. Compass floating bar > Toolbar Drag the floating bar to the edge of the screen, the Compass floating bar can be back to the toolbar. In the floating bar, users can tap the icon to enter function interface, add and delete icons, add custom icons, drag the tool bar with their fingers to move around on the screen.
-
Page 37: Whiteboard
Delete icons Long press the icons to enter the icon deleting status, tap the × icon on the upper left corner to delete icons. Signal source 4.3 Whiteboard Z komentarzem [李阔1]: 截图已更新 The whiteboard function is designed to present conference writing to attendees in a quick and easy manner. - Page 38 Palm rejection When Palm rejection is turned on, fingers and pen can write and draw, but palm and fist would not be recognized. Palm eraser When Palm eraser is turned on, fingers and pens can also be recognized, and palm and fist will be recognized as large eraser.
- Page 39 21 22 23 Icon Name Icon Function Mode Switch Tap to switch to annotation mode. Tap to enter options interface. Users can insert image, Text, Sticky More note, Search Image or Search Web etc. QR Code Tap to export the whiteboard data into QR Code. Tap to enter move canvas function, press and move your finger in Move Canvas the page to move canvas and content on it.
-
Page 40: Whiteboard Functions
Icon Name Icon Function Capture Tap to take a screenshot. New Page Tap to add a new page. Previous Page Tap to back to the previous page. Next Page Tap to go to the next page. Navigation Tap to show the page thumbnails. Settings Tap to enter the whiteboard setting interface. - Page 41 Tap and hold for two seconds to enter the background setting. Select the color and pattern and click ADD to add a new page. The set color and pattern will be displayed on the new page, as shown in the following figure. Mode Switch in the lower left corner of the whiteboard mode to switch to annotation modes.
- Page 42 On the FILE items, you can import data from file management, save whiteboard files and export whiteboard page. On the ADD items, you can import the pictures, Text, Smart table, Sticky note, PDF document, Concept map, video, and audio from system files and USB device. You also can import the Search Image, Search Web and YouTube on the internet.
- Page 43 QR code export On the Whiteboard, tap to pop up QR code exporting windows. You can export the whiteboard page into QR Code, before that, you can customize the number of export page, change the export format at first. Move canvas On the whiteboard, tap the icon to enter move canvas function, press and move your finger in the page to move canvas and content on it.
- Page 44 Pen Type On the whiteboard, four types of pens are supported: hard pen, brush, highlighter and AI pen. : used to write. Highlighter : used to highlight. Characters covered by comments are still visible. AI Pen : used to write, support text recognition, shape recognition and formula recognition.
- Page 45 Insert auto shape On the whiteboard, tap to insert the shape and three-dimensional diagram or set the shapes and color. icon supports three status: Unavailable: The icon is unavailable when users insert arrow and line; Unselected: The edge of shapes are colored when the icon is not selected; Selected: The shape will be filled with colors when you import the shape;...
- Page 46 Select On the whiteboard, tap and user could choose the data on the page to move/ zoom in/ zoom out/ rotate/change colors. Rotate: Zoom in/out: Icons Functions Long press this icon to rotate the selected items...
- Page 47 Tap this icon to copy the items. Tap this icon to cut the items. Tap this icon to push to top layer. Tap this icon to push to bottom layer. Tap this icon to lock the layer. Tap this icon to delete the items. Paste (Long press the screen around two seconds.
- Page 48 You can tap to enter Settings> Default settings>Eraser to set the type of eraser. Clear All On the whiteboard page, tap to show the pop-up windows to clear all content on the current page, as shown in the following figure: Capture to take a screenshot and save the data to Photos and Files >...
-
Page 49: Whiteboard Setting
4.3.2 Whiteboard Setting Tap the icon to enter the settings bar, users can set the object recognition, action hint, default settings and handwriting recognition. Object recognition Users can drag the slider to enable the object detection function, tap icon to view details functions, as shown in the following figure: Example 1: Turn on write with Fine Pen only Fine Pen (2mm): User Fine Pen to write and erase with small eraser. - Page 50 Pinch with two fingers: Zoom in/out selected objects or canvas. ⚫ Rotate with two fingers: Rotate selected objects. ⚫ Example 2: Turn on write with Fine Pen or fingers Fine Pen and finger (thick pen): User Fine Pen or finger (thick pen) to write. System will detect ⚫...
-
Page 51: Page Operations
The move button: After tapping this button, you can move the canvas with one finger or pen, ⚫ and zoom in/out with two fingers (pinch). Long press on objects: Shortcut for selecting objects. ⚫ Palm Rejection: Drag the slider to enable and disable the Palm Rejection. When Palm rejection is turned on, fingers and pen can write and draw, but palm and fist would not be recognized. -
Page 52: Annotation
to share the writing pages to local file or AquaMail. ⚫ to copy the page. ⚫ to delete selected pages. ⚫ 4.3.4 Annotation In annotation mode, the system generates a transparent layer at the top of the screen, and users can add annotations to the transparent layer until the annotation mode is exited. - Page 53 Take a Screenshot icon to enter take a screenshot interface, users can tap icon to take a screenshot; tap icon to switch to whiteboard mode; tap icon to save screenshot, tap icon to exit screenshot. Save screenshot icon to pop up save screenshot interface, you can save or share screenshot as following: to select all pages.
-
Page 54: Application
4.4 Application On the Home page, slide up to view all applications. The following figure shows applications that the system is delivered with 4.4.1 Google Play Store Enter the Google Play Store, you can install apps as you need, enter my apps to uninstall the applications. -
Page 55: Newline Display Management
Newline Display Management Plus is a remote display management solution that enables users to centrally manage the Newline displays from the comfort of their desk. Users can deploy and install apps, configure display settings, and push updates without communicating back and forth. -
Page 56: Files
4.4.4 Files The product supports connection to USB flash memory. In Files application, you can preview all files in the internal storage and storage devices connected via USB ports. Functions Instruction Tap the submenu on the left side to preview recent files, images, videos, File Preview audio, documents and downloads files, files on the external storage devices connected via the USB ports. -
Page 57: Vote
Icon Name Icon Function Annotation Tap to enter annotation mode. Whiteboard Tap to enter whiteboard mode. Screen Display Tap to display the visualizer camera. Screen Split Mode (2) Tap to display in 2 split screen mode. Screen Split Mode (4) Tap to display in 4 split screen mode. - Page 58 Users can input a topic (not required) and input options (2 options minimum, 10 options maximum). After tapping “Complete”, a QR code is generated for users to scan with their mobile devices. “Vote” only works when both the panel and the mobile device are connected to the internet. User will see the voting topic and options on the mobile device after the QR code is scanned.
-
Page 59: Extended Functions
In the voting process, the number of voters is displayed in real-time under the QR code. Users can tap “Result” button to terminate the current vote process and show the voting results. The voting results can be displayed in the “Pie chart” or “Bar chart” form. Users can tap Insert into whiteboard to insert the current voting results into the whiteboard. -
Page 60: Capture
Only mode, the screen was Tap the icon in the quick setting menu. extinguished and the sound Turn off played normally. Tap anywhere on the screen. Turn on When the function is turned on, the child lock icon will Long press the button on the front button for appear in the upper right 5 seconds. -
Page 61: Sources
Common functions: Freedom: Select the free mode, you can freely drag the screenshot box to adjust the screenshot screen; Full screen: Select full screen mode, full screen capture; Save: Click Save to get the screenshot and save it automatically; ... - Page 62 Icon Functions Drag the slider to adjust the brightness. Tap to enter the setting of internet. Tap to enable or disable the Bluetooth. Tap to enable or disable the Do Not Disturb function. Tap to enter the Nearby Share interface. Tap to enter the setting of Alarm.
-
Page 63: Automatically Power Off
Icon Functions Tap to edit the shortcut menu, hold and drag to add the items. Tap to enter the account selection interface, you can switch users, add user and guest. Tap to enter the settings page. Tap to select access to lockdown, power off and restart. 4.5.4 Automatically Power Off If the screen is left un-operated for a specified duration, it will automatically turn off. -
Page 64: Settings
4.6 Settings Enter the system setting page using one of the following methods: on the Home page. ⚫ In the Quick Setting Menu, tap the icon. ⚫ Press MENU button on the remote control. ⚫ 4.6.1 Network & Internet Enter the Network&Internet submenu to enable Wi-Fi or Ethernet, view network information, and enable the Wake on LAN function. -
Page 65: Connected Devices
Menu Setting Functions Private ON/OFF Tap to select DNS mode, off, automatic, private DNS provider hostname three modes are available 4.6.2 Connected devices Enter the Connected devices submenu to check the connected devices, system will automatically detect and connect to new device via Bluetooth. Menu Functions After the device is connected via USB, it can transfer files or charge. -
Page 66: Storage
Notifications Set how to display notifications on the lock screen page. lock screen Do not disturb Set how apps and notifications are displayed in Do not Disturb mode. Wireless emergency Switch ON/OFF alerts Hide silent notifications in Switch ON/OFF status bar Allow notification Switch ON/OFF... -
Page 67: Display
Display text and Set font size and screen size size Google theme Switch on/off Theme Newline theme 1 Switch on/off, same theme as newline Q Newline theme 2 Switch on/off, same theme as newline Z Logo Switch ON/OFF Color Switch ON/OFF... -
Page 68: Security
Basic colors Changeable Basic colors Dark theme Switch ON/OFF Themed Switch ON/OFF icons 4.6.9 Security Enter the Security submenu to view the security status, find my device, update the security and add the screen lock. Menu Functions Google Play Check the apps and device for harmful behavior. protect Log into your google account and follow the prompts to find your Find my device... -
Page 69: Tool Bar
Android system. 1. Default is off; 2. Only one Newline app can be selected at a time; 3. Enter the link, boot automatically jump to the URL. 4.6.14 Power Setting Enter the Power submenu to set power on or power off as following:... -
Page 70: Screen Eye Filters
Studies have shown that just as the ultra-violet rays can cause eye damage, the shortwave-length blue light rays from displays can cause eyestrain, retina damage, and affect vision over time. Newline Blue Light filter is an eye protection feature that can reduce the blue light. TT-6523QA /TT-7523QA /TT-8623QA has obtained this certification. -
Page 71: Google
Using Low Blue Light Decreasing the blue light emitting by the Interactive Flat panel display reduces the blue light exposure to your eyes. The Interactive Flat panel display use a low blue light panel default setting mode, that when used in the default setting mode, is certified by TUV to reduce blue light output and create a more relaxing and less stimulating image while reading content on the screen. - Page 72 enabled. Profile info: Tap to change owner icon and name. Owner import data: If you had more than two devices and would like to keep the setting as the same. You can put the export file into the USB disk and plug it into the USB port, then press the import option to import the setting you have done in the Owner...
- Page 73 external source, all the USB devices will be blocked. Notes: Once the USB lock function is turned on, it will be effective for owner, all users and guest. Whether the owner, user or guest enters the system, the USB lock function is always valid. Installation lock: When you enable the Installation lock, under the smart system, you will not be able to install software through the app store or USB...
-
Page 74: About Tablet
The multiple users icon will appear on the lock screen page and quick setting menu when the multiple users function is enabled, tap the icon to add roles and switch users. You can create account by the following method: Enter Settings >... -
Page 75: Serial Port Control
Serial Port Control RS232 communication cable (please use cross data cables) This Device Computer RXD0 TXD0 TXD0 RXD0 Cover RS232 port of panel Connect RS-232 port to the PC or controlling product. Enable RS-232 serial port connection and complete the following configuration. Port: COM1 (Set according to PC or controlling product’s port number) Baud rate 19200... - Page 76 Function Controlling codes Return codes Power on 7F 08 99 A2 B3 C4 02 FF 01 7F 09 99 A2 B3 C4 02 FF 01 00 01 00 CF Power off 7F 08 99 A2 B3 C4 02 FF 01 7F 09 99 A2 B3 C4 02 FF 01 01 01 01 CF Mute/Unmute...
- Page 77 Return (exit) 7F 08 99 A2 B3 C4 02 FF 01 7F 09 99 A2 B3 C4 02 FF 01 1D 01 1D CF 7F 08 99 A2 B3 C4 02 FF 01 7F 09 99 A2 B3 C4 02 FF 01 2B 01 2B CF ←...
- Page 78 Freeze ON/OFF 7F 08 99 A2 B3 C4 02 FF 01 7F 09 99 A2 B3 C4 02 FF 01 3B 01 toggle 3B CF Freeze On 7F 09 99 A2 B3 C4 02 FF 0B 7F 09 99 A2 B3 C4 02 FF 0B 00 01 00 CF Freeze Off 7F 09 99 A2 B3 C4 02 FF 0B...
- Page 79 Function Querying codes Return codes 7F 09 99 A2 B3 C4 02 FF 01 37 XX Notes: 7F 08 99 A2 B3 C4 02 FF 01 Power supply 37 CF XX indicates the power on/off state. XX = 01: power on state; XX = 00: power off state.
- Page 80 7F 09 99 A2 B3 C4 02 FF 01 35 XX Notes: XX indicates the mode. 7F 08 99 A2 B3 C4 02 FF 01 D.Mode 35 CF XX = 00-standard; XX = 01-ECO mode; XX = 02-custom; XX = 03-auto. 7F 09 99 A2 B3 C4 02 FF 01 49 XX Notes: Backlight...
- Page 81 OP: Backlight brightness; QR: Backlight state; ST: Whiteboard state; UV: Screen lock state.
-
Page 82: Faqs & Troubleshooting
FAQs & Troubleshooting Symptom Troubleshooting Methods The screen cannot be powered on or Check whether the power supply is connected. the power indicator light is off. Check whether the power supply plug is properly connected. Check whether the power outlet has electricity. Check whether the rocker switch is enabled. - Page 83 Symptom Troubleshooting Methods the external signal source channel is Ensure that the USB touch cable is connected to being used. the proper port. For details, see section "Ports". Remove and insert the USB touch cable again. There is no sound when the HDMI in Remove and insert the HDMI cable again.
-
Page 84: Specifications
Specifications Model TT-5523QA TT-6523QA TT-7523QA TT-8623QA TT-9823QA Display Backlight Display Area 1211 x 680mm 1428 x 803mm 1650 x 928mm 1895 x 1066mm 2163 x 1221mm Active Screen Size 55 inch 65 inch 75 inch 86 inch 98 inch Display Ratio 16:9 Resolution 3840 x 2160 Pixel... - Page 85 Model TT-5523QA TT-6523QA TT-7523QA TT-8623QA TT-9823QA Touch Touch Surface Anti-Glare + Anti-Fingerprint + Antimicrobial Tempered Glass 88%±3% Transparency Touch Points Android, MAC, Linux 20 points, Windows 50 points Writing Tools Eraser, Stylus or Finger Communication USB-A Interface Transportation/Storage Storage -20~60°C/ 0~90% RH (non-condensing) Temperature/ Humidity 0℃-40℃/ 20~80%...
- Page 86 Model TT-5523QA TT-6523QA TT-7523QA TT-8623QA TT-9823QA Multimedia File Image: BMP, JPG, PNG, GIF, WEBP Formats Video: H.263, MJPEG, MPEG1, MPEG2, AVC(H264), VP8, VP9, Motion JPEG, HEVC, 4K HEVC(4K H265) Audio: MPEG1/2, MPEG1/2 LAYER2, MPEG1/2/2.5 LAYER3, AAC, AVORBIS, VORBIS, LPCM, FLAC, OPUS, MP2, MP3 Pre-installed Refer to the actual panel display applications...
-
Page 87: More Information
More Information For More Information Please visit our website (https://newline-interactive.com/eu/support/downloads) for detailed instruction manual. Contact Us for Support Please email us at support_eu@newline-interactive.com National Service Hotline: +34 91 804 31 79 Our company is devoted to product innovation and technology enhancement. Therefore, we may change product specification and information without notice.
Need help?
Do you have a question about the Elara Pro Series and is the answer not in the manual?
Questions and answers