JVA MB1.5 Installation And User Manual
Electric fence energizer
Hide thumbs
Also See for MB1.5:
- Installation and user manual (24 pages) ,
- Installation and user manual (31 pages) ,
- Installation and user manual (40 pages)

Subscribe to Our Youtube Channel
Related Manuals for JVA MB1.5


Summary of Contents for JVA MB1.5
- Page 1 JVA ElEctric FEncE EnErgizEr MB1.5 • MB3.0 • MB4.5 installation and User Manual October 2019 Edition JVA AGRIRANGE ENERGIZERS...
- Page 2 JVA AgriRange Energizers INTRODUCTION Congratulations, and welcome to the shocking world of JVA. We thank you for placing your faith in our product range. In doing so you have joined the world-wide body of satisfied JVA users who are benefiting from our products.
-
Page 3: Table Of Contents
JVA MODELS AND FEATURES ........ - Page 4 MB1.5, MB3.0, MB4.5 JVA AgriRange Energizers Table of Contents (continued) COMMON FENCE PROBLEMS ............
-
Page 5: Important Notes - Please Read
• 24V Battery (not supplied) • 12V Battery with Solar panel (not supplied) • 240Vac (via Power Pack) (13.8V DC Power Pack supplied) The JVA Mb1.5, Mb3 and Mb4.5 energizers have limited power supply options. For more information please refer to section 2.2. -
Page 6: Rechargeable Batteries
Always mount the power supply either indoors or undercover. 1.4 Rechargeable Batteries if powered from a rechargeable battery, JVA Mb energizers are compatible with lead-acid batteries. SLA battery life is shortened considerably if it is: left in a discharged state or exposed to very high temperatures. -
Page 7: Specifications
MB1.5, MB3.0, MB4.5 JVA AgriRange Energizers The Mb series of energizers has the electronics enclosed inside a durable UV stable case ► to protect against ants, moisture and dust and so maximize reliability. The overload indication warns if the fence is heavily loaded by flashing a warning LED and ►... -
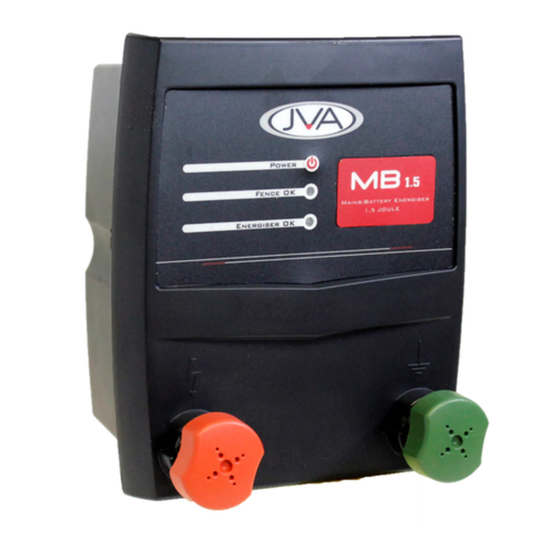
Page 8: Parts Of The Energizer
MB1.5, MB3.0, MB4.5 JVA AgriRange Energizers PARTS OF THE ENERGIZER MB1.5, MB3.0, MB4.5 On/Off switch (not on MB1.5 and MB3) Fence oK indicator (red Led) energizer on and oK indicator (green Led) rubber o-ring seal between front and back case pieces... -
Page 9: Fence Connectors
MB1.5, MB3.0, MB4.5 JVA AgriRange Energizers 3.1 Fence Connectors Fence terminal Earth terminal Fence terminal – should be connected to the live wires of the fence. Earth terminal – should be connected to a suitable electric fence earth stake. 3.2 Energizer LED Display This feature is included in all units. -
Page 10: Installation
4.3 Powering the Energizer Mains Power Source (Mb1.5, Mb3.0 and Mb4.5): Plug the power adapter (Mb1.5, Mb3.0 and Mb4.5) supplied with the energizer, into an AC power source and the energizer. Turn the energizer ON by pressing the On/Off switch. -
Page 11: Operation
For best results locate the energizer as centrally as possible in a fencing layout. The fence and the earth voltages can be measured using an electric fence digital voltmeter, or a digital electric fence directional fault finder, such as the JVA Electric Fence Digital Directional Fault Finder. -
Page 12: All-Live Earth Return System
MB1.5, MB3.0, MB4.5 JVA AgriRange Energizers 5.3 All-Live Wire, Earth Return System The Earth Return (also called Ground Return) configuration is the most common method of configuration for electric fences, particularly smaller fence applications like strip grazing. The fence live wire(s) are electrified and rely on the soil to complete the circuit back to the energizer earth Terminal when an animal touches the fence. -
Page 13: Earthing Your Energizer
Maintaining permanent fences is important, especially during the warmer months when plant growth is at its highest and after any disruptive weather events. Check the fence voltage using an electric fence voltmeter. The JVA Fault Finder will also detect faults and direct you towards them. -
Page 14: Common Energizer Problems
However, nature is capable of performing more extremely than can be tested for in the laboratory; to ensure the wellbeing of your JVA investment for the long term, it is recommended that a Lightning Protection Kit is installed to prevent lightning damage and possible costly repairs. -
Page 15: Errors And Error Codes
Short the end of your fence to earth by hammering a metal stake into the soil and connecting this to the live fence wire. Using an electric fence voltmeter or a JVA electric Fence Fault Finder, (do not use a standard multimeter.) check the voltage is at the earth terminal of the energizer. in general it should be a reading less than 300 volts (0.3kV). - Page 16 MB1.5, MB3.0, MB4.5 JVA AgriRange Energizers 8. INSTRUCTIONS FOR THE INSTALLATION AND CONNECTION OF ELECTRIC FENCES instructions for installation and connection of electric fences vary from country to country. Most are based on the International Electrical Commission (IEC) AS60335.2.76 specifications.
- Page 17 MB1.5, MB3.0, MB4.5 JVA AgriRange Energizers The energizer earth electrode shall penetrate the ground to a depth of at least 1.2 m. Connecting leads that are run inside buildings shall be effectively insulated from the earthed structural parts of the building. This may be achieved by using insulated high voltage cable.
- Page 18 9.1 For Assistance if you have any questions or need further assistance, or for more information on our complete range of electric fencing products, please see the JVA website at www.jva-fence.com. 9.2 Service or Repairs if service is required, package your energizer carefully and return it to the place of purchase or your nearest JVA distributor along with your proof of purchase.
- Page 19 For full par culars of our ranges of e The JVA range of agricultural and security electric fence energizers are the result of a joint venture between the Australian company, Pakton Technologies and South African...
Need help?
Do you have a question about the MB1.5 and is the answer not in the manual?
Questions and answers