JVA Z13 User Manual
Hide thumbs
Also See for Z13:
- Installer manual (52 pages) ,
- Manual (48 pages) ,
- Quick start manual (16 pages)
Table of Contents
Advertisement
Advertisement
Table of Contents

Related Manuals for JVA Z13


Summary of Contents for JVA Z13
- Page 1 Z13 U anUal J VA T E CH N O LO G I E S www.jva-fence.com...
-
Page 2: Table Of Contents
Description . . . . . . . . . . . . . . . . . . . . 21 JVA Z13 - Exterior ... . . 21 Front Panel Status Lights . - Page 3 Anti-Bridging threshold (Option 17) ..44 8.5.15 Combined Options 2 (Option 18) ..45 8.5.16 Auto Re-arm Time (Option 20) ..46 JVA Z13 Manual Page 3...
- Page 4 Specifications . . . . . . . . . . . . . . . . . . 51 Z13 Specification ....51 Z-Series Keypads .
- Page 5 13.1 Group Simultaneous Pulse Feature ..71 13.2 Group Mode Programming (Option 26) ..71 13.3 Group linking via the Keypad “bus” ..72 JVA Z13 Manual Page 5...
-
Page 6: Quick Start Guide
Key8 Key9 Enter Programming Mode Installer Pin When you have entered Programming mode you can begin to enter the following options to configure your Z13 Se- curity Energizer. Default Values are highlighted in grey. Command Key1 Key2 Keys 3 and 4... - Page 7 Command Key1 Key2 Keys 3 and 4 Key5 Return Fence Alarm Enter the value in Hundreds of Volts Voltage For High Example: to set 3.8kV, use 38 for keys 3 and 4. Default is 30 (3.0kV) Power Mode Return Fence Alarm Enter the value in Hundreds of Volts Voltage For Low Example: to set 0.8V, use 08 for keys 3 and 4.
- Page 8 Quick Start Guide Command Key1 Key2 Keys 3 and 4 Key5 Gate Entry/Exit Delay (S=Seconds, M=Minutes) Chime Mode None Door Chime Siren Fence Gate Beeps Alarm Plus Siren Combined Options 1 Maximum Limits out- Enables IR Stop slaves Stop Ener- (add up the options Power at all put to 2.5J...
- Page 9 Command Key1 Key2 Keys 3 and 4 Key5 Combined Options 2 +128 (like Combined Siren Enable 4800 9600 Bite to Options 1) Chirp Entry Baud Baud Power Exit to Bite Power Gate Auto Re-arm Time S=Seconds, M = Min- utes, D=Disabled Relay 1 Options Explained under “2.1.1 Relay Functions”.
-
Page 10: Relay Functions
Quick Start Guide 2.1.1 Relay Functions The table below is for use for the relay programming options mentioned in the table on the previous page. Keys 3 Function Description and 4 Fence Triggers when Zone 1 is Armed and Return Voltage is below the Threshold Voltage Fence or Off Triggers when Zone 1 is Disarmed or Return Voltage is below the Threshold Voltage Armed... - Page 11 Keys 3 Function Description and 4 This Relay is completely controlled from a Host system such as Perimeter Patrol or a Host Control Keypad. If the Host system is disconnected from the Energizer for more than 30 sec- onds, the Relay will automatically change to the Alarm State This Relay is completely controlled from a Host system such as Perimeter Patrol or Host Control - Not Fail Safe...
-
Page 12: Input Functions
Quick Start Guide 2.1.2 Input Functions Key3 Input Trigger Key4 Input Function Normally Open (Active when Closed) Arm when Active / Disarm otherwise Normally Closed (Active when Open) Arm when Active / Disarm otherwise Momentary Toggle (Toggle between states) NO Pulse Extend (Extend a short Close signal by Low Power when Active / High Power otherwise. - Page 13 JVA Z13 Manual Page 13...
-
Page 14: Quick Test Of Configured Unit
Z-Series energizer, or the configuration of the unit itself. To test your unit it is best to connect your Z13 with a test fence, this is done by connecting cables as shown in the picture below. -
Page 15: Connecting Your Z13 To The Fence
This is covered under “6.3 Example of Fence (High Voltage) Wiring Dia- grams” on page 29. In depth installation instructions begin on page 27. After the Z13 has been wired up you can begin to protect your pe- rimeter. JVA Z13 Manual... -
Page 16: Most Frequently Used Lcd Keypad Commands
MOST FREQUENTLY USED LCD KEYPAD COMMANDS For a full list of all keypad commands please see “11.6 Summary Of Keypad Functions” on page 57. Default Installer PIN 012345 Default User PIN 1234 First you need to connect the Z-Series LCD keypad to the Z-Series device. Once you have a keypad connected you can refer to the table below to control the Z-Series device. -
Page 17: Introduction
Designed and manufactured to meet the most stringent international safe- ty standards, the JVA Z13 is in a class of its own when it comes to features and benefits at an affordable price. - Page 18 JVA Z13 Manual Page 18...
-
Page 19: Features And Benefits
Siren and Strobe ing user to breach of security Earth monitor input Ensures that all the wires on the fence are monitored continually Enclosed fence terminals Tamper resistant and prevents acciden- tal contact with high voltage Page 19 © JVA Technologies www.jva-fence.com... -
Page 20: More Features
• AC fail, low battery and bad battery detection • Large number of keypad programmable options • Adjustable fence voltage level • Two 12V dc switch outputs (also referred to as relays) • Two control Inputs configured as NO or NC contacts JVA Z13 Manual Page 20... -
Page 21: Description
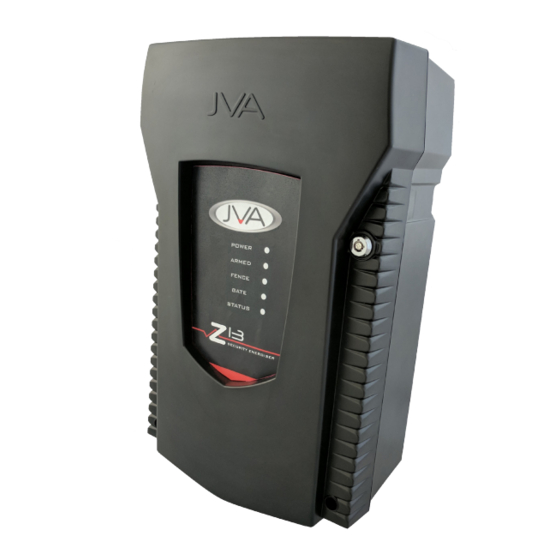
DESCRIPTION JVA Z13 - EXTERIOR Page 21 © JVA Technologies www.jva-fence.com... -
Page 22: Front Panel Status Lights
Tamper circuit. Dual zone, conventional 8 Joule (4 Joules per zone). Single zone start of fence monitor with Distant Fault Detection ™ ZM20 Twenty sector loop monitor. ZLM4 Four zone low voltage electric fence monitor. JVA Z13 Manual Page 22... -
Page 23: Internal Beeper/Keypad Beeper
Detail” on page 38. Each parameter has a factory set default. ARM INPUT AND KEY SWITCH The JVA Z-Series energizer can be armed (to energise the fence) by closing a contact wired into the arm input. On some models a key switch is fitted to the right-hand side of the case for this purpose. -
Page 24: Agricultural Mode
5.12 REMOTE CONTROL UNIT (OPTIONAL) The Remote Control Unit provides the Z13 with the ability to arm or dis- arm the energizer via a compact key chain fob remote control. If using the remote control the siren can be used to acknowledge arming with 1 beep and disarm with 2 beeps, see programming option “9.5.11 Chime Mode... -
Page 25: Lightning Protection
5.15 EARTH LOOP MONITORING The Z13 has two fence earth terminals. If the earth monitoring facility is not required, the Earth Out and Earth Return terminals must be joined with a wire bridge. Directions on how to wire for earth loop monitoring are in Section “6.3 Example of Fence (High Voltage) Wiring Diagrams”... - Page 26 JVA Z13 Manual Page 26...
-
Page 27: Installation
2. Design and build the fence. (Beyond the scope of this manual.) Ask your distributor for help if required. 3. Decide where the JVA Z13 is to be mounted. If on an external wall it should be housed within a waterproof equipment box and definitely not in direct sunlight. -
Page 28: Interior Configuration
INTERIOR CONFIGURATION High Voltage Terminals Low Voltage Terminals JVA Z13 Manual Page 28... - Page 29 Installation...
- Page 30 JVA Z13 Manual Page 30...
-
Page 31: Control
CONTROL Your JVA Z13 security energizer has been designed for ease of operation. It may be armed and disarmed using any of the following: • Key switch or remote switch connected to the control input (IN1) • Remote control radio receiver connected to IN1 •... -
Page 32: When An Alarm Occurs
• Enter your new User PIN (must be 4 digits) and then #. • Press *# to exit User Programming mode. • Make sure your new User PIN works by using it to arm the energizer. JVA Z13 Manual Page 32... -
Page 33: Technical Information
Low side switched STROBE 2 Way Switched 12V output. 30W max, shared between Siren and Strobe. A buffer relay should be used when connecting these outputs to an alarm panel. Low side switched Page 33 © JVA Technologies www.jva-fence.com... -
Page 34: Power Options
(4 Amp slow blow fuse). POWER OPTIONS The Z13 has 2 sources of power, 16VAC and 12VDC (battery). If using solar power and an external battery, connect the battery to the battery leads, not the 16Vac input. A 24Vdc 1.5A supply can be used in place of the 16Vac supply. The correct connection is +24V to the left AC pin, GND to the middle AC pin. -
Page 35: Status Codes
If an error has momentarily caused the energizer to stop pulsing, this can be corrected by disarming and rearming the unit. Should the error recur return the unit for service. Page 35 © JVA Technologies www.jva-fence.com... - Page 36 JVA Z13 Manual Page 36...
-
Page 37: Installation Programming
INSTALLATION PROGRAMMING OPTIONS The Z13 has permanent memory in which the programming options are stored. These are factory pre-set but can be field programmed using a Z- Series keypad. To see the programming options in brief see “2.1 Changing The Programming Options” on page 6... -
Page 38: Programming Options In Detail
Low Power Mode Output Voltage (Option 2) Same as above, but for Low Power mode. The Default setting is 20 (2.0kV), the Maximum is 20. Energizer Function Key1 Key2 Key3 Key4 Key5 Low Power Level 100’s volts JVA Z13 Manual Page 38... -
Page 39: Fence Return Alarm Voltage (Option 3)
The Default setting is 03, the Maximum is 99. NOTE: The lower this option is set, the more likely you are to get false alarms. Energizer Function Key1 Key2 Key3 Key4 Key5 Missed Pulse Count New Value Page 39 © JVA Technologies www.jva-fence.com... -
Page 40: Battery Alarm Voltage (Option 7)
The default is 2 minutes. This may be the subject of local regulations to stop an alarm causing undue disturbance to neighbours, etc. NOTE: The Siren On Time will be cut short if the battery falls below the low battery level. Key3 Time 10 Seconds 30 Seconds JVA Z13 Manual Page 40... -
Page 41: Siren Off Time (Option 9)
“on time” if the alarm continues. This may be limited by local regulations to stop an alarm causing undue disturbance to neighbours, etc. NOTE: This is the maximum number of cycles for 1 continuous alarm. Page 41 © JVA Technologies www.jva-fence.com... -
Page 42: Gate Entry/Exit Delay (Option 13)
Key3 Time 0 Seconds (immediate) 30 Seconds 1 Minute 2 Minutes 3 Minutes 4 Minutes 5 Minutes 6 Minutes 7 Minutes 8 Minutes 15 minutes 30 minutes 45 minutes 60 minutes JVA Z13 Manual Page 42... -
Page 43: Chime Mode (Option 14)
Gate beeps plus Siren 9.5.12 Fence Mode This option sets the fence mode from conventional mode to Bi-Polar mode. Bi-Polar mode is not available on the Z13. Setting this option to Zero will have cause detection problems Key3 Function Bi-Polar Conventional 9.5.13... -
Page 44: Anti-Bridging Threshold (Option 17)
+2: Maximum power at all times. NOTE: Turning this option on may remove IEC standards compliance. +4: Limits a Z13 to 2.5J per zone in group mode. +8: Enables the IR tamper detection under the lid. J3 changes function to inhibit tamper. -
Page 45: Combined Options 2 (Option 18)
Low Power Mode for 5 pulses before reverting to High Power Mode. A “Fence Touch“ is detected when the fence voltage drops below the threshold for one pulse NOTE: Only enable one Bite modes at a time. Page 45 © JVA Technologies www.jva-fence.com... -
Page 46: Auto Re-Arm Time (Option 20)
“Off” time and the number of Siren Cycles will be reduced. Key3 Time 0 Seconds (Immediate) 30 Seconds 1 Minute 2 Minutes 3 Minutes 4 Minutes 5 Minutes 6 Minutes 7 Minutes Disabled – Do not auto rearm JVA Z13 Manual Page 46... -
Page 47: Relay Programming
Installation Programming Options 9.5.17 Relay Programming All relays can be set to any of the available functions (user assignable). Command Key1 Key2 Keys 3 and 4 Key 5 Relay 1 Options Explained under “9.5.18 Relay Functions” Default is 08 Relay 2 Options Explained under “9.5.18 Relay Functions”... -
Page 48: Relay Functions
9.5.18 Relay Functions The table below is for use for the relay programming options mentioned in the above table. Key3 4 Function Description Fence Triggers when Zone 1 is armed and return voltage is below set threshold voltage Fence or Off Triggers when Zone 1 is off or return voltage is below the threshold voltage Armed Zone 1 is armed... -
Page 49: Group Mode (Option 26)
Installation Programming Options Key3 4 Function Description Host Control This Relay is completely controlled from a Host system such as Perimeter Patrol or a Keypad. If the Host system is disconnected from the Energizer for more than 30 seconds, the Relay will automatically change to the Alarm State Host Control - Not This Relay Host Controlled however if the Host system is disconnected then the Relay will maintain its current state... -
Page 50: Input Function And Trigger
Key3 and 4 Group Mode No Group Group Master Slave 1 Slave 14 9.5.20 Input Function and Trigger Each Input is configured independently using two digits to configure the Trigger followed by the Function. Input 1 is Option 27. Default setting is 00 - Normally Open Input with Arm/Disarm Function Input is Option 28. -
Page 51: Specifications
4A slow SMD fuses. Siren and Strobe Outputs Self-resetting fuse protection, switched 12V, rated at 30W (combined) Enclosure IP4x ABS plastic Size 300mm high, 190mm wide, 115mm deep Weight – packed, no battery 1.9kg Page 51 © JVA Technologies www.jva-fence.com... - Page 52 Children should be supervised to ensure that they do not play with the appliance. JVA Z13 Manual Page 52...
-
Page 53: Series Keypads
The onboard beeper alerts the user to any issues and instantly shows the relevant information that the user needs to see. Page 53 © JVA Technologies www.jva-fence.com... -
Page 54: Pte0230 Touch Keypad
11.2 PTE0230 TOUCH KEYPAD JVA’s most advanced keypad features include: • Touch screen with clean user interface designed for ease of use • Quickly arm or disarm the entire site or granularly via the Zones screen • Emails on alarm •... -
Page 55: Pte0240 4-Line Keypad
11.3 PTE0240 4-LINE KEYPAD JVA’s mid-range keypad features include: • Quick Arm/Disarm keys • 4-line Backlit LCD Display • Menu driven interface • 500 entry event log with date and time stamps 11.4 CONNECTING MULTIPLE KEYPADS Function Code Default Code... -
Page 56: Notes Regarding Keypad Configuration
NOTE: 1. If the group ID has recently been changed you may need to reset, [User Pin] * 6 8 # before the new ID’s will be properly reported to the keypad. JVA Z13 Manual Page 56... -
Page 57: Summary Of Keypad Functions
Z-Series Keypads 11.6 SUMMARY OF KEYPAD FUNCTIONS Default Installer PIN 012345 Default User PIN 1234 Command Key1 Key2 Key3 Key4 Key5 Key6 Key7 Key8 Key9 Key10 Arm/Disarm USER PIN Silence the Energizer Siren Enter Programming Mode INSTALLER PIN Enter Keypad Programming Mode INSTALLER PIN Exit Programming (Any Mode) Change a User PIN, 4 Digits... - Page 58 Command Key1 Key2 Key3 Key4 Key5 Key6 Key7 Key8 Key9 Key10 Switch to High Power Mode (All Zones) USER PIN Switch Specific Zone to High Power USER PIN Zone No. Arm Gate Zone only USER PIN Bypass Siren (All Zones) USER PIN Bypass Specific Zone Siren USER PIN...
- Page 59 Display the Group ID of the Energizer Siren Test Battery Test Keypad Specific Function Key1 Key2 Key3 Key4 Re-Analyse the Energizer Group Keypress Beep On/Off Chimes On/Off Error Tones On/Off Keypad Alarm Tones On/Off Change Backlight Mode Display Keypad Model Page 59 © JVA Technologies www.jva-fence.com...
- Page 60 JVA Z13 Manual Page 60...
-
Page 61: Remote Control Unit
REMOTE CONTROL UNIT The Remote Control Unit provides the Z13 with the ability to arm or disarm the energizer via a compact key chain fob remote control. 12.1 FEATURES • Enables arm / disarm of the energizer, or a single zone, by key chain fob remote control •... -
Page 62: Installation
The Remote control receiver unit requires 12V and 0V (GND) from the key- pad bus, and its output wired to IN1. Mount the receiver on the right hand side of the Z13 energizer. Connect +12V and 0V (GND) from the KEYPAD terminals on the energizer to the right-most terminals of the receiver, as per the diagram above. -
Page 63: Standard Requirements For Security Electric Fences
2.5 m. If this gap is to be closed, this shall be af- fected by means of electrically non-conductive material or an isolated metal barrier. Page 63 © JVA Technologies www.jva-fence.com... - Page 64 10. Connecting leads shall not be installed in the same conduit as the mains supply wiring, communicating cables or data cables. 11. Connecting leads and electric fence wires shall not cross above over- head power or communication lines. JVA Z13 Manual Page 64...
-
Page 65: Particular Requirements For Electric Animal Fences In Australia
4. A non-electrified fence incorporating barbed wire or razor wire may be used to support one or more off-set electrified wires of an electric Page 65 © JVA Technologies www.jva-fence.com... -
Page 66: Installation Of Electric Security Fences
1.5 m from the floor or access level then the physical barrier need only extend up to a height of 1.5 m above the floor or access level. JVA Z13 Manual Page 66... -
Page 67: Prohibited Zone For Pulsed Conductors
Pulsed conductors shall not be installed within the shaded zone shown in Figure 8. Prohibited Area for Pulse Conductors NOTE: Where an electric security fence is planned to run close to a site boundary, the relevant government authority should be consulted before installation begins. Page 67 © JVA Technologies www.jva-fence.com... - Page 68 Typical Constructions where an Electric Security Fence is Exposed to the Public NOTE: Typical electric security fence installations are shown in Figure 9 and Figure 10. JVA Z13 Manual Page 68...
-
Page 69: Separation Between Electric Fence And Physical Barrier
1. These restrictions are intended to reduce the possibility of persons making inadvertent contact with the pulsed conductors and to pre- vent them from becoming wedged between the electric fence and the physical barrier, thereby being exposed to multiple shocks from the energizer. Page 69 © JVA Technologies www.jva-fence.com... -
Page 70: Prohibited Mounting
Where there is a risk of persons being injured by a secondary cause, ap- propriate additional safety precautions should be taken. NOTE: An example of a secondary cause is where a person may be expect- ed to fall from a surface if contact is made with pulsed conductors. JVA Z13 Manual Page 70... -
Page 71: Appendix A: Group Simultaneous Pulse
A group MUST have only 1 master. The other Energizers in the group are slaves. For the Z13 Energizers, if there is no Master, a Slave will display Error 4 on the Status LED when Armed and it will not electrify the fence. This is a requirement for Australian Standards. - Page 72 NOTE the connections can be a star or daisy chain or any mixture. It is possible for a PC to be added to the group using a keypad to USB adaptor (PAE223). JVA Z13 Manual Page 72...
- Page 73 4. When connected to Perimeter Patrol, the arm/disarm function of a keypad is disabled. Control of these functions is through the Perimeter Patrol interface. 5. A Keypad that is connected to a Slave Energizer that is disconnected Page 73 © JVA Technologies www.jva-fence.com...
- Page 74 Appendix A: Group Simultaneous Pulse Feature...
- Page 75 DEALER fEncE...
Need help?
Do you have a question about the Z13 and is the answer not in the manual?
Questions and answers