
Subscribe to Our Youtube Channel
Related Manuals for JVA M1.5


Summary of Contents for JVA M1.5
- Page 1 JVA Energizer User Manual www.jva-fence.com.au JVA Electric Fence Energizer Installation and User Manual (M1.5, M3, MB1.5, MB3.0, MB4.5, RSG1, SV2)
- Page 2 JVA Energizer User Manual Congratulations on your choice of a JVA Energizer. In choosing to purchase the JVA brand you have opted for the highest quality in electric fencing. Please read this manual entirely before installing your new energizer. All JVA products offer a three-year warranty against faulty components and workmanship but excludes Acts of God, i.e.
-
Page 3: Table Of Contents
Electric Fences ................... 3 Energizers ..................3 Power Supply Options ................ 3 2.3.1 Important Notes ..............3 JVA MODELS AND FEATURES............4 Features ..................... 4 Specifications ..................5 PARTS OF THE ENERGIZER ............6 Fence Connectors ................7 Energizer LED Display ............... 7 IMPORTANT NOTES –... - Page 4 JVA Energizer User Manual Dirty Solar Panels ................14 Errors and Error Codes ..............15 COMMON FENCE PROBLEMS ............16 Testing the ‘Earth’................16 Testing the Fence, Finding Shorts ............ 16 INSTRUCTIONS FOR INSTALLATION AND CONNECTION OF ELECTRIC FENCES AS REQUIRED UNDER IEC 60335.2.26 ..... 17 10.1...
-
Page 5: Important Notes - Please Read
High voltage may remain on some internal parts long after the unit has been switched off. Power Supply Options The JVA MB series of electric fence energizers can be powered from a range of power sources. 12V Battery 24V Battery ... -
Page 6: Jva Models And Features
JVA Energizer User Manual 3 JVA Models and Features Features Models Features Mains Digital control M1.5, M3 “Smooth” wave shape Fence OK indicator Ant & moisture protection Lightning protection AC surge protection Fused Plug Large Knobs Power on demand Mains/Battery Battery protection MB1.5, MB3.0,... -
Page 7: Specifications
JVA Energizer User Manual Specifications Specifications *Solar Panel Size for Minimum Energizer Stored ~12V *Solar Peak Expected Sun Hours Per Day Model output Power Energy drain Battery Output voltage # 3hrs 4hrs 5hrs >6hrs M1.5 8.0kV 1.6J 230Vac 1.5J 8.0kV 3.3J... -
Page 8: Parts Of The Energizer
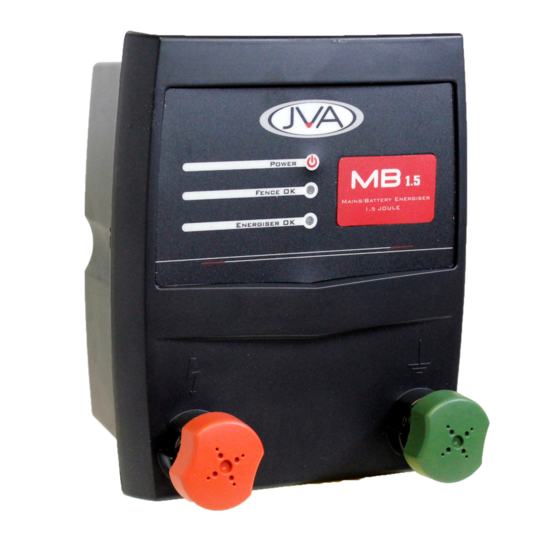
JVA Energizer User Manual 4 Parts of the Energizer (M1.5, M3, MB1.5, MB3.0, MB4.5, RSG1, SV2) 1. On/Off Switch (not on M1.5 and M3) 2. Fence OK indicator (red LED) 3. Energizer On and OK indicator (green LED) 4. Rubber O-ring seal between front and back case pieces 5. -
Page 9: Fence Connectors
JVA Energizer User Manual Fence Connectors Earth Fence terminal terminal Fence Connections Fence terminal – should be connected to the live wires of the fence. Earth terminal – should be connected to a suitable electric fence earth rod. Energizer LED Display This feature is included on all units. -
Page 10: Important Notes - Please Read
Rechargeable Batteries 1. JVA’s MB and SV energizers are compatible with sealed lead acid (SLA) batteries. SLA battery life is shortened considerably if it is a) left in a discharged state or;... -
Page 11: Installation
Northern hemisphere, and at an angle of degree latitude plus 10 degrees). 2. Mounting the Energizer The M1.5, M3, MB1.5, MB3.0, MB4.5 and RSG1 can be hung from the plastic hanger bracket. There are two different methods for mounting the SV2. These are shown below. -
Page 12: Connecting To The Fence
5. Powering the Energizer: Mains Power Source (M1.5, M3, MB1.5, MB3.0, MB4.5): Plug the mains power cable (M1.5, M3) or the power adapter (MB1.5, MB3.0, MB4.5) supplied with the energizer into an AC power source and the energizer. -
Page 13: Operation
JVA Energizer User Manual 7 Operation Electric Fences The energizer places a very short, safe, high voltage pulse on the fence live wires approximately once every second. Please be advised that there is always a risk associated with any device designed to impart an electric shock. - Page 14 JVA Energizer User Manual 7.3 Earth Return System The Earth Return (also called Ground Return) configuration is the most common method electric fences, particularly smaller fence applications like “strip grazing”, due to its lower cost and ease of setting up. The fence live wire(s) are electrified and rely on the dirt to complete the circuit back to the energizer Earth terminal when an animal touches the fence.
-
Page 15: Common Energizer Problems
Blown Fuses (AC units only) Flat batteries Moisture and Ants Moisture and Ants should not be a significant problem for the JVA range of energizers as they come in a weatherproof case. Still, where possible, keep the energizer protected from the weather. -
Page 16: Dirty Solar Panels
JVA Energizer User Manual If you don’t feel confident in changing the battery, or can’t find the correct replacement please call us, for a small fee we will be happy to service your unit. Steps Attention: Take Care: Risk of electrical shock! Risk of fire (See “Important Notes”... -
Page 17: Errors And Error Codes
JVA Energizer User Manual Errors and Error Codes The JVA energizer may stop and display error codes. The error codes are displayed in two places. The first of these is on the Status (red) LED, where it will flash rapidly a number of times. The number of these flashes corresponds to the Error Code. -
Page 18: Common Fence Problems
Short the end of your fence to earth by hammering a metal stake into the soil and connecting this to the live fence wire. Using an electric fence volt meter or a JVA Electric Fence Fault Finder (do not use a standard multimeter) check what the voltage is at the earth terminal of the energizer. -
Page 19: Instructions For Installation And Connection Of Electric Fences As Required Under Iec 60335.2.26
JVA Energizer User Manual 10 Instructions for installation and connection of electric fences as required under IEC 60335.2.26 This material is copyright of the International Electrical Commission (IEC). 10.1 Definitions Connecting lead an electric conductor, used to connect the energizer to the... - Page 20 JVA Energizer User Manual Figure 1 – Warning plate symbol 4. The energizer earth electrode shall penetrate the ground to a depth of at least 1.2 m. 5. Connecting leads that are run inside buildings shall be effectively insulated from the earthed structural parts of the building. This may be achieved by using insulated high voltage cable.
-
Page 21: Particular Requirements For Electric Animal Fences In Australia
JVA Energizer User Manual 11. If connecting leads and electric animal fence wires are installed near an overhead power line, their height above the ground shall not exceed 3m. This height applies either side of the orthogonal projection of the outermost conductors of the power line on the ground surface, for a distance of ... -
Page 22: Warranty
JVA website at www.jva-fence.com. 11.2 Service or Repairs If service is required, package your energizer carefully and return it to the place of purchase or your nearest JVA distributor along with your proof of purchase. -
Page 23: Contacts
JVA Energizer User Manual 11.3 Contacts JVA Australia JVA Technologies PO Box 408 Narangba QLD 4504 Tel : 07 3013 0582 JVA South Africa Bloemfontein Klerksdorp Rustenburg 36 Kolbe Laan, Oranjesig 72 Central Avenue, Flamwood, Shop 7, Waterfall Mall Tel : 051 448 6695/6... - Page 24 Manufactured for JVA by Pakton Technologies The JVA logo is a trademark of JVA Technologies Pty Ltd ST058 JVA MM Energizer Manual 1v32...
Need help?
Do you have a question about the M1.5 and is the answer not in the manual?
Questions and answers