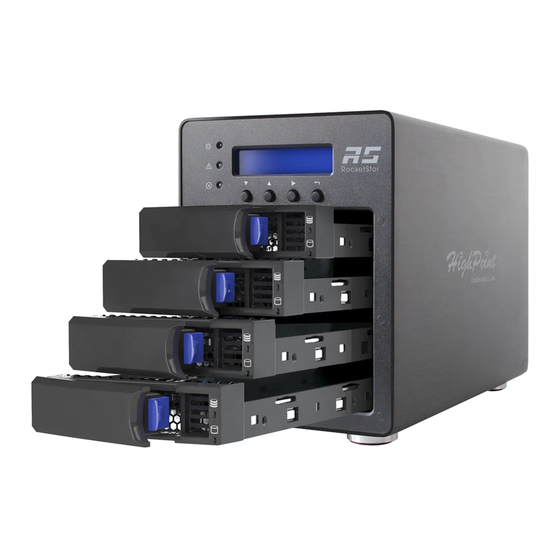
HighPoint SSD6540M User Manual
4-bay m.2 nvme raid enclosure
Hide thumbs
Also See for SSD6540M:
- Quick installation manual (9 pages) ,
- Installation manual (28 pages) ,
- Quick installation manual (9 pages)
Table of Contents
Advertisement
Quick Links
Advertisement
Table of Contents

Related Manuals for HighPoint SSD6540M


Summary of Contents for HighPoint SSD6540M
- Page 1 SSD6540M 4-Bay M.2 NVMe RAID Enclosure User Guide V1.03...
-
Page 2: Table Of Contents
Driver Installation for Windows ............. 7 Driver Installation for macOS ..............8 Driver Installation for Linux ..............8 Install the HighPoint RAID Management software........ 9 Using the HighPoint RAID Management..............9 Starting the HighPoint RAID Management ..........9 Verify the Controller Status ..............10 Logical Tab ................... -
Page 3: Kit Contents
1x PCIe 3.0 x16 RAID Controller 4x Drive Trays 4x M.2 Drive to U.2 Host Adapter 2x HD mini-SAS cable (1 meter) 1x UL Power Cord 1x Quick Installation Guide SSD6540M Hardware Controller Card Back Port: SFF-8644... - Page 4 Panel Layout-Front View Disk Present LED: Solid Blue Disk Active LED: Flash Blue Disk Fail LED: Solid Red Enclosure Power LED: Solid Blue Temperature Warning LED: Solid Yellow Fan/Temperature Fail LED: Solid Red...
- Page 5 Panel Layout-Rear View M.2 Drive to U.2 Host Adapter and Tray...
-
Page 6: System Requirements
Enclosure Setup 1. Insert the Controller card into a PCIe x16 slot in your system. 2. Place the SSD6540M enclosure on a level surface and remove each disk tray. 3. Remove the ‘M.2 Drive to U.2 Host Adapter’ from the disk tray. -
Page 7: Setting Up The Ssd6540M
6. After installing the hard drives, connect the SSD6540M to a power source. 7. With the power cord connected to the power source, turn on the SSD6540M using the power button on the rear panel (click the button to power on the SSD6540M). -
Page 8: Driver Installation For Macos
Driver Installation for macOS 1. Download the Mac driver package from the HighPoint website: http://highpoint-tech.com/USA_new/series-ssd6540m-download.htm 2. Once downloaded, locate the folder you downloaded the driver to and double click on the file named “HighPointNVMe” 3. The file will be mounted onto the operating system, click on HighPointNVMe.pkg located on the mounted drive. -
Page 9: Install The Highpoint Raid Management Software
Starting the HighPoint RAID Management Double click the Desktop HPT ICON to start the Web browser. It will automatically log-in to the HighPoint RAID Management using the default password. The password can be set after the first log-in. To change the password, select Setting>System from the menu bar (see page... -
Page 10: Verify The Controller Status
Verify the Controller Status The Global View Tab will display the status of the installed SSD6540M. Show ‘HBA Properties’ and ‘Storage Properties’ Logical Tab Creating An Array To create a new RAID disk: Click the Create Array link from the Logical page:... - Page 11 Array Type: An array is a collection of physical disks that will be seen as one virtual drive by your Operating System (OS). The SSD6540M is capable of creating the following array types: RAID 0 — Striping RAID 1 — Mirroring ...
- Page 12 Initialization Method: Initialization of a disk sets all data bits to 0, essentially clearing all the data on the drive. It is important to initialize disks as previous data physically stored on the drive may interfere with new data. Keep Old Data: This option skips the initialization process and all data on each physical disk of the array will be untouched.
- Page 13 array. But when your array requires rebuilding, residual data left behind may interfere with the process. Cache Policy (Default: Write Back): Write Back – Any data written to the array will be stored as cache, resulting in better I/O performance at the risk of data failures due to power outages.
-
Page 14: Adding Spare Disks
Capacity (Default: Maximum): The total amount of space you want the RAID array to take up. When creating RAID levels, disk capacities are limited by the smallest disk. Review the array settings and confirm RAID creation. An example of how disk capacities are limited by smallest disk. ... - Page 15 4. Check the box for the disk you want as a spare under Available Disks 5. Click Add Spare, and confirm by selecting OK from the pop-up window: 6. The disk has now been assigned as a spare. Click OK to confirm Disks added to the spare pool will be displayed under Spare Pool and can be removed by checking the box before the target drive,...
-
Page 16: Obtaining Logical Device Information
then clicking the Remove Spare button. Physical drives marked as a spare will automatically be added to an array whenever there is a disk failure. This feature minimizes the chances of a data loss by reducing the time an array is in the critical status. -
Page 17: Array Information &Maintenance Options: Normal Status
Array Information &Maintenance Options: Normal Status Arrays with the Normal status are healthy and functioning properly. Arrays with the Normal status will have the following options: Delete – deletes the selected RAID array Verify – verifies the integrity of the RAID array Rename –... -
Page 18: Array Information & Maintenance Options: Critical Status
Array Information & Maintenance Options: Critical Status Arrays in the Critical status can be accessed and utilized, but are no longer fault tolerant. A Critical array should be rebuilt as soon as possible to restore redundancy. A critical status array has all the normal status options except the following: ... -
Page 19: Array Information & Maintenance Options: Disabled Status
state will begin rebuilding using the next available spare disk. Array Information & Maintenance Options: Disabled Status An array with the Disabled status means that the RAID level does not have enough disks to function. Your data will be inaccessible ... -
Page 20: Setting Tab
Max Free — total capacity that is not configured Revision — revised version of drive Status — Current state of drive PCIe Width — PCIe width occupied by drivers PCIe Speed — Rate of current bandwidth Rescan Clicking rescan will force the drivers to report the array status. For any disk(s) you hot plug into the device;... -
Page 21: Password Setting
There are 5 levels of priority [Lowest, Low, Medium, High, Highest] Port Number (default: 7402) The default port that the HighPoint HRM listens on is 7402. You may change it to any open port. Password Setting... -
Page 22: Email Setting
Under Password Setting, type your new password, confirm it, then click Submit. Recovering your HRM password If you forget your password, you can delete the file hptuser.dat. Then you need to restart the computer and open the WEBGUI to set a new password For Windows Users: 1. - Page 23 To set up email alerts: 1. Check the Enable Event Notification box. 2. Enter the ISP server address name or SMTP name 3. Type in the email address of the sender (email account that is going to send the alert) 4.
-
Page 24: Event Tab
Figure1 Example event log email Event Tab In the event tab, you can see log entries associated with the HighPoint device. The event log provides useful information when troubleshooting your set up. In the event tab, there are four options available: Download –... -
Page 25: Shi (Storage Health Inspector)
SHI (Storage Health Inspector) S.M.A.R.T Attributes Schedule a task(Task list and Health Inspector Scheduler) SHI outputs information collected using SMART (Self-Monitoring Analysis and Reporting Technology) Hard Drive Technology. The data provided on this tab helps you to anticipate any disk failures based on a variety of monitored hard disk properties. - Page 26 How to Use the Health Inspector Scheduler The Health Inspector Scheduler (HIS) enables you to schedule disk/array checkups to ensure disks/array are functioning optimally. How to Create a New Verify Task All Redundant RAIDs will appear under New Verify Task 1.
- Page 27 5. Select the array you want to schedule the verify task 6. Type the name in Task Name entry box 7. Choose whether you want to schedule 8. One time verify task on specific date (YYYY-MM-DD) at (HH:MM:SS, 24-hr clock) 9.
-
Page 28: Troubleshooting
Troubleshooting This section provides guidelines to some problems you may encounter: Handling Critical Arrays Handling Disabled Arrays PC hangs when card is installed. Handling Critical Arrays When your disk status turns critical, your array as a whole is still accessible, but one or more disks is faulty (depending on your RAID level), and the array is in danger of failing. - Page 29 Rebuilding Stops Due to Bad Sectors If rebuilding fails to complete due to bad disk sector errors (check in the Event Log), there is an option to continue rebuilding on error in the HighPoint HRM. 1. Log into the HRM 2. Click Setting tab 3.
-
Page 30: Handling Disabled Arrays
Online Array Roaming One of the features of all HighPoint RAID controllers is online array roaming. Information about the RAID configuration is stored on the physical drives. So if a card fails or you wish to switch cards, the RAID configuration data can still be read by another HighPoint card. -
Page 31: Help
Online Help redirects you to additional documentation concerning the HighPoint HRM. Register Product takes you to the HighPoint Online Web Support Portal. On this page you can create a new customer profile where you can register your product, or post an online support ticket. - Page 32 Table 1.HRM Icon Guide Critical – missing disk A disk is missing from the array bringing it to ‘critical’ status. The array is still accessible but another disk failure could result in data loss Verifying The array is currently running a disk integrity check Rebuilding The array is currently rebuilding meaning you replaced a failed disk or added a new disk to a ‘critical’...
- Page 33 The array initialization process has been interrupted, and the process is incomplete Not Initialized Disk is not initialized yet, and needs to be initialized before use OCE/ORLM Array is performing a OCE/ORLM operation OCE/ORLM has stopped The array expansion process has been stopped Legacy An existing file system has been detected on the disk These disks are classified as legacy drives...
- Page 34 The array is currently rebuilding Verifying The array is performing a data consistency check. Array status will show ‘verifying’ Disabled The array does not have enough disks to maintain the RAID level. A disabled array is not accessible OCE/ORLM Array is expanding its capacity or migrating to a different raid level.
-
Page 36: Customer Support
Customer Support If you encounter any problems while utilizing the SSD6540M, or have any questions about this or any other HighPoint Technologies, Inc. product, feel free to contact our Customer Support Department or check our FAQ for more information. Web Support: http://www.highpoint-tech.com/websupport/...
Need help?
Do you have a question about the SSD6540M and is the answer not in the manual?
Questions and answers