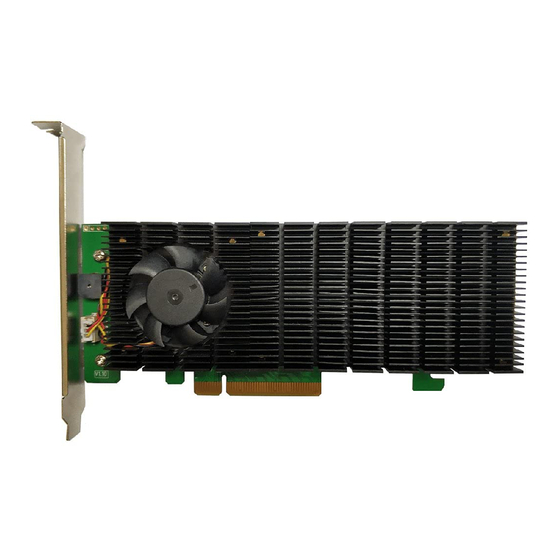
SSD7000 series NVMe RAID controllers & enclosures in a macOS environment. Troubleshooting Please consult this section if you encounter any difficulties installing or using SSD7000 series NVMe RAID controllers or enclosures. It includes descriptions and solutions for commonly reported technical issues.
Prerequisites 1) Make sure at least one NVMe SSDs has been installed into the HighPoint NVMe controller or enclosure. The driver will not install properly unless NVMe SSDs are detected by the hardware environment. 2) The SSD7101A-1/7120/6540/6540M/7103/7104/7140/7505/7502/7540 NVMe device must installed into a PCIe 3.0 slot with x16 dedicated lanes. The SSD7204 can be installed into a PCIe 3.0 x8 or x16 slot.
In addition, macOS 10.13x and earlier may require that SIP (System Integrity Protection) be disabled. If enabled, older versions of macOS may prevent the NVMe drivers from loading. HighPoint products affected by this requirement include our NVMe RAID product lines (SSD7100 and SSD7500 Series RAID Controllers and SSD6540 series NVMe RAID Enclosures).
2. Disabling SIP (for macOS 10.13x and earlier) While macOS is running, open a terminal window to confirm whether System Integrity Protection (SIP) status is disabled. If enabled, you will need to manually disable the setting. Open a terminal, and then enter the following command: csrutil status The example screenshot shown above indicates that SIP is enabled.
Page 7
Click the Apple logo in the upper left-hand corner of the desktop, and select Restart to reboot the system. After rebooting, confirm that SIP is disabled. Open terminal and type the following command: csrutil status If the status is now reported as disabled, you can install the HighPoint NVMe driver.
Customers working with Apple M1 Platforms will need to reduce the Security Policy in order to load drivers for third party devices. HighPoint products affected by this requirement include our NVMe RAID product lines (SSD7100 and SSD7500 Series RAID Controllers and SSD6540 series NVMe RAID Enclosures).
4. Installing the Device Driver Current drivers can be downloaded from each product’s Software Downloads webpage. Product Download Page SSD7105 https://www.highpoint-tech.com/gen3-nvme-m2-bootable SSD7101A-1 SSD7204 SSD7104 https://www.highpoint-tech.com/gen3-nvme-m2-non-bootable SSD7104F SSD7140A SSD6540M https://www.highpoint-tech.com/ssd6540-catalog SSD6540 SSD7120 https://www.highpoint-tech.com/gen3-nvme-u2-non-bootable SSD7540 https://www.highpoint-tech.com/gen4-nvme-m2 SSD7505 SSD7502 RS6661A- https://highpoint-tech.com/USA_new/series-rs6661a-nvme-download.htm NVMe macOS High Sierra 10.13 and Mojave10.14 and Catalina 10.15 and Big Sur 11.x and Monterey 12.x Driver Installation Procedure...
Page 10
3) You will be prompted that installer is trying to install new software, enter the Administrator Username and Password. Once these have been entered, Click Install Software. 4) If no pop-ups appear, please proceed to the next step of installation. Click Restart. 5) If you receive a popup window prompting you for permission, click Open Security Preferences.
Page 11
6) Make sure App Store and identified developers is checked, and then click Allow. 7) You will see a popup window, prompting you to restart. Click Not Now. 8) If you receive the permission prompt for the second time, click “Open Security Preferences” again.
Page 12
9) Make sure App Store and identified developers is checked, and then click Allow. 10) You will see a popup window, prompting you to restart. Click Restart. 11) Return to the driver installation window. Click Restart to restart the system.
5. Updating the Device Driver : Note Update the driver, please make sure the RAID controller is connected to the host. Current drivers can be downloaded from each product’s Software Downloads webpage. Product Download Page SSD7105 https://www.highpoint-tech.com/gen3-nvme-m2-bootable SSD7101A-1 SSD7204 SSD7104 https://www.highpoint-tech.com/gen3-nvme-m2-non-bootable SSD7104F SSD7140A SSD6540M https://www.highpoint-tech.com/ssd6540-catalog...
Updating the Device Driver (for macOS 10.13/10.14/10.15/11.x/12.x) 1) Locate the download and double click the HighPointNVMe.pkg package to start the installer. Click the Continue button: 2) macOS will prompt you to install the driver. Click Install to proceed. 3) You will be prompted that installer is trying to install new software, enter the Administrator Username and Password.
Page 15
4) If no pop-ups appear, please proceed to the next step of installation. Click Restart. 5) If you receive a popup window prompting you for permission, click Open Security Preferences. 6) Make sure App Store and identified developers is checked, and then click Allow.
Page 16
7) You will receive a popup window, prompting you to restart. Click Not Now. 8) Return to the driver installation window. Click Restart to restart the system. 9) After the system restarts, the driver’s status can be viewed under System Information→ Extensions;...
Note: The driver revision shown in the screenshots may not correspond with current software releases. Please make sure to download the latest driver updates from the product’s Software Updates page. 6. Uninstalling the Device Driver Uninstalling the Device driver for macOS 10.13 and 10.14 To uninstall the NVMe driver, you will need to open a Terminal window and enter the following command: sudo rm -rf /Library/Extensions/HighPointNVMe.kext...
7. Installing the RAID Management Software (WebGUI) Installing the WebGUI for macOS 10.13/10.14/10.15/11.x/12.x 1) Double click the package named HighPointWebGUI.pkg to start the installer. When the window appears, click the Continue button. 2) You will be promoted to click the Install button. Click Install to continue. 3) You will then be promoted to enter the Administrator Username and Password.
4) The WebGUI Management software has been installed. Click Close to complete the procedure. 8. Updating the WEBGUI for macOS 10.13/10/14/10.15/ 11.x/12.x 1) First, uninstall the current WebGUI. Please refer to Uninstalling the WebGUI. 2) After uninstalling the WebGUI, reboot macOS. 3) Once the system has rebooted, download the latest version of the WebGUI from the appropriate Software Downloads webpage.
This error can be triggered by one of the following issues: 01. The HighPoint NVMe hardware is not recognized by macOS 02. The HighPoint NVMe device driver is not installed or is not loading properly. 03. WEBGUI service is not running.
Appendix - Checking the Driver status and Version to make sure the HighPoint NVMe driver is installed properly. If the HighPoint NVMe driver is not loading, proceed to step 2 – Check the security & privacy status. If HighPoint software is blocked in the permission, you need to click Allow.
1) Click on the Apple logo located near the upper left-hand portion of the Desktop, and click “Version”. Then the version number of the system will all be displayed. Check the security & privacy 1) Check if there is HighPoint software blocked in the permission, if it is blocked, you need to click “Allow”.
Mac”. RocketStor 6661A-NVMe (Thunderbolt entry): 2) If you are using a SSD7000 series NVMe RAID controller, check under Hardware, PCI. Reference screenshots for each product are show below. SSD7101A / 7104 / 7204 / 7120 / 6540 / 6540M, or RS6661A-NVMe:...
SSD7540 WEBGUI service restart If you can't connect to the WebGUI, please check if a process named raidman-httpsd is running on the system. If it is not running, you can start it manually by opening a terminal window and running the command: “sudo hptdaemonctl restart”.
1) Click on the Apple logo located near the upper left-hand portion of the Desktop, and select “About this Mac”. 2) Click on Extensions, and then click on HighPoint NVMe entry – please take a screenshot and attach it this support case (see the example below): System Information→Software→Extensions→HighPointNVMe...
How to Collect Diagnostic Logs We have provided a detailed video on log collection methods: link 1-Click Self-Diagnostic Solution: Diagnostic View provides a “1-click” information collection system for troubleshooting. It will gather all necessary hardware, software and storage configuration data and compile it into a single file, which can be transmitted directly to our FAE Team via our Online Support Portal.
Page 28
Click the “Save Logs” button to create the diagnostic file. Note, this process may take several minutes to complete. 'Logs Location' will display the location of the saving path. Please submit the log file to our Support Department using our online services: (https://www.highpoint-tech.com/support-and-services).
Need help?
Do you have a question about the SSD7000 Series and is the answer not in the manual?
Questions and answers