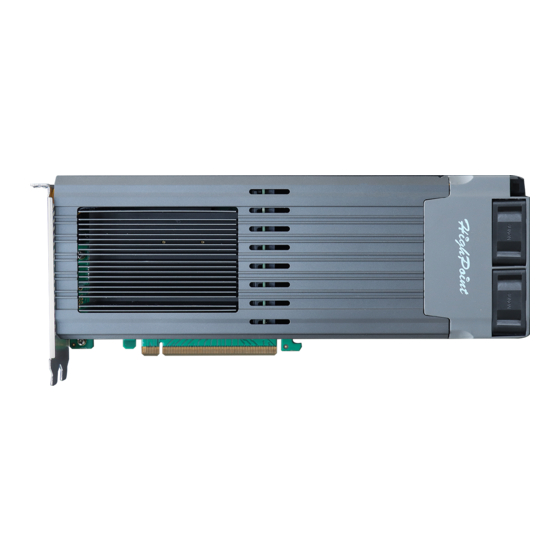
HighPoint RocketAIC 7505HW Series Installation Manual

HighPoint RocketAIC 7505HW Series Installation Manual

Nvme boot raid windows
Hide thumbs Also See for RocketAIC 7505HW Series:

Advertisement

Quick Links

HighPoint NVMe Boot RAID Windows Installation Guide
HighPoint NVMe Boot RAID Windows
Installation Guide
V1.08-June 27st 2023
Copyright 2023 HighPoint Technologies, Inc.
All rights reserved
1

Advertisement

Table of Contents
loading

Summary of Contents for HighPoint RocketAIC 7505HW Series

  • Page 1 HighPoint NVMe Boot RAID Windows Installation Guide HighPoint NVMe Boot RAID Windows Installation Guide V1.08-June 27st 2023 Copyright 2023 HighPoint Technologies, Inc. All rights reserved...
  • Page 2: Table Of Contents

    HighPoint NVMe Boot RAID Windows Installation Guide Content Prerequisites for a Bootable RAID Configuration ..................3 UEFI BIOS Settings ............................. 5 How to install Windows to the NVMe product ..................7 Method 1 UEFI Command Line (RAID Tool) ..................7 Method 2 UEFI HII(UEFI Utility)...
  • Page 3: Prerequisites For A Bootable Raid Configuration

    1. An NVMe SSD must be installed. You must have at least one NVMe SSD installed into the NVMe products . Note: The RocketAIC 7505HW series, RocketAIC 7540HW series and RocketAIC 7749EW series NVMe drives already include pre-configured SSDs. 2. A PCIe 3.0/4.0/5.0 slot with x8 or x16 lanes. The NVMe products must be installed into a PCIe 3.0/4.0/5.0 slot with x8 or x16 lanes.
  • Page 4 SAS/SATA drives. You can reattach these drives after the operating system has been successfully installed. 9. Make sure any non-HighPoint drivers are uninstalled for any SSD’s hosted by the NVMe product. 3 party software and manufacturer provided drivers may prevent the NVMe from functioning properly.
  • Page 5: Uefi Bios Settings

    HighPoint NVMe Boot RAID Windows Installation Guide UEFI BIOS Settings Different motherboards will provide different UEFI-related BIOS settings. Please consult your motherboard’s user manual for more information. This section provides examples for two different types of motherboard BIOS menus. Example 1: Changing the UEFI setting (SuperMicro H12SSL-i motherboard).
  • Page 6 HighPoint NVMe Boot RAID Windows Installation Guide Disable "Secure Boot", and set "Attempt Secure Boot" to "Disabled". Example 2: Changing the UEFI setting (ASUS PRIME X299 –DELUXE): Boot the system and access the motherboard’s BIOS menu. Set "Boot from Storage Devices" to "UEFI driver first";...
  • Page 7: How To Install Windows To The Nvme Product

    Step 3 – Creating the RAID Array Note: RocketAIC 7505HW series, RocketAIC 7540HW series and RocketAIC 7749EW series NVMe drives are already pre- configured with RAID0. You can skip this step. If you want to use another type of RAID for Boot-RAID, you can refer to the following steps.
  • Page 8 HighPoint NVMe Boot RAID Windows Installation Guide e. Next, enter the following command to enter the RAID creation utility: ArrayCreate.efi f. Next, create the array using the following command: create RAID0 This will create a RAID0 array using all of the SSD’s, and configured for maximum capacity.
  • Page 9 HighPoint NVMe Boot RAID Windows Installation Guide Step 4 - Install Windows a. Insert the Windows installation media (USB flash drive or DVD), then reboot the system. b. Enter the Boot list, and select the appropriate boot path to the Windows installation media (the example below shows how the system’s optical drive was selected for a Windows...
  • Page 10 HighPoint NVMe Boot RAID Windows Installation Guide e. Next, insert a USB flash drive that contains the NVMe product driver into the motherboard USB slot and click “Browse”. Select the driver file as shown: Note: The driver revision shown in the screenshots may not correspond with current software releases.
  • Page 11: Method 2 Uefi Hii(Uefi Utility

    Step 1 – Create RAID Note: RocketAIC 7505HW series, RocketAIC 7540HW series and RocketAIC 7749EW series NVMe drives are already pre- configured with RAID0. You can skip this step. If you want to use another type of RAID for Boot-RAID, you can refer to the following steps.
  • Page 12 HighPoint NVMe Boot RAID Windows Installation Guide Step 2 - Install Windows a. Enter the Boot list, and select start from UEFI BOOT: b. After Windows setup begins, follow the on-screen prompts. When Windows asks “Where do you want to install Windows?”, you should see several Legacy disks available (one for each SSD you have installed into the NVMe product).
  • Page 13 HighPoint NVMe Boot RAID Windows Installation Guide d. Next, insert a USB flash drive that contains the NVMe product driver into the motherboard USB slot and click “Browse”. Select the driver file as shown: Note: The driver revision shown in the screenshots may not correspond with current software releases.
  • Page 14: Disabling Hibernation

    HighPoint NVMe Boot RAID Windows Installation Guide Disabling Hibernation a. After Windows is installed, boot into the operating system and disable Hibernation. Hibernation fails when the system is installed on an NVMe RAID array; this bug will slow down or prevent startup and disable sleep mode.
  • Page 15: Trouble Shooting

    HighPoint NVMe Boot RAID Windows Installation Guide Trouble shooting No supporting host adapter is found In the UEFI environment, run the command, " go.nsh (Please see UEFI Read me for specific input content.)" Solutions: If you get the message, "No supporting host adapter is found. "Try the following, a.
  • Page 16: Yellow Warning Before And After Installation Of The Driver

    HighPoint NVMe Boot RAID Windows Installation Guide Yellow warning before and after installation of the driver. Before and after installing the driver, a yellow exclamation point warning appears in the lower left corner of the installation interface. Solution: a. Please confirm "Boot from Storage Devices" is set to "UEFI driver first";...
  • Page 17: This Pc Can't Run Windows11

    HighPoint NVMe Boot RAID Windows Installation Guide This PC Can’t run Windows11 If it prompts ‘This PC Can’t run Windows11’ during the installation process, please check whether the computing platform you are using complies with " Minimum system requirements for...
  • Page 18: Appendix

    HighPoint NVMe Boot RAID Windows Installation Guide Appendix Support command: help/info/quit/exit/create/delete.  Create Command Syntax Create Array Type (RAID0/RAID1) Member Disk list (1/1, 1/2|*) Capacity (100|*) Examples <<< create RAID0 <<< create RAID0 * <<< create RAID0 * * Create RAID0 array with all disks and with maximum capacity.
  • Page 19 HighPoint NVMe Boot RAID Windows Installation Guide info Display physical device list and logical list  Exit Command Syntax Q/q/quit/exit Quit the application  Help Command Syntax H/h/help This is help message...

Table of Contents