Table of Contents
Advertisement
Operations & Maintenance Manual
For Commercial Use Only
Form No. L9120AA 08/19 ©Tornado Industries, LLC. All rights reserved
AUTOMATIC SCRUBBERS
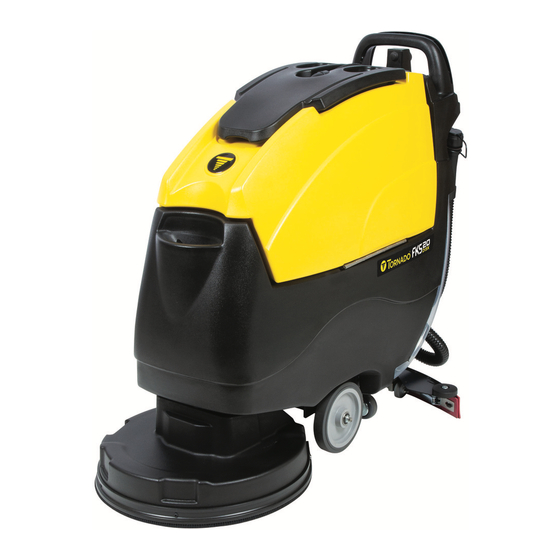
Floorkeeper 20 PD/99120B
Floorkeeper 20 TD/99120D
Floorkeeper 20 OB/99120ORB
Floorkeeper 24 TD/99124D
Save These Instructions
1
TORNADO INDUSTRIES, LLC
3101 WICHITA COURT
FORT WORTH, TX 76140
PHONE 800-VACUUMS
FAX 817-551-0719
WWW.TORNADOVAC.COM
Advertisement
Table of Contents

Subscribe to Our Youtube Channel
Related Manuals for Tornado Floorkeeper 20 PD/99120B


Summary of Contents for Tornado Floorkeeper 20 PD/99120B
- Page 1 PHONE 800-VACUUMS FAX 817-551-0719 WWW.TORNADOVAC.COM Operations & Maintenance Manual For Commercial Use Only AUTOMATIC SCRUBBERS Floorkeeper 20 PD/99120B Floorkeeper 20 TD/99120D Floorkeeper 20 OB/99120ORB Floorkeeper 24 TD/99124D Form No. L9120AA 08/19 ©Tornado Industries, LLC. All rights reserved Save These Instructions...
- Page 2 For full details, contact your Authorized Tornado Distributor, Service Center, or the Tornado Technical Service Department. Tornado sales and service representatives are not authorized to waive or alter the terms of this warranty, or to increase the obligations of Tornado under the warranty. 10 Years*...
- Page 3 NOTES...
-
Page 4: Important Safety Instructions
Your new Tornado unit is a high quality, precision-made product. All parts used in the manufacturing of this unit have passed rigid quality control standards prior to assembly. Please safeguard the original receipt / invoice. If you experience any problems with your unit during the warranty period, the original receipt / invoice will act as proof of purchase. -
Page 5: Safety Precautions
SAFETY PRECAUTIONS This machine is intended for commercial use. Only use recommended pads or brushes and commercially approved floor cleaning chemical intended for machine application. The following symbols will be used to warn you of hazards or unsafe practices which could result in personal injury or death: CAUTION: INDICATES A POTENTIALLY HAZARDOUS SITUATION WHICH, IF NOT AVOIDED, MAY RESULT IN MINOR OR MODERATE INJURY. - Page 6 WARNING: When servicing the machine, do not work under the lifted machine without supporting it with safety stands. NOTE: When servicing the machine, use manufacturer supplied or approved replacement parts. NOTE: All repairs must be performed by a qualified service person. CAUTION: When servicing the machine, do not modify the machine from its original design.
- Page 7 An optional item is a Hydralert™ battery water monitoring system. When the battery water falls below an acceptable level you will hear a audio alarm indicating the batteries need to be watered. Scrubbers equipped with Hydralert™ technology have a sensor on the battery pack and an audio alarm which monitors and communicates low battery water conditions.
-
Page 8: Machine Preparation
NOTE: The on-board charger has been programmed to work with the batteries that Tornado provides. Using other battery types not specified for the units by Tornado may impair performance of the unit and will affect the life of the batteries. - Page 9 BATTERY POWER LEVEL INDICATOR - TRACTION DRIVE MODELS The battery power level gauge is located on the upper control panel. The gauge has red, yellow and green LEDs to indicate the amount of power left in the batteries. On lead acid battery-equipped units, when the discharge level reaches the first red LED, it is a good time to finish your scrubbing application and recharge the unit.
- Page 10 NOTE: The on-board charger has been programmed to work with the batteries that Tornado provides. Using other battery types not specified for the unit by Tornado may impair performance of the unit and will affect the life of the batteries.
-
Page 11: Solution Tank
MACHINE PREPARATION SOLUTION TANK To prepare the machine for cleaning, the unit must be filled with cleaning solution. 1.Water and cleaning detergent can be added to the unit’s rear hose fill port located to the left of the control panel. 2. - Page 12 MACHINE PREPARATION ATTACHING A CLEANING PAD TO YOUR PAD DRIVER - DISK HEAD If using a floor pad with your pad driver: 1. Place your pad driver(s) on a work surface and remove the center lock fitting from the pad driver. To do so on the 20 PD and 20TD, unscrew the center lock in a counter-clockwise motion.
- Page 13 Position scrub head over pad driver(s) Turn unit on using key switch Quickly pulse the activation trigger Lower the scrub head using the foot pedal or brush(es) MACHINE PREPARATION ATTACHING YOUR PAD - ORBITAL HEAD ATTACHING A PAD TO YOUR ORBITAL PAD DRIVER The orbital unit can be used for daily cleaning;...
- Page 14 MACHINE PREPARATION CONNECTING THE SQUEEGEE AND ADJUSTING WHEEL HEIGHT Prior to shipping from the factory, the squeegee assembly is removed from the unit. To connect your squeegee assembly to the machine: 1. Align the squeegee assembly retention slots with the easy-grip knobs then tighten until secure. 2.
-
Page 15: Machine Operation
MACHINE OPERATION OPERATIONAL CONTROLS TURNING THE UNIT ON/OFF The machine is powered on through a key switch on the upper control panel. Turn the key to the ON position. You will see the battery meter on the left side of the upper control panel light up to show the battery charge level. -
Page 16: Transport Mode
Locking in high down pressure Self-adjusting head shroud with bristle Lowering scrub head using foot pedal setting by lifting foot lever skirt LOWERING THE SQUEEGEE To lower the squeegee, lift the squeegee lever and shift it left to clear the notch. Once clear, lower the squeegee into the recovery position. In doing so, the unit’s vacuum motor will activate. - Page 17 Scrub deck in transport/storage position Squeegee assembly in transport/storage position...
-
Page 18: Maintenance
MAINTENANCE SCHEDULE FOR SERVICE EVERY SIX MAINTENANCE DAILY WEEKLY MONTHLY MONTHS 100 HOURS 200 HOURS Clean squeegee assembly. Check blades for wear or damage. Check if adjustment needed to squeegee height Clean out recovery tank inside and out and float shut off assembly. -
Page 19: Recovery Tank
MAINTENANCE END OF SHIFT Once you’ve completed your daily scrubbing, project work or finish maintenance, proper end of use maintenance can greatly extend the machine’s life, improve performance, enhance sanitization and lower the machine’s long-term operational costs. There are four key areas we will review and demonstrate: the recovery tank, squeegee assembly, battery maintenance and charging, ending with pad and brush maintenance. -
Page 20: Battery Maintenance
The front-blade exchange is completed in a similar fashion to the rear blade by removing the front blade retainer, attaching a new blade using the guides and re-engaging the squeegee retainer. When squeegee assembly and blade maintenance is complete, re-attach the squeegee assembly by aligning the assembly, tightening the easy grip knobs and re-attaching the hose. -
Page 21: Periodic Maintenance
Should the pad or brush show ample wear and have reached their replacement point, simply discard the pad or brush and replace it at the beginning of your next shift. Brushes should be replaced when the bristle length reaches 3/4 in (19 mm). Alternatively, if not worn out, you can extend the life of your pad driver, pad or brush by rinsing out any captured debris or sediment and then hanging it to dry between shifts - a simple step that can lower your cost... - Page 22 If any of your isolators show signs of wear, degradation or damage, contact an authorized service center or Tornado technical service to find a local authorized service center to replace all eight isolators. Cross section view of REAR of orbital scrub head with...
-
Page 23: Troubleshooting
If the edge is worn to half the blade thickness, flip to a new blade edge or order a replacement blade. Finally, should you still have recovery issues, contact your distributor or Tornado for technical support. After checking for wear, wipe the blade or... - Page 24 See Changing Batteries segment of this manual for further instructions on how to replace your batteries. If none of these factors are present and you are still not getting expected run times, contact your distributor or Tornado for technical support. On-board charger LEDs...
- Page 25 4. Check the wire connections to the valve. If none of the actions listed above fix the solution flow, contact your distributor or Tornado for technical support.
- Page 26 Of course, a long thin tool of some kind can be used as well, but be extremely careful not to puncture the hose wall. If a clog isn’t found in the system, contact your distributor or Tornado for technical support. Drain opening...
- Page 27 1. To fix this, route the recovery hose to have the loop hose trap between the squeegee assembly neck and left easy-grip knob. If this isn’t the issue, contact your distributor or Tornado for technical support. Properly routed loop hose trap placed...
-
Page 28: Troubleshooting Guide
TROUBLESHOOTING GUIDE ISSUE POSSIBLE CAUSE POSSIBLE SOLUTION Make sure the solution control valve Solution flow setting is too low is open by adjusting the solution flow knob Check the sight gage for solution Solution tank is empty level. If low or empty, add water and Insufficient water to the detergent brushes... - Page 29 ISSUE POSSIBLE CAUSE POSSIBLE SOLUTION Inspect & replace if necessary. Brushes Machine isn’t cleaning Pad or brush may be worn should be replaced when the bristles satisfactorily reach a length of 3/4 in (19 mm) Check bottle label. Use low foaming detergent or add a small quantity of Excessive foam is being Detergent used is not a low...
- Page 30 TROUBLESHOOTING GUIDE BATTERY POWER LEVEL INDICATOR FAULT CODES TRANSAXLE DRIVE UNITS CODE (FLASHING LED CAUSE SOLUTION Recharge batteries Low voltage shut-off. Brush motor shut down Check battery connections Battery charge level getting low Recharge batteries Remove overload condition Traction drive motor tripped and reset Three Contact a service center for...
- Page 31 This page intentionally left blank...
- Page 32 Damage or defect arising from abuse, neglect or other misuse is excluded from this warranty. Other items may or may not apply based on your specific machine. If any defect occurs, and service is attempted by non-Authorized Tornado Service Centers, the warranty will be void.
Need help?
Do you have a question about the Floorkeeper 20 PD/99120B and is the answer not in the manual?
Questions and answers