Table of Contents
Advertisement
Quick Links
Operations & Maintenance Manual
For Commercial Use Only
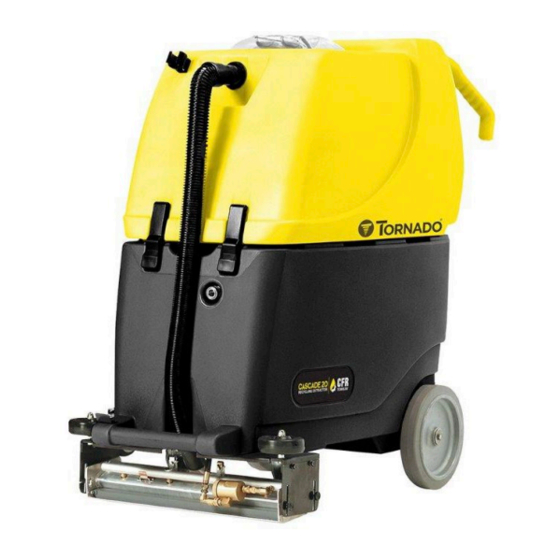
MODEL NO: 98856 CASCADE 20SP
MODEL NO: 98858 CASCADE 20SP w/WAND, COMBO TOOL, and 33' HOSE
MODEL NO: 98860 CASCADE 20SP OZ
MODEL NO: 98862 CASCADE 20SP OZ w/ WAND, COMBO TOOL, and 33' HOSE
Form No. L8856AA 06/19 ©Tornado Industries, LLC. All rights reserved
CASCADE 20SP SERIES
Save These Instructions
1
TORNADO INDUSTRIES, LLC
3101 WICHITA COURT
FORT WORTH, TX 76140
PHONE 800-VACUUMS
FAX 817-551-0719
WWW.TORNADOVAC.COM
Advertisement
Table of Contents

Subscribe to Our Youtube Channel
Related Manuals for Tornado CASCADE 20SP Series


Summary of Contents for Tornado CASCADE 20SP Series
- Page 1 MODEL NO: 98858 CASCADE 20SP w/WAND, COMBO TOOL, and 33’ HOSE MODEL NO: 98860 CASCADE 20SP OZ MODEL NO: 98862 CASCADE 20SP OZ w/ WAND, COMBO TOOL, and 33’ HOSE Form No. L8856AA 06/19 ©Tornado Industries, LLC. All rights reserved Save These Instructions...
- Page 2 For full details, contact your Authorized Tornado Distributor, Service Center, or the Tornado Technical Service Department. Tornado sales and service representatives are not authorized to waive or alter the terms of this warranty, or to increase the obligations of Tornado under the warranty. 10 Years*...
- Page 3 NOTES Serial Number The serial number of the machine is located on the nameplate, located next to pressure regulator. This information is needed when ordering parts or scheduling repairs. Fill in the information below for future reference: Serial Number _____________________________________________________________ Part Number ______________________________________________________________ Purchase Date _______________________________________________________...
-
Page 4: Grounding Instructions
GROUNDING INSTRUCTIONS This appliance must be grounded. If it should malfunction or breakdown, grounding provides a path of least resistance for electric current to reduce the risk electric shock. This machine is equipped with a cord having an equipment -grounding conductor and grounding plug. The plug must be inserted into an appropriate outlet that is properly installed and grounded in accordance with all local codes and ordinances. -
Page 5: Safety Instructions
Your new Tornado unit is a high quality, precision-made product. All parts used in the manufacturing of this unit have passed rigid quality control standards prior to assembly. Please safeguard the original receipt / invoice. If you experience any problems with your unit during the warranty period, the original receipt / invoice will act as proof of purchase. - Page 6 CASCADE20 Series Model 98856 98858 98860 98862 Tank Size 25 Gallon 25 Gallon 25 Gallon 25 Gallon Speed 0 - 114ft./min 0 - 114ft./min 0 - 114ft./min 0 - 114ft./min Drive Motor 0.18 hp/134W 0.18 hp/134W 0.18 hp/134W 0.18 hp/134W Tools Power 115V/20A...
-
Page 7: Unpacking Instructions
UNPACKING INSTRUCTIONS The Cascade is shipped with the tool head unattached. The tool head must be assembled and then attached prior to using the machine. Note: The Cascade ships complete with tool head, spray bar, 2 side plates for tool head, 4 thumb screws for tool head, 4 black screw for tool head, 2 quick release pin, extension cord, manual, main filter, inlet filter, tank lid, vacuum hose, and priming hose 1. - Page 8 Control Panel Vacuum Motor Switch..Turn vacuum motor on/off. Pump Motor Switch....Turn pump motor on/off. Ozone Switch.......Turn ozone on/off. Speed Dial........Select speed control from 0-11. Pump Circuit Breaker....5 AMP breaker provides overload protection for the pump motor. The breaker will pop out if tripped. To reset, wait several minutes and push the breaker back in.
- Page 9 Transporting the Cascade To transport the Cascade from one location to another, it is recommended that the complete tool head be removed. 1. Disconnect vac hose and solution line from cleaning head. 2. Remove two quick release pins. 3. Unscrew the 4 screws on the side of the tool head. 4.
- Page 10 OPERATING INSTRUCTIONS All operators should read this entire manual prior to using the machine. Pre-Use Inspection WARNING! Do not fill the Cascade tank prior to the pre-use inspection. 1. To prepare the Cascade for use, remove the clear tank lid and disconnect the vacuum hose. 2.
- Page 11 Filling the Tank 1. Fill the tank with water to the desired level. For the full 25 gallon capacity fill to the 25 gallon mark on the level gauge inside the tank. The Cascade requires a minimum of approximately 15 gallons to operate properly.
- Page 12 Operating the Cascade 2. The Cascade provides the ability to clean in 2 different modes. Maintenance Mode - Routine Maintenance is performed on a regular basis to maintain the appearance and the cleanliness of the carpeting. • Adjust the p.s.i. to 200 and set the speed dial at 7. Restorative Mode - Restorative Cleaning allows for the deepest cleaning of heavily soiled carpets or high traffic areas.
-
Page 13: Maintenance
MAINTENANCE Routine Daily Maintenance To maintain optimum performance the equipment, tools and filters should be cleaned after each use. Replace any filters that are damaged. Nozzles that cannot be cleared should be discarded. Tank and Filters 1. Make sure all power is off. 2. - Page 14 Tool Head 1. Lower the tool head. 2. Disconnect the vacuum hose. 3. Disconnect and remove the tool head. A. Disconnect the solution hose. B. Remove the two quick release tool pins. C. Unscrew the two thumbscrews from each side of the tool head and slide the tool head off. 4.
-
Page 15: Optional Accessories
General 1. Wipe down the equipment with a damp cloth. Do not use abrasive chemicals or solvents. 2. Remove clear plastic lid for storage. Hand tools & wands 1. Rinse opening of tool with water to eliminate any debris. 2. Wand only – open and clean in-line strainer. A. - Page 16 Carpets/Hard Floor and Surfaces 1. Place the wand on the surface to be cleaned and move it at the rate of a slow walk. 2. Apply solution by engaging the trigger. CAUTION! When using carpet wands, solution is applied on the forward stroke only. Use only enough downward pressure on the wand to move it effectively on both the push and pull stroke.
- Page 17 Periodic Maintenance 1. Check power cord for any breaks, separations, or cuts. Make sure the ground pin on the connector is intact or the machine will be unsafe. Make sure the ground pin on all three prongs on the connector are intact. 2.
- Page 18 Trouble Shooting Guide Vacuum and pump will not run • Check that electrical cord is firmly seated in wall outlet. • Check and reset building circuit breaker if tripped. • Check main power switch. Trips building circuit breaker • Circuit is overloaded – move cord to a different wall outlet. •...
- Page 19 This page intentionally left blank...
-
Page 20: Warranty Registration Form
Damage or defect arising from abuse, neglect or other misuse is excluded from this warranty. Other items may or may not apply based on your specific machine. If any defect occurs, and service is attempted by non-Authorized Tornado Service Centers, the warranty will be void.
Need help?
Do you have a question about the CASCADE 20SP Series and is the answer not in the manual?
Questions and answers