Table of Contents
Advertisement
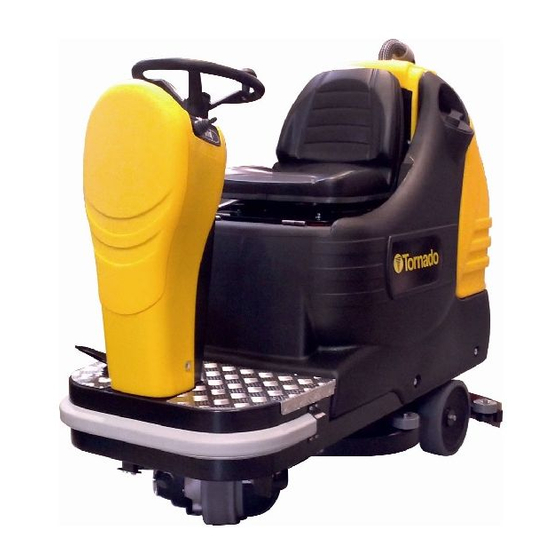
Operations & Maintenance Manual
For Commercial Use Only
Form No. L9772AB 02/17 ©Tornado Industries, LLC. All rights reserved
BD 26/27 RIDE ON SCRUBBER
MODEL NO: 99772
1
TORNADO INDUSTRIES, LLC
FORT WORTH, TX 76140
WWW.TORNADOVAC.COM
3101 WICHITA COURT
PHONE: 800-VACUUMS
FAX: 817-551-0719
Advertisement
Table of Contents

Related Manuals for Tornado 99772


Summary of Contents for Tornado 99772
- Page 1 Operations & Maintenance Manual For Commercial Use Only BD 26/27 RIDE ON SCRUBBER MODEL NO: 99772 Form No. L9772AB 02/17 ©Tornado Industries, LLC. All rights reserved...
- Page 2 2. All non-wear item parts purchased after warranty expiration are warranted for 90 days. 3. Warranty starts from the date of sale to the consumer or, at Tornado’s discretion, 6 months after the dealer purchased the unit from Tornado, whichever comes first.
- Page 3 NOTES...
- Page 4 GROUNDING INSTRUCTIONS This appliance must be grounded. If it should malfunction or breakdown, grounding provides a path of least resistance for electric current to reduce the risk electric shock. This machine is equipped with a cord having an equipment -grounding conductor and grounding plug. The plug must be inserted into an appropriate outlet that is properly installed and grounded in accordance with all local codes and ordinances.
-
Page 5: Table Of Contents
SUMMARY LEGEND PANEL OF CONTROLS Working in manual mode LEGEND MACHINE Working adjustments TECHNICAL DESCRIPTION Adjustment of the detergent solution flow INTRODUCTORY COMMENT Adjustment of the brushes pressure GENERAL RULES OF SECURITY Electric protection SYMBOLOGY Overflow device OPTIONAL ACCESSORIES STOP OF THE MACHINE AFTER CLEANING OPERATION BEFORE USE DAILY MAINTENANCE... -
Page 6: Legend Panel Of Controls
LEGEND PANEL OF CONTROLS DISPLAY SIGNAL LAMP PARKING BRAKE ON SIGNAL LAMP MANUAL MODE ON SIGNAL LAMP UP/DOWN BRUSHES PUSH BUTTON FOR MANUAL MODE PUSH BUTTON UP/DOWN BRUSHES SIGNAL LAMP MODE BREAK WASHING ON SIGNAL LAMP BRUSHES ROTATION PUSH BUTTON FOR MODE BREAK WASHING PUSH BUTTON WATER OPENING (SOLENOID VALVE) or PUSH BUTTON ADJUSTMENT DETER- GENT DOSAGE 3SD system (OPTIONAL) -
Page 7: Legend Machine
LEGEND MACHINE RECOVERY TANK EXHAUST HOSE RECOVERY TANK SOLUTION TANK SQUEEGEE ASSEMBLY SEAT CONTROL PANEL DRIVE WHEEL ELECTRICAL LAYOUT COVER CAP FOR DETERGENT SOLUTION ACCELERATOR PEDAL SUCTION HOSE SOLUTION DRAIN PLUG SUCTION COVER DETERGENT SOLUTION OUTER FILTER BLOCKING LEVERS SUCTION COVER TRACTION MOTOR WHEEL SQUEEGEE HOSE BOTTOM PLATE... -
Page 8: Technical Description
TECHNICAL DESCRIPTION 99772 Cleaning width in/mm 26/660 Squeegee width in/mm 33/835 Working capacity, up to sq.ft./h/sqm/h 35,521/3300 Brushes diameter in/mm 2 x 14/345 Brushes rpm Pressure on the brushes lbs./kg 132/60 max Brushes motor 27/650 Traction motor 25/600 Suction motor... -
Page 9: Introductory Comment
INTRODUCTORY COMMENT - For any cleaning and/or maintenance Symbol denoting the functioning of Thank you for choosing our machine. This floor operation take off the power supply from the the adjustment knob of the brushes cleaning machine is used for the industrial and machine. -
Page 10: Optional Accessories
OPTIONAL ACCESSORIES ATTENTION: Do not place more than 2 machines on top of each other. UNPACKING OF THE MACHINE 1. Remove the external packing. 2. Unscrew the brackets (1+2) that secure the machine to the pallet. Front light (1) and relative switch (2). 5. -
Page 11: Battery Installation
In this way it will be possible to handle BATTERY RECHARGER the batteries with suitable lifting equip- Make sure that the battery recharger is ment. suitable for the installed batteries both for their capacities and type (lead/acid BATTERY INSTALLATION or GEL and equivalent). The machine is equipped either with batteries in serial connection or ele- In the plastic bag containing the use... -
Page 12: Batteries Disposal
BATTERIES CHARGE LEVEL INDI- 4. The batteries charge level indica- CATOR tor is digital and remains fixed on the To start any function of the machine, display. The battery charge level starts it is necessary to rotate clockwise the from -100-, which indicates the 100% key switch (A). -
Page 13: Hour Meter
4. The display ‘GE24’ starts to blink. Once that the pressure and inclination 5. When the display stops blinking, the of the squeegee have been adjusted, setting is modified. it is necessary to fix this optimum con- To change from GEL to Lead-Acid, dition making touch slightly the wheels repeat the procedure pressing button onto the floor. -
Page 14: Brushes Assembly
DETERGENT SOLUTION TANK The capacity of the detergent solution tank is indicated in the technical data. Open the screw plug placed in the left part of the machine and fill the deter- gent solution tank with clean water at a maximum temperature of 122°F (50°C). -
Page 15: Starting Of The Machine
Pressing the same push button in NOTE: if the automatic dosing system II. To activate separately only the con- succession, six different possibilities of is not being used for a long time, it is trols relative to the washing function setting can be selected and the display possible that the hoses of the deter- with the brushes (see under paragraph... -
Page 16: Working In Manual Mode
8. In backward movement, when the MANUAL MOVEMENT OF THE MA- 5. Adjust the movement speed in CHINE machine is moving, an intermittent forward with the push button (2) (see warning device is activated. To move the machine manually, it under paragraph "FORWARD AND is necessary to unblock the parking BACKWARD MOVEMENT"). -
Page 17: Working Adjustments
2. Pressing the push button (2) the ADJUSTMENT OF THE BRUSHES functioning of manual (MAN) mode is ATTENTION: PRESSURE chosen. When the signal lamp (1) is Through the knob (4) it is possible to on, then the machine is functioning in In manual mode every function of the adjust the brushes pressure onto the manual (MAN) mode. -
Page 18: Overflow Device
OVERFLOW DEVICE 5. Rinse the inside of the tank with a In order to avoid serious damages water jet. to the suction motor, the machine is 6. Reassemble all parts. equipped with a mechanical float that intervenes when the recovery tank is full, closing the air flow of the suction. -
Page 19: Squeegee Cleaning
BRUSHES DISASSEMBLY Check the squeegee rubber wear and 4. Unscrew the drain plug of the deter- With the brushes base in lifted position turn or replace it if needed. gent solution (3). (see under paragraph "BRUSHES AS- For the replacement it is necessary to: 5. -
Page 20: Cleaning Of The Inner Filter Solution Tank
CLEANING OF THE INNER FILTER THE WATER DOES NOT COME SOLUTION TANK DOWN ONTO THE BRUSHES OR IS Empty the solution tank, remove the INSUFFICIENT fitting (1) of the water outlet by taking 1. Verify that the key switch (1) is off the two screws that fix it to the tank positioned clockwise to switch on the in the rear part of the machine. -
Page 21: The Machine Does Not Clean Properly
THE MACHINE DOES NOT CLEAN PROPERLY 1. The brushes do not have the suit- able bristle dimension: contact the authorized technical assistance. 2. The brushes have got worn bristles. Check the brushes wear condition and eventually replace them (the brushes have to be replaced when the bristles have reached a height of about 1/2”... -
Page 22: Programmed Maintenance
PROGRAMMED MAINTENANCE DAILY 20 HOURS * 200 HOURS * 1000 HOURS * INTERVENTION • RECOVERY TANK CLEANING • SUCTION FILTER CLEANING SOLUTION TANK FILTER CLEANING • • BRUSH CLEANING • BRUSH DISASSEMBLY AND CLEANING • SQUEEGEE CLEANING • FRONT SQUEEGEE RUBBER REPLACEMENT •... - Page 23 3101 Wichita Court may or may not apply based on your specific machine. If any defect occurs, the warranty is voided if service is Fort Worth, TX 76140 attempted by non-Authorized Tornado Service Centers. Fax: 817-551-0719 or online at ©2017 Tornado Industries. All rights reserved.
Need help?
Do you have a question about the 99772 and is the answer not in the manual?
Questions and answers