Table of Contents
Advertisement
TORNADO INDUSTRIES, LLC
3101 WICHITA COURT
FORT WORTH, TX 76140
PHONE 800-VACUUMS
FAX 817-551-0719
WWW.TORNADOVAC.COM
Operations & Maintenance Manual
For Commercial Use Only
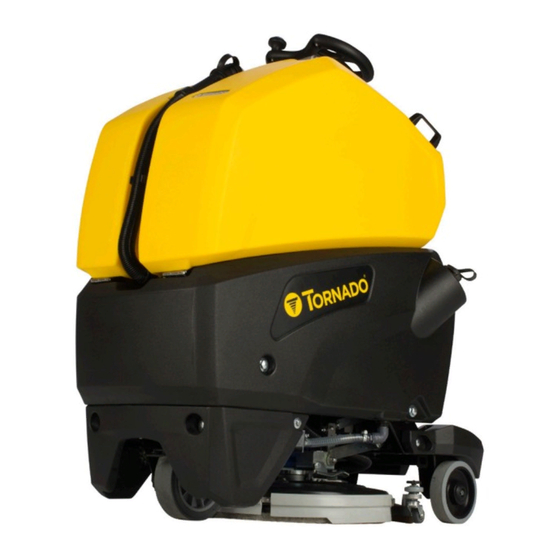
BDSO 20/21 STAND-ON AUTOMATIC SCRUBBER
MODEL NO: TS120-S59-U
Form No. T-OM-BDSO20 05/2021 ©Tornado Industries, LLC. All rights reserved
Save These Instructions
Advertisement
Table of Contents

Related Manuals for Tornado BDSO 20/21


Summary of Contents for Tornado BDSO 20/21
- Page 1 3101 WICHITA COURT FORT WORTH, TX 76140 PHONE 800-VACUUMS FAX 817-551-0719 WWW.TORNADOVAC.COM Operations & Maintenance Manual For Commercial Use Only BDSO 20/21 STAND-ON AUTOMATIC SCRUBBER MODEL NO: TS120-S59-U Form No. T-OM-BDSO20 05/2021 ©Tornado Industries, LLC. All rights reserved Save These Instructions...
- Page 2 NOTES Within 30 days, to activate the warranty, go to; https://tornadovac.com/services/warranty-registration-form.aspx For warranty information go to www.tornadovac.com...
-
Page 3: Table Of Contents
Please safeguard the original receipt / invoice. If you experience any problems with your unit during the warranty period, the original receipt / invoice will act as proof of purchase. Contact Tornado for any warranty inquiries. -
Page 4: General Rules Of Safety
GENERAL RULES OF SAFETY MAINTENANCE - The rules below have to be followed carefully in order - If the machine does not work properly, check by to avoid injury to the operator and damage to the conducting simple maintenance procedures. Otherwise, machine. -
Page 5: Technical Description
TECHNICAL DESCRIPTION TS120-S59-U Cleaning width mm/in 508/20 Squeegee width mm/in 685/27 Working capacity sqm/h/sqft/h 2032/21,872 Brush diameter mm/in 508/20 Brush rpm Pressure on the brush kg/lbs 48/22 max Brush motor 380/16 Traction motor 280/11 Type of drive automatic Movement speed kmh/mph 4/2.5 Maximum gradient... -
Page 6: Display And Controls Legend
DISPLAY AND CONTROLS LEGEND 1. DISPLAY 2. CLEANING MODE SELECTION BUTTON: • AUTOMATIC • MANUAL • BREAK WASHING 3. WORKING MODE SELECTION BUTTON • STANDARD • 3S • 3SD 4. UP/DOWN AND UNLOCK, BRUSH BASE BUTTON 5. SUCTION MOTOR BUTTON •... -
Page 7: Reading The Display
BDSO READING THE DISPLAY DISPLAY WHEN SWITCHING ON When the machine is switched on the display shows the following screen. 20/21 The next screen shows: BATTERY SETTINGS Gel batteries setting HOURMETER AGM batteries setting SOFTWARE RELEASE Lead/acid batteries setting Display card Check card WATER SYSTEM (empty field if standard) -
Page 8: Navigation Controls
NAVIGATION CONTROLS GENERAL SETTINGS DISPLAY CONTRAST To enter the settings menu, use the dashboard Once entered the general settings it is possible buttons and proceed as follows: to set the display tune 1. Keep buttons (1) and (5) pressed Scroll with the button (1) and (3) until is shown simultaneously “Display tune”. -
Page 9: Manual Symbols
MANUAL SYMBOLS Open book symbol. Obligation symbol requiring to wear Indicates that the operator has to the safety glasses. read the manual before the use of the machine. Open book symbol. Obligation symbol requiring to wear For the proper functioning of the on- the safety gloves. -
Page 10: Before Use
ACCESS TO THE BATTERY TRAY BEFORE USE HANDLING OF THE PACKED MACHINE The machine is provided with an extractable tray for the batteries installment. To access it, The machine is supplied with suitable packing turn the knob (1) and pull the compartment (2) foreseen for fork lift truck handling. -
Page 11: Battery Charger
BATTERY CHARGER LIFTING THE RECOVERY TANK For some ordinary maintenance operations, like battery charging, it could be necessary to open the recovery tank. Grab the handles (1) and lift it. Make sure that the battery charger is suitable Open it to its maximum extension in order to for the installed batteries both for their lock the opening system.. -
Page 12: Assembling The Brush
Carefully follow the instructions provided The operation has to be made for both the by the battery charger and the batteries splash guards rubbers. manufacturers. With the brush on, the splash guard rubber has NOTE: Never leave the batteries completely to slightly touch the floor. -
Page 13: Detergent Solution Tank
DETERGENT SOLUTION TANK Grab the hose cap (1) located on the left side of the machine, pull out the hose and after opening the cap, connect the hose to the water valve. Fill the solution tank with clean water at a temperature not over 122°F (50°C). Add MANUAL MODE WORK detergent solution with the concentration 1. -
Page 14: Speed Adjustment, Forward And Backward
DETERGENT SOLUTION FLOW ADJUSTMENT 6. While running the first few meters check that the squeegee adjustment guarantees a perfect In standard mode the detergent solution flow drying action and that the detergent solution adjustment is made through the lever (1) both flow is appropriate. -
Page 15: Silent Mode Suction Motor
SILENT MODE SUCTION MOTOR When this happens, try to reduce the brushes pressure (see under “ADJUSTMENT OF THE It is possible to start the silent mode of the BRUSHES PRESSURE”). suction motor by pressing for a few seconds If the problem persists, contact the authorized the switch-on button (1) of the suction motor. -
Page 16: Daily Maintenance
4. Clean with a water jet especially the bottom DAILY MAINTENANCE part and the sides of the filter. DRAINING AND CLEANING THE RECOVERY 5. Do the cleaning procedure precisely. TANK 1. Hold the exhaust hose placed on the front part of the machine after having taken it off from its fixing support. -
Page 17: Weekly Maintenance
Take the machine to the place assigned for the detergent solution draining. 1. Unscrew the filter cap (1) and take the filter out. 2. Wash the filter components with a water jet. Once finished, close the valve, reassemble the WEEKLY MAINTENANCE filter and replace the tank cap. -
Page 18: Six-Monthly Maintenance
THE SUCTION MOTOR DOES NOT WORK 1. Check the battery charge on the display. 2. Check on the display that the starting signal of the suction motor is on. 3. Check the suction motor connections. If the problem persists, please contact the authorized service center. -
Page 19: The Machine Does Not Clean Properly
THE SQUEEGEE DOES NOT DRY PROPERLY 4. Check that the solution filter is clean (see 1. Check that the squeegee rubbers are clean. under paragraph 2. Check the adjustment of the height and “CLEANING THE OUTER SOLUTION FILTER”). the inclination of the squeegee (see section TWO-MONTHLY MAINTENANCE “ADJUSTMENT OF THE SQUEEGEE”... -
Page 20: Programmed Maintenance
PROGRAMMED MAINTENANCE PERIODIC ORDINARY MAINTENANCE CHART INTERVENTION DAILY PERIODIC RECOVERY TANK CLEANING • SUCTION FILTER CLEANING • SOLUTION TANK FILTER CLEANING • BRUSHES CLEANING • BRUSHES DISASSEMBLY AND CLEANING • SQUEEGEE CLEANING • FRONT SQUEEGEE RUBBER CHECK • REAR SQUEEGEE RUBBER CHECK •... - Page 21 TS120-S59-U...
Need help?
Do you have a question about the BDSO 20/21 and is the answer not in the manual?
Questions and answers