Table of Contents
Advertisement
Quick Links
Advertisement
Table of Contents

Related Manuals for HIKVISION Pyronix Enforcer 64


Summary of Contents for HIKVISION Pyronix Enforcer 64
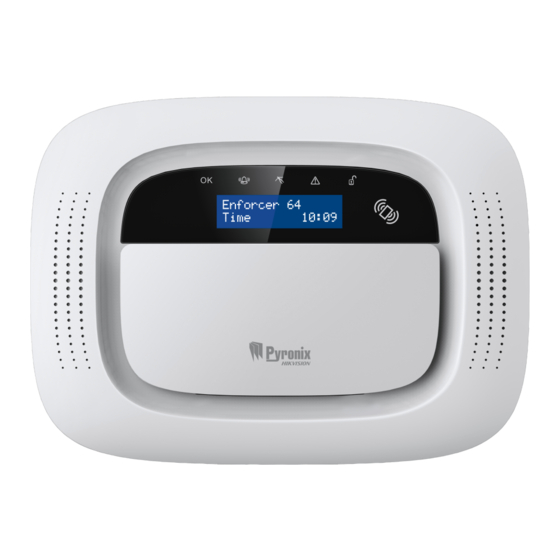
- Page 1 Enforcer 64 User Guide 102017855 - V01 Software V12.0...
- Page 2 Date: 26 February 2018 Document ID: 102017855 -V01 Copyright Copyright © 2018 Pyronix All Rights Reserved. Contains information owned by Pyronix and/or its affiliates. Do not copy, store, transmit or disclose to any third party without prior written permission from Pyronix. Other product and company names may be trademarks or registered trademarks of other companies, and are the property of their owners.
-
Page 3: Table Of Contents
Contents Contents System Description Introduction HomeControl+ App Operation Getting Started Operating the Panel Arming the System Disarming the System Using the Keyfob Locking the Keyfob Quick Arming Arming and Disarming with the Tag Reader Access Control Special Disarm Users PyronixCloud Setting up PyronixCloud on the Panel Setting up the PyronixCloud Setting Up The HomeControl+ App... - Page 4 Inputs Outputs Users Compliance Notes Enforcer User Guide 102017855 - V01...
-
Page 5: System Description
System Description Introduction The Enforcer is a wireless alarm system that has been designed with your security in mind; with quick and easy installation and minimal maintenance, the Enforcer protects your home with a multitude of unique features. Taking full advantage of Pyronix’ innovative two-way wireless technology, the wireless devices on the Enforcer are constantly communicating with each other, using the Pyronix High Security Wireless Encryption Protocol. -
Page 6: Homecontrol+ App
your property. You can also opt to receive these via SMS text messages, when a GPRS modem is connected to the panel. HomeControl+ App The Enforcer system can be remotely controlled using the HomeControl+ App. It allows you to arm and disarm the Enforcer, check the system status and bypass inputs. It also allows you to activate devices remotely, such as gates, lights, sprinklers and more. -
Page 7: Operation
Operation Getting Started Operating the Panel There are four different methods that can be used in arming or disarming your alarm: using a keypad, using a proximity tag, a keyfob or the HomeControl+ App on your smart device. Table 1 - Button Operations Button Description Quickly exit a menu. -
Page 8: Arming The System
For example, if the question is: LEARN USER CODES KEYFOBS & TAGS?, pressing t will take you into the sub-menu User Codes/Tags/Learn Keyfobs?, and pressing t again will then take you into the programmable options of this sub-menu. If at this point you press x, you will be taken out of the individual option. -
Page 9: Disarming The System
For more information, contact your installer. 4. Press Î and then release, the keyfob will arm the areas it has been assigned to by your installer. A red LED light will illuminate when the system is armed. The keyfob buttons can be programmed in the Master Manager Menu Learn User Codes/Tags/Keyfobs . -
Page 10: Using The Keyfob
3. Open the HomeControl+ App on your smart device and sign into your system with your User Code and password details. Then touch the red (armed) padlock icons to turn them to green padlock icons and disarm those areas. 9:41 AM 100% For more information, contact your installer. -
Page 11: Locking The Keyfob
Button Default configuration Programmed for ‘Status LED’. This displays the system status when pressed: • RED: Armed • GREEN: Disarmed • AMBER: Fault No action. Locking the Keyfob All four buttons on the keyfob can be ‘locked’ to prevent you from accidentally pressing them. To do this, press the two central keys together ( Ï... -
Page 12: Access Control
Figure 1: External Tag Reader LEDs (arming shown) Table 2 - Internal Tag Reader LEDs Description Tag Area (present tag here) Ready LED (ready to arm) Alarm LED (shows alarms) Tamper LED (shows tamper alarms) Fault LED (shows system faults) Unset LED (shows system is disarmed) Access Control The readers can also be used for opening doors only, without the ability to arm or disarm. -
Page 13: Pyronixcloud
PyronixCloud Setting up PyronixCloud on the Panel Check with your Engineer that the panel has been set up to allow communication between the panel and the cloud/app. 1. Press d and enter your User Code, then press t. The Master Manager Menu is displayed. 2. -
Page 14: Setting Up The Homecontrol+ App
2. Enter an appropriate System Name. This will only be used by the Cloud, as you may want a different name on the App. 3. The panel will now appear on 'View Systems' and 'System Polling' will be displayed on the right. The green tick shows that the system is connected. - Page 15 3. Enable and disable the relevant options and enter the SIM phone number used on the panel (in the format +447777123456 for example). The SIM card and phone number options are only applicable when a DIGI-GPRS modem is installed. This allows the smart device to send SMS to the control panel in order to force the modem to poll the cloud.
- Page 16 3. Ensure the HomeControl+ app is 4. If connected successfully, Connected to authorised on the PyronixCloud. Contact your system will be briefly displayed and your engineer if the message below is then the screen below will be displayed. displayed. 5. To disconnect, select X next to Disconnect.
-
Page 17: Homecontrol+ App Icons
HomeControl+ App Icons My Security Area unset My Video Area set Settings Area does not exist Delete Unable to arm area Edit Area cannot be armed Add system Detector fault New notification Area in alarm Notifications Supervision fault Search Output is off, or option is set to 'no' Output is on, or option is set to Refresh 'yes'... -
Page 18: Configuration
Configuration Chime Feature This feature can be setup by your installer and is most commonly enabled for doors using the magnetic contact. When activated you will hear a ‘chime’ sound to alert you whenever the door is opened. To disable the chime on the panel or keypad, close all doors that chime and press the c key until 'c' is no longer displayed on the screen. -
Page 19: Master Manager Menu Options
Master Manager Menu Options Bypass Inputs Disables any 24 hour input on the system for the current disarm period. NOTE: Inputs programmed as Entry Delay or PA cannot be bypassed Operate User Activates/deactivates user automation outputs that are used to remotely activate devices, such as Outputs electronic gates &... - Page 20 Enforcer User Guide 102017855 - V01...
- Page 21 Enforcer User Guide 102017855 - V01...
- Page 22 Enforcer User Guide 102017855 - V01...
- Page 23 Enforcer User Guide 102017855 - V01...
- Page 24 Enforcer User Guide 102017855 - V01...
- Page 25 Enforcer User Guide 102017855 - V01...
- Page 26 Enforcer User Guide 102017855 - V01...
- Page 27 Enforcer User Guide 102017855 - V01...
- Page 28 Enforcer User Guide 102017855 - V01...
- Page 29 Enforcer User Guide 102017855 - V01...
- Page 30 Enforcer User Guide 102017855 - V01...
- Page 31 Enforcer User Guide 102017855 - V01...
- Page 32 Enforcer User Guide 102017855 - V01...
- Page 33 Enforcer User Guide 102017855 - V01...
-
Page 34: Reference
Reference Handover Form Alarm Company: Date of Installation: Site Reference: Engineer Name: Engineer Contact Number: Installed to Grade 2: Yes / No Environmental Class: Other Comments: SMS Commands You can send SMS commands to the panel via your mobile phone. All SMS commands must start with a valid User Code and are not case sensitive unless the utilised outputs are activated. - Page 35 Example SMS command send Description Example SMS command response NOTE: If no areas are specified then all areas will disarm (default). Arming with inputs bypassed via SMS text command 1234 = User Code. Arm A Bypass 4 = Arms Input Bypass; Area A Input 04 1234 Arm A Bypass 4 Force Arm: Area A Area A and will bypass Input 4.
-
Page 36: Inputs
Example SMS command send Description Example SMS command response Start uploading/downloading via SMS text command 1234 UDL 1234 = User Code. UDL = The panel will No response as the panel is already make an outgoing data connection to the connected to the PC1 programmed PC1 number. -
Page 37: Outputs
Inputs Input Input Description Input Input Input Description Name Areas Name Areas Outputs Wired Outputs Latched / Timed Type Action PGM (Onboard) STB (Onboard) BELL (Onboard) PGM1 (KPD/TRD Address 1) PGM1 (KPD/TRD Address 2) PGM1 (KPD/TRD Address 3) PGM1 (ROX Address 0) PGM2 (ROX Address 0) PGM3 (ROX Address 0) PGM4 (ROX Address 0) -
Page 38: Users
Wired Outputs Latched / Timed Type Action PGM3 (RIX Address 0) PGM4 (RIX Address 0) PGM1 (RIX Address 1) PGM2 (RIX Address 1) PGM3 (RIX Address 1) PGM4 (RIX Address 1) PGM1 (RIX Address 2) PGM2 (RIX Address 2) PGM3 (RIX Address 2) PGM4 (RIX Address 2) PGM1 (RIX Address 3) PGM2 (RIX Address 3) -
Page 39: Compliance
User Name Code/Tag/ User Name Code/Tag/ User Name Code/Tag/ Keyfob Keyfob Keyfob Compliance As per EN 50131-1 the Enforcer is capable of supporting all conditions A, B and C: In Grades 1 & 2 I&HAS when an I&HAS or part thereof is in a set state: a. -
Page 40: Notes
Notes Enforcer User Guide 102017855 - V01...
Need help?
Do you have a question about the Pyronix Enforcer 64 and is the answer not in the manual?
Questions and answers