
Related Manuals for Mitsubishi Electric RH-1FHR Series


Summary of Contents for Mitsubishi Electric RH-1FHR Series
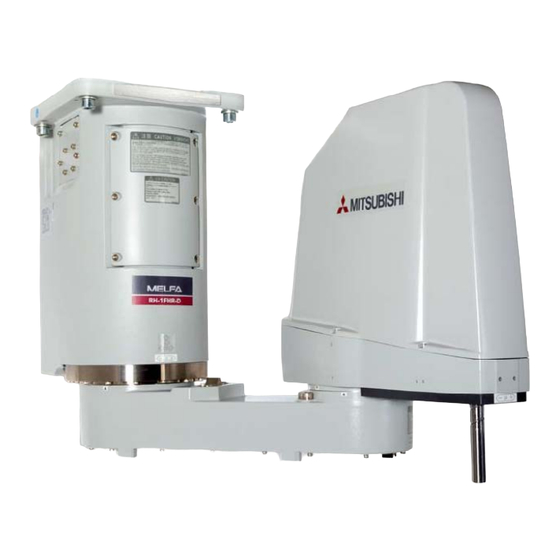
- Page 1 Mitsubishi Industrial Robot RH-1FHR-S60 Series INSTRUCTION MANUAL ROBOT ARM SETUP & MAINTENANCE BFP-A3335-J...
- Page 3 Safety Precautions Always read the following precautions and the separate "Safety Manual" before starting use of the robot to learn the required measures to be taken. CAUTION All teaching work must be carried out by an operator who has received special training.
- Page 4 The points of the precautions given in the separate "Safety Manual" are given below. Refer to the actual "Safety Manual" for details. DANGER When automatic operation of the robot is performed using multiple control devices (GOT, programmable controller, push-button switch), the interlocking of operation rights of the devices, etc.
- Page 5 (VPNs), and antivirus solutions. Mitsubishi Electric shall have no responsibility or liability for any problems involving robot trouble and system trouble by unauthorized access, DoS attacks, computer viruses, and other cyberattacks.
- Page 6 *CR751-D or CR751-Q controller Notes of the basic component are shown. CAUTION Please install the earth leakage breaker in the primary side supply power supply of the controller of CR751-D or CR751-Q because of leakage protection. Controller Controller Three phase Single phase AC200V AC200V...
- Page 7 CAUTION Be careful of interference with peripheral equipment. Especially don't give a shock to the shaft (J3 axis). When you install the hand, be careful not to knock at the shaft end by the hammer etc. The shaft may be damaged. Take care also of the following items.
- Page 8 Revision history Date of Point Instruction Manual No. Revision Details 2014-08-09 BFP-A3335 ・ First print 2014-08-22 BFP-A3335-A ・ Recommended grease gun was described. 2015-02-10 BFP-A3335-B ・ The explanation of the origin setting method were added. The description of the setting range of ABS origin method was added.
- Page 9 Please contact your nearest dealer if you find any doubtful, wrong or skipped point. ・ This specifications is original. ・ Company names and production names in this document are the trademarks or registered trademarks of their respective owners. Copyright(C) 2014-2020 MITSUBISHI ELECTRIC CORPORATION...
-
Page 10: Table Of Contents
CONTENTS Page 1 Before starting use .......................... 1-1 1.1 Using the instruction manuals ....................1-1 1.1.1 The details of each instruction manuals ................1-1 1.1.2 Symbols used in instruction manual ..................1-2 1.2 Safety Precautions ........................1-3 1.2.1 Precautions given in the separate Safety Manual ..............1-4 2 Unpacking to Installation ................................ - Page 11 CONTENTS Page (1) Installation procedure .............................. 3-57 3.6 External Wiring and Piping Box ............................3-60 3.7 Installing the vacuum valve set ............................3-63 3.8 Connector protection when the option devices are installed ................3-65 4 Basic operations .................................... 4-67 5 Maintenance and Inspection ..............................5-68 5.1 Maintenance and inspection interval ..........................
-
Page 12: Before Starting Use
1Before starting use 1 Before starting use This chapter explains the details and usage methods of the instruction manuals, the basic terminology and the safety precautions. Moreover, handling and operation of a teaching pendant (T/B) are described based on R32TB (R33TB) in instruction manuals. If using other T/B, such as R56TB (R57TB), refer to a supplied instruction manual of the T/B. -
Page 13: Symbols Used In Instruction Manual
1Before starting use 1.1.2 Symbols used in instruction manual The symbols and expressions shown in Table 1-1 are used throughout this instruction manual. Learn the meaning of these symbols before reading this instruction manual. Table 1-1:Symbols in instruction manual Terminology Item/Symbol Meaning iQ Platform... -
Page 14: Safety Precautions
1Before starting use 1.2 Safety Precautions Always read the following precautions and the separate "Safety Manual" before starting use of the robot to learn the required measures to be taken. CAUTION All teaching work must be carried out by an operator who has received special training. -
Page 15: Precautions Given In The Separate Safety Manual
1Before starting use 1.2.1 Precautions given in the separate Safety Manual The points of the precautions given in the separate "Safety Manual" are given below. Refer to the actual "Safety Manual" for details. DANGER When automatic operation of the robot is performed using multiple control devices (GOT, programmable controller, push-button switch), the interlocking of operation rights of the devices, etc. - Page 16 (VPNs), and antivirus solutions. Mitsubishi Electric shall have no responsibility or liability for any problems involv- ing robot trouble and system trouble by unauthorized access, DoS attacks, com- puter viruses, and other cyberattacks.
-
Page 17: Unpacking To Installation
Users who have purchased optional products should refer to the separate "Special Specifications". Table 2-1 : Standard configuration Part name Type Qty. Remarks Robot arm RH-1FHR series 1 unit Guarantee card 1 copy Installation bolts M12 x 45 4 pcs. -
Page 18: Installation
2Unpacking to Installation 2.2 Installation 2.2.1 Unpacking <2> Upper lid Pull out ②上ブタ 引き抜く <1> Tape ①テープ Fixing board 固定台 (a) (b) Robot arm ロボット本体 Fixing plate 固定具 <3> Hexagon socket bolts ③六角穴付ボルト (Four positions) (4箇所) CAUTION Always unpack the robot at a flat place. -
Page 19: Transportation Procedures
2Unpacking to Installation 2.2.2 Transportation procedures (1) Transporting with a crane Mass RH-1FHR series: Approx. 56kg Wire Fixing plate Wire hook Transporta - Eye bolt tion tool Fig.2-2 : Transportation of robot arm 1) Hook the wires to each of the four eyebolts attached to the transportation tool. (Make sure the bolts are securely hooked.) -
Page 20: Transporting With A Manual Pallet Jack
2Unpacking to Installation (2) Transporting with a manual pallet jack Mass RH-1FHR series: Approx. 56kg Fixing plate Transportation tool Forks <Fork insertion segment> View A View B Fork insertion segment Fig.2-3 : Transportation of robot arm 1) Insert the forks of a manual pallet jack surely into the fork insertion segment of the transportation tool. -
Page 21: Installation Procedures
2Unpacking to Installation 2.2.3 Installation procedures The installation procedure of the robot arm is shown below. F V F M H L F F H H F H M L Plain washer 平座金 Spring washer バネ座金 4-M12×45 (Four positions) (4箇所) M... - Page 22 2Unpacking to Installation rigidity. Table 2-3 shows the maximum reaction force (design values) that may be applied to an installation stand. Please use these values as reference when designing the installation stand. Table 2-3 : Magnitude of each reaction force Unit Value Item...
-
Page 23: Grounding Procedures
2Unpacking to Installation 2.2.4 Grounding procedures (1) Grounding methods 1) There are three grounding methods as shown in Fig. 2-5, but the dedicated grounding (Fig. 2-5 (a)) should be used for the robot arm and controller when possible. (Refer to the separate " Controller Controller Controller Controller... -
Page 24: Connecting With The Controller
2Unpacking to Installation 2.2.5 Connecting with the controller (1) CR750 controller Note1) Controller コントローラ Motor power Motor signal モータパワー モータ信号 (CN1) (CN2) Latch ラッチ Motor signal cable モータ信号ケーブル Latch ラッチ Robot arm base section ロボット本体ベース部 Motor power cable モータ電源ケーブル Note 1) Although the picture is the CR750-D controller, also the connection method is the same in the CR750-Q controller Fig.2-7 :... - Page 25 2Unpacking to Installation To remove the cable, insert a minus screwdriver into the hook while padding with a cloth, and remove the cable by lifting the Hook hook. Projection Minus screwdriver CAUTION When installing or removing the connector, to the connector of the other party in parallel, install or remove.
-
Page 26: Cr751 Controller
2Unpacking to Installation (2) CR751 controller Note1) Robot arm base section ロボット本体ベース部 Controller コントローラ Motor power (CN1) Motor signal (CN2) モータ電源(CN1) モータ信号(CN2) AMP1 AMP2 BRK ネジ Two fixing screws (固定用 2本) ネジ Two fixing screws (固定用 2本) CONBOX cover Motor signal cable モータ信号ケーブル... - Page 27 2Unpacking to Installation This completes connecting the machine cables. CAUTION The machine cable connectors are dedicated for the controller side and robot arm side, so take special care when connecting. If connected incorrectly, the connector pins could bend or break. Thus, even if connected correctly, the robot will not operate correctly, creating a dangerous situation.
-
Page 28: Ethernet Cables
2Unpacking to Installation 2.2.6 Ethernet Cables Ethernet cables (4 pairs, totaling 8 lines, of AWG#26 (0.13mm ) cabtyre cables) are installed within the robot arm from the base unit up to the No. 2 arm, and can be used. LAN connectors are mounted to both ends of the cables, and can therefore be used to connect to LAN connection devices. -
Page 29: Base Area
2Unpacking to Installation become seriously impaired and there is a risk that the specified level of product protection may not be achievable. Normal condition abnormal condition 正常な状態 折れた状態 Air hose エアホース CAUTION When fixing the cable, please keep too much load from being applied to the cables. If too much load is applied, the may break, when the robot moves. - Page 30 2Unpacking to Installation CAUTION Take care against applying big force to the Ethernet cable, other cables, and the air hose. CAUTION Please confirm not having broken or not having stripped the packing when installing or removing the cover. Contact to the dealer. Failure will be caused if the robot is used under the condition that the packing is broken or stripped, because oil mist etc.
-
Page 31: Passing Air Hoses And Cables Through The Shaft
2Unpacking to Installation 2.2.7 Passing air hoses and cables through the shaft For this robot, customer prepared air hoses and cables can be pulled out from the No. 2 arm by passing through the shaft. For how to pass air hoses and cables through the shaft, refer to the following. (1) Specifications of internal air hoses and cables Use the air hoses and the cables, which have flexibility, capability of being repeatedly bent and twisted, and high wear resistance, for the internal use. - Page 32 2Unpacking to Installation (3) Installation procedure The installation procedure is shown below. Refer to the installation diagram shown from the next section, and perform the installation correctly. 1) Move the J3 axis to the top end with a jog operation and shut off the controller's power supply. This is necessary for space standard settings when feeding the air hose and hand input cable through the inside of the shaft.
-
Page 33: Installation Procedure
2Unpacking to Installation Refer to Page 21, "(3) Installation procedure" and install cables and air hoses correctly. The numbers in Fig. 2- are correspond to the same numbers in "(3)Installation procedure". Turn the controller’s power OFF before this operation. Refer to Page 72, "5.3.2 Installing/removing the cover"... -
Page 34: Setting The Origin
2Unpacking to Installation 2.3 Setting the origin The origin is set so that the robot can be used with a high accuracy. After purchasing the robot, always carry out this step before starting work. This step must also be carried out if the combination of robot and controller being used is changed. -
Page 35: Cr751 Controller
2Unpacking to Installation (2) CR751 controller Explain the installation method of T/B below. 1) Check that the POWER (power supply) switch of the robot controller is OFF. 2) Connect the T/B connector to the controller’s T/B connector. Make sure to fix it securely by fastening the hand locks (in 2 places), as shown in Fig. -
Page 36: Setting The Origin With The Origin Data Input Method
2Unpacking to Installation 2.3.2 Setting the origin with the origin data input method (1) Confirming the origin data ● Origin data history table (Origin Data History) Serial No.ES804008 The origin data to be input is noted in the Date Default . -
Page 37: Preparing The T/B
2Unpacking to Installation (3) Preparing the T/B Next, prepare to use the T/B 1) Set the mode of the controller to "MANUAL". (The figure is example for CR750 controller) MODE MANUAL AUTOMATIC 2) Set the T/B [ENABLE] switch to "ENABLE". The menu selection screen will appear. -
Page 38: Selecting The Origin Setting Method
2Unpacking to Installation (4) Selecting the origin setting method <MENU> 1) Press the [4] key on the menu screen, and display the 1.FILE/EDIT 2.RUN ORIGIN/BRAKE screen. 3.PARAM. 4.ORIGIN/BRK 5.SET/INIT. 6.ENHANCED 123 CLOSE <ORIGIN/BRAKE> 2) Press the [1] key on the ORIGIN/BRAKE screen, and 1.ORIGIN 2.BRAKE display the origin setting method selection screen. -
Page 39: Inputting The Origin Data
2Unpacking to Installation (5) Inputting the origin data Origin data label T/B screen Input the value confirmed in section Page 25, "(1) (D,J1,J2,J3,J4,J5,J6,J7,J8) Confirming the origin data". The correspondence of the origin data label value and axis to <ORIGIN> DATA D:(■... -
Page 40: Installing The Battery Cover
2Unpacking to Installation <ORIGIN> DATA 6) After inputting all of the values, press the [EXE] key. The D:( V!%S29) origin setting confirmation screen will appear. J1( 06DTYY) J2( 2?HL9X) J3( 1CP55V) J4( T6!MSY) J5( ) J6( ) J8( CLOSE <ORIGIN> DATA 7) Press [F1] (Yes) to end the origin setting CHANGE TO ORIGIN. -
Page 41: Confirming The Operation
2 Unpacking to Installation 2.4 Confirming the operation In this section, the robot will be moved manually using the T/B to confirm that the operation is correct. Moving the robot manually is called "jog operation". This operation includes the JOINT jog that moves each axis, the XYZ jog that moves along the base coordinate system, the TOOL jog that moves along the tool coordinate system, and the CYLNDER jog that moves along the circular arc. - Page 42 2 Unpacking to Installation J1-axis J1軸 J2-axis - + J2軸 - + + J3-axis J3軸 - - + * Each axis moves independently. J4-axis J4軸 Fig.2-16 : JOINT jog operation Base coordinate system reference origin 直交座標系原点 +Z +Z -X -Y +Y +X End axis...
- Page 43 2 Unpacking to Installation +Z 先端軸 End axis ツール座標原点 Tool coordinate reference origin -X -Y +Y - + * While maintaining the end axis posture, the axis moves +X straight along the tool coordinate system. Also, while maintaining the end axis position, the end axis posture changes -Z Fig.2-18 :...
- Page 44 2 Unpacking to Installation +Z Vertical 上下 -X -Y +Y +X * The current position is set as the arc centering on the Z axis, and the axis moves along that arc, expands and -Z contracts in the radius direction, and moves vertically.
-
Page 45: Joint Jog Operation
2 Unpacking to Installation (1) JOINT jog operation Select joint jog mode [JOG] Press the key and display the jog screen. ("JOG" is displayed on the screen bottom) <CURRENT> JOINT 100% M1 T0 Check that the "joint" in jog mode is displayed on +0.00 +0.00 the screen. - Page 46 2 Unpacking to Installation ◇◆◇ When the robot is in the transportation posture ◇◆◇ The axes may be outside the movement area. Move these axes toward the inner side of the movement area. J3 axis jog operation + J3 axis J3軸...
-
Page 47: Xyz Jog Operation
2 Unpacking to Installation (2) XYZ jog operation Select XYZ jog mode [JOG] Press the key and display the jog screen. ("JOG" is displayed on the screen bottom) <CURRENT> JOINT 100% M1 T0 Check that the "XYZ" in jog mode is displayed on +0.00 +0.00 the screen. - Page 48 2 Unpacking to Installation ◇◆◇If the buzzer of T/B sounds and the robot does not move ◇◆◇ If it is going to move the robot across the operation range, the buzzer of T/B sounds and the robot does not move. In this case, please move to the counter direction. Changing the end axis posture +Z +Z...
-
Page 49: Tool Jog Operation
2 Unpacking to Installation (3) TOOL jog operation Select TOOL jog mode [JOG] Press the key and display the jog screen. ("JOG" is displayed on the screen bottom) <CURRENT> JOINT 100% M1 T0 Check that the "TOOL" in jog mode is displayed +0.00 +0.00 on the screen. - Page 50 2 Unpacking to Installation ◇◆◇ When the robot is in the transportation posture ◇◆◇ There are directions from which linear movement is not possible from the transportation posture. In this case, the robot will not move. Refer to section Page 34, "(1) JOINT jog operation"", and move the robot to a position where linear movement is possible, and then carry out XYZ jog.
-
Page 51: 3-Axis Xyz Jog Operation
2 Unpacking to Installation (4) 3-axis XYZ jog operation Select 3-axis XYZ jog mode [JOG] Press the key and display the jog screen. ("JOG" is displayed on the screen bottom) 3-XYZ <CURRENT> JOINT 100% M1 T0 Check that the "3-XYZ" in jog mode is displayed +0.00 +0.00 on the screen. - Page 52 2 Unpacking to Installation Changing the end axis posture +Z +Z -X -Y +Y +X -Z -X -Y +Y +X - + J4 axis J4軸 *The Position of the end axis will not change. -Z ・ When the[+C (J6)] keys are pressed, the J4-axis will rotate in the plus direction. When the[-C (J6)] keys are pressed, rotate in the minus direction.
-
Page 53: Cylnder Jog Operation
2 Unpacking to Installation jog operation CYLNDER Select cylindrical jog mode [JOG] Press the key and display the jog screen. ("JOG" is displayed on the screen bottom) CYLNDER <CURRENT> JOINT 100% M1 T0 Check that the "CYLNDER" in jog mode is +0.00 +0.00 displayed on the screen. - Page 54 2 Unpacking to Installation Changing the flange surface posture +Z Vertical 上下 -X -Y +Y +X -Z Radius 半径 円弧 - + *The position of the end axis will not change. ・ When the [+C (J6)] keys are pressed, the Z axis will rotate in the plus direction. When the [-C (J6)] keys are pressed, rotates in the minus direction.
-
Page 55: Work Jog Operation
2 Unpacking to Installation (6) Work jog operation Setting of the work coordinates system is necessary. By this jog operation, robot can be move along with the direction of work (or working table etc.), so teaching operations get easier. When jog operation, select by which work coordinates the robot moves The setting method of the work coordinates system using T/B (R32TB) is shown in the following. - Page 56 2 Unpacking to Installation 2) Press the [2] keys in the menu screen and select "2. WORK COORD." <EMHANCED> <WORK COORD> WORK NUMBER (1) TEACHING POINT (WO) 1.SQ DIRECT 2.WORK COORD. X: 0.00 Y: 0.00 Z: 0.00 123 TEACH ...
- Page 57 2 Unpacking to Installation Presses the function key corresponding to"Yes", the robot's current position is registered, and the registered coordinates value is displaye. Operation will be canceled if the [CLOSE] key is pressed. <WORK COORD> WORK NUMBER (2) <WORK COORD> WORK NUMBER (2) TEACHING POINT (WO) TEACHING POINT (WO)
- Page 58 2 Unpacking to Installation Although setting of work coordinates is finishing above, confirmation of work coordinates can be done by press - ing the function key corresponding to "W GRID."([F2]) <WORK COORD> WORK NUMBER (2) <WORK COORD> WORK NUMBER (2) TEACHING POINT (WO) WORK COORDINATES DATA X: 214.12...
- Page 59 2 Unpacking to Installation When the software version is R5 (F-Q series)/S5 (F-D series) or later, the additional WORK jog operation, Ex-T jog, is available. The conventional WORK jog operation and the Ex-T jog operation can be switched by setting the parameters WK1JOGMD to WK8JOGMD of each work coordinates system. The respective operations are as follows.
- Page 60 2 Unpacking to Installation Changing the end axis posture +Z <1> Work jog mode +Z -X -Y +Y +X Work coordinates system -Z Tool length ツール長 Control point - + * The position of the control point does not -Z change.
- Page 61 2 Unpacking to Installation ◇◆◇ When the robot is in the transportation posture ◇◆◇ There are directions from which linear movement is not possible from the transportation posture. In this case, the robot will not move. Refer to section Page 34, "(1) JOINT jog operation"", and move the robot to a position where linear movement is possible, and then carry out XYZ jog.
-
Page 62: Installing The Option Devices
3Installing the option devices 3 Installing the option devices 3.1 Installing the solenoid valve set The installation summary of the solenoid valve is shown in Fig. 3-1. Remove the No.2 arm cover U, and install the solenoid valve on the No.2 arm. Turn the controller’s power OFF before this installing operation. Refer to Page 72, "5.3.2 Installing/removing the cover"... -
Page 63: Hand Number And Solenoid Valve Ports (Common To Rh-Fh Series)
3Installing the option devices solenoid valve is installed and are tied up with cable tie. Pull out and connect them to the connectors. Fix Page 65, "3.8 Connec - the connectors so that they will not move along with the robot movement. (Refer to tor protection when the option devices are installed"). -
Page 64: Installing The Hand Input Cable
3Installing the option devices 3.2 Installing the hand input cable Fig. 3-2 shows the hand input cable’s storage location on the robot. Please use the optional external wiring and piping box to pull the hand input cable out externally. After connecting the hand input cable connector, reference Page 60, "3.6 External Wiring and Piping Box", and pull it out from the... -
Page 65: Installing The Hand Output Cable
3Installing the option devices 3.3 Installing the hand output cable Fig. 3-3 shows the hand output cable’s storage location on the robot. Please use the optional external wiring and piping box to pull the hand output cable out externally. After connect - ing the hand output cable connector, reference Page 60, "3.6 External Wiring and Piping Box", and pull it out from... -
Page 66: Changing The Operating Range
3Installing the option devices 3.4 Changing the operating range The operating ranges of J1 axis can be limited. Change the mechanical stopper and the operating range to be set inside of that area. If the operating range must be limited to avoid interference with peripheral devices or to ensure safety, set up the operating range as shown below. -
Page 67: The Change Method Of The Operating Range
3Installing the option devices (2) The change method of the operating range ■ Installation of the mechanical stopper 1) Turn off power to the controller. 2) Install the hexagon socket bolt in the screw hole to the angle to set up referring to Table 3-2 Fig. -
Page 68: Hand Internal Wiring And Piping Set
3Installing the option devices 3.5 Hand internal wiring and piping set Remove the No. 2 arm cover U and fix this option to the plate on the No. 2 arm. Turn the controller’s power OFF before this operation. Refer to Page 72, "5.3.2 Installing/removing the cover"for removing/ installing the cover. - Page 69 3Installing the option devices CAUTION Do not power on the controller when the internal cables are connected to the con - nectors on the robot. If the end of the cables on the tool side is not processed, troubles such as fuse blown by ground fault or short circuit may occur.
- Page 70 3Installing the option devices Refer to Page 57, "(1) Installation procedure" and install cables and air hoses correctly. The numbers in Fig. 3- are correspond to the same numbers in "(1)Installation procedure". Turn the controller’s power OFF before this operation. Refer to Page 72, "5.3.2 Installing/removing the cover"...
-
Page 71: External Wiring And Piping Box
3Installing the option devices 3.6 External Wiring and Piping Box The air hose that is connected inside the robot, the optional hand output cable, the hand input cable, etc., can all be pulled out from the rear of the No. 2 arm. These can be used to connect a customer supplied solenoid valve to the hand output cable, etc. - Page 72 3Installing the option devices Fig. 3-6 shows the installation procedure for the external wiring and piping box. Remove the No. 2 arm cover B and install this option using the same screw holes. The installation procedure is shown below. Turn the controller’s power OFF before this operation. Refer to Page 72, "5.3.2 Installing/removing the cover"...
- Page 73 3Installing the option devices CAUTION The parameter must be changed to limit J1 axis operating range to ±120 degree. If the parameter not be changed, this option and a robot could interfere and cause breakage. 10) After changing the parameter, turn off the controller power and turn on again. And, move the axis changed by joint jog operation to the limit of the operating range.
-
Page 74: Installing The Vacuum Valve Set
3Installing the option devices 3.7 Installing the vacuum valve set The installation summary of the vacuum valve is shown bellow. Remove the No.2 arm cover U, and install the vac - uum valve on the No.2 arm. Turn the controller’s power OFF before this installing operation. Refer to Page 72, "5.3.2 Installing/removing the cover"... - Page 75 3Installing the option devices The installation procedure is detailed below. 1) Move the J3 axis to the top end with a jog operation and shut off the controller's power supply. This is necessary for space standard settings when feeding the air hose and hand input cable through the inside of the shaft.
-
Page 76: Connector Protection When The Option Devices Are Installed
3Installing the option devices 3.8 Connector protection when the option devices are installed The connectors for the hand input and output cables are stored inside the No. 2 arm so that they do not rub against peripheral parts under the vibrations generated by the robot movement. When an option device is installed, the stored connectors are pulled out for connection to the option device. - Page 77 3Installing the option devices 3) Arrange the expanding sleeve in a ring-like shape and fix it with a cable tie. 4) Store the expanding sleeve in the position shown in the figure below. 5) Fix the expanding sleeve with a cable tie using a hole on the metal plate. Connector protection is completed.
-
Page 78: Basic Operations
4Basic operations 4 Basic operations The basic operations from creating the program to automatic operation are explained in section "4. Basic operations" in the "From Controller Setup to Maintenance" manual. Refer that manual as necessary. 4-67... -
Page 79: Maintenance And Inspection
5Maintenance and Inspection 5 Maintenance and Inspection The maintenance and inspection procedures to be carried out to use the robot for a long time without trouble are described in this chapter. The types and replacement methods of consumable parts are also explained. 5.1 Maintenance and inspection interval Maintenance and inspection are divided into the inspections carried out daily, and the periodic inspections carry out at set intervals. -
Page 80: Inspection Items
5Maintenance and Inspection 5.2 Inspection items The inspection items for the robot arm are shown below. Also refer to section "5. Maintenance and inspection" in the "Controller setup, basic operation, and maintenance" manual, and inspect the controller. 5.2.1 Daily inspection items Carry out the daily inspections with the procedures given in Table 5-1. -
Page 81: Periodic Inspection
5Maintenance and Inspection 5.2.2 Periodic inspection Carry out periodic inspection with the procedures given in Table 5-2. Table 5-2 : Periodic inspection items (details) Procedure Inspection item (details) Remedies Monthly inspection items Are any of the bolts or screws on the robot arm loose? Securely tighten the bolts. -
Page 82: Maintenance And Inspection Procedures
5Maintenance and Inspection 5.3 Maintenance and inspection procedures The procedures for carrying out the periodic maintenance and inspection are described in this section. Thoroughly read the contents, and follow the instructions. This work can be commissioned to the Mitsubishi Service Depart - ment for a fee. -
Page 83: Installing/Removing The Cover
5Maintenance and Inspection 5.3.2 Installing/removing the cover <1> No.2 arm cover U <4> ADD cover (Upper side of back of base) <6> CONBOX cover (Under side of back of base) <3> No.2 arm cover B (No.2 arm rear) Base section rear <5>... -
Page 84: Packing Replacement Procedure
5Maintenance and Inspection 5.3.3 Packing Replacement Procedure When signs of cracking or peeling are noted in the packing, they must be replaced.Replace the packing in accordance with the instructions given below. If the packing is not replaced in a timely manner, water or oil will be allowed to intrude the robot, possibly making it inoperative. - Page 85 5Maintenance and Inspection Sliding. Fig.5-5 : Example of sticking packing (bad example) Some of the packings to be used are cord-like. Stick such packings by bending in line with the form. Location at which gasket Location at which is applied. packing is bent Stick the packing Cord-like packing...
- Page 86 5Maintenance and Inspection A 1mm overlap [2] Apply liquid gasket to the cut edges. [1] Cut the packing so that there is a 1mm overlap at the end. Join by liquid gasket [3] Stick the packing so that there is no gap between the adjacent pieces.
- Page 87 5Maintenance and Inspection Fig.5-8 : Example of order which tighten bolts Maintenance and inspection procedures 5-76...
-
Page 88: Inspection, Maintenance And Replacement Of Timing Belt
5 Maintenance and Inspection 5.3.4 Inspection, maintenance and replacement of timing belt This robot uses a timing belt for the drive conveyance system of the J5 axis. Compared to gears and chains, the timing belt does not require lubrication and has a low noise. However, if the belt usage method and tension adjust - ment are inadequate, the life could drop and noise could be generated. -
Page 89: Inspecting/Adjusting The J3 Axis Timing Belt
5 Maintenance and Inspection (2) Inspecting/Adjusting the J3 axis timing belt The section related to J3 axis timing belt and adjustment is shown in Fig. 5-10. The picture is the image which removed the No.2 arm cover. <2> J3 axis motor fixing screw <3>... -
Page 90: Replacing The J3 Axis Timing Belt
5 Maintenance and Inspection (3) Replacing the J3 axis timing belt The procedure for replacing the J3 axis timing belt is shown below. The diagram shows an image of the removed No. 2 arm cover U. After replacing the J3 axis timing belt the resetting the origin of J3 and J4 axis is necessary. 1) Move the J3 axis to the position lowered about 30mm from the upper limit by jog operation. - Page 91 5 Maintenance and Inspection 6) Remove the timing belt <4> from the shaft to upward. Remove the fixing screw <7> of shaft fixing plates and lift up the shaft fixing plate <8>. When using the optional hand internal wiring and piping set remove the fixing screws fixed to the top. Remove the timing belt <4>...
- Page 92 5 Maintenance and Inspection 7) Remove the timing belt <4> from the top of the shaft If using the optional hand internal wiring and piping set, temporarily remove the hand input cable connector <11> and air hoses <12> of solenoid valve side. And remove the timing belt to upward. Remove to upward <4>...
-
Page 93: Inspecting/Adjusting The J4 Axis Timing Belt
5 Maintenance and Inspection (4) Inspecting/Adjusting the J4 axis timing belt As shown in Fig. 5-11, the J4 axis timing belt consists of two timing belts: timing belt A <1> and timing belt B <2>. When adjusting the timing belts, first adjust timing belt B <2> and then proceed to adjust timing belt A <1>. <The No.2 arm bottom view (Inside of the No.2 arm cover D)>... - Page 94 5 Maintenance and Inspection Inspection and adjustment procedure of the timing belt of J4 axis are shown below. 1) Confirm that the power supply of the controller is OFF. 2) Refer to Page 72 "Fig. 5-3: Installing/removing the cover", and remove the No.2 arm cover U and No.2 cover D.
- Page 95 5 Maintenance and Inspection 8) Next, adjusts the tension of the timing belt A <1>. Lightly loosen two J4 motor fixing screws <7> (Be careful not to overly loosen the screws.). 9) Loosen the nut of tension adjustment screw <8> for timing belt A. Adjusts by turning the tension adjustment screw <8>...
-
Page 96: Timing Belt Tension
5 Maintenance and Inspection (5) Timing belt tension f : Pressing force s : Span d : Slack T : Tension Pressing force Belt type Span : s Slack : d Pressing force : f Remarks Axis 309-EV3GT-6 J4(motor side) 336-EV3GT-6 J4(shaft side) 282-EV3GT-12... -
Page 97: Replacing The Bellows (Option)
5 Maintenance and Inspection 5.3.5 Replacing the bellows (Option) With reference to , exchanges the bellows (option). Replacement method of bellows is shown Fig. 5-13 below. 1) Loosen the two set screws (M4) and remove the shaft fixation part from the shaft. Remove the liquid gasket from the rim of the screw holes before removing the screws. -
Page 98: Lubrication
5 Maintenance and Inspection 5.3.6 Lubrication (1) Lubrication position and specifications The grease nipple position is shown in Fig. 5-14. The lubrication specifications for each place are shown in Table 5-4. Refer to the Page 72, "5.3.2 Installing/removing the cover" for the method of removing and installing the cover. -
Page 99: Lubrication Method To The J1, J2 Axis
5 Maintenance and Inspection ・ The numbers in theTable 5-4 correspond to the supply positions in Fig. 5-14. ・When the specified time limit (24,000 Hr) is due, the overhaul work to replace internal grease is required. For the J1/J2 axis reduction gears, if the overhaul cannot be conducted at the specified timing, lubricate them at the lubrication interval in Table 5-4. -
Page 100: Replacing The Backup Battery
5 Maintenance and Inspection 5.3.7 Replacing the backup battery An absolute encoder is used for the position detector, so while power of controller is turned off the position must be saved by the backup battery. The controller also uses a backup battery to save the program, etc. The battery is the lithium battery. -
Page 101: Replacing The Battery (Robot Arm)
5 Maintenance and Inspection (1) Replacing the battery (robot arm) CAUTION The power supply for the encoder is supplied by cable connected with battery board. The cable must be connected while replacing the battery or operating usually. Thus, if the cable connection is incomplete, the encoder position data will be lost, and reset - ting the origin is necessary. -
Page 102: About Overhaul
5 Maintenance and Inspection 5.4 About Overhaul Robots which have been in operation for an extended period of time can suffer from wear and other forms of deterioration. In regard to such robots, we define overhaul as an operation to replace parts running out of speci - fied service life or other parts which have been damaged, so that the robots may be put back in shape for contin - ued use. -
Page 103: Maintenance Parts
Lithium battery ER6V Inside the battery cover Note1) Liquefied gasket A small Packing Mitsubishi Electric amount Timing belt J3 axis J4 axis motor side J4 axis shaft side Bellows set (option) J4 axis shaft Note1)The liquefied gasket is necessary for the place which uses two or more packings to connect. -
Page 104: Resetting The Origin
5 Maintenance and Inspection 5.6 Resetting the origin The origin is set so that the robot can be used with a high accuracy. After purchasing the robot, always carry out this step before starting work. The origin must be reset if the combination of robot and controller being used is changed or if the motor is changed causing an encoder area. -
Page 105: Mechanical Stopper Method
5 Maintenance and Inspection 5.6.1 Mechanical stopper method The method for setting the origin with the transportation jig is explained below. This operation is carried out with the T/B. Set the mode of the controller to "MANUAL", and set the T/B [ENABLE] switch to "ENABLE"... - Page 106 5 Maintenance and Inspection <ORIGIN> MECH 5) Input "1" into the J1 axis. Set "0" to other axes. 6) Press the [EXE] key, and display Confirmation SPACE screen. CLOSE <ORIGIN> MECH 7) Press the [F1] key , and the origin position is set CHANGE TO ORIGIN.
-
Page 107: J2 Axis Origin Setting (Mechanical Stopper)
5 Maintenance and Inspection (2) J2 axis origin setting (mechanical stopper) <MENU> 1) Press the [4] key on the menu screen, and dis - play the Origin/Break selection screen. 1.FILE/EDIT 2.RUN 3.PARAM. 4.ORIGIN/BRK 5.SET/INIT. 6.ENHANCED 123 CLOSE 2) With both hands, slowly move the J2 axis in + (plus) direction , and contact the axis against the mechanical stopper. - Page 108 5 Maintenance and Inspection 8) Setting of the origin is completed. <ORIGIN> MECH COMPLETED 9) Refer to Page 111, "5.6.5 Recording the origin data" in this manual, and record the origin data on the origin data seal. CLOSE ◇◆◇ Release the brake ◇◆◇ Do cursor movement into the parenthesis of each axis by the arrow key.
-
Page 109: J3 And J4 Axis Origin Setting (Mechanical Stopper)
5 Maintenance and Inspection (3) J3 and J4 axis origin setting (mechanical stopper) Always perform origin setting of the J3 axis and the J4 axis simultaneously.If the wiring and piping is passed in the shaft, remove the No.2 arm cover U and operate the origin setting. Note) If origin setting is carried out with the No.2 arm cover U installed, the origin may not be set up correctly because the wiring and the piping interfere with the No.2 arm cover U. - Page 110 5 Maintenance and Inspection CAUTION If [F1] key or enable switch of T/B is released, the brakes will be work immediately. 8) Hold the J4 axis with your hand and rotate it slowly to match the alignment marks. *Move the J4 axis with maintaining the condi - tion that the releasing brake of the J3 axis and the J3 axis contact to the mechanical stopper.
- Page 111 5 Maintenance and Inspection <ORIGIN> MECH 14) Press the [F1] key, and the origin position is set up. CHANGE TO ORIGIN. OK? 15) When No.2 arm cover U was removed, installs as before. 16) Setting of the origin is completed. <ORIGIN>...
-
Page 112: Jig Method
5 Maintenance and Inspection 5.6.2 Jig method This method is using the origin setting tool. If the origin setting tool is required, please ask nearby dealer. The reference figure of the origin setting tool is shown in Fig. 5-17. Fig.5-17 : Reference dimension of origin setting tool The procedure of setting the origin with the origin setting tool is shown below. -
Page 113: J1 Axis Origin Setting
5 Maintenance and Inspection (1) J1 axis origin setting <MENU> 1) Press the [4] key on the menu screen, and dis - 1.FILE/EDIT 2.RUN play the Origin/Break selection screen. 3.PARAM. 4.ORIGIN/BRK 5.SET/INIT. 6.ENHANCED 123 CLOSE Select ORIGIN/BRK 2) Move the J1 axis slowly toward the front using both hands. - Page 114 5 Maintenance and Inspection <TOOL> 8) Setting of the origin is completed. J1:( )J2:( )J3:( J4:( )J5:( )J6:( 9) Refer to Page 111, "5.6.5 Recording the origin J7:( )J8:( data" in this manual, and record the origin data CLOSE REL. on the origin data seal.
-
Page 115: J2 Axis Origin Setting
5 Maintenance and Inspection (2) J2 axis origin setting <MENU> 1) Press the [4] key on the menu screen, and dis - 1.FILE/EDIT 2.RUN play the Origin/Break selection screen. 3.PARAM. 4.ORIGIN/BRK 5.SET/INIT. 6.ENHANCED 123 CLOSE 2) Slowly rotate the J2 axis 0 degree with both No.2 arm 第2アーム... -
Page 116: J3 And J4 Axis Origin Setting
5 Maintenance and Inspection <TOOL> 8) Setting of the origin is completed. J1:( )J2:( )J3:( J4:( )J5:( )J6:( 9) Refer to Page 111, "5.6.5 Recording the origin J7:( )J8:( data" in this manual, and record the origin data on the origin data seal. REL. -
Page 117: Abs Origin Method
5 Maintenance and Inspection 5.6.3 ABS origin method When the origin setting of the robot is performed for the first time, this product records the angular position of the origin within one rotation of the encoder as the offset value. If the origin setting is performed according to the ABS origin method, this value is used to suppress variations in the origin setting operations and to reproduce the initial origin position accurately. -
Page 118: Select The T/B
5 Maintenance and Inspection The procedures for setting the origin with the ABS method are explained below. (1) Select the T/B <MENU> 1) Press the [4] key on the menu screen, and dis - 1.FILE/EDIT 2.RUN play the Origin/Break selection screen. 3.PARAM. - Page 119 5 Maintenance and Inspection CAUTION If the ABS marks on axes other than the J4 axis have peeled off, use the jig method to set the origin. The joint coordinates are the same between the ABS origin method and the jig method. Resetting the origin 5-108...
-
Page 120: User Origin Method
5 Maintenance and Inspection 5.6.4 User origin method CAUTION Before using this method, the origin must be set with the other method. The setting method is explained in Page 93, "Table 5-8 : Origin setting method". The procedure for setting the origin with the user origin method is explained below. This operation is carried out with the teaching pendant. - Page 121 5 Maintenance and Inspection <USER> 8) Input "1" into the axis to origin setting. Press J1:( )J2:( )J3:( the [EXE] key, and display Confirmation screen. J4:( )J5:( )J6:( J7:( )J8:( REL. CLOSE → 9) Press the [F1] key, and the origin position is set <ORIGIN>...
-
Page 122: Recording The Origin Data
5 Maintenance and Inspection 5.6.5 Recording the origin data When the origin has been set with the jig method, record that origin data on the origin data label. With this, the ori - gin can be set with the origin data input method the next time. Confirm the origin data on the teaching pendant screen (origin data input screen). -
Page 123: 6Appendix
6Appendix 6 Appendix Appendix 1 : Configuration flag The configuration flag indicates the robot posture. For the 6-axis type robot, the robot hand end is saved with the position data configured of X, Y, Z, A, B and C. However, even with the same position data, there are several postures that the robot can change to. The posture is expressed by this configuration flag, and the posture is saved with FL1 in the position constant (X, Y, Z, A, B, C) (FL1, FL2). - Page 124 6Appendix Configuration flag Appendix-113...
- Page 126 HEAD OFFICE: TOKYO BUILDING, 2-7-3, MARUNOUCHI, CHIYODA-KU, TOKYO 100-8310, JAPAN NAGOYA WORKS: 5-1-14, YADA-MINAMI, HIGASHI-KU NAGOYA 461-8670, JAPAN Authorised representative: Mitsubishi Electric Europe B.V. FA - European Business Group Mitsubishi-Electric-Platz 1, D-40882 Ratingen, Germany Tel: +49(0)2102-4860 Oct. 2020 MEE Printed in Japan on recycled paper.
Need help?
Do you have a question about the RH-1FHR Series and is the answer not in the manual?
Questions and answers