
Related Manuals for Mitsubishi Electric RV-35FR Series


Summary of Contents for Mitsubishi Electric RV-35FR Series
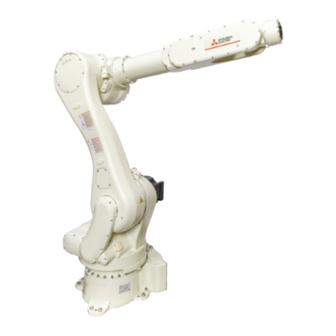
- Page 1 RV-35FR/50FR/80FR Series INSTRUCTION MANUAL ROBOT ARM SETUP & MAINTENANCE RV-35FR RV-35FRM RV-50FR RV-50FRM RV-80FR RV-80FRM...
-
Page 3: Safety Precautions
SAFETY PRECAUTIONS Read the separate Safety Manual thoroughly before using this product. Take precautions as necessary. Before using this product, please read this manual and the relevant manuals carefully and pay full attention to safety to handle the product correctly. The precautions given in this manual are concerned with this product only. - Page 4 ● All teaching work must be carried out by an operator who has received special training. (This also applies to maintenance work with the power source turned ON.) Enforcement of safety training ● For teaching work, prepare a work plan related to the methods and procedures of operating the robot, and to the measures to be taken when an error occurs or when restarting.
- Page 5 B. This shows precaution points given in the "Safety Manual". For details, please read the text of the "Safety Manual". ● When automatic operation of the robot is performed using multiple control devices (GOT, programmable controller, push-button switch), the interlocking of operation rights of the devices, etc. must be designed by the customer.
- Page 6 ● Securely install the hand and tool, and securely grasp the workpiece. Failure to observe this could lead to personal injuries or damage if the object comes off or flies off during operation. ● Securely ground the robot and controller. Failure to observe this could lead to malfunctioning by noise or to electric shock accidents.
- Page 7 ● Warning labels for electric shock, pinch points, and hot areas are affixed to the corresponding parts of the arm. Check the dangerous areas in advance. Refer to the following figure for the position of the labels. : Electric shock hazard : Hot area : Pinch point : No stepping...
- Page 8 ● Use the robot within the environment given in the specifications. Failure to do so could lead to a decrease in reliability or faults. (Temperature, humidity, atmosphere, noise environment, etc.) ● Transport the robot with the designated transportation posture. Transporting the robot in a non-designated posture could lead to personal injuries or faults from dropping or tipping over.
- Page 9 (VPNs), and antivirus solutions. Mitsubishi Electric shall have no responsibility or liability for any problems involving robot trouble and system trouble by unauthorized access, DoS attacks, computer viruses, and other cyberattacks.
-
Page 10: Introduction
INTRODUCTION Thank you for purchasing Mitsubishi Electric MELFA industrial robots. This manual explains unpacking, installation, maintenance, and inspection methods of the robot. Before operating this robot, be sure to read and fully understand the contents of this manual. Information on special handling is also included in this manual as much as possible. However, do not handle the product in ways other than those described in the manual. -
Page 11: Table Of Contents
CONTENTS SAFETY PRECAUTIONS ..............1 INTRODUCTION . - Page 12 Resetting the origin..............80 Origin data input method .
-
Page 13: Chapter 1 Before Use
BEFORE USE This chapter explains how to use this manual. It also contains information on safety and the basic terms used in this manual. Handling and operation of the teaching pendant (T/B) described in instruction manuals are based on the R32TB. If using a T/ B other than the R32TB, refer to the instruction manual that comes with the T/B. -
Page 14: Chapter 2 Unpacking To Installation
UNPACKING TO INSTALLATION Items in package This product includes the robot arm-related items shown in the following table as standard. Check that all the items are present. Users who have purchased optional products should refer to the following manual: Standard Specifications (BFP-A3779) Standard configuration Item Model... -
Page 15: Installation
Installation Install the robot with a safety fence or enclosure around it. Otherwise, operators may be injured due to unintended access to the robot. Before transporting the packaged robot using a forklift, check that no one is around the robot to prevent anyone from becoming trapped when the robot falls. Transportation procedure Transporting jigs and eye bolt are attached to the robot from the factory. - Page 16 *3 Check that the anti-rotation sling is long enough, and support the weight of the robot using the wire*2. If selecting a 1000mm long wire, use a 4000mm or longer sling with a load bearing of 0.6t or more. The following shows an example of a usable sling. Anti-rotation sling (model): S III E35X4.5M, Manufacturer: TORAY *4 When using a crane for transportation, select one with a vertical working range of 3m or more from the floor.
-
Page 17: Installation Procedure
Installation procedure The installation procedure of the robot arm is shown below. Installation screw 8-M16X45 φ26 φ18 2-φ13H9 reamer 8-18φinstallation screw Base installation (for positioning) dimensions 210±0.1 hole (M16 screw hole) φ0.06 Bottom view Remove the transporting jigs before installing the robot on the surface. The removed transporting jigs are required when relocating the robot. -
Page 18: Grounding Procedure
Grounding procedure Grounding methods There are three grounding methods as shown in the figure below, but the exclusive grounding (shown in (a) in the figure below) should be used for the robot arm and controller when possible. For details on the controller grounding, refer to the following manual: Controller setup, basic operation, and maintenance (BFP-A3783) Ground the robot with a ground resistance of 100 ohms or less. -
Page 19: Connecting The Controller
Connecting the controller Back of the controller Back of the robot arm base Machine cable ports Machine cable ports Connecting the machine cable For information on how to install the robot controller, refer to the following manual: Controller setup, basic operation, and maintenance (BFP-A3783) After installing the robot controller, perform wiring using the steps on the following page: Page 18 Connection of robot arm and machine cable 2 UNPACKING TO INSTALLATION... - Page 20 Connection of robot arm and machine cable • When attaching or removing the machine cable connector to or from the robot arm, prevent your fingers from being caught in the latches of the machine cable connector. When removing the machine cable, hold the connector and pull it out. Pulling the cable may cause it to come off or break. •...
- Page 21 Connect the connector. After the connection, fix the Normal environment specifications connector securely with the lock levers. The fixing Lock lever procedure differs depending on the normal environment specifications or oil mist specifications. • For normal environment specifications Engage the lock levers of the port on the robot with the projections of the connector to fix the connector securely.
- Page 22 Connecting a machine cable to the controller • When connecting and disconnecting the connector, be careful not to get your hand pinched. • When connecting or disconnecting the connector, keep it parallel to the port. If one side is heavily loaded, a connector pin may be damaged, resulting in poor contact.
-
Page 23: Checking The Operation
Checking the operation When shutting off the controller power, prevent dangerous situations such as due to a drop of the workpiece. To keep the hand open or closed during power shut-off, use methods such as using double solenoid type if necessary. At power-on, the settings of the parameter (HANDINIT) that specifies the initial state of the hand at power-on are applied. -
Page 24: Installing The Teaching Pendant (T/B)
Installing the teaching pendant (T/B) • Note that forcibly pulling or excessively bending the T/B cable may result in disconnection of the cable or damage to the connector. When installing or removing the T/B, hold the connector to protect the cable from stress. •... -
Page 25: Turning On The Control Power
Turning on the control power Check that there are no operators near the robot before turning on the power. Turn on the power switch on the front of the controller. Error C0330 (Undefined hand condition) will occur. Press the reset button on the controller's operation panel to clear the error. - Page 26 • Operation using the T/B Be sure to set the controller mode to "MANUAL" before setting the [ENABLE] switch of the T/B to "Enabled". When the T/B is enabled, operations can be performed only from the T/B, and cannot be performed from the controller or using external signals.
- Page 27 JOINT jog operation Each axis moves independently. J4 axis J3 axis J5 axis J6 axis J2 axis J1 axis XYZ jog operation While maintaining the flange surface posture, the robot arm moves straight along the XYZ coordinate system. While maintaining the position of the tool center point, the flange surface direction changes.
- Page 28 TOOL jog operation While maintaining the flange surface posture, the robot arm moves straight along the tool coordinate system. Also, while maintaining the position of the tool center point, the flange surface direction changes. Tool length Tool center point 3-axis XYZ jog operation The robot arm moves straight along the XYZ coordinate system.
- Page 29 CYLINDER jog operation Assuming that the current position is on an arc centering on the Z axis, the robot arm moves on the arc, in the radially inward or outward direction, or vertically. At this time, the flange surface direction does not change. While maintaining the position of the tool center point, the Tool length flange surface direction changes.
- Page 30 JOINT jog operation • Selecting joint jog mode Press the [JOG] key to display the jog screen. ("JOG" will appear at the bottom of the screen.) Check that "JOINT" (jog mode) is displayed at the top of the screen. If a different jog mode is displayed, press the function key corresponding to "JOINT".
- Page 31 • J3 axis jog operation When the [+Z (J3)] key is pressed, the J3 axis will rotate in the plus direction. When the [-Z (J3)] key is pressed, the J3 axis will rotate in J3 axis rotation the minus direction. •...
- Page 32 XYZ jog operation • Selecting XYZ jog mode Press the [JOG] key to display the jog screen. ("JOG" will appear at the bottom of the screen.) Check that "XYZ" (jog mode) is displayed at the top of the screen. If a different jog mode is displayed, press the function key corresponding to "XYZ".
- Page 33 • Changing the flange surface direction The position of the tool center point does not change. When the [+A (J4)] key is pressed, the robot arm will rotate in the plus direction around the X axis. When the [-A (J4)] key is pressed, the robot arm will rotate in the minus direction.
- Page 34 • Moving the robot arm along the tool coordinate system The flange direction does not change. When the [+X (J1)] key is pressed, the robot arm will move along the X axis in the plus direction of the tool coordinate system.
- Page 35 • Changing the flange surface direction The position of the tool center point does not change. When the [+A (J4)] key is pressed, the robot arm will rotate in the plus direction around the X axis of the tool coordinate system.
- Page 36 3-axis XYZ jog operation • Selecting 3-axis XYZ jog mode Press the [JOG] key to display the jog screen. ("JOG" will appear at the bottom of the screen.) Check that "3-XYZ" (jog mode) is displayed at the top of the screen. If a different jog mode is displayed, press the function key corresponding to "3-XYZ".
- Page 37 • Changing the flange surface direction The wrist posture can be changed while maintaining the flange position. When the [+A (J4)] key is pressed, the J4 axis will rotate in J4 axis rotation the plus direction. J5 axis rotation At this time, axes other than the J5 and J6 axes will also move to maintain the flange position.
- Page 38 CYLINDER jog operation • Selecting cylinder jog mode Press the [JOG] key to display the jog screen. ("JOG" will appear at the bottom of the screen.) Check that "CYLINDER" (jog mode) is displayed at the top of the screen. If a different jog mode is displayed, press the function key corresponding to "CYLINDER".
- Page 39 • Changing the flange surface direction The position of the tool center point does not change. This is the same as the A, B, and C axis XYZ jog operation. When the [+A (J4)] key is pressed, the robot arm will rotate in the plus direction around the X axis.
- Page 40 WORK jog operation Be sure to set a workpiece coordinate system before performing WORK jog operation. The workpiece coordinate system refers to the coordinate system tailored to the workpiece (or workbench) for work. Performing this jog operation can move the robot along the workpiece (or workbench), which facilitates teaching work. Up to eight workpiece coordinate systems can be set up.
- Page 41 Specify workpiece coordinates. Press the [FUNCTION] key to display the "W. JUMP" function, then press the function key corresponding to "W. JUMP" ([F1]). Press any of the numeric keys [1] to [8] to specify a workpiece coordinate system for teaching. The coordinates of the specified workpiece coordinate system will be displayed.
- Page 42 Set (define) workpiece coordinates. Pressing the function key corresponding to "DEFINE" ([F4]) will calculate the workpiece coordinate system from the three taught points, and display the results. An alarm occurs when the workpiece coordinate system cannot be set correctly (the three points line up in a straight line or two points overlap).
- Page 43 • Checking and selecting a workpiece coordinate system Check that the workpiece coordinate system selected is for WORK jog operation. The number of the currently selected workpiece coordinate system (any number from W1 to W8, eight systems in total) is displayed in the top right of the screen.
- Page 44 • Moving the tool center point along the workpiece coordinate system The flange direction does not change. Moves the tool center point linearly along the workpiece coordinate system. Tool length When the [+X (J1)] key is pressed, the tool center point will move along the X axis (Xw) in the plus direction of the workpiece coordinate system.
- Page 45 Ex-T jog mode The tool center point rotates around each axis of the workpiece coordinate system (Ex-T coordinate system). When the [+A (J4)] or [-A (J4)] key is pressed, the tool center Tool center point point will rotate around the Xw axis. When the [+B (J5)] or [-B (J5)] key is pressed, the tool center point will rotate around the Yw axis.
-
Page 46: Setting Hand Parameters
• When the robot is in the transportation posture There are directions in which linear movement is not possible from the transportation posture. In this case, the buzzer of the T/B will sound and the robot will not move. Move the robot to a position where linear movement is possible, and carry out XYZ jog by referring to the following page: Page 28 JOINT jog operation •... -
Page 47: Opening And Closing The Hand
Opening and closing the hand • In the initial parameter settings, hands are in the "open" state upon power-on. Keep in mind that workpieces may drop upon power-on if "open" is set for the initial hand condition. For the initial hand condition settings, refer to the following manual: Detailed explanations of functions and operations (BFP-A3478) •... -
Page 48: Chapter 3 Installing Option Devices
INSTALLING OPTION DEVICES Installing operating range change stoppers The operating range can be limited by using the following two stoppers together: this optional stopper and the standard stopper pre-installed on the robot. The operating range of the J1 axis is limited by installing mechanical stoppers on the robot arm and changing the relevant controller parameter setting. - Page 49 *1 Good example: When the limit angles are +60 and -40 60 - (-40) = 100 The combination is possible as the difference is 100. Bad example: When the limit angles are -40 and -20 -40 - (-20) = -20 The combination is not possible as the difference is 20 (absolute value). Installation position: +60°...
- Page 50 Limit angle () +100 +120 +140 +160 -100 -120 -140 -160 When changing the operating range, reposition the stoppers on the robot arm and change the parameter setting. For details, refer to the following manual: Detailed explanations of functions and operations (BFP-A3478) 3 INSTALLING OPTION DEVICES 3.1 Installing operating range change stoppers...
- Page 51 Installation procedure As a safety measure, turn off the control power of the robot controller before installing this option. If installing a stopper just above the CONBOX, change the position to avoid interference of the stopper before turning off the power. Securely tighten the bolts with a torque of 240N•m.
- Page 52 Robot front view Stopper Stopper M16 × 40 bolt (Loctite #243 applied) View Y Hexagon wrench Robot side view Stopper installation position A Robot front view Stopper Stopper initial installation installation position position B (Operating range: ±180°) Cross section Z-Z *1 Purchase Loctite #243 from the following supplier: Henkel Japan Ltd.
-
Page 53: Installing The Hand Input Cable
Installing the hand input cable Connect the hand input cable to the port on the elbow cover. The installation procedure of the hand input cable is shown below. Power off the controller before attempting these steps. Hand input Turn it until it snaps into connector port (HC) place. -
Page 54: Installing The Hand Output Cable
Installing the hand output cable Connect the hand output cable to the port on the elbow cover. The installation procedure of the hand output cable is shown below. Power off the controller before attempting these steps. Hand output Turn it until it snaps into connector port (GR) place. -
Page 55: Installing The Hand Ethernet Cable
Installing the hand Ethernet cable Remove the No. 2 arm cover U, then connect the hand Ethernet cable to the LAN cable inside the No. 2 arm. The installation procedure of the hand Ethernet cable is shown below. Power off the controller before attempting these steps. Remove the No. - Page 56 House the connector and cable in the arm. Do not forcibly tuck them into the arm as it may cause disconnection. House the connector and cable in a space next to the motor. Attach the No. 2 arm cover U that comes with the hand Ethernet cable.
-
Page 57: Chapter 4 Basic Operations
BASIC OPERATIONS For information on basic operation from programming to automatic operation, refer to the following manual: Controller setup, basic operation, and maintenance (BFP-A3783) 4 BASIC OPERATIONS... -
Page 58: Chapter 5 Maintenance And Inspection
MAINTENANCE AND INSPECTION This chapter explains maintenance and inspection to use the robot for a long time without trouble. The types and replacement methods of consumable parts are also explained. Types of maintenance and inspection works Maintenance and inspection are divided into daily inspection and periodic inspection. Be sure to carry out these inspections to prevent failure, prolong the service life of products, and ensure safety. -
Page 59: Inspection Items
Inspection items The following shows what inspections should be performed on the robot arm. Record the inspection date and the name of the person in charge on the inspection sheet. Additionally, inspect the controller by referring to "Maintenance and Inspection" in the following manual: Controller setup, basic operation, and maintenance (BFP-A3783) Daily inspection The following table shows the procedure of daily inspections and what inspections should be performed. -
Page 60: Periodic Inspection
Periodic inspection This section provides information on what inspections should be performed periodically and when to do them. Inspection items Carry out the periodic inspections given in the table below. Schedule Inspection items (details) Remedies 300 hours Are any of the bolts or screws on the robot arm loose? Securely tighten them. - Page 61 Schedule The following table shows the schedule for periodic inspections. Perform periodic inspections as appropriate according to the following table. Operation time Inspection schedule Types of periodic inspection works (hours) (months) 15 hours 8 hours Inspection Motor Timing Internal cables Battery Grease per day...
-
Page 62: Maintenance And Inspection Procedures
Maintenance and inspection procedures The origin of the mechanical system may deviate when this work is carried out. "Review of position data" and "re-teaching" may be required. The procedures for carrying out periodic maintenance and inspection are described below. Read the procedures thoroughly and follow the instructions. -
Page 63: Installing/Removing Covers
to rotate the J4 axis. The rotation of the J5 axis motor 12) in the No. 2 arm is conveyed to the J5 axis reduction gears 14) via the J5 axis gears 13) to rotate the J5 axis. The rotation of the J6 axis motor 15) in the No. 2 arm is conveyed to the J6 axis reduction gears 18) via the timing belt 16) and J6 axis gears 17) to rotate the J6 axis. -
Page 64: Replacing The Gasket
After maintenance or inspection, reattach the cover in reverse order. Tighten the screws with the torque shown in the list of covers and installation screws. • As the cover has a gasket, the cover may be difficult to remove. When inserting a tool into the space between the cover and the robot or taking some other means to remove the cover, take care not to damage the gasket and cover installation surface. -
Page 65: Screw Tightening Inspection
Screw tightening inspection Inspect whether the screws and nuts fixing each part are loose. If screws or nuts are loose, tighten them again. It is essential to tighten the following screws. • Servo motor and encoder installation screws • Motor plate installation screws •... -
Page 66: Inspection And Replacement Of The Timing Belt
Inspection and replacement of the timing belt When the timing belt has to be removed for repair or some other reason, measure the tension before removing the belt. When the belt is reinstalled, the tension must be the same as the one measured before removal. Otherwise, the life of the belt and relevant parts may be shortened. - Page 67 Timing belt replacement timing • Initial wear will occur due to manufacturing of timing belts. Abrasion powder may remain adhered to the inside of the cover after approx. 300 hours of robot operation, but this is not a fault. • When the belt is replaced, the origin of the mechanical system may deviate. After the replacement, be sure to reset the origin. The service life of the timing belt is greatly affected by the robot working conditions, and the replacement timing cannot be determined in general.
- Page 68 Timing belt tension measurement Rotate the timing pulley A in one direction while visually checking its position, and measure the belt tension at every 90 degrees, four times in total. The average of the four measurements is used as the timing belt tension value. The timing belt must be pulled tight before the tension is measured.
- Page 69 Inspection and replacement of the J6 timing belt 2) Timing belt 5) Timing pulley B 4) Timing pulley A (joint side) (motor side) Motor plate 3) Tension adjustment screw 1) Motor plate installation No. 2 arm cover L screws ■Inspecting the J6 axis timing belt When adjusting the belt tension twice or more, contact the dealer.
- Page 70 • Measuring tension based on the sagging amount The tension is correct if load F falls within the range shown in the figure below when the belt is pressed so that the sagging amount in the middle of the belt is δ. Load F Sagging amount δ...
- Page 71 When the maintenance forecast function is enabled, reset the accumulated data about the belt. To reset the data, use the RT ToolBox3 dedicated screen or the parameter MFBRST. For information on how to operate the dedicated screen, refer to the following manual (option): RT ToolBox3 / RT ToolBox3 mini User's Manual Refer to the following manual for the parameter MFBRST.
-
Page 72: Inspection On Internal Cables And Air Hoses
Inspection on internal cables and air hoses Turn off the control power before inspecting the internal cables and air hoses. Inspect the areas indicated by numbers 1 to 4 in the figure below. If any abnormalities (such as wear of a cable or air hose) are found during inspection, contact your dealer. Remove the cover and inspect whether the connectors of cables are loose. -
Page 73: Grease Replacement
Grease replacement Be sure to remove the drain plug before replacing grease. Failure to do so may apply internal pressure, causing damage to the seal, or grease to flow into the motor. • Use the specified grease. • When replacing grease, put the specified amount of grease (do not put too much grease). •... - Page 74 Grease inlets and specifications The following figures show the positions of grease inlets and outlets. The following table shows the grease specifications of each axis. The numbers in the table correspond to those shown at the inlets of each axis in the figure below. Grease inlet Grease inlet type Lubrication oil...
- Page 75 • Inlet and outlet on the J3 axis 3) Inlet (R1/8) Outlet (R1/8) • Inlet and outlet on the J4 axis 4) Inlet (R1/8) Outlet (R1/8) • Inlets and outlets on the J5 and J6 axes 5) J5 axis inlet (R1/8) 6) J6 axis inlet (R1/8) J6 axis outlet (R1/8) J5 axis outlet (R1/8)
- Page 76 ■How to replace grease of the J1 axis Power off the robot. Remove the plug on the inlet, then attach a grease nipple. Place a grease receiving pan, and remove the drain plug. Inject grease into the inlet until the outlet drains clean grease only. Power on the robot and reciprocate the J1 axis slowly several times in the plus and minus directions using jog operation with the T/B to drain old grease.
- Page 77 ■How to replace grease of the J4 axis Move the robot to position the inlet upward and the outlet downward, then turn off the power. Remove the plug on the inlet, then attach a grease nipple. Place a grease receiving pan, and remove the drain plug. Inject grease into the inlet until the outlet drains clean grease only.
-
Page 78: Replacing The Backup Battery
Replacing the backup battery • If error No. 7500 or 112n (n: axis number) occurs, backup data is not guaranteed. In this case, the origin needs to be set. • If error No. 7450 occurs, backup data is not guaranteed. In this case, programs or other data need to be created again. The robot uses a backup battery to store encoder position data at power shut-off as an absolute encoder is used for position detection. - Page 79 Replacing the battery of the robot arm • Do not use batteries other than the specified one. • Do not charge, disassemble, modify, or heat the battery. • Do not throw the battery in fire or water. • Do not use batteries that are subjected to shock or have a damaged surface due to drop, etc. Otherwise, a short circuit may occur internally. •...
-
Page 80: About Overhaul
About overhaul Robots which have been in operation for an extended period of time can suffer from wear and other forms of deterioration. In regard to such robots, we define overhaul as an operation to replace parts running out of specified service life or other parts which have been damaged (such as covers), so that the robots can operate continuously. -
Page 81: Maintenance Parts
Maintenance parts Some Mitsubishi Electric-designated parts differ from the maker's standard parts. Thus, check the part name, robot arm and controller serial number, and purchase the parts from the dealer. The parts that need to be replaced periodically as consumable parts are shown in the robot arm consumable parts list, and the spare parts that may be required during repair are shown in the robot arm spare parts list. -
Page 82: Resetting The Origin
Resetting the origin • The ABS origin method cannot be used to reset the origin when the robot arm mechanically deviates (for example caused by replacement of the reduction gear, motor, or timing belt). To reset the origin, use the jig method or user origin method. •... -
Page 83: Origin Data Input Method
Origin data input method Always install or remove the cover with the controller control power turned off. Otherwise, the robot will operate due to careless operation, causing property damage or bodily injury. Checking origin data The origin data to be input is found on the origin data history table shown in the figure below. The origin data history table is affixed to the back of the shoulder cover U. - Page 84 Selecting the origin setting method The following shows T/B screen images, keys on the T/B, and operation procedure. Press the [4] key on the menu screen to display the ORIGIN/BRAKE screen. Press the [1] key on the ORIGIN/BRAKE screen to display the origin setting method selection screen.
- Page 85 Input the D value "V!%S29". • Inputting "V" Press the [CHARACTER] key to select character input mode ("ABC" is displayed at the bottom of the screen). Press the [TUV] key three times. "V" will appear. • Inputting "!" Press the [%] key four times. "!" will appear. Press the [] key once to move the cursor, then press the [%] key once.
- Page 86 • Moving the cursor Press the arrow keys ([], [], [], or []). • Inputting characters and space Characters at the bottom right of keys can be input in character input mode. To select the mode, display "ABC" at the bottom of the screen by pressing the [CHARACTER] key. Three characters appear one after another each time the character key is pressed.
-
Page 87: Jig Method
Jig method This method uses jigs to set the origin. If an origin setting jig is required, contact your local sales representative or the dealer. The figures of origin setting jigs are shown in the following table as a reference. Origin setting jigs Name Quantity... - Page 88 Set each axis to the origin position. There are two positioning methods: jog feeding and manual setting by releasing the brake. It is recommended to use jog feeding because the arm of this robot falls under its own weight when the brake is released. Operation using jog feed is explained here.
- Page 89 Press the [F1] key. The origin posture will be set. The origin settings are complete. Refer to the following page to record the origin data on the origin data label. Page 97 Recording origin data • Specifying an axis for the origin settings To move the cursor to the parentheses of each axis on each origin setting screen, use the arrow keys ([] and []).
- Page 90 Press the [3] key to select the jig method. Press the [] or [] key to move the cursor to the parentheses of J2, then press the [1] key. Set "0" for the other axes. Press the [EXE] key. A confirmation screen will appear. Press the [F1] key.
- Page 91 Press the [4] key on the menu screen to select the ORIGIN/BRAKE screen. When pressing the [4] key, ensure that number input mode is selected ("123" is displayed in the middle at the bottom of the screen). Press the [1] key to select the origin setting menu screen.
- Page 92 J4 axis origin setting (jig) Move the J4 axis in the minus direction by 5 or more beforehand. Remove the cap covering the pin hole. Apply grease to origin setting jigs 1 thinly, and attach them to the pin holes on the J4 axis as shown in the figure on the left.
- Page 93 The origin settings are complete. Refer to the following page to record the origin data on the origin data label. Page 97 Recording origin data • Specifying an axis for the origin settings To move the cursor to the parentheses of each axis on each origin setting screen, use the arrow keys ([] and []).
- Page 94 Then, align the J6 axis. Since the origins of the J5 and J6 axes are set at a time, be careful not to move the J5 axis. Move the J6 axis in the minus direction by 5 or more beforehand. Origin setting jig 5 Attach origin setting jigs 4 and 5 as shown in the figure on the left.
- Page 95 The origin settings are complete. Refer to the following page to record the origin data on the origin data label. Page 97 Recording origin data • Specifying an axis for the origin settings To move the cursor to the parentheses of each axis on each origin setting screen, use the arrow keys ([] and []).
-
Page 96: Abs Origin Method
ABS origin method When the origin of the robot is set for the first time, this product records the angular position of the origin within one rotation of the encoder as the offset value. If the origin is set using the ABS origin method, this value is used to suppress variations in the origin setting work and to reproduce the initial origin position accurately. - Page 97 Origin setting procedure After the origin has been set, if the joint coordinates of the ABS mark position deviate from the coordinates of the ABS origin by 2mm or more, align the tips of the ABS marks and set the origin using the ABS origin method again. Perform the following operations while lightly holding down the 3-position enable switch on the T/B.
-
Page 98: User Origin Method
User origin method • Before using this method, set the origin using another method. Refer to the following page for information on other origin setting methods. Page 80 Resetting the origin • Place a mark or the like at the user origin position. This makes it possible to position all the axes using jog operation when the origin is set using this method again. -
Page 99: Recording Origin Data
Press the [F1] key. The origin posture will be set. Recording origin data Check origin data on the origin data input screen of the T/B. The origin data label is affixed to the back of the shoulder cover U on the robot arm. The methods of operating the T/B and installing/removing the cover for checking origin data are the same as when setting the origin using the origin data input method. -
Page 100: How To Release The Brake In An Emergency
How to release the brake in an emergency • This option is used for the RV-35FR/50FR/80FR series only. Do not use it for other models. • Use this product in emergency cases only, for example, when the robot cannot be moved using the controller. •... -
Page 101: Appendix
APPENDIX Appendix 1 Configuration flag The configuration flag indicates the robot posture. The robot uses position data composed of X, Y, Z, A, B, and C to save the position of the tip of the hand. However, even with the same position data, there are several postures that the robot can change to. The posture is expressed by this configuration flag, and the posture is saved with FL1 in the position constant (X, Y, Z, A, B, C) (FL1, FL2). -
Page 102: Nonflip/Flip
NONFLIP/FLIP This indicates which direction the flange faces in relation to the plane that runs through the center of rotation of both the J4 and J5 axes. FLIP J4 axis FL1 (flag1) &B0000 0000 J6 axis ↑ flange surface 1/0=NONFLIP/FLIP NON FLIP Note: &B indicates... -
Page 103: Revisions
Amended other sections This manual confers no industrial property rights or any rights of any other kind, nor does it confer any patent licenses. Mitsubishi Electric Corporation cannot be held responsible for any problems involving industrial property rights which may occur as a result of using the contents noted in this manual. -
Page 104: Trademarks
TRADEMARKS No part of this manual may be reproduced by any means or in any form, without prior consent from Mitsubishi Electric. The details of this manual are subject to change without notice. Specifications are based on in-house standardized tests. - Page 106 BFP-A3781-B(2404)MEE HEAD OFFICE: TOKYO BLDG., 2-7-3, MARUNOUCHI, CHIYODA-KU, TOKYO 100-8310, JAPAN NAGOYA WORKS: 1-14, YADA-MINAMI 5-CHOME, HIGASHI-KU, NAGOYA 461-8670, JAPAN Specifications subject to change without notice.
Need help?
Do you have a question about the RV-35FR Series and is the answer not in the manual?
Questions and answers