
Related Manuals for D-Link DVG-3004S


Summary of Contents for D-Link DVG-3004S
-
Page 2: Table Of Contents
STEPS IN CONFIGURATION ...2 1. START UP...3 1.1 I ...3 NTRODUCTION 1.2 F EATURES AND SPECIFICATION 1.3 A CCESSORIES AND EQUIPMENT 1.4 A ...7 PPEARANCE 2. HOW TO SETUP AND CONNECT BASICALLY...9 2.1 S ...9 YSTEM EQUIREMENT 2.2 IP E NVIRONMENT ETTING 2.2.1 For Windows 2000/NT ...9... - Page 3 D-Link DVG-3004S User Manual 4.1 H YPER ERMINAL ETTING 4.2 C ...54 OMMAND 4.2.1 [help] ...54 4.2.2 [quit] ...55 4.2.3 [debug]...55 4.2.4 [reboot] ...55 4.2.5 [flash]...56 4.2.6 [commit]...56 4.2.7 [ifaddr]...57 4.2.8 [time] ...58 4.2.9 [ping] ...58 4.2.10 [sysconf]...59 4.2.11 [sip] ...61 4.2.12 [security]...62...
-
Page 4: Steps In Configuration
D-Link DVG-3004S User Manual Steps in configuration To check out the peripheral equipments and STEP 1 understand the feature of this gateway. Please Start Up read this step very carefully before starting the configuring. Connecting the gateway and computer to start configuring by WEB GUI. -
Page 5: Start Up
1. Start Up 1.1 Introduction The DVG-3004S provides voice service over IP network with SIP protocol. By connecting to your existing ADSL or cable modem service, which allows the use of a single, network for voice and fax services with consequent saving in network infrastructure and greatly reduced telephone charges. -
Page 6: Features And Specification
D-Link DVG-3004S User Manual 1.2 Features and specification Features IETF RFC 3261 Automatically Dial Path Selection (IP or PSTN) PSTN Line switch to telephone set when power is failure PPPoE support Behind NAT router or IP sharing device DNS server inquiry Provide Peer-to-Peer Mode (Non SIP Proxy needed) selection E.164 Dial Plan... - Page 7 D-Link DVG-3004S User Manual PSTN polarity reversal detection Disconnect tone detection Asking ping function with the incoming calls from PSTN side Record and analyze the Tone from PSTN side Environmental Operation temp:0°C to 40°C Humidity: 10% to 90% (Non-condensing)
-
Page 8: Accessories And Equipment
D-Link DVG-3004S User Manual 1.3 Accessories and equipment The voice gateway in 4 FXO ports models and only one RJ-45 connector (WAN). The AC adapter. The CD of user manual. The connection cable in RS-232 interface. -
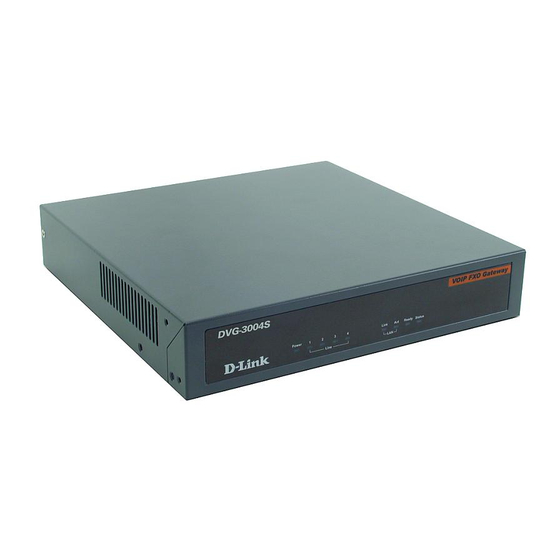
Page 9: Appearance
D-Link DVG-3004S User Manual 1.4 Appearance Front panel: The LED lights provide related system messages of the gateway. Power: Light on means Gateway is power on, and vice versa. LINE: Light on means the line is in use (off-hook), and vice versa. - Page 10 D-Link DVG-3004S User Manual 10/100base-T. The pin-out is as following: 2. COM: RS232 console port (DB-9pin male connector) Note: use straightforward cable to connect to your computer. Pin Name Dir 3. LINE: RJ-11 connector, FXO interface is for connecting the extension line of PABX or PSTN Line.
-
Page 11: How To Setup And Connect Basically
D-Link DVG-3004S User Manual 2. How to Setup and connect basically 2.1 System Requirement 1. One PC (a) Pentium 100 or above, 64 RAM, Windows 98 or above. (b) Ethernet card or COM port 2. One standard straightforward RS-232 cable (female connector to Gateway side). - Page 12 D-Link DVG-3004S User Manual Figure 2.1: Network Configuration Select the Property of the LAN card. Setup the ip address, subnet mask and default gateway as below: Figure 2.2: Configure the network Click OK after you finished the network setup.
-
Page 13: Network Configurations In Your Gateway
D-Link DVG-3004S User Manual The default ip address, netmask and default gateway address of the gateway is 10.1.1.3, 255.0.0.0, 10.1.1.254. 2.3 Network configurations in your gateway Key in the ip address of the gateway (http://10.1.1.3) with the browser Figure 2.3: WEB Browser After key in the ip address, you have to enter the user name and password to enter the WEB configuration. - Page 14 D-Link DVG-3004S User Manual Figure 2.4: Login the username and password You will enter the main page of the configuration after key in the login name and password correctly: Figure 2.5: The main WEB configuration Press the Network Interface to configure the networking of your gateway:...
-
Page 15: Static Ip Address
D-Link DVG-3004S User Manual Figure 2.6: The Network Interface 2.3.1 Static ip address Please get the correct ip address, netmask and default gateway address from your ISP first. Press the OK button if you finished. Figure 2.7: Configure the static ip address... - Page 16 D-Link DVG-3004S User Manual Press the commit if you finish the configuration. Press the reboot if you want the configuration executed. Figure 2.8: Commit the data Figure 2.9: Reboot the system...
-
Page 17: Dhcp Mode
D-Link DVG-3004S User Manual 2.3.2 DHCP mode Enable the DHCP if you are using the cable modem or DHCP server. Figure 2.10: Enable the DHCP function Please commit the data and reboot the machine after you enable the DHCP function. - Page 18 D-Link DVG-3004S User Manual Figure 2.11: Switch to PPPoE function...
-
Page 19: Making A Voip Call
D-Link DVG-3004S User Manual Enter the Login account and password. Press the “OK” button if the configuration is finished. (see figure 2.12) Figure 2.12: Configure the info about PPPoE Please commit the data and reboot the machine after you finished the configuration of PPPoE. - Page 20 D-Link DVG-3004S User Manual Define the port numbers whatever you like. Press the “OK” button if the configuration is all finished. (see figure 2.13) Figure 2.13: Configure the Peer-to-Peer mode...
- Page 21 D-Link DVG-3004S User Manual Enter the Phone Book configuration table and configure the name, ip address and phone number of the destination. (see figure 2.14) Figure 2.14: Phone Book 【Example】...
- Page 22 D-Link DVG-3004S User Manual This is the first record of Phone Book. So the index is 1 The name of the destination: test The E164 number (phone number) of the destination: 123 The ip address of the destination: 10.1.1.100 Press the “Add Data” button when you finished, and the new table will display on the first index if you press the Phone Book configuration button.
-
Page 23: Configure The Gateway Into The Proxy Mode
D-Link DVG-3004S User Manual Disable Disable ※ X – Do not enter any numbers Please make sure about that the FXO port was connected with the PSTN line or the extension line of the PABX before you start to make a voip call. - Page 24 D-Link DVG-3004S User Manual Press the OK button that is on the bottom of this page to save the configuration. Switch to the Security Config page and put the user account and password in the correct table. Please get this info from your ITSP. Press the OK button if the configuration is finished.
-
Page 25: Advance Configurations
D-Link DVG-3004S User Manual 3. Advance Configurations There are too many advanced commands for the advanced users. The following chapters are based on the application layer. Please get the info what you need. If you need the command, please watching the chapter of Command Line Interface. - Page 26 D-Link DVG-3004S User Manual Figure 3.1: Network Interface IP Address – Define the ip address for your networking if it is the fixed ip. Please get this info from your ISP. Subnet Mask – Define the mask address for your networking. Please get this info from your ISP.
-
Page 27: Sip Information
D-Link DVG-3004S User Manual GMT – Configuring the time area for the time display in the Command Line Interface. PPPoE User Name – To configure the user name for the PPPoE connection. PPPoE Password – To configure the password for the PPPoE connection. - Page 28 D-Link DVG-3004S User Manual Mode – Pick up the calling mode for this gateway. Peer-2-Peer : It only supports the peer-to-peer mode and users have to define the phone book for this mode. Proxy : Users have to register on the Proxy if users picked up this option.
-
Page 29: Security Config
D-Link DVG-3004S User Manual Line 4 Number – The phone number of the Line 2. SIP port – Users could change the sip port of this unit for the registration. RTP port – Users could change the beginning RTP ports in this table. -
Page 30: System Configuration
D-Link DVG-3004S User Manual includes the hunt group, hotline, and no answer forward configuration. Press the Line configuration button to enter configuration table (see figure 3.4) Type – Just show the interface for this port. Hunt Group –Define the group number of this port. When the port is busy, the call could be transferred to another port in the same group. -
Page 31: Voice Configuration
D-Link DVG-3004S User Manual Figure 3.5: System Configuration Keypad type – There are tow types for the Keypad. On is the In-Band type, another is the RFC2833 type. User could define the keypad type for the dialing. Inter Digit Time – It’s the time for the time out during the dialing numbers. - Page 32 D-Link DVG-3004S User Manual Figure 3.6: System Configuration Codec Priority – This could help users configure the codec priority for using. Please pay more attentions about the firmware you use. If the firmware only support G.729 series codec, the G.723 codec in this table will be useful.
-
Page 33: Tone Setting
D-Link DVG-3004S User Manual min is from 0ms and the max is 150ms. A large jitter buffer causes increase in the delay and decreases the packet loss. A small jitter buffer decreases the delay but increases the packet loss. The size of the jitter buffer depends on the condition of the network, which varies with time. -
Page 34: Phone Book
D-Link DVG-3004S User Manual standard tone. (see figure 3.7) Disconnect Tone – Users could put the correct pattern of the disconnect tone in this table. The call will be dropped if the tone from PSTN side is match with these patterns. Users could have four tables for the disconnect tone. - Page 35 D-Link DVG-3004S User Manual Index – The list number of the Phone Book. Name – The name for this contact number. E164 – The dialing number for the calling side. IP Address – The destination IP address for this phone number.
-
Page 36: Prefix Configuration
D-Link DVG-3004S User Manual Delete Date – If users want to delete the record from the table, enter the index number first and press this button. The record will be deleted. 3.9 Prefix Configuration The Prefix function is using the drop and inserts function (see figure 3.9). - Page 37 D-Link DVG-3004S User Manual This function is just like the Phone Book configuration. But it will make the drop and insert function in the GK routed mode. All the numbers into this gateway will check out the prefix table first and find out the destination in the Routing Table.
- Page 38 D-Link DVG-3004S User Manual Enter the index number. Put the prefix numbers you will dial in the prefix table, enable (disable) the drop function and enter the numbers you want to insert (see figure 3.10) Figure 3.10: Configure the Prefix Table The usage is as same as the drop, insert function of the Phone Book.
- Page 39 D-Link DVG-3004S User Manual Press the Prefix Configuration button to reload the configuration table (see figure 3.11) Figure 3.11: Show the added table Please Commit it and Reboot the system if the configuration is finished.
-
Page 40: Routing Table
D-Link DVG-3004S User Manual 3.10 Routing Table Routing Table is a rule to define the destination of the calls you make. You could define the rules by the number you dial or by the ports. The Routing Table button will show you the configuration table (see figure 3.11). -
Page 41: Fxo Password
D-Link DVG-3004S User Manual Index – The list number of the Route Table. Default – For change the default setting. Users have to pick the direction for the default setting changed. Prefix – The prefix number for the dialed digits. The call will be followed this route table if the prefix number was matched. -
Page 42: Ip Packet Tos
D-Link DVG-3004S User Manual Index – The number of this table. Password – The password you set. This function is only for the calls from the PSTN side. It’s not ready for the IP side as so far. 3.12 IP Packet ToS The Type of Service should be worked with the network router. -
Page 43: Password Configuration
D-Link DVG-3004S User Manual Figure 3.14: ToS According to the RFC 1349 document, the TOS value as following: 1000 – minimize delay 0100 – maximize throughput 0010 – maximize reliability 0001 – minimize monetary cost 0000 – normal service These values are the Binary format. Please change to the Decimal and put these values in to the correct table. -
Page 44: Rom Upgrade
D-Link DVG-3004S User Manual Figure 3.15 Password Configuration root – The password for the root account. administrator – The password for the administrator account. This account couldn’t upgrade the 2M and boot rom file. Current Password – Enter the original password for the account. - Page 45 D-Link DVG-3004S User Manual TFTP/FTP server IP Address – Put the ip address of the TFTP or FTP server in this table. Target File name – Put the target file name in this table. Method – There are two upgrade methods for the upgrade procedure.
- Page 46 D-Link DVG-3004S User Manual Figure 3.17 ROM Upgrade for FTP Key in the IP address, the login name, password of your FTP server and the correct file name, file type. (see figure 3.18) Please pay more attentions about the red blank. The Target File Type has to be matched with the Target File name.
- Page 47 D-Link DVG-3004S User Manual Press the OK button to start the upgrade procedure. Please press the “Reboot System” button to make it reboot. 【Updating the firmware by the TFTP server】 Downloading the TFTP program from our web site and install it first.
- Page 48 D-Link DVG-3004S User Manual Figure 3.19: ROM Upgrade for TFTP Key in the IP address of your TFTP server, pick up the file type for your upgrade file and the correct file name for upgrading. (see figure 3.20)
- Page 49 D-Link DVG-3004S User Manual Figure 3.20: TFTP information Press the OK button to start the upgrade procedure. Please pay more attentions on the file name you used. The file name with the prefix “2m” is the complete firmware, it will take more times for the downloading and upgrading.
-
Page 50: Flash Clean
D-Link DVG-3004S User Manual button to make it reboot. 3.15 Flash Clean Users could make all the configurations back to the default setting by this button. The password of the account and the networking configuration couldn’t be back to the default setting by this command. (see figure 3.21) -
Page 51: Commit
D-Link DVG-3004S User Manual 3.16 Commit This web page could save the configurations if users change some configurations. This is necessary for users change the configurations. (see figure 3.22) Figure 3.22: Commit the data... -
Page 52: Reboot System
D-Link DVG-3004S User Manual 3.17 Reboot System This web page will restart the whole system. This is the necessary step for the changing the configurations and makes it executed. (see figure 3.23) Figure 3.23: Reboot System... -
Page 53: Command List
D-Link DVG-3004S User Manual 4. Command List 4.1 Hyper Terminal Setting A terminal emulator is needed when using RS-232 port to configure Gateway. There are kinds of terminal emulator software. Here, we use Microsoft HyperTerminal to depict how to set up terminal emulator: Execute the Hyper Terminal program, and then the following windows will pop-up on the screen. - Page 54 D-Link DVG-3004S User Manual Define a name such as ‘voip’ for this new connection. Figure 4.2: Edit the name for the connection After pressing OK button, the next window appear, and then choose COM1/2 Port, which you are going to use.
- Page 55 D-Link DVG-3004S User Manual Configure the COM Port Properties as following: Bits per second: 9600 Flow control: None Figure 4.4: Configure the right Bps and control Press ‘OK’ button, and then start to configure Gateway.
-
Page 56: Command List
D-Link DVG-3004S User Manual 4.2 Command List 4.2.1 [help] Type help or man or ? to list all the available command. usr/config$ ? help help/man/? [command] quit quit/exit/close debug show debug message reboot reboot local machine flash clean configuration from flash rom... -
Page 57: Quit]
If so, the unit will ask password again when next user connects to console port. 4.2.3 [debug] Open debug message will show up specific information while DVG-3004S is in operation. After executing the debug command, it should execute command debug -open as well. One example is demonstrated below. -
Page 58: Flash]
Note: It is recommended that use “flash –clean” after application firmware id upgraded. Warning: Once users execute flash –clean, all the configurations of DVG-3004S will be cleaned. This can only be executed by user who log in with root 4.2.6 [commit] Save changes after configuring the DVG-3004S. -
Page 59: Ifaddr]
D-Link DVG-3004S User Manual 4.2.7 [ifaddr] Configure and display DVG-3004S network information. usr/config$ ifaddr LAN information and configuration Usage: ifaddr [-print]|[-mode used]|[-sntp mode [server][-cmcenter ipaddress]] ifaddr [-ip ipaddress] [-mask subnetmask] [-gate defaultgateway] ifaddr [-dns index [dns server address]] ifaddr [-id username][-pwd password][-http http port] -print Display LAN information and configuration. -
Page 60: Time]
D-Link DVG-3004S User Manual -mode Switch the network type (0 = Static IP; 1 = DHCP mode 2 = PPPoE mode) -sntp Simple Network Time Protocol (1 = ON; 0 = OFF) When SNTP function is activated, users have to specify a SNTP server as network time source. -
Page 61: Sysconf]
D-Link DVG-3004S User Manual no answer from 192.168.1.2 usr/config$ ping 192.168.1.254 PING 192.168.1.254: 56 data bytes 64 bytes from 192.168.1.254: icmp_seq=0. time=5. ms 64 bytes from 192.168.1.254: icmp_seq=1. time=0. ms 64 bytes from 192.168.1.254: icmp_seq=2. time=0. ms 64 bytes from 192.168.1.254: icmp_seq=3. time=0. ms ----192.168.1.254 PING Statistics----... - Page 62 D-Link DVG-3004S User Manual usr/config$ Parameters Usage: -print print out all current settings -idtime set the duration(in second) of two pressed digits in dial mode as timed out. If after the duration user hasn’t pressed next number, it will dial out all number pressed. (1-10 seconds) -keypad DTMF replay type.
-
Page 63: Sip]
D-Link DVG-3004S User Manual 4.2.11 [sip] Phone Book function allows users to define their own numbers, which mapping to real IP address. It is effective only in peer-to-peer mode. When adding a record to Phone Book, users do not have to reboot the machine, and the record will be effective immediately. -
Page 64: Security]
D-Link DVG-3004S User Manual -print print current h323 related settings -mode alternatives for proxy or peer-to-peer mode (1=proxy mode; 0=peer-to-peer mode). If users select proxy mode, a valid proxy is needed when Gateway is in operation. ----------------------------------------------------------------------------------------------- usr/config$ sip –mode 0 (peer to peer mode) to assign the ip address of the proxy when Gateway is in proxy mode. -
Page 65: Line]
D-Link DVG-3004S User Manual -line Specify which line number you want to set the account. -name Specify user name. -password Specify password. Example: security -line 1 -name kkk -password 12345 usr/config$ Parameter Usages: -print print out all current settings of security. -
Page 66: Route]
D-Link DVG-3004S User Manual gateway will automatically dial out a phone number. In the other hand, user will hear ring back tone or dial tone immediately depended on configurations of destination device. Note: This function can both work in Proxy or P2P mode. - Page 67 D-Link DVG-3004S User Manual route -ip [dst number][e164 number] route -fxo [dst number][e164 number] route -print Routing table information. prefix The prefix of dialed number. Destination port(FXO:1/IP:2). e164 Destination e164 number(when destination is FXO). Min digits.(0 ~ 255) Max digits.(0 ~ 255)
-
Page 68: Prefix
D-Link DVG-3004S User Manual prefix prefix of dialed number destination port, 0 means FXS TELs, 1 means FXO Lines, 2 means IP side, x means no determinate number. e164 destination SIP number. This only need to be set when routed port is FXS TELs or FXO Lines to determine which port will this call be routed to. -
Page 69: Pbook]
D-Link DVG-3004S User Manual Prefix drop/insert information and configuration Usage: prefix -add [prefix number][drop number][insert digits] prefix -delete index prefix -modify index [prefix number][drop number][insert number] prefix -print Prefix drop/insert information. prefix The prefix of dialed number. drop Drop prefix(Enable:1/Disable:0). - Page 70 D-Link DVG-3004S User Manual ----------------------------------------------------------------------------------------------- usr/config$ pbook Phone book information and configuration Usage: pbook [-add [name string][e164 number][ip address] [drop digit][insert number]] [-modify number [name string][e164 number][ip address] [drop digit][insert number]] [-delete number] pbook -print -print Display phone book information and configuration.
-
Page 71: Voice]
D-Link DVG-3004S User Manual book, Gateway will give each record a automatic sequence number as index. -add add a new record to phone book. When adding a record, users have to specify name, ip, and e164 number to complete the command. - Page 72 D-Link DVG-3004S User Manual [-nscng [G711U used1] [G711A used2] [G723 used3]] [-echo used] [-mindelay t1] [-maxdelay t2] [-optfactor f] voice -print voice -priority [G723] [G729] [G729A] [G729B] [G729AB] [G711U] [G711A] -print Display voice codec information and configuration. -send Specify sending packet size.
- Page 73 D-Link DVG-3004S User Manual usr/config$ Parameters Usage: -print print current voice information and configurations. -send define packet size for each codec. 20/40/60ms means to send a voice packet per 20/40/60 milliseconds. The smaller the packet size, the shorter the delay time. If network is in good condition, smaller sending packet size is recommended.
-
Page 74: Tone]
D-Link DVG-3004S User Manual -echo activate each canceler (1 = ON; 0 = OFF). -mindelay the minimum jitter buffer size. (Default value= 90 ms) -maxdelay the minimum jitter buffer size. (Default value= 150 ms) usr/config$ voice –mindelay 90 –maxdelay 150 Note: be sure to know well the application before you change voice parameters because this might cause incompatibility. -
Page 75: Fxopwd]
D-Link DVG-3004S User Manual ports. When making a call from FXO ports, there are 2 ways to detect cal lee has already picked up the call, one is to detect reverse signal, the other is to detect the termination of ring back tone, so user must set ring back tone of PBX or PSTN network. -
Page 76: Record]
D-Link DVG-3004S User Manual -print show all FXO password configuration -add add 1 set of FXO password -delete delete 1 specific set of FXO password -modify modify 1 specific set of FXO password passwd password 4.2.20 [record] User can record greeting and askpin file and analyze tone frequency by calling in FXO line of Gateway. - Page 77 D-Link DVG-3004S User Manual Press (S) to stop record..s... Press (P) to play the voice or (W) to write to flash or (Q) to quit... Please wait a moment... Write flash ok... Boot Rom : boot.104 Application Rom : 4fxo.118a DSP App : 48302ce3.140...
- Page 78 D-Link DVG-3004S User Manual Press (S) to stop record..s... Press (P) to play the voice or (W) to write to flash or (Q) to quit... Please wait a moment... Write flash ok... Boot Rom : boot.104 Application Rom : 4fxo.118a DSP App : 48302ce3.140...
- Page 79 D-Link DVG-3004S User Manual Analizing!! Please wait a moment... Frequency 1 : 620 Frequency 2 : 474 0.25sec on 0.25sec off usr/config$ The Procedures of recording the disconnect tone Before you start : Two PSTN lines which connected with the Line 1 and Line 2 port.
- Page 80 D-Link DVG-3004S User Manual (Make a call from PSTN to FXO port) usr/config$ record -tone Press (R) to start record... (Please make sure that you are already finish the steps 2 ~ 7) r (Press “Enter” button after you key in “R”) Analizing!! Please wait a moment...
- Page 81 D-Link DVG-3004S User Manual Tone1 on Tone1 off Tone2 on Tone2 off Disconnect tone 3 paramter Frequency high frequency low frequency high level frequency low level Tone1 on Tone1 off Tone2 on Tone2 off Disconnect tone 4 paramter Frequency high...
- Page 82 D-Link DVG-3004S User Manual Analizing!! Please wait a moment... (You could hang up the call from PSTN if you get this message) Frequency 1 : 473 Frequency 2 (2623) is more than 1000, please ignore it. 0. 25sec on 0.25sec off...
-
Page 83: Tos]
D-Link DVG-3004S User Manual frequency low frequency high level frequency low level Tone1 on Tone1 off Tone2 on Tone2 off Disconnect tone 4 paramter Frequency high frequency low frequency high level frequency low level Tone1 on Tone1 off Tone2 on... -
Page 84: Pt]
D-Link DVG-3004S User Manual -sigtype the package of call signal Note: The value of rtptype and sigtype is from 0 to 63. It’s working if it supported by your network. 4.2.22 [pt] RTP payload type configuration and information ------------------------------------------------------------------------------------------------- usr/config$ pt... - Page 85 D-Link DVG-3004S User Manual -print show versions of rom files. (optional) -app update main application code(optional) -boot update main boot code(optional) -boot2m update 2M code(optional) -dsptest update DSP testing code(optional) -dspcore update DSP kernel code(optional) -dspapp update DSP application code(optional)
-
Page 86: Passwd]
D-Link DVG-3004S User Manual Note: To set mac address please key in command setmac:(when key in MAC address ,press enter each time after key in two characters) Please get the MAC address from the bottom of your FXO VOIP units. - Page 87 D-Link DVG-3004S User Manual passwd -set Loginname Password passwd -clean Note: 1. Loginname can be only 'root' or 'administrator' 2. passwd -clean will clear all passwd stored in flash, please use it with care. Example: passwd -set root Your_Passwd_Setting usr/config$...
Need help?
Do you have a question about the DVG-3004S and is the answer not in the manual?
Questions and answers