
Subscribe to Our Youtube Channel
Related Manuals for Numatic TTV 4555


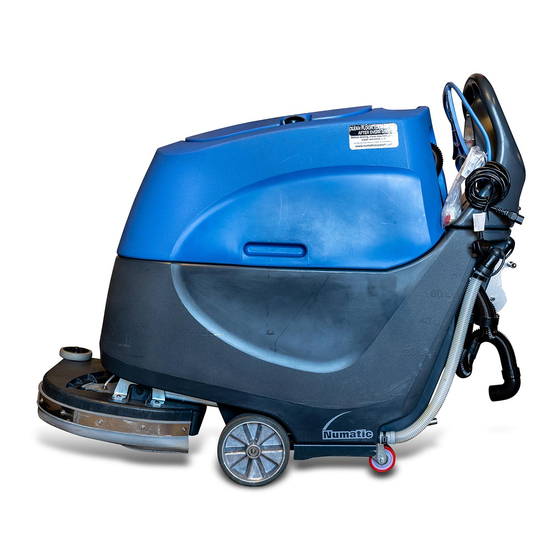
Summary of Contents for Numatic TTV 4555
- Page 1 Owner Instructions Original instructions Warning! Read instructions before using the machine TTV 4555 Scrubber Dryer TTV 4555 www.numatic.com...
- Page 2 Before continuing, please refer to Quick Set Up Guide on Page 8 / 9 Index Page 2 Machine Overview Page 3 Control Panel Overview Page 4 Rating Label / Personal Protective Equipment / Recycling Page 5 Safety Precautions Page 6 / 7 Quick Set-up Guide Page 8 / 9 Machine set-up...
-
Page 3: Machine Overview
Machine Overview Operator Control Panel (see page 4) Chemical Dosing Pump Charging Socket Water Pump Clean-water Fill Point Gel Batteries Floor-tool Lifting Lever 50 Amp Battery Fuses x 1 Clean-water Level Indicator / Drainage Hose Waste-water Emptying Hose Floor-tool Vacuum Hose Top Tank Hood Release Catches Charging Light Top Tank (waste-water) -
Page 4: Control Panel Overview
Control Panel Overview Control handle (Variable Speed - start / stop trigger) Main Control On / Off Key Speed Control Chemical Mix Adjustment Forward / Reverse Switch Off Aisle Vacuum Button / Whisper mode Traction Status Indicator Battery Charge Level Meter Water Flow Rate Adjustment Hour Meter Toggle Button Hi - Lo Button... -
Page 5: About The Machine
A risk assessment should be conducted to determine which PPE should be worn. Safety Critical Component Charging Lead: H05VV-F x 1.0 mm x 3 core Battery Charger: 220 / 240 Volt In the event of a breakdown contact your Numatic dealer or the Numatic Technical help line +44 (0)1460 269268... - Page 6 • Regularly examine the power cord for damage, such as cracking or ageing. If damage is found, replace the cord before further use. • Only replace the power cord with the correct Numatic approved replacement parts. • Ensure that the work area is clear of obstructions and / or people.
-
Page 7: Precautions When Working With Batteries
Operators shall be adequately instructed as to the correct use of the machine. If this product does not have a factory installed Numatic battery charger, then it is the responsibility of the owner and user of the product to ensure that the charging system and battery combination are compatible, fit for purpose and safe to use. - Page 8 Quick Set-Up Guide PLEASE READ BEFORE COMMENCING ANY OPERATION. AFTER THE REMOVAL OF ALL THE PACKAGING, CAREFULLY OPEN AND CHECK THE CONTENTS OF THE START UP PACK. Contents: 1 x Operator Manual 1 x Battery Charging Lead 2 x Keys 2 x 50 Amp Fuses (1 spare) 1 x Maxi Fuse-puller Use handle grip when...
-
Page 9: Machine Setup
Machine Set-Up ALWAYS ENSURE THAT THE MACHINE IS SWITCHED OFF BEFORE MAKING ANY ADJUSTMENTS Setting the width adjustment Lift the Deck locking knob located at the front of the machine (Fig.9), then move the side pod to expand or contract the deck to the desired width - 450mm (see Fig.10) or 550mm (see Fig.11). -
Page 10: Fitting The Hose Guide
Machine Set-Up Fitting the Hose Guide The vacuum hose has a U-bend clip which creates a U-bend in the hose preventing water spillage when the vacuum is switched off. If you need to remove the U-bend clip for any reason always ensure it is refitted correctly before you resume operation. Refit vacuum hose to the Floor-tool when finished. -
Page 11: Filling The Clean-Water Tank
Machine Set-Up Filling the Clean-water Tank The TTV 4555 is equipped with a large capacity 60 litre clean-water tank allowing, for large areas to be covered in a single fill. To fill the clean-water tank, extend the hose located to the rear of the machine in the centre of the removable filler cap, see (Fig.17). -
Page 12: Chemical Dosing System
Only use chemicals recommended for use in auto scrubber-dryers. Chemical dosing System The TTV 4555 scrubber dryer has an optional automatic chemical-dosing system. Simply fill the 5 litre chemical dosing bottle and the machine will deliver the correct mix ratio as set by the operator, using the setting on the control panel (see page 15) depending on the floor and cleaning conditions. -
Page 13: Lowering The Floor-Tool
Machine Operation Lowering the floor-tool After preparing the floor (see previous section), we are now ready to set the controls to suit the cleaning conditions. Before any settings can be applied, ensure the brush deck is lowered (see Fig.25). Move the floor-tool lever to its lower position (see Fig.26). Note: The machine will still reverse with the floor-tool in the lowered position, this could possibly damage the blades. -
Page 14: Setting The Cleaning Controls
(fig.30). The TTV 4555 has been fitted with a Hi - Lo mode, this reduces the noise produced by the vacuum motor. To operate the Hi - Lo mode start the machine in the normal way. -
Page 15: Brush Pressure / Load Adjustment
The waste-water tank requires emptying (see page 19). Emergency Stop The TTV 4555 is equipped with an electronic braking system. Simply release the hand operated start / stop trigger and the machine will stop. In an emergency, strike the Emergency Stop button. -
Page 16: Breakaway Floor-Tool
Machine Operation Breakaway Floor-tool The floor-tool design incorporates a breakaway feature. Allowing it to safely disengage from its mounting should it become caught on an obstruction, during forward machine movement. (See Fig.34) To re-attach the blade to its holder. First loosen the retaining knobs on the floor-tool body and slide onto the holding bracket. Tighten retaining knobs to finger tight. - Page 17 Off-Aisle Cleaning Kit (Optional Extra Accessory) 606182 The optional off-aisle cleaning kit gives added flexibility to the operator. (Fig.37) The kit can be used to clean hard to reach / inaccessible areas. Return the hose to the floor-tool once finished using the off-aisle facility. (Fig.38) Off-Aisle Accessory Kit (Optional) (606182)
-
Page 18: Free-Wheel Function
ARM. NEVER DISENGAGE THE BRAKE WHEN THE MACHINE IS ON A SLOPE / GRADIENT. The TTV 4555 is equipped with a free-wheel function that will enable the operator to move the machine manually if required. The motor brake is located on the left side of the machine near the rear wheel (see Fig.39). -
Page 19: Regular Maintenance
Regular Maintenance ALWAYS ENSURE THAT THE MACHINE IS SWITCHED OFF PRIOR TO ANY MAINTENANCE USING THE MASTER CONTROL ON/OFF KEY. REMOVE THE KEY PRIOR TO ANY MAINTENANCE OPERATION. After use, empty waste-water tank using emptying hose and flush-out with clean-water. Next remove floor-tool vacuum hose and flush out with clean-water. -
Page 20: Changing The Floor Tool Blades
Changing the Floor Tool Blades ALWAYS ENSURE THAT THE MACHINE IS SWITCHED OFF PRIOR TO ANY MAINTENANCE USING THE MASTER CONTROL ON/OFF KEY. REMOVE THE KEY PRIOR TO ANY MAINTENANCE OPERATION. The Floor-tool To clean the floor-tool, remove securing-pin and pull-free from the holder. Rinse the floor-tool assembly with clean-water and refit. -
Page 21: Machine Charging
Machine Charging ALWAYS ENSURE THAT THE MACHINE IS SWITCHED OFF PRIOR TO CHARGING. The battery charge indicator displays the charge level of the batteries; when fully charged, all meter lights are illuminated. As the machine is used and the batteries are discharged, the meter lights will go out from right to left. If the battery-charge level is allowed to discharge to the point that only three red lights are illuminated, the operator must consider charging the machine. -
Page 22: Battery Care
Battery Care To ensure your machine remains at its maximum efficiency and prolong your battery life, please follow the simple steps below: Under normal daily usage: Recharge batteries after each use regardless of machine operation time (see page 21). Showing location of Viewing panel for charging-light sequence (Fig.53). Signal (LED) Meaning Red LED on... - Page 24 Contact Service Agent...
-
Page 25: Troubleshooting
(page 15) In the event of a breakdown contact your Numatic dealer or the Numatic Technical helpline +44 (0)1460 269268 (See back page for company addresses or dealers stamp) -
Page 26: Spare Parts And Accessories
Filter Basket 204116 Rear Castor 237173 Filter Basket Lid 220386 Charging Lead V17 - UK 237688 Foam Filter Body 221079 Chargling Lead V34 - EURO 208947 Foam FIlter 221107 50 AMP Maxi Fuse 208950 Float Pad TTV 4555 - Schematic Diagrams... - Page 28 This machine has been packed TTV 4555 with the following: Charging Lead Fuses Isolator Key / Pin Hose Hook 38 / 32mm Adaptor Signed Distributed by Numatic International Limited Chard, Somerset TA20 2GB ENGLAND. Telephone 01460 68600 Fax: 01460 68458 www.numatic.co.uk...
Need help?
Do you have a question about the TTV 4555 and is the answer not in the manual?
Questions and answers