Numatic TTB 4045/100 Owner's Instructions Manual
Hide thumbs
Also See for TTB 4045/100:
- Original instructions manual (52 pages) ,
- Owner's instructions manual (24 pages) ,
- Owner's instructions manual (48 pages)

Related Manuals for Numatic TTB 4045/100


Summary of Contents for Numatic TTB 4045/100
- Page 1 Owner Instructions Original instructions Warning! Read instructions before using the machine TTB 4045/100 TTB 4055/100 TTB 4552/100 TTB 4552/100 TTB 4055/100 TTB 4045/100 www.numatic.com...
-
Page 2: Table Of Contents
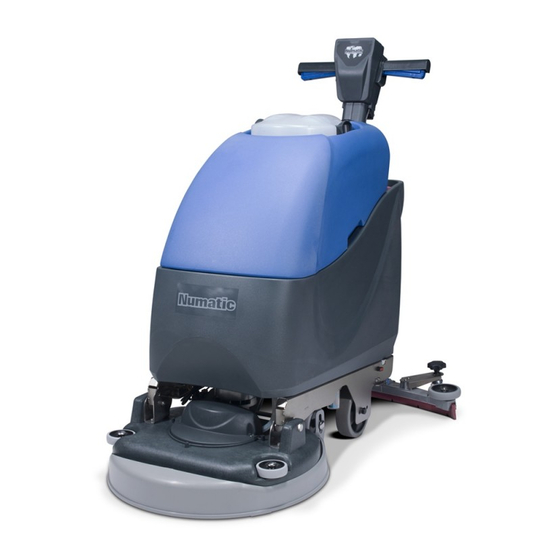
Before continuing, please refer to Quick Set Up Guide on Page 8 Index Page 2 Machine overview Page 3 Control panel overview Page 4 Rating label / Personal Protective Equipment / Recycling Page 5 Safety Precautions Page 6 / 7 Quick set-up guide Page 8 Machine set-up... - Page 3 Machine Overview Fuse Clean-water filler cap Waste-water tank Floor-tool vacuum hose Clean-water tank Vacuum hose Brush deck Isolator Key Clean Water Filter Floor-tool Lifting Lever Rear wheels Hour Meter - TTB machines only Clean water On / Off tap Floor-tool retaining knobs Separator Squeegee blades Clean-water emptying hose...
-
Page 4: Control Panel Overview
Control Panel Overview Battery Charge Level Meter Cycle sequence button Hi / Lo Indicator Water Flow On / Off Button Brush Operation / Load Indicator Handle Position Lever Vacuum Indicator On / Off Switch Water Flow Indicator On / Off Triggers Hi / Lo Button Charging Point For full instructions on control panel set up and use, see setting the cleaning controls, page 13. - Page 5 A risk assessment should be conducted to determine which PPE should be worn. Safety Critical Component Charging Lead: H05VV-F x 1.0 mm x 3 core Battery Charger: 220 - 240 Volt (50/60 Hz) In the event of a breakdown contact your Numatic dealer or the Numatic Technical help line +44 (0)1460 269268...
- Page 6 Children should be supervised to ensure that they do not play with the appliance. If this product does not have a factory installed Numatic battery charger and batteries then it is the responsibility of the owner and user of the product to ensure that the charging system and battery combination are compatible, fit for purpose and safe to use.
- Page 7 The machine must be disconnected from the supply when removing the battery. The batteries are to be disposed of safely and in accordance with the battery directive. Only use genuine Numatic replacement batteries. Do not allow the batteries to become fully discharged; it may not be possible to recharge them.
-
Page 8: Quick Set-Up Guide
Quick Set-Up Guide PLEASE READ BEFORE COMMENCING ANY OPERATION. After the removal of all the packaging, carefully open and check the contents. Ensure the Batteries are charged before use. Using the handle position lever (Fig.1), move the handle into the upright position (Fig.2). - Page 9 Fill the clean-water tank to a Max of 40 litres (see page 11) For operation and cleaning controls (see page 13) Off-Aisle Cleaning Kit (Optional Extra Accessory) TTB = 38mm Ø 606182 In the event of a breakdown contact your Numatic dealer or the Numatic Technical helpline +44 (0)1460 269268...
-
Page 10: Tipping The Brush Deck
Featuring the Nulock brush system. The brush is simply pushed and twisted to lock, making fitting and removal a simple process. The Pad is retained using Numatic’s own PadLoc system (ask your supplier for details). Only use manufacturer supplied brushes / pads. -
Page 11: Filling The Clean-Water Tank
Always ensure that chemical manufacturers safety guidelines are followed. Only use chemicals recommended for use in auto scrubber-dryers. Pre-cleaning advice Before performing the cleaning operation, place out appropriate warning signs and sweep or dust-mop the floor (Fig.22). Numatic part (629044) Wet Floor sign (available if required) Fig.22... -
Page 12: Pre-Scrub Mode
Machine Operation Pre-scrub mode The TTB Range has been designed to cope with a variety of floor types and different levels of soiling. On heavily soiled floors use a ‘double scrub’ technique. First pre-scrub the floor with the floor-tool in the raised position, allow the chemical time to work, then scrub the area a second time with the floor-tool lowered. -
Page 13: Setting The Cleaning Controls
Setting the cleaning controls To activate the machine from SLEEP MODE press either on / off trigger or yellow on / off switch once. The sleep mode will re-activate after 60 seconds if no further controls are used. Stand-by mode will be entered and will illuminate blue display lights. - Page 14 Regular Maintenance ALWAYS ENSURE THAT THE BATTERY IS DISCONNECTED PRIOR TO ANY MAINTENANCE OPERATION The TTB Range has been designed with ease of use in mind, this included easy stripping-down and cleaning. After use, empty waste-water tank using emptying hose and flush out with clean water (Fig.29). Fig.29 Remove the two hoses to disconnect the separator from the machine (Fig.30).
- Page 15 Changing the Floor Tool Blades ALWAYS ENSURE THAT THE BATTERY IS DISCONNECTED PRIOR TO ANY MAINTENANCE The floor-tool The TTB range is provided with the aluminium floor-tool shown. Fig.38 To clean the floor-tool, remove securing-pin and disconnect the lifting strap and remove the floor-tool securing pin pull-free the floor-tool from the rear of the machine.
- Page 16 Batteries will increase to their full capacity after 5-10 charge / discharge cycles. Charge time for a fully discharged basttery, is approximately 8 hours for the TTB 4045/100 / TTB 4055/100 / TTB 4552/100 Range. Spare replacement batteries are available from your supplier.
-
Page 17: Hour Meter
Under abnormal use: i.e. leaving the machine without charging for a period of time - we advise that you follow these steps: If fuse requires replacing use only Numatic approved part (221107). 50 Amp fuse. If the machine will be standing unused for a period of 30 days or more, then batteries must be fully charged and battery fuse removed using the Maxi fuse-puller provided, prior to this period. -
Page 18: Trouble Shooting
Reset the machine and decrease the brush load to best Machine just ‘stops’ while suit the floor type (page 13) operating Blown fuse in Battery pack Replace 50 Amp fuse (page 8) TTB 4045/100, TTB 4055/100 & TTB4552/100 TTB 4045/100 Capacity Brush Motor Vac Motor Brush Sizes... - Page 19 Spare Parts & Accessories 237654 Top Tank Blue 606029 280MM POLYSCRUB BRUSH 577839 Separator 606552 280MM NYLOSCRUB BRUSH 206813 SWITCH KEY 606553 280MM LONGLIFE BRUSH 206953 DETENT PIN 606203 450MM POLYSCRUB BRUSH 208588 Vac hose 606204 450MM NYLOSCRUB BRUSH 208624 Floor Tool Hose 606306 450MM LONGLIFE BRUSH...
-
Page 20: Schematic Diagram
TTB 4045/100 / TTB 4055/100 TTB 4552/100 Schematic Diagrams Notes ............................................................................................................................................................................................................................ - Page 21 Notes ............................................................................................................................................................................................................................................................................................................................................................................................................
- Page 22 Machinery Directive 2006/42/EC EMC Directive 2004/108/EC RoHS Directive 2011/65/EU Machine Description: Scrubber Dryer Type: TTB, ETB series Manufactured by: Numatic International Limited Relevant standards upon which conformity is declared include: IEC 60335-1:2010 IEC 60335-2-72:2002 +A1 EN 55014-1:2006 EN 55014-2:1997/A2:2007 IEC 62233:2005 A technical construction fi...
-
Page 23: Warranty
Warranty... -
Page 24: Fuse
Brush / Pad Floor Tool Fuses Isolator Pin Hose Hook 38mm / 32mm Adaptor Signed Distributed by Numatic International Limited Chard, Somerset TA20 2GB ENGLAND. Telephone 01460 68600 Fax: 01460 68458 www.numatic.co.uk Subject to change without prior notice. 244469 11/14 (A01)
Need help?
Do you have a question about the TTB 4045/100 and is the answer not in the manual?
Questions and answers