Table of Contents
Advertisement
Quick Links
Advertisement
Table of Contents

Subscribe to Our Youtube Channel
Related Manuals for Akuvox R67G


Summary of Contents for Akuvox R67G
- Page 1 R67G IP Phone User Manual...
-
Page 2: Table Of Contents
Content 1 Overview..................5 1.1. Introduction......................5 1.2. Feature......................6 1.3. Kaypad......................8 1.4. Icon introduction....................10 1.5. Installation......................10 1.5.1 Check package content................10 1.5.2 Installation steps..................11 2 Function...................12 2.1 Make a call.......................12 2.1.1 Call Device.....................12 2.1.2 Call Method...................12 2.2 Answer the call....................13 2.3 Mute........................13 2.4 Call Hold/Resume....................13 2.5 DND.........................14 2.6 Call Waiting......................14 2.7 Call Completion....................15... - Page 3 2.23 ACD........................24 2.24 Hoteling......................25 2.25 Application.....................25 2.25.1 Text Message..................25 2.25.2 Voice Message..................26 2.26 Simple Menu....................27 3 Setting..................28 3.1 Basic setting.....................28 3.1.1 Language....................28 3.1.2 Date &Time....................28 3.1.3 Ring Tones....................29 3.1.4 Phone Volume..................29 3.1.5 Backlight....................30 3.1.6 Password Setting...................30 3.2 Phone Book.....................30 3.2.1 Local Phone Book..................30 3.2.2 Blacklist....................31 3.2.3 Remote Phone Book................32 3.2.4 LDAP......................32...
- Page 4 4.8 Phone->Call Feature..................51 4.9 Phone->Voice....................55 4.10 Phone->Key/Display..................56 4.11 Phone->DSS Key....................58 4.12 Phone-> Ext Key.....................58 4.13 Phone->Ringtones..................60 4.14 Phone->Tones....................61 4.15 Phone->Dial Plan->Replace rule..............61 4.16 Phone->Dial Plan->Dial now................62 4.17 Phone->Action URL..................63 4.18 Phone->Multicast..................66 4.19 PhoneBook->Local Book................66 4.20 PhoneBook->Remote Book................68 4.21 PhoneBook->Call Log..................69 4.22 PhoneBook->LDAP..................69 4.23 Phone->Broadsoft..................71 4.24 Upgrade->Basic....................72...
-
Page 6: Overview
Based on the SIP standard, the Akuvox R67G has been tested to ensure comprehensive interoperability with equipments from VOIP infrastructure leaders enabling service providers to quickly roll-out competitive, feature rich services to their customers. Akuvox R67G is very easy to understand, configure, and deploy. The web interface is... -
Page 7: Feature
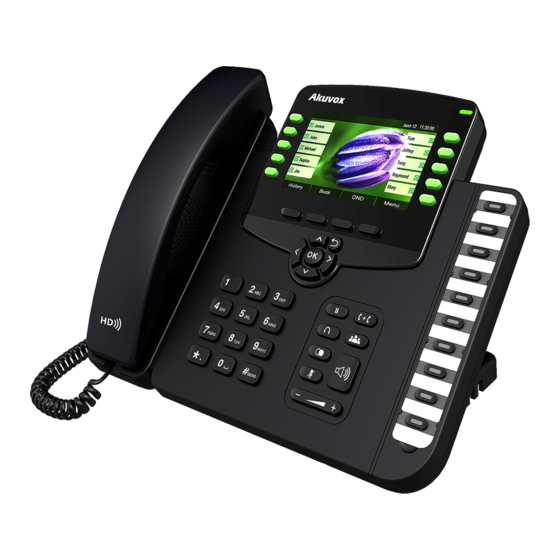
designed to provide a clean and user-friendly configuration window so that users won’t get lost in complicated menus and maintenance. 2. Feature Highlights HD Voice Dual-port Gigabit Ethernet, PoE Up to 3 SIP accounts 4.3" 480 *272 pixel color display with backlight ... - Page 8 Support up to 3 expansion modules Support wireless headset adapter IP-PBX Features SMS.Voicemail.MWI Message Music on hold, Intercom, Paging BLF (Busy Lamp Field) Call Pickup, Group Call Pickup Call Recording Call Completion ...
- Page 9 Support SRTP for Voice Data Encryption Support Login for Administration OpenVPN, IEEE802.1X Digest Authentication Using MD5/MD5-sess AES Encryption for Configuration file SIP Over TLS 3. Keypad Keypad description Key name Function Description Navigation Assists you in selecting an item that you want to process...
- Page 10 under the menu by pressing the Up, Down, Right or Left key. Press the center key to save. Soft Keys 1/2/ Key combination includes functions such as History/Favorites/Redial/CallReturn/HotDesking/XML Browser/DND/Menu/MSG/Status/Book/FWD/PickUp/Gr oup PickUp/Intercom/Speed Dial/and so on. Line Keys 1/ Key combination includes functions such as History/Favorites/Redial/Account/ACD/BLF/BLFList/CallRe 2/3/4/5/6 turn/HotDesking/Record/XML Browser/DTMF/DND/...
-
Page 11: Icon Introduction
4. Icon introduction... -
Page 12: Installation
Connect one end of the RJ-45 Ethernet cable to the Internet port at the back of the Akuvox R67G and the other end to wall network jack. Step 3 – Connect the computer Connect one end of the RJ-45 Ethernet cable to the PC port at the back of the Akuvox... -
Page 13: Function
R67Gand the other end to the Ethernet port on you computer. Step 4 – Configure the device Launch the web browser on your computer, and enter the IP address of the phone into the address bar. The login screen will appear if the address is correct. Enter the user name and password to log into the web console. -
Page 14: Call Method
2.1.2 Call Method User can press an available line key if there is more than one account, then 1. Dial the number User wants to call. 2. Press History softkey. Use the navigation keys to highlight User choice Left/Right key to choose Missed Calls, Incoming Calls and Outgoing Calls. 3. -
Page 15: Call Hold/Resume
but User can hear the other party, icon will be shown on the LCD, and press the Mute key again to recover. 2.4 Call Hold/Resume 1. Press Hold softkey to put User active call on hold. 2. If there is only one call on hold, press the hold softkey to retrieve the call. 3. -
Page 16: Call Waiting
phone will send a SIP message to server to turn off DND on server side if you press DND when DND is on. Note: If adding multi emergency numbers, please use comma to separate. 2.6 Call Waiting To configure Call Forward via Phone interface: 1. -
Page 17: Call Forward
2.8 Call Forward You can set the static forward to switch all the incoming calls to specified number; Also you can use dynamic forward to switch all the incoming calls forward to the number inputted when the phone is ringing. ... -
Page 18: Call Transfer
2.9 Call Transfer You can use the following two ways to transfer talking to the other party: Blind Transfer: Transfer talking directly to the other party without any negotiation. Consultation Transfer: Transfer talking to the other person involved after the other person involved answer the incoming and with consultation. -
Page 19: Conference
The Network conference feature allows you to add or delete the party who attend the conference. The local conference feature of IP phone Akuvox R67G can invite two parties at most to attend conference. The conference type of IP phone Akuvox R67G is Local conference with default. -
Page 20: Call Park
Note: Not all server can support Call Park feature. 2.12 Pickup You can use pickup to answer other users’ incoming call. The IP phone Akuvox R67G supports specified pickup and group pickup. Note: Press the group pickup only to answer line 1 incoming call if there are many lines incoming calls in group. -
Page 21: Group Pickup
1. Set specified pickup key via phone interface PATH: Press Menu ->Features ->Programmable keys ->Line Keys/Soft Keys/Function Keys/DSS Keys ->PickUp ->Press Down key to set label/Value -> Save softkey; 2. Use specified pickup feature When the user of specified pickup number is off or busy, you can press the pickup key to answer incoming call. -
Page 22: Auto-Redial
2.14 Auto-redial When hang-up by the other party, call failure during the calling, the phone will enter the auto-redial screen, and begin to count. Press OK for redial now or wait for the time interval. After trying designated times of auto-redial, the phone will hang-up automatically. -
Page 23: Intercom
2. Press the Intercom key or the Back softkey to end the intercom. 3. Answer the intercom incoming calling. 4. In default situation, the IP phone Akuvox R67G will answer the intercom incoming calling automatically and make a noise. You can set the phone to enable silent mode when picking up the intercom call so that the other will not hear you. -
Page 24: Xml Browser
2.18 XML Browser XML Browser allows the users to develop and deploy custom services. Users need to pre-configure a custom service functions on the server, such as news, weather report, stock information. The user receives and displays the service information on the IP phone from the server, and all service information are transmitted in XML object. -
Page 25: Keypad Lock
2.20 Keypad Lock You can lock the keypad of your phone temporarily when you are not using it. This feature helps to protect your phone from unauthorized use. Keypad Lock can be set to ON or OFF, how long to enable this function during the phone is idle and you can choose to lock the function keys or all keys. -
Page 26: Blflistcode
call. Solid red The monitored user is dialing. The monitored user is talking. The monitored user does not exist. To configure a BLF key via phone user interface: PATH: Press Menu ->Features ->Programmable keys ->Line Keys/DSS Keys->BLF -> Save softkey. 2.22 BLFListCode BLF List:While using BroadSoft platform, the accounts which are monitored by the sip phone will reply the subscribe news in the form of XML list to improve efficiency. -
Page 27: Hoteling
2.25 Application 2.25.1 Text Message The IP phone Akuvox R67G can send and answer text message. The phone will make a “Du” sound and present “N piece of new message” on the LCD( For example: 1 new message), and a twinkling message icon will appears. -
Page 28: Voice Message
OK softkey then all the messages in the in-box will be deleted. 2.25.2 Voice Message The IP phone Akuvox R67G can send or answer voice message. The phone will make a “Du Du” sound as well as the LED light of message flashes green, and the LCD presents “New Voice Message”... -
Page 29: Simple Menu
2.26 Simple Menu Setup the shortcut menu Key, It includes Status, Backlight,Volume,Network,Reset to factory and Autoprovision. Then users can use these common functions more conveniently. Path: Menu ->Features ->Programmable Keys ->Soft Keys ->Simple Menu... -
Page 30: Setting
3 Setting 3.1 Basic setting 3.1.1 Language You can change the language through below method: Press Menu ->Settings ->Basic Setting ->Language 3.1.2 Date &Time 1. The IP phone displays Time and Date in Idle status. You can set the Time and Date obtain from SNTP server automatically or you can set the time and date manually. -
Page 31: Ring Tones
1. The Ring Tone refers to incoming ring tone, which reminds the user that there is a incoming call. The IP phone Akuvox R67G supports phone ring tone to distinguish the incoming call from other near phones’ ring tone; At the same time, the IP phone Akuvox R67G also supports setting specific incoming ring tone for contacts. -
Page 32: Backlight
3.2.1 Local Phone Book The Local Phone Book is used for storing the contacts names and number. The Akuvox R67G can store up to 500 entries contacts. You can add, edit, delete, search, or call any contact from the Local Phone Book. -
Page 33: Blacklist
2. Select the Local Phone Book, Press the OK key on the phone keyboard or the Enter softkey to enter the Local Phone Book. 3.2.2 Blacklist 100 Blacklists contacts are available with Akuvox R67G IP phone. You can add, edit, delete, search or call contact. The phone will reject to answer the call from blacklist automatically. -
Page 34: Remote Phone Book
3. Press the Search softkey to search contacts. 4. Input keywords such as name, any character of number or whole phone number, press the Search softkey or the OK key to enter the Search Contacts interface. 3.2.3 Remote Phone Book 1. -
Page 35: System Customizations
The History management of IP phone Akuvox R67G contains dialed calls, received calls, missed calls and forwarded calls and support 100 logs storage at most. You can check the history, make calls from the calls history and delete the calls history. -
Page 36: Register An Account
3.5.1 Register an account Register an account via phone interface: 1. Press the Menu softkey to enter setting interface to select advanced setting, input password(password: admin) to select account; 2. Select the account you want to set and press the Enter softkey; 3. -
Page 37: Static Ip Mode
is DHCP). 3. Press the Enter on the softkey or the OK key on the phone keyboard to enter the DHCP switch interface, it will auto return to last interface after seconds. 3.6.2 Static IP Mode 1. In the LAN Port interface, press the Up or Down key on the phone keyboard to select Static IP, then Press the OK key on the phone keyboard or the Enter softkey to enter Static IP Setting interface and input IP address. -
Page 38: Configure Vlan
5. Configured Routing mode, enter routing setting interface, input according value in the corresponding position; 6. Press Save key after configuration, the phone will reboot. 3.6.5 Configure VLAN In the Network Settings interface, press the Up or Down key on the phone keyboard to select VLAN Port, press the OK key on the phone keyboard or the Enter softkey to enter LAN Port configuration interface. -
Page 39: Reset To Factory
access the disable/enable WebServer setting. 3.8 Reset to Factory In the Advanced Setting interface, press the Up or Down key on the phone keyboard to select “Reset to factory”. Press the OK key on the phone keyboard or the Enter softkey to access the reset to factory interface. - Page 40 Sections Description Product Information To display the device’s information such as Model name, MAC address (IP device’s physical address), Firmware version and Hardware firmware. Network Information To display the device’s Networking status(LAN Port),such as Port Type(which could be DHCP/Static/PPPoE), Link Status, IP Address, Subnet Mask, Gateway, Primary DNS server, Secondary DNS server, Primary NTP server and Secondary NTP server(NTP server is used to...
-
Page 41: Account->Basic
Account Information To display device’s Account information and Registration status (account username, registered server’s address, Register result). 4.2 Account->Basic Go to the path: Account ->Basic Sections Description... - Page 42 SIP Account To display and configure the specific Account settings. Status: To display register result. Display Label: Which is displayed on the phone’s LCD screen. Display Name: Which is sent to the other call party for display. ...
-
Page 43: Account->Advanced
a solution to solve NAT issues. Note: By default, NAT is disabled. 4.3 Account->Advanced Go to the path: Account ->Advanced... - Page 44 Sections Description SIP Account To display current Account settings or to select which account to display. Codecs To display and configure available/unavailable codecs list. Codec means coder-decoder which is used to transfer analog signal to digital signal or vice versa. Familiar codecs are PCMU(G711U), PCMA(G711A), G722 (wid-bandth codecs), G723,G726,G729 and so on.
- Page 45 Provisioning Response ACK: 100% reliability for all provisional messages, this means it will send ACK every time the IP phone receives a provisional SIP message from SIP server. User=phone: If enabled, IP phone will send user=phone within SIP message. ...
-
Page 46: Network->Basic
platform. Note: Please consult your administrator further information. Encryption To enable or disabled SRTP feature. Voice Encryption(SRTP): If enabled, all audio signal (technically speaking it’s RTP streams) will be encrypted for more security. To display NAT-related settings. UDP Keep Alive message: If enabled, IP phone will send UDP keep-alive message periodically to router to keep NAT port alive. -
Page 47: Network->Advanced
address from DHCP server automatically. Static IP: If selected, you have to set IP address, Subnet Mask, Default Gateway and DNS server manually. PPPoE: Use PPPoE username/password to connect to PPPoE server. PC Port To display and configure PC Port settings. ... - Page 49 Sections Description LLDP To display and configure LLDP settings. LLDP Active: To enable or disable LLDP feature. Packet interval: To configure the interval for LLDP admin message. Note: LLDP stands for Link Layer Discovery Protocol, it’s used to exchange device information between any two directly-connected devices.
- Page 50 equipment as client side devices. URL: To configure URL address for ACS or CPE. User name: To configure username for ACS or CPE. Password: To configure Password for ACS or CPE. Periodic Inform: To enable periodically inform. ...
-
Page 51: Phone->Time/Language
4.6 Phone->Time/Language Go to the path: Phone ->Time/Lang... - Page 53 Sections Description Web Language To choose the web language. LCD Language To choose the phone language. Format Setting To configure time display settings. Time Format: Determine what format to display on Phone UI(12 hour/24 hour). Date Format: Determine what format to display on Phone UI for Date.
-
Page 54: Phone->Preference
4.7 Phone->Preference Go to the path: Phone ->Preference... - Page 55 Sections Description Headset Mode To enable or disable Headset Mode. Active: If enabled, the default audio track will be headset mode, if audio track is changed during a call, it will be back to headset mode after you hangup the call. Key Press Sound To configure the sound volume for key press.
-
Page 56: Phone->Call Feature
Wallpaper Setup the wallpaper you like. Select the picture from your PC ,upload the picture. Click Submit to save the configuration. Phone->Call Feature Go to the path: Phone ->Call Feature Sections Description Mode To enable or disable feature key sync. ... - Page 57 DND (Do Not Disturb) allows IP phones to ignore any incoming calls. Return Code when DND: Determine what response code should be sent back to server when there is an incoming call if DND on. DND On Code: The Code used to turn on DND on server’s side, if configured, IP phone will send a SIP message to server to turn on DND on server side if you press DND when DND is off.
-
Page 58: Phone->Voice
host address. Note: For now, IP phone can only support IP address, IP address list and IP address pattern as allowed hosts Keypad Lock Keypad Lock allows to lock the keypad of your phone temporarily when you are not using it. This feature helps to protect your phone from unauthorized use. - Page 59 VAD(Voice Activity Detection): Allow IP phone to detect the presence or absence of human speech during a call. When detecting period of “silence”, VAD replaces that silence efficiently with special packets that indicate silence is occurring. It can facilitate speech processing, and deactivate some processes during non-speech section of an audio session.
-
Page 60: Phone->Key/Display
4.10 Phone->Key/Display Go to the path: Phone ->Key/Display... -
Page 61: Phone->Dss Key
Sections Description Line Key Allows user to assign specific feature to the designated line key. For line key, the available feature list: DND, Menu, MSG, Status, Book, Fwd, PickUp, Group PickUp, Intercom, Speed Dial, History, Favorites, Redial, Account, ACD, BLF, BLFList, Call Return, Hot Desking, Record, XML Browser, DTMF,XML VoiceMail,XML PhoneBook, XML History,Multicast paging. -
Page 62: Phone-> Ext Key
BLFList,Call Return, Hot Desking, Record, XML Browser, DTMF and so on. 4.12 Phone-> Ext Key Go to the path: Phone ->Ext Key Sections Description Upload To upload firmware for expansion module... -
Page 63: Phone->Ringtones
Go to the path: Phone ->Ringtones Sections Description All Ringtones Allow user to upload and view ringtone files or delete uploaded ringtone files. Note: Ringtone files must be .wav format and has some specific requirement, please contact to Akuvox technical... -
Page 64: Phone->Tones
support team for instructions how to make ringtone files. System ringtones files cannot be deleted thus user can only delete uploaded ringtones. Distinctive Ringers Distinctive ringers allow different incoming calls to trigger distinctive ringtones. The IP phone will check "Alert-Info" header inside the incoming “invite” SIP message. -
Page 65: Phone->Dial Plan->Replace Rule
China,Spain,Luxembourg,Sweden,Taiwan,Belgium,Denm ark,Finland,Germany,Netherlands,Norway,Portugal. 4.15 Phone->Dial Plan->Replace rule Go to the path: Phone ->Dial Plan ->Replace Rule Sections Description Rules Allow user to select Replace rule or Dial-now to display or edit. Rules Modify Allow user to modify selected rules information, for replace rule, you can modify related accounts, prefix... -
Page 66: Phone->Dial Plan->Dial Now
and replace. Area Code Area codes are also known as NPAs (Numbering Plan Areas). They usually indicate different geographical areas within one country. If entered numbers match the predefined area code rule, the IP phone will automatically prefix outgoing number with area code. Note: There is only one area code rule supported. -
Page 67: Phone->Action Url
if it match any dial now rule. Rules Modify Allow user to modify selected rules information, for dial-now rule, user can modify related accounts, Dial now Rule itself. Area Code Area codes are also known as NPAs(Numbering Plan Areas). They usually indicate different geographical areas within one country. - Page 68 Sections Description Action URL To display and configure Action URL settings. Setup Completed: When the IP phone completes startup.
- Page 69 Registered: When the IP phone successfully registers an account. Unregistered: When the IP phone logs off the registered account. Register Failed: When the IP phone fails to register an account. Off Hook: When the IP phone is off hook. ...
-
Page 70: Phone->Multicast
Reject Incoming Call: When the IP phone rejects an incoming call. Answer New Call: When the IP phone answers a new call. Transfer Finished: When the IP phone completes to transfer a call. Transfer Failed: When the IP phone fails to transfer a call. -
Page 71: Phonebook->Local Book
Paging priority Active: Enable o disable the multicast. Priority List To setup the multicast parameters. Listening Address: Enter the IP address you need to listen Label: Input the label for each listening address 4.19 PhoneBook->Local Book Go to the path: PhoneBook ->Local Book... -
Page 73: Phonebook->Remote Book
Sections Description Contact To display and select local contact type. All Contacts: To display or edit all local contacts. Favorites: To display or edit favorites contacts. Black List: To display black list contacts. Search To search designated contacts from local phonebook. Dial To dial out a call or hangup an ongoing call from Web UI. -
Page 74: Phonebook->Call Log
Local Book URL: To configure remote book server address Local Book Name: To configure display remote book name on Phone UI Search Remote Phonebook Name: To enable or disable search remote phonebook name Search Flash Interval: To set interval (Range from 120s to 2592000s) Note: IP phone support at most 5 remote books. -
Page 75: Phonebook->Ldap
Note: For “HangUp” feature, you need to have the remote control privilege to control IP phone via Web UI. Please refer to section “Remote Control” in the Web UI- >Phone->Call Feature page. 4.22 PhoneBook->LDAP Go to the path: Phone Book ->LDAP Sections Description... -
Page 76: Phone->Broadsoft
LDAP To display and configure LDAP phonebook settings. Name Filter: The settings used to tell LDAP server what name attributes to search. Number Filter: The settings used to tell LDAP server what number attributes to search. Server: To configure LDAP server’s address. ... -
Page 77: Upgrade->Basic
Server Address: Broadsoft PhoneBook server’s address. Server Port: Broadsoft PhoneBook server’s port. User Name: Username used to access Broadsoft PhoneBook server. Password: Password used to access Broadsoft PhoneBook server. Note: IP phone supports at most 5 Broadsoft PhoneBook items. -
Page 78: Upgrade->Advanced
Hardware Version To display Hardware version. Reset to Factory Setting To enable you to reset IP phone’s setting to factory settings. Reboot To reboot IP phone remotely from Web UI. 4.25 Upgrade->Advanced Go to the path: Upgrade ->Advanced... - Page 80 Sections Description PNP Option To display and configure PNP setting for Auto Provisioning. PNP: Plug and Play, once PNP is enabled, the phone will send SIP subscription message to PNP server automatically to get Auto Provisioning server’s address. By default, this SIP message is sent to multicast address 224.0.1.75(PNP server address by standard).
-
Page 81: Security->Basic
Remote System Log: To enable or disable Remote System Log. Remote System Server: To input the syslog server address. PCAP To start, stop packets capturing or to export captured Packet file. Start: To start capturing all the packets file sent or received from IP phone. -
Page 82: Security->Advanced
Confirm Password: Repeat the new password. Note: For now, IP phone can only support user admin. 4.26 Security->Advanced Go to the path: Security ->Advanced Sections Description Web Server Certificate To display or delete Certificate which is used when IP phone... - Page 83 is connected from any incoming HTTPs request. Note: The default certificate could not be deleted. Web Server Certificate To upload a certificate file which will be used as server Upload certificate. Client Certificate To display or delete Certificates which is used when IP phone is connecting to any HTTPs server.
Need help?
Do you have a question about the R67G and is the answer not in the manual?
Questions and answers