Table of Contents
Advertisement
Quick Links
Advertisement
Table of Contents

Related Manuals for Akuvox VP-R47P


Summary of Contents for Akuvox VP-R47P
- Page 1 VP-R47P User Manual...
-
Page 2: Table Of Contents
Content 1 Welcome................... 6 2 Product Overview................8 2.1 Instruction......................8 2.2 Technical Specification..................9 2.3 Equipment Appearance And Interface Description........10 2.3.1 Interface Description................11 2.3.2 Keypad Description................11 2.4 Indicators......................12 3 Installation..................13 3.1 Equipment Packaging..................13 3.2 Connecting Video Phone................13 3.3 Installation Considerations................14 4 Getting Started................15 4.1 Basic Operation.................... - Page 3 4.5.2 Call Waiting..................33 4.5.3 Always forwarding&Forwarding Number..........33 4.5.4 Call forwarding busy&Forwarding Number.........33 4.5.5 No Answer Forwarding&Forwarding Number........34 4.5.6 Time out....................34 4.5.7 Playtone....................34 4.5.8 Intercom....................34 4.6 Dial Plan......................34 4.7 Personalize......................35 4.7.1 Log Level....................35 4.8 Reboot Manager.....................36 4.8.1 Reboot time..................36 4.8.2 Status of time..................
- Page 4 5.8.1 View Photo & Picture & Video............65 5.9 Bluetooth......................66 5.9.1 Turning Bluetooth On /Off..............67 5.9.2 Changing Bluetooth Device Name............67 5.9.3 Paring VP-R47P With A Bluetooth Device........... 67 5.9.4 Un-pairing A Bluetooth Device............68 5.10 USB....................... 68 5.11 Calendar....................... 69 5.11.1 Add An Account.................69...
- Page 5 7.4 Backup & Reset....................96 7.5 Failure Process....................97 8 Web Interface.................99 8.1 Web login......................99 8.2 Status->Basic....................99 8.3 Account->Basic..................... 100 8.4 Account->Advanced..................103 8.5 Network ->Advanced..................106 8.6 Phone ->Call Feature..................107 8.7 Phone-> Ext Key....................109 8.8 Phone->Dial Plan..................110 8.9 Upgrade->Basic.....................111 8.10 Upgrade->Advanced...................112 8.11 Security->Basic...................
-
Page 6: Welcome
Multimedia VoIP Phone also features broad interoperability with most 3 party SIP based devices, IPPBX and major IMS platforms. The VP-R47P represents the future multimedia terminal in modern Internet age. This user manual is designed to help you understand how to configure and manage the VP-R47P Multimedia VoIP Phone. - Page 7 interference to radio communications. However, there is no guarantee that interference will not occur in a particular installation. If this equipment does cause harmful interference to radio or television reception, which can be determined by turning the equipment off and on, the user is encouraged to try to correct the interference by one or more of the following measures: ...
-
Page 8: Product Overview
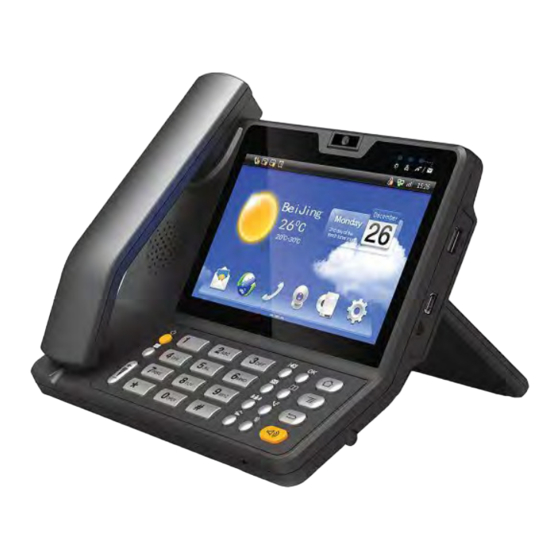
2 Product Overview 2.1 Instruction VP-R47P is an Android-based multimedia terminal with a 7 inch touch screen and a 2M CMOS sensor camera. It supports H.264/H.263 codec with adaptive bandwidth adjustment. The 7 inch touch screen offers excellent user experiences such as high quality videophone, smooth internet surfing, various Android Apps and daily information. -
Page 9: Technical Specification
2.2 Technical Specification Model VP-R47P 7 inch capacitive touch screen TFT LCD, 800x480 pixels, 16:9 wide Graphic Display screen aspect ratio Camera 2 mega pixels CMOS camera, free rotation Network Protocol SIP RFC3261,TCP/UDP/IP,PPPOE,RTP/RTCP Operation System Android 4.2 ... -
Page 10: Equipment Appearance And Interface Description
2.3 Equipment Appearance And Interface Description Figure 1-1 R47P Front View Figure 1-2 R47P Rear View... -
Page 11: Interface Description
Figure 1-3 R47P Profile View 2.3.1 Interface Description Interface Description Camera Adjustable camera shooting angle, rotate down the camera to "off" angle. USB interface External USB storage device Headset Connect to 3.5mm stereo headphone, headset device HDMI Use HDMI cable to output the video to a TV screen Network interface can be connected to a hub, switch or other network Power over Ethernet) . -
Page 12: Indicators
Volume Press + or – for the phone volume adjustment Standard Keypad Input the number or symbol Delete Delete a character before the cursor Same function with soft keyboard "Enter" key Message Optional Contact Enter Into the contacts list, you can view the local contact Conference The first party is held in the case, according to a Function Key... -
Page 13: Installation
3 Installation 3.1 Equipment Packaging Name Quantity Main Case Handset Phone Cord Power Adapter Ethernet Cable Quick Start Guide 3.2 Connecting Video Phone Connection diagram... -
Page 14: Installation Considerations
Connecting to Network Use the matched network cable to connect the LAN Port of the video phone to the Router or Switch. Viewing the top right corner of the screen, if the indicator light is on, network cable is connected properly. ... -
Page 15: Getting Started
4 Getting Started 4.1 Basic Operation 4.1.1 Main Screen Instruction Status bar, at the top of the screen, displaying the status of system information. Do Not Disturb plug-in, When enabled DND, prohibit incoming calls in; Incoming call will be normal when DND is closed ... -
Page 16: Using The Touchscreen
Status Area Icon Description Network is connected Network is not connected Mute mode Alarm clock is set PPPOE is connected PPPOE is failed Notification Area Icon Description SIP account is registered Missed call, number means how many missed calls downloading uploading Receives a new email An event is coming... -
Page 17: Startup And Shutdown
Drag Touch and hold an item for a few seconds first. Once the item has a red frame activated, or a move option shows up, keep your finger on the screen and move it until the target position is reached. Then lift your finger up to release. ... -
Page 18: Connecting To Network And Wi-Fi
4.2 Connecting To Network And Wi-Fi VP-R47P supports a variety of network connections (Ethernet, Wireless) and device connections Network connections includes four modes, Static IP, DHCP, PPPOE, Wi-Fi access. DHCP is the default configuration. Device connections include EHS headset, USB and Bluetooth device. -
Page 19: Configuring Dhcp
->SETTINGS-> ->Wireless & Networks-> Ethernet->Use static IP. Mode 4: In the main screen, tap ->Network Settings->LAN Connecting->Static IP. Configuration page is shown as below: Configuration parameter specification: Parameter Specification IP address set the IP address of the device Subnet Mask set the subnet mask of the device Default Gateway set the default gateway... -
Page 20: Configuring Pppoe
Mode 3: Drag down the status bar, click shortcut icon on the status bar ->SETTINGS> ->Wireless & Networks-> Ethernet-> uncheck Use static IP. Mode 4: In the main screen, tap ->Network Settings->LAN Connecting->DHCP. Configuration page is shown as below: Note: 1) If DHCP acquired IP, it will display dynamic IP address information on the location of static IP configuration, cannot be modified, and there is a item of Use static DNS at... - Page 21 Mode 2: In the main screen, tap -> Settings-> Wireless & Networks-> Ethernet -> More ->PPPOE. Mode 3: Drag down the status bar, click shortcut icon on the status bar ->SETTINGS ->Wireless & Networks-> Ethernet-> More ->PPPOE. Mode 4: In the main screen, tap ->Network Settings->LAN Connecting->PPPOE Configuration page is shown as below:...
-
Page 22: Configuring Wi-Fi
Note: 1) After dialing, can display the acquired IP address, server IP, the primary DNS, Secondary DNS information, status as connected 2) Not Dial, IP address information will be 0.0.0.0 3) There is a redial entry under Alternate DNS, click redial, then re-launch a PPPOE dial-up process, re-dial. - Page 23 1) When the Wi-Fi switch is turned on, the video phone can list and display all Wi-Fi AP searched in the environment; 2) When connects to available AP in the environment, if a Wi-Fi AP is without password protection, there is no lock icon on Wi-Fi signal, it will automatically connect when clicked;...
- Page 24 IP settings(Static IP): 5)Long press on the connected Wi-Fi AP, it will pop-up a dialog box, you can forget the network or modify the network. Long press on the non-connected Wi-Fi AP, it will pop up a dialog box, and you can click and connect to network. 6)Click WPS button, if the wireless router has WPS function, and the router WPS button is pressed, the video phone will be able to connect to the Wi-Fi without entering a password.
-
Page 25: Sip Account Configuration
8)Click Menu, you can do the operations such as: Scan(scan the new wi-fi AP), WPS Pin Entry(enter the PIN on the Router, the phone will no need to input the wi-fi password), Wi-Fi Direct and Advanced. 9)In Advanced Menu, shown as below: a. -
Page 26: Add Account
4.3.1 Add Account Click an account to enter Account Editor... -
Page 27: Sip Account On/Off
Configuration parameters are described as follows: Parameter Specification Register Name SIP Accout ID provided by ISP User Name SIP User Name provided by ISP Password SIP Password provided by ISP Display Name SIP Display name SIP Register Server, format: domain/IP, for example: Reg Server IP 194.168.1.2 Reg Server Port... -
Page 28: Modify/Remove Sip Account
the status bar. See the below picture: a. If you want to disable the account, please click b. If the sip account is failed to register, the failure code will be displayed under the account, and then you can check with the account configuration or network connection. -
Page 29: Sound
2)Remove the sip account: Click the box of the account which you want to delete, and then press “Clear Account”. 4.4 Sound You can select one of the following methods to enter the Sound configuration: Mode 1: In the main screen, press "Menu" key on the hard keyboard-> System Settings->... -
Page 30: Silent Mode
Including Volume, Ringtone and Notification, Dial pad touch tones and Touch sound. 4.4.1 Silent Mode Long press the Power button, then choose Silent mode in the pop-up menu. In addition to the media and the alarm sound, the rest sound is mute. As shown in the picture below:... -
Page 31: Volumes
4.4.2 Volumes In Sound configuration page, click “Volumes”, the volume configure is shown as below: Volume options include ringtones and notifications, Media, Alarm clock. You can hold and drag the slide button or just directly click a volume location to adjust the volume. -
Page 32: Call Settings
configuration page to click the correspond sound. Dial pad touch tones and Touch sounds are enabled in default configuration. 4.5 Call Settings 4.5.1 Do Not Disturb DND function is to prevent foreign phone from disturbing, if open DND, external... -
Page 33: Call Waiting
phone call is unable to call in, turned off by default. Configuration on the phone: 1.Phone Settings->Call Settings->Call Forwarding 2.Select the desired account. 3.Enable Do not Disturb. 4.5.2 Call Waiting Open call waiting, if enable call waiting, after establishment of a conversation, there are a third party call in, then video phone will have a new call tips, you can choose to answer or reject the call. -
Page 34: No Answer Forwarding&Forwarding Number
It is used to answer the incoming call automatically after users set up the intercom function. In default situation, the IP phone Akuvox R47P will answer the intercom incoming calling automatically and make a noise. You can set the phone to enable silent mode when picking up the intercom call so that the other will not hear you. -
Page 35: Personalize
Note: There is only one area code rule supported. 4.7 Personalize 4.7.1 Log Level The Log level is divided into seven levels: EMERG, ALERT, CRIT, ERR, WARNING, NOTICE, INFO, DEBUG, log class is from low to high. The default setting is EMERG, which is the lowest grade log. -
Page 36: Reboot Manager
4.8 Reboot Manager 4.8.1 Reboot time User can setup the reboot date and hour you want . 4.8.2 Status of time If the status is enable ,users can edit the reboot time you want. 4.8.3 Status of active Enable/disable the reboot function 4.8.4 Reboot settings Click the icon to reboot. - Page 37 Settings-> Date & time. Mode 2: In the main screen, tap -> Settings-> Date & time. Mode 3: Drag down the status bar, click shortcut icon on the status bar ->SETTINGS> -> Date & time. The configuration page is shown as below: If you want to manually set the date and time, firstly, remove the click ”Automatic data &...
- Page 38 You can increase or decrease the corresponding value by dragging upper or lower, also can directly input corresponding value in input flied, and then click the "Done" button. Click "Set time, time settings, as shown below: In the figure, uncheck Use 24-hour format, you can increase or decrease the corresponding time value by dragging upper and lower.
-
Page 39: Personalization Settings
4.10 Personalization Settings According to personalized settings, you can make the equipment more characteristic. 4.10.1 Wallpaper You can use the following three ways to change your favorite wallpaper. Mode 1: 1) You can choose one of the following steps to enter into the choice of wallpaper source: ... -
Page 40: Widgets
When clipping, if want to change clip size of the box, press clipping frame, the border follows the direction of the arrow to be shown in the figure, you can drag it to the border or outside the borders, to change the size of the crop box. - Page 41 following window: 2) Each widget has indicated the name and the location, press and hold the component, put it to the designated location on the desktop. 4.10.2.2 Modify An Added Widget If you want to modify the location of added widgets on the desktop, hold the widget until the icon appears on the upper left corner of the screen, you can drag the widget to the corresponding position of the desktop.
-
Page 42: Shortcuts
At this time, you can press the arrow button to drag the border to change the size of the widget frame. And then only need to press “Back” button on the keyboard to save the change. 4.10.2.3 Delete A Widget Hold the widget until the icon appears on the upper left corner of the screen, you can drag the widget to... -
Page 43: Modify Extended Bar
4.10.3.2 Modify A Shortcut If you want to modify the location of shortcut on the desktop, hold the shortcut until the icon appears on the upper left corner of the screen, you can drag the shortcut to the corresponding position of the desktop. 4.10.3.3 Delete A Shortcut Hold the shortcut until the icon... -
Page 44: Backup & Reset
1) Click -> Music(App). 2) See the music list in App, select and press a music, and then In the pop-up menu options, select "Ringtone" -> "Phone" 4.11 Backup & Reset 1) Click Setting 2) Click “Backup & reset”; 3) Click “Factory data reset”; 4) Click “Reset Multimedia Terminal”... -
Page 45: Function
5 Function 5.1 Call Function Video phone supports voice calls and video calls. Please ensure that the device has been configured SIP account successfully before using the call function. SIP account configuration refers to section 3.3. 5.1.1 Make A Call You can directly dial from the keypad, from the contact or from call records. - Page 46 1) By pressing the number keys on the dial interface or directly pressing the number on keypad. To delete a number, press the on the dial interface, or press Delete button on the keypad. 2) If you want to make an audio call, please click "Audio Call"; if you want to make a video call, please click "Video Call".
- Page 47 5.1.1.2 Dial Out From Contact You can choose one of the following steps to enter into the contacts: In dialing interface, Click the icon Contact is shown as below: Contact supports rapid locating the contact through first letter. 1) Click the contact in Contacts, and you can view the details on the right side. As shown in below picture:...
-
Page 48: Receive A Call
quickly. When input no number, displaying the current call records; when input numbers, list the current matching results. Click the contact, and it will enter the telephone number to dial automatically. 5.1.2 Receive A Call Incoming calls include audio and video calls. If the caller has been stored in the contacts, it will show the contact name, otherwise the caller number will be displayed. - Page 49 Click "Audio" to establish the audio call, and video is not visible; click "Video" to establish the video call, and video is visible. Pick up the handle is to answer the call as a video call. 3) Answer a video invite During an audio call, if a video invite is requested, it will pop up the following window: Click “Accept”...
-
Page 50: Call Options
5.1.3 Call Options Call options as shown below: Call options are described as below: Click the button to hold the current call. Click the button to resume the current call. Mute Click to switch to video call Click to switch to audio call Click to switch to Speaker Click to switch to handset Extended function... -
Page 51: Call Records
View local video View the other part video 5.1.3.3 Multiple Calls The Phone supports more than 3 line calls. The line information is on the right side of call interface. During a call, you can click on the button to add a new call. - Page 52 1) you can click the drop-down list to choose the call record types, it supports for all call, missed call, received call, dialed call and forwarded call five types of call information. 2) Call records are shown on the left, and show the total number in the bracket. Click the number or contact, and you can view all the call records details on the right.
-
Page 53: Contacts
5.1.4.3 Delete Call Records 1) If you want to delete one call record, steps as below: Long press the call record you want to delete; Pop-up a menu, press “Confirm” to confirm the deletion. 2) If you want to delete multiple call records, steps as below: ... -
Page 54: Contacts
Enter the dialing interface, and then click the icon 5.2.1 Contacts You can view, audio call, video call, add, edit, delete the contacts. 5.2.1.1 Add A New Contact 1) Click the icon on the top right corner, and click “New Contact” in the drop-down window;... - Page 55 Edit the contact photo, Browse the image from “Take Photo” or “Choose photo from Gallery” Delete the note Cancel the edit Save the contact Some more information If you want to add some more information, please click ,it will pop up the page of contact details, as shown:...
- Page 56 Click to save the contact. 5.2.1.2 Modify The Contact 1) Select the contact you need to modify in the contact list; 2) Click 3) Enter into contact edit page, you can edit the contact information. 5.2.1.3 Delete The Contact You can choose one of the following methods to delete the contacts: ...
-
Page 57: Group
5.2.2 Group Group, it will be convenient for you to have contact group management. Contacts should at least belong to a group, the default is no group. In the contact page, click “My Groups” to view the groups, as shown: 5.2.2.1 Add A New Group 1) Click... -
Page 58: Conference
4) Click “Confirm” to save. 5.2.2.3 Remove A Group 1) In Contact page, click the group you need to delete, and then click 2) Click “Remove Group”, and then click “OK”. (Note:the system default group cannot be deleted) 5.2.2.4 Edit A Group 1) In Contact page, click the group you need to edit. - Page 59 4. When the second party answers your call, press the Conference softkey or the Conference key on the keypad to start 3-way conference.
-
Page 60: Transfer
5.4 Transfer 4.4.1 Blind Transfer 1. When the IP phone blind transfers a call. 2. Pick up a call, press transfer key on the keypad or click 3. Drag down the current call into the gray box 4. Press to enter the target number, then click Confirm. 5. -
Page 62: Keypad Input
5.5 Keypad Input Only numbers, * and # can be input by keypad. The default Input method is Android keyboard. You can also download your preferred input method from the internet. 5.6 Webpage Browser This section describes the default web browser in the video phone, and you can also download your preferred browser through the internet. -
Page 63: Camera
Add a new webpage View the bookmark and browsing history Others 5.7 Camera Open the camera: in the main screen, click -> 。 You can view your photos and videos in “Gallery” 5.7.1 Photograph Mode Turn on the camera, and the default mode is photograph mode. 5.7.1.1 Basic Setting Click on the upper right corner... - Page 64 menu Setting White balance setting 5.7.1.2 Mode Switch Click on the lower right corner to switch the mode. Panoramic camera mode Video mode Photo mode 5.7.1.3 Take A Photograph You can click on the center button on the right side to take pictures. It supports automatic focusing, if you want to adjust the focal length, please use two fingers to press on the screen, shrinkage or expansion to adjust the focal length.
-
Page 65: Gallery
5.7.1.4 Take A Video Click -> to swith to video mode. Click ,video starts when the icon turns to . And click to stop the video recording and save. 5.8 Gallery You can use Gallery to view photos or videos, and you can also view the picture or video downloaded from the Internet. -
Page 66: Bluetooth
Bluetooth device with the VP-R47P, “pair” the device with VP-R47P so that both devices know how to connect securely to each other. After that, users could simply connect to a pared device. Turn off Bluetooth if it’s not used. -
Page 67: Turning Bluetooth On /Off
Click on Bluetooth, and tick Bluetooth to turn it on; Click on SEARCH FOR DEVICE; The VP-R47P scans and displays the IDs of all available Bluetooth devices in range. If the device you would like to pair with does not show up in the list,... -
Page 68: Un-Pairing A Bluetooth Device
“Pairing” under the device ID. Make sure the Bluetooth device is active in pairing mode. Then tap on the device ID on the VP-R47P to pair them. Confirm the passkey in the prompted message (if any). Or if PIN is required, please refer to the device’s documentation or other procedures to... -
Page 69: Calendar
5.11 Calendar To start the calendar: In the main screen,click -> Calendar; As shown below: If one day has activity, color will appear on the calendar to remind. 5.11.1 Add An Account While using the calendar at the first time, it will remind you to add an account. Click ”Add account”... -
Page 70: View Calendar
5.11.2 View Calendar The calendar will display weekly by default, and you can slide the calendar up and down to view the different weeks. In order to view the activities or create the new activities, you can also make the calendar display daily or monthly. While using daily or monthly displaying, you can slide the calendar left and right to view the different day or month. -
Page 71: Edit Activities
3) Click “Done” to finish. 5.11.4 Edit Activities You can click on schedule needed to be modified to edit the schedule. 5.11.5 Delete Activities While viewing the activity, you can click “DELETE” on the upper right corner to delete... -
Page 72: Clock
the activity. 5.12 Clock Enter the Clock: In the main screen, click -> Clock; As shown below: Description: Alarm Countdown timer Stopwatch Time zone Others 5.12.1 Alarm You can add one or multiple alarms:... - Page 73 1) Click 2) Click 3) Input the time of alarm: 4) If you want to repeat the alarm in some days of a week, please click “REPEAT”; 5) You can choose the ringtone of the alarm. 5.12.1.1 Enable/Disable Alarm You can click ON/OFF to enable or disable the alarm. Note: if power off the phone, the alarm will also be off.
-
Page 74: Countdown Timer
5.12.1.2 Modify Alarm If you want to modify the status of the alarm, including time, repeat data, alarm ringtone, you can directly click on the alarm. 5.12.1.3 Delete Alarm In Alarm page, you can use the following method to delete the alarm: ... -
Page 75: Stopwatch
5.12.3 Stopwatch 1) Click 2) Click “START” or “STOP” to start or stop the stopwatch; 3) Click the time icon to start a new time; 4) When the time is on hold, click to reset the timer. 5.13 Email Email Application can let you use POP3 or IMAP service to send and receive e-mail. Start Email:... -
Page 76: Music
If you have already set up an email account, In the main Email page, Press “Menu” button, and then click “Account”, and last press ”Menu” to “Add Account”. 2) Input the email account and password, and then click “Next”; If there is no account type in the equipment database you want to set, the device will require you to enter more detailed information (the receiving server settings and outgoing server settings). -
Page 77: Explorer
You can click the labels of Artists, Albums or Songs to view all songs. You can also view or play the songs from the playlists. To view the currently playing song, please click the "now playing" label 5.15 Explorer You can use explorer to manage the files in the device. In the main screen, click ->... -
Page 78: Video Player
Home Page Upper Layer Multiple Choices, And the selected file will change to blue color. Editor, you can do Copy, Delete, Move, Paste, Rename, Send, Create shortcut operations. New Folder Previous File Next File If you insert a SD card, you can view the files in SD card. (Optional) View the internal files of the device View the files in inserted USB device... -
Page 79: Floating Browse Mode
Bookmark Screen Brightness Adjustment The previous video, and long press to make video fast backward. Hold/Play The next video, and long press to make video fast forward. Screen size adjustment, four type of video sizes: original size, full screen, 16:9, 4:3 Floating browse mode Others 5.16.1 Floating Browse Mode... -
Page 80: Blf
You can click on to play the video, click to shrink the floating window. And use two fingers to press on the screen, shrinkage or expansion to adjust the window size. If you want to close the floating window, please long press the floating window until it displays icon in the center, click on the icon to close the floating window. -
Page 81: Blf List
5.18 BLF List BLF List:While using BroadSoft platform, the accounts which are monitored by the sip phone will reply the subscribe news in the form of xml list to improve efficiency. BLF List Code:While using BroadSoft platform,when press BLF List key configured the BLF LIST CODE,can Pick up call or Barge in call. -
Page 82: Call Return
2. Answer the intercom incoming calling. 3. In default situation, the IP phone Akuvox R47P will answer the intercom incoming calling automatically and make a noise. You can set the phone to enable silent mode when picking up the intercom call so that the other will not hear you. -
Page 83: Others
5.21 Others 5.21.1 Apk Installer You can use Apk Installer to install the apk application In the main screen, click ->Apk Installer. As shown below: 5.21.1.1 Install You can click “Install”, and then browse the path:... -
Page 84: Ping Tool
The system will list all the Apk applications under the path, click the Apk to install. 5.21.1.2 Manage You can click on "Manage" button to browse the Apk installed in the system. 5.21.2 Ping Tool You can use the Ping tool for Ping query, network packet capture and view the log information. - Page 85 enter the Ping + address, such as: , and then click the Ping button. 5.21.2.2 Tcpdump Log captured tool interface is as shown: You can choose what type protocol and specified port you need to capture the logs. Press “Start Tcpdump” to start the log captured. If you want to finish the log captured, you can press “Stop Tcpdump”...
- Page 86 You can use to search the log information, and select the log level through the drop-down list. Or click to see more options. if you need to save the log, please click , select "Save" If you need to highlight the log information, please click , select "highlight", and then the log will be showed as different color.
-
Page 88: Software Upgrade
6 Software Upgrade 6.1 Immediate Update Choose one way below to enter the system upgrade interface: In the main screen, press “Menu” on board -> System Settings -> System -> About Multimedia Terminal -> System Upgrade -> System Update Now ... -
Page 89: Select Other Upgrade Package
6.1.1 Select Other Upgrade Package 1) Via USB to Upgrade Put upgrade package into USB, insert USB, then click “Select other upgrade package”, find “/mut/usb_storage”, find the upgrade package, then click “OK” to upgrade. 2) Via Internal Memory to Upgrade Use USB to copy the upgrade package into Internal Memory, then press “Select other upgrade package”, find “/mnt/sdcard”... -
Page 90: Remote Update
2) Via built-in SD Card to upgrade First, change the name of upgrade package into upgrade.zip, then copy it into USB, and then use USB to copy the upgrade package into Internal Memory, enter the upgrade interface, will find path upgrade package:/mut/sdcard/upgrade.zip, because... -
Page 91: Auto Update Period
2) Click “Remote Upgrade”, video phone will check the new version automatically. If exist a new version, it will prompt. Press “OK” to download upgrade document. 3) After finish downloading, it prompts “Download update image success! You need to restart system for update! ”, press reboot now, and then system will upgrade automatically. -
Page 92: Upgrade On The Web
The terminal will detect the new version automatically in time, if there is, the status bar will show “There is a new version, please update!”. Click and download the image for upgrade. As shown: 6.3 Upgrade on the web 1.Click Upgrade->Basic 2.Choose the software you want to update from the computer. -
Page 93: Check Update After System Power On
6.4 Check Update After System Power On Click “Check Update After System Power On” in figure 5-1. Every time you power on, the system will check the new version automatically. If there is a new one, the status bar will notice: “System has new version, please update now!”, click and download the image for upgrade. -
Page 94: System Maintenance
7 System Maintenance 7.1 System State Inspection Mode 1: In the main screen, press "Menu" key on the hard keyboard-> System Settings-> About Multimedia Terminal Mode 2: In the main screen, click -> -> About Multimedia Terminal It will display phone status, software version and hardware version in this item. 7.2 IP Query Mode 1: In the main screen, press "Menu"... -
Page 95: Sip Account Registration Query
Mode 3 and Mode 4 can check the corresponding network information in setting interface. 7.3 SIP Account Registration Query You can choose one of the following methods to enter the SIP account registration query: If the account is successfully registered, the icon will be light up in notification area of phone. -
Page 96: Backup & Reset
Mode 1: Press Speaker button or pick up to enter the dialing interface, click on upper right corner, check Account Manager. Mode 2: Slide down the top-left , click the account, enter the setup interface, check Account Manager. 7.4 Backup & Reset Mode 1: In the main screen, press "Menu"... -
Page 97: Failure Process
7.5 Failure Process Failure 1: Power LED is off Please check whether the adapter fits this product requirement; Please check whether the outlet is working properly. Failure 2: No voice when pick up the handle Please check whether the connection of handset and base is working properly; ... - Page 98 (call volume) separately. These two adjustments are unrelated. Adjust the volume won’t change ring volume when off-hook the phone.
-
Page 99: Web Interface
8 Web Interface 8.1 Web login 1. Open the browser on your computer. 2. Input the IP address in the address bar. 3. Enter the user name and password (user name: admin, password: admin), then click 8.2 Status->Basic Click Status->Basic to check the phone information. -
Page 100: Account->Basic
Sections Description Product Information To display the device’s information such as Model name, MAC address (IP device’s physical address),Hardware Model, Firmware version and Hardware firmware. Network Information To display the device’s Networking status(LAN Port),such as Port Type(which could be DHCP/Static/PPPoE), Link Status, IP Address, Subnet Mask, Gateway, Primary DNS server, Secondary DNS server. - Page 102 Sections Description SIP Account To display and configure the specific Account settings. Status: To display register result. Display Label: Which is displayed on the phone’s LCD screen. Display Name: Which is sent to the other call party for ...
-
Page 103: Account->Advanced
8.4 Account->Advanced 1. Click Account->Advanced. 2. Filled the corresponding parameters you need. - Page 105 Sections Description SIP Account To display current Account settings or to select which account to display. Codecs To display and configure available/unavailable codecs list. Codec means coder-decoder which is used to transfer analog signal to digital signal or vice versa. Familiar codecs are PCMU(G711U), PCMA(G711A), G722 (wid-bandth codecs),G729 and so on.
-
Page 106: Network ->Advanced
ongoing call will be disconnected automatically once the session expired unless it’s been refreshed by UAC or UAS. Session Expire: Configure session expire time. Session Refresher: To configure who should be response for refreshing a session. Note: UAC means User Agent Client, here stands for IP phone. -
Page 107: Phone ->Call Feature
stream can use. Min RTP Port: Determine the minimum port that RTP stream can use. 8.6 Phone ->Call Feature 1. Click Phone->Call Feature 2. Filled the corresponding parameters you need. - Page 108 Sections Description Forward Transfer To display and configure Forward setting. Note: There are three types of forward: Always Forward, Busy Forward and No answer Forward. Always Forward: Any incoming call will be forwarded in any situation. Busy Forward: An incoming call will be forwarded if IP ...
-
Page 109: Phone-> Ext Key
8.7 Phone-> Ext Key 1. Click Phone-> Ext Key 2. Select the Type, Account, input the Lable, Value. 3. Click... -
Page 110: Phone->Dial Plan
8.8 Phone->Dial Plan Click Phone-> Dial Plan Sections Description Rules Allow user to select Replace rule or Dial-now to display or edit. Dial Now Delay Allow user configure dial now delay time for dial now. It means user can configure the IP phone to dial out the phone number automatically after the designated delay time if it match any dial now rule. -
Page 111: Upgrade->Basic
Note: There is only one area code rule supported. 8.9Upgrade->Basic 1.Click Upgrade->Basic 2.Choose the software you want to update from the computer. 3.Click Sections Description Firmware version To display firmware version, firmware version starts with MODEL name. Hardware Version To display Hardware version. Upgrade To select upgrading rom file from local or a remote server automatically. -
Page 112: Upgrade->Advanced
8.10 Upgrade->Advanced 1. Click Upgrade->Advanced 2. Filled the corresponding parameters you need. Sections Description PNP Option To display and configure PNP setting for Auto Provisioning. PNP: Plug and Play, once PNP is enabled, the phone will send subscription message server automatically to get Auto Provisioning server’s address. -
Page 113: Security->Basic
Common AES Key: Used for IP phone to decipher common Auto Provisioning configuration file. AES Key (MAC): Used for IP phone to decipher MAC-oriented auto provisioning configuration file(for example, file name could be 0c1105888888.conf if IP phone’s MAC address is 0c1105888888). Note: AES is one of many encryption, it should be configure only configure filed is ciphered with AES, otherwise left blank. - Page 114 Sections Description Web Password Modify To modify user’s password. User Name: Choose the character you are.(admin or user) Current Password: The current password you used. New Password: Input new password you intend to use. Confirm Password: Repeat the new password. ...
Need help?
Do you have a question about the VP-R47P and is the answer not in the manual?
Questions and answers