Table of Contents
Advertisement
Quick Links
Advertisement
Table of Contents

Subscribe to Our Youtube Channel
Related Manuals for Akuvox VP-R48G


Summary of Contents for Akuvox VP-R48G
- Page 1 VP-R48G User Manual...
-
Page 2: Table Of Contents
Content 1 Welcome..................6 2 Product Overview..............8 2.1 Instruction......................8 2.2 Technical Specification..................9 2.3 Equipment Appearance And Interface Description........10 2.3.1 Interface Description................11 2.3.2 Keypad Description................11 2.4 Indicators......................12 3 Installation................13 3.1 Equipment Packaging...................13 3.2 Connecting Video Phone................13 3.3 Installation Considerations................14 4 Getting Started...............15 4.1 Basic Operation....................15 4.1.1 Main Screen Instruction..............15 4.1.2 Status And Notifications Instruction............15... - Page 3 4.7 Call Settings....................35 4.7.1 Always forwarding & Forwarding Number..........35 4.7.2 Call forwarding busy & Forwarding Number........36 4.7.3 No Answer Forwarding & Forwarding Number........36 4.7.4 Time out.....................36 4.7.5 Do Not Disturb..................37 4.7.6 Call Waiting..................37 4.7.7 Playtone....................37 4.7.8 Intercom.....................37 4.7.9 Hotline....................38 4.8 Dial Plan.......................38 4.9 Auto Provision....................39 4.10 Personalize....................40 4.10.1 Log Level...................40...
- Page 4 5.15 Gallery......................78 5.15.1 View Photo & Picture & Video............78 5.16 Bluetooth....................79 5.16.1 Turning Bluetooth On /Off..............80 5.16.2 Changing Bluetooth Device Name.............80 5.16.3 Paring VP-R48G With A Bluetooth Device.........80 5.16.4 Un-pairing A Bluetooth Device............81 5.17 USB......................81 5.18 Calendar.....................82 5.18.1 Add An Account................83 5.18.2 View Calendar...................83...
- Page 5 6.1.2 Local Update..................96 6.1.3 Remote Update...................97 6.2 Auto Update Period..................98 6.3 Upgrade on the web..................99 6.4 Check Update After System Power On............99 7 System Maintenance............100 7.1 System State Inspection................101 7.2 IP Query......................101 7.3 SIP Account Registration Query..............102 7.4 Backup & Reset...................103 7.5 Failure Process....................103 8 Web Interface...............104 8.1 Web login....................105...
-
Page 6: Welcome
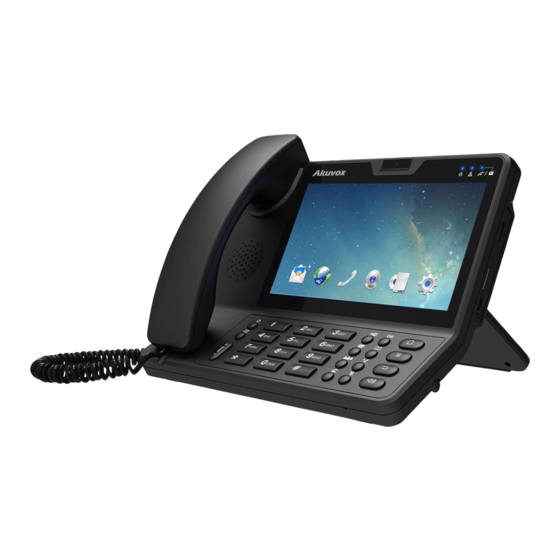
1 Welcome Thank you for purchasing Akuvox VP-R48G Multimedia VoIP Phone. The VP-R48G is an innovative smart desk phone loaded with tremendous value for business communications as well as unprecedented power for advanced custom business applications development and personalization. Featuring Android 5.1 system, a 7 inch capacitive touch screen TFT LCD, a 1.3M CMOS sensor camera, Bluetooth,... - Page 7 provide reasonable protection against harmful interference in a residential installation. This equipment generates uses and can radiate radio frequency energy and, if not installed and used in accordance with the instructions, may cause harmful interference to radio communications. However, there is no guarantee that interference will not occur in a particular installation.
-
Page 8: Product Overview
2 Product Overview 2.1 Instruction VP-R48G is an Android-based multimedia terminal with a 7 inch touch screen and a 1.3M CMOS sensor camera. It supports H.264/H.263 codecs with adaptive bandwidth adjustment. The 7 inch touch screen offers excellent user experiences such as high quality videophone, smooth internet surfing, various Android Apps and daily information. -
Page 10: Technical Specification
2.2 Technical Specification Model VP-R48G l 7 inch capacitive touch screen TFT LCD, 1024x600 pixels, 16:9 wide Graphic Display screen aspect ratio l 1.3 mega pixels CMOS camera, free rotation Camera l SIP RFC3261,TCP/UDP/IP,PPPOE,RTP/RTCP Network Protocol l Android 5.1 Operation System l G.711A/U, G.729, G.722,... -
Page 11: Equipment Appearance And Interface Description
2.3 Equipment Appearance And Interface Description Figure 1-1 R48G Front View... - Page 12 Figure 1-2 R48G Rear View...
-
Page 13: Interface Description
Figure 1-3 R48G Profile View 2.3.1 Interface Description Interface Description Camera Adjustable camera shooting angle, rotate down the camera to "off" angle. USB interface External USB storage device Headset Connect to 3.5mm stereo headphone, headset device HDMI Use HDMI cable to output the video to a TV screen Network interface can be connected to a hub, switch or other network Power over Ethernet) . -
Page 14: Keypad Description
Power Connect to 12V adapter, Power supply Handset Connect to handset Lock Lock the video phone with a Laptop lock Note: If Power over Ethernet is being used, do not plug in the AC adapter. 2.3.2 Keypad Description Interface Description Power Turn on/off the LCD, Reboot, Silent mode Suspend... - Page 15 System is not working Network(LAN Port)is connected Network Connection Network(LAN Port)is disconnected Flashing Contains Miss Calls or Unread Message Information Normal status...
-
Page 16: Installation
3 Installation 3.1 Equipment Packaging Name Quantity Main Case Handset Phone Cord Power Adapter Ethernet Cable Quick Start Guide... -
Page 17: Connecting Video Phone
3.2 Connecting Video Phone l Connection diagram l Connecting to Network Use the matched network cable to connect the LAN Port of the video phone to the Router or Switch. Viewing the top right corner of the screen, if the indicator light is on, network cable is connected properly. -
Page 18: Installation Considerations
Use the matched network cable to connect the PC Port of the video phone to the PC. The PC can access to the internet network via PC Port of the video phone. 3.3 Installation Considerations This product is a desktop product, and here are some safety recommendations about the installation and the usage: l Do not use this product near water, such as: bath, washbasin, kitchen sink and other damp places and so on;... -
Page 19: Getting Started
4 Getting Started 4.1 Basic Operation 4.1.1 Main Screen Instruction l Status bar, at the top of the screen, displaying the status of system information. l Shortcuts, at the bottom of the screen, user can drag a shortcut to this... -
Page 20: Status And Notifications Instruction
region to achieve the replacement of the shortcut. Supports max four shortcuts. 4.1.2 Status And Notifications Instruction The status bar in main screen is divided into two zones, notification area and status area, as shown below: Status Area Icon Description Network is connected Slide mode (Sound is off) Alarm clock is set... -
Page 21: Startup And Shutdown
l Touch and Hold Touch the item on the screen and hold it without lifting your finger from the screen till an action occurs. For example, touch and hold on a picture to bring up operation options. l Drag Touch and hold an item for a few seconds first. Once the item has a red frame activated, or a move option shows up, keep your finger on the screen and move it until the target position is reached. -
Page 22: View / Turn Off Notifications
As shown below. 4.2 Connecting To Network And Wi-Fi VP-R48G supports a variety of network connections (Ethernet, Wireless) and the... -
Page 23: Configuring Static Ip
device Network connections includes three modes, Static IP, DHCP, Wi-Fi access. DHCP is the default configuration. The device connections include EHS headset, USB and Bluetooth device. 4.2.1 Configuring Static IP You can select one of the following methods to enter the static IP configuration interface: l Mode 1: In the main screen, tap icon->... - Page 24 l Mode 2: In the main screen, tap icon -> Network Settings -> LAN Type- >Access Mode->chose Static IP. Configuration page is shown as below: Configuration parameter specification: Parameter Specification IP address set the IP address of the device Subnet Mask set the subnet mask of the device Default Gateway set the default gateway...
-
Page 25: Configuring Dhcp
4.2.2 Configuring DHCP You can select one of the following methods to enter the DHCP configuration interface: l Mode 1: In the main screen, tap icon-> Settings-> Wireless & Networks->More->Ethernet -> Ethernet Ip mode->check dhcp. l Mode 2: In the main screen, tap cion ->Network Settings->Network Management->LAN... -
Page 26: Configuring Wi-Fi
1) There is a item of Use static DNS at the second bar, when checked, you can modify the primary DNS address and Secondary DNS address. 2) If DHCP is failed, the IP address will show as: 0.0.0.0. 4.2.3 Configuring Wi-Fi You can select one of the following methods to enter the Wi-Fi configuration: l Mode 1: In the main screen, tap icon->... - Page 27 Configuration page is shown as below: 1) When the Wi-Fi switch is turned on, the video phone can list and display all Wi-Fi AP searched in the environment. 2) When connects to available AP in the environment, if a Wi-Fi AP is without password protection, there is no lock icon on Wi-Fi signal, it will automatically connect when clicked.
- Page 28 4) check Show advanced options, drag up to the modify Proxy server and IP mode. Proxy Settings...
- Page 29 IP settings(Static IP):...
- Page 30 5) Tap the connected Wi-Fi AP, it will pop-up a dialog box, you can forget the network or modify the network. Touch and hold on the non-connected Wi-Fi AP, it will pop up a dialog box, and you can click and connect to network. 6) Click Menu, you can do the operations such as: add network setting, refresh the Wi-Fi AP list and Advanced setting.
-
Page 31: Sip Account Configuration
Check Network notification, it will notify you when an open network is available; b. Check Scanning always avaible, let google’s location service and other apps scan for networks, even when Wi-Fi is off. View the Wi-Fi Mac address and IP address; 4.3 SIP Account Configuration You can select one of the following methods to enter the SIP account configuration: l Mode 1: In the main screen,... -
Page 32: Add Account
Account Manager. l Mode 3: Directly pick up handset press Speaker button-> click ->click Account Manager. l Mode 4: Click Browser icon, input IP address to enter login interface. Input username and password( default:admin;admin), click Login label. Go to the path: Account- >Basic. - Page 33 Click an account to enter Account Editor interface.
- Page 34 Configuration parameters are described as follows: Parameter Specification Register Name SIP Accout ID provided by ISP User Name SIP User Name provided by ISP Password SIP Password provided by ISP Display Name SIP Display name SIP Register Server, format: domain/IP, for example: Reg Server IP 194.168.1.2 Reg Server Port...
-
Page 35: Sip Account On/Off
After all the parameters are configured, Click "save" button to save the configurations, then the sip account is added successfully. Then active the account. 4.3.2 SIP Account ON/OFF After SIP account is configured and registered successfully, it will display the prompt ”Registered” in the Account Manager, and the icon will be displayed on the status bar. -
Page 36: Modify/Remove Sip Account
4.3.3 Modify/Remove SIP Account 1) Modify the sip account: Directly click the account to modify. 2) Remove the sip account: Click the box of the account which you want to delete, then on the bottom of the account list will display the label “Clear Account”, tap this label to remove the selected account. -
Page 37: Sound & Notification
4.4 Sound & notification You can select one of the following methods to enter the Sound configuration: l Mode 1: In the main screen, tap shortcut icon -> Device-> Sound & notification. l Mode 2: In the main screen, click ->... -
Page 38: Volumes
Including Volume, Ringtone and Notification. 4.4.1 Volumes In Sound & notification page, the volume configure is shown as below:... -
Page 39: Interruptions
l Volume options include Media, Alarm clock, Notification. l You can directly click a volume location to adjust the volume. l The volume settings, you can also press the keyboard volume button ”+ -” to increase decrease volume. Usually, volume button to adjust for ringtone notification... - Page 40 Touch and hold the Power button, tap the Silent mode bar in the pop-up menu to change the status. The silent mode icon will be displayed on the right side of the status bar. As shown in the picture below:...
-
Page 41: Phone Ringtone
4.4.3 Phone ringtone In the Sound & notification interface, click the Phone ringtone bar to pop up default ringtone setting interface. Click the ringtone you want to set, after the selection, it will ring a short time. Finally, click "OK".Setting interface shown as below:... -
Page 42: Default Notification Ringtone
4.4.4 Default notification ringtone In the Sound & notification interface, click the Default notification ringtone bar to pop up the phone default notification ringtone setting interface. Click the ringtone you want to set, after the selection, it will ring a short time. Finally, click "OK".Setting interface shown as below. -
Page 43: Other Sounds
4.4.5 Other Sounds If you want to enable Screen looking sounds and Touch sounds, please go to Other Sounds configuration page to click the correspond sound. Screen locking sounds and Touch sounds are enabled in default configuration. Shown as below. -
Page 44: Audio Settings
4.5 Audio Settings To setup the corresponding audio parameters and Volume. -
Page 45: Video Settings
4.6 Video Settings To configure the video corresponding parameters. -
Page 48: Call Settings
4.7 Call Settings... -
Page 49: Always Forwarding & Forwarding Number
4.7.1 Always forwarding & Forwarding Number All the incoming calls will be forwarded unconditionally to specified number. Configuration on the phone: 1. Phone Settings -> Call Settings -> Call Forwarding -> Always Forwarding 2. Select the desired account on the Account bar. 3. -
Page 50: No Answer Forwarding & Forwarding Number
Configuration on the phone: 1. Phone Settings->Call Settings->Call Forwarding->Call Forwarding Busy 2. Select the desired account on the Account bar. 3. Check to enable Call Forwarding Busy feature. 4. Input the forward number into the Forwarding Number bar. 4.7.3 No Answer Forwarding & Forwarding Number The incoming calls will be forward to the specified number when the ringtone is time out without answer. -
Page 51: Call Waiting
4.7.6 Call Waiting If enable call waiting feature, after establishment of a conversation, there is a third party call in, then video phone will have a new call tips, the incoming call will be displayed on the conversation interface, user can choose to answer or reject the call. If disable the call waiting feature, the third party will prompt a busy tone. -
Page 52: Dial Plan
automatically, without input any number by manual in dial-up interface. Hotline Delay Time is to set the call out delay value. The range value is 0 to 5 second. 4.8 Dial Plan Rules: Allow user to select Replace Rules or Dial Now to display or edit. Rules Modify: Allow user to modify selected rules information, for replace rule, you can modify related accounts, prefix number and replace number. -
Page 53: Auto Provision
4.9 Auto Provision Phone can be configured to resynchronize its internal configuration state to match a remote profile periodically and on power up by contacting a normal provisioning server (NPS) or an access control server (ACS). -
Page 55: Personalize
4.10 Personalize 4.10.1 Log Level The Log level is divided into seven levels: EMERG, ALERT, CRIT, ERR, WARNING, NOTICE, INFO, DEBUG, log class is from low to high. The default setting is EMERG, which is the lowest grade log. 4.10.2 Hook Mode Hook Mode is divided into Phone Mode, Disable, App Mode, Auto Mode. -
Page 56: Reboot Manager
mode is Phone Mode. 4.11 Reboot Manager 4.11.1 Reboot time User can setup the reboot date and hour you want . 4.11.2 Status of time If the status is enable ,users can edit the reboot time you want. 4.11.3 Status of active Enable/disable the reboot function... -
Page 57: Reboot Settings
4.11.4 Reboot settings Set the reboot time. Disable this feature by default. 4.12 Date & Time You can select one of the following methods to enter Date & Time configuration: l Mode 1: In the main screen, tap -> Settings->System->Date &... - Page 58 The configuration page is shown as below. If user want to manually set the date and time, firstly, tap Automatic data & time bar to disable status, and then set the date, time, select a time zone. Tap Set date bar to pop-up date set interface. As shown below.
- Page 59 Tap Set time. Time settings as shown below.
- Page 60 Tap the Use 24-hour format bar to change the hour format displayed, 1:00 PM format by default. Tap the Choose date format bar to pop up the date format selection interface. Month/day/year date format by default. Shown as below.
-
Page 61: Personalization Settings
4.13 Personalization Settings According to personalized settings,user can set the equipment more characteristic. 4.13.1 Wallpaper User can use the following ways to set the favorite wallpaper. Mode 1: In the main screen, Press Menu button on the keyboard-> tap WALLPAPERS icon. -
Page 62: Widgets
Mode 2: In the main screen, touch and hold on the blank part of desktop-> tap WALLPAPERS icon. On the bottom of the screen displayed the default wallpapers, tap Pick image can enter the gallery to select the picture. Click the Set wallpaper to save the change. Configuration interface shown as below. - Page 63 Mode 1: In the main screen, Press Menu button on the keyboard-> tap the WIDGETS icon. Mode 2: In the main screen, touch and hold on the blank part of desktop-> tap WIDGETS icon. Each widget has indicated the name and the location, touch and hold to pick up a widget, move it to the designated location on the desktop,then move fingers away from the screen.
- Page 64 touch and hold the widget until the icon appears on the upper left corner of the screen, drag the widget to the corresponding position of the desktop. If user want to change the space size of added widgets on the desktop, touch and hold the widget until the icon appears on the upper left corner of the screen, then move fingers away from the screen, the widget will appear frame...
-
Page 65: Shortcuts
4.13.3 Shortcuts User can add the shortcuts such as Application, Webpage bookmarks and the other applications to the main screen desktop. 4.13.3.1 Add A Shortcut In the main screen, click icon , touch and hold a shortcut, put it to the designated location on the desktop, then move fingers away the main screen. -
Page 66: Ringtone
main screen, hold shortcut until the icon appears on the upper left corner of the screen, drag the shortcut to location to delete the shortcut. Also can replace the default shortcut with another shortcut. 4.13.5 Ringtone User can select the ringtone provided by phone default, can download music from the Internet, and then set the favorite music as a ringtone. -
Page 68: Function
5 Function 5.1 Call Function R48G phone supports audio calls and video calls. User can use the SIP account to make a call, also can use IP direct make a call. SIP account configuration refers to chapter 4.3 5.1.1 Make A Call User can directly dial from the keypad, select from the contact list or from call records to call out the number. - Page 69 Dialing interface is shown as below: 3) If registered multiple available SIP accounts, when finishing dialing, user can click line label to choose the outgoing account for the number, as shown below.
-
Page 70: Dialing Out From Contact List
5.1.2 Dialing Out From Contact List 1) Tap icon ->Click the icon -> Label Phone Book->All Contacts. 2) Click label to make an audio call, click label to make a video call, or click label to send the message. Contact is shown as below:... - Page 71 5.1.2.1 Contacts Fuzzy Matching Query Phone supports contacts fuzzy matching queried, intuitive, concise dialing interface for the intelligent input, greatly reducing the number of buttons, achieve rapid, effective positioning search, avoid duplication of invalid operation, saving time. Tap search icon to enter the search interface.
-
Page 72: Receive A Call
5.1.3 Receive A Call Incoming calls include audio and video calls. If the caller has been stored in the contacts, it will show the contact name, otherwise the caller number will be displayed. 5.1.3.1 Answer A Call 1) Answer an audio call When receiving an audio call, click Audio label or pick up the handset or press speaker button on the keypad to answer. - Page 73 2) Answer a video call When receiving an video call, click Audio label to establish the audio call, click Video label to establish the video call. As shown below:...
- Page 74 5.1.3.2 Reject A Call If user want to reject a call, click label calling interface. If user want to reject a call from a number, you can add the number to the blacklist.
-
Page 75: Call Options
5.1.4 Call Options During the audio conversation, the default call options shown as below. Call options are described as below. Click the button to hold the current call. Click the button to resume the current call. Click the button to enter the establish transfer interface Click the button to mute Click the button to resume mute Click the button to send a video request/close the video... - Page 76 Headset mode Click the button to open the extended icons Click the button to close the extended icons Click the button to enter the establish conference interface Click the button to start record Click the button to stop record During the audio conversation, the default call options shown as below.
- Page 77 Video options are described as below. Support local and remote video displayed Support remote video displayed Click to open full screen/ exit full screen 5.1.4.1 Multiple Calls l The Phone supports more than 3 line calls. The line information is on the right side of call interface.
-
Page 78: Call Records
call, user can click on the icon to add a new call. And when click on this button, the current call will be hold. l During a call, user can click on any line in the list to resume the call. 5.1.5 Call Records 5.1.5.1 View Call Records When got a missed call, the screen will... - Page 79 2) Click icon. Shown as below. 3) User can click the drop-down list to choose the call record types, it supports for All Call, Missed Call, Received Call, Dialed Call and Forwarded Call five types of call information. 4) Call records are shown on the left. Click the number or contact, and user can view all the call records details on the right.
- Page 80 Following the below steps to initiate a call. 1) Click a contact or a number on the left list. 2) If you want to initiate an audio call directly, click the icon in call records. 3) If you want to initiate an audio call directly, click the icon in call records.
- Page 81 contact number list. Do the following operations. 1) Click the number on the call records list. 2) To new contact, click icon , a new contact edit page will pop up. Click icon 3) To merge the number into the existing contact number list, click icon , select the existing contact and then click Confirm label to save.
-
Page 82: Contacts
5.2 Contacts Following method to enter into Contacts interface. Enter dialing interface, and then click the icon . 5.2.1 Local Phone Book User can view, audio call, video call, add, edit, delete the Local contacts. 5.2.1.1 Add A New Contact Click the icon on the top right corner, and click New Contact label in... - Page 83 the drop-down window. The new contact interface is as shown: To add some more information,...
- Page 84 click pop up the page of contact details, click to save. As below shown. 5.2.1.2 Modify The Contact 1) Select the contact need to modify in the contact list. 2) Click icon . 3) Enter into contact edit page, edit the contact information. 5.2.1.3 Delete The Contact Following methods to delete the contacts.
-
Page 85: Broadsoft Phone Book
l Select the contact, click icon, select Remove label, check the contact and click Confirm label to delete. 5.2.2 Broadsoft Phone Book To setup Broadsoft contact. For Broadsoft PhoneBook’s server address, port, username and password, user need to consult the Broadsoft service provider for further information. -
Page 86: Group
5.2.5 Group Group, it will be convenient for you to have contact group management. Contacts should at least belong to a group, the default is no group. 5.2.5.1 Add A New Group 1) Access contact setting interface- > Local Phone Book-> tap icon on the upper right of the screen. -
Page 87: Blf
5.3 BLF Busy Lamp Field (BLF) is used to monitor a specific user for status changes on IP phones. For example, user can configure a BLF key on a supervisor’s phone to monitor the phone user status (busy or idle). When the monitored user places a call, a busy indicator on the supervisor’s phone indicates that the user’s phone is in use. - Page 88 Note:After finish BLF Key configuration, drag ExtKey from the WIDGETS to the main interface. As shown below.
-
Page 89: Intercom
5.4 Intercom Select Type as Intercom, enter intercom code in Value. Choose the availed account. To click Confirm to save. Note: Different SIP server has different codes. -
Page 90: Call Return
1. Press the Intercom key when the phone is available. The phone will connect the extension number of remote user automatically. 2. The phone enable silent mode when picking up the intercom call so that the other will not hear you. 5.5 Call Return This function can be used to call the latest dialed call record automatically. -
Page 91: Blflist
5.6 BLFList BLF List:While using BroadSoft platform, the accounts which are monitored by the sip phone will reply the subscribe news in the form of xml list to improve efficiency. BLF List Code :While using BroadSoft platform, configure the BLF LIST CODE,can Pick up call or Barge in call. -
Page 92: Pickup & Group Pickup
Note: BLFListCode is supported by Broadsoft platform, Please consult your administrator further information. 5.7 Pickup & Group Pickup User can use pickup to answer other users’ incoming call. The phone Akuvox R48G supports specified pickup and group pickup. l Specified pickup Specified pickup can answer specified user’s incoming calls. -
Page 93: Acd
Group pickup can answer group’s user incoming calls. When anyone in group receives an incoming call, user can press the group pickup key to answer. Note: Press the group pickup only to answer line 1 incoming call if there are many lines incoming calls in group. -
Page 94: Hot Desking
5.9 Hot Desking In some working place, the people are always walking around. HotDesking feature will make the staffs login his account on any computer in the company. In some public places, the working people is not fixed, anyone can use HotDesking for logging his account, and setting the phones to the familiar mode, such as the remote function of the computer. -
Page 95: Conference
5.10 Conference User can use the conference feature to hold a 3-way conference by pressing the Conference soft key to invite the current talking and one line talking held to attend conference. 5.10.1 Create 3-way conference 1. Create talking with first party; party and press the Video Call or Auido Call to make a call;... - Page 96 4. When the second party answers the call, press the Conference softkey or the Conference key on the keypad to start 3-way conference.
-
Page 98: Transfer
5.11 Transfer 5.11.1 Blind Transfer When the IP phone blind transfers a call. 1. During first conversation, press transfer key on the keypad or click enter the configuration interface. 2. Enter the transfer number, then click Blind label to transfer the number. Configuration interface shown as below. -
Page 99: Attended Transfer
5.11.2 Attended Transfer 1. During first conversation, press transfer key on the keypad or click enter the configuration intserface. 2. Enter the transfer number, then click Attended label to transfer the number. Configuration interface shown as below. - Page 100 3. When third party answered, press comfirm the transfer. Shown as below.
-
Page 101: Keypad Input
5.12 Keypad Input Only numbers, * and # can be input by keypad. The default Input method is Android keyboard. User can also download the preferred input method from the internet. 5.13 Webpage Browser This section describes the default web browser in the video phone, and user can also download the preferred browser through the internet. -
Page 102: Open The Webpage
click . l Mode 2: In the main screen, click ->. 5.13.1 Open The Webpage 5.13.1.1 Browser Address Bar Run the browser, enter the URL in the address bar or direct input the information to search. After the input, user can click “Go” on the soft keyboard to complete. 5.13.1.2 Bookmark And Browsing History Run the browser, click... -
Page 103: Camera
Icon description shown as below. Add a new webpage View the bookmark and browsing history Others 5.14 Camera 1. In the main screen, click ->. 2. Slide right on the screen, view photos videos “Gallery”. 5.14.1 Photograph Mode Turn on the camera, and the default mode is photograph mode. 5.14.1.1 Basic Setting Click on the right upper corner... - Page 104 Video mode Photo mode Click icon on the right upper corner to enter the related parameters setting interface. User can enter to set the resolution & quality to set the camera & video parameter.
- Page 105 5.14.1.3 Take A Photograph User can click the button on the right side to take pictures. If user want to adjust the focal length, use two fingers to press screen, shrinkage or expansion to adjust the focal length. 5.14.1.4 Take A Video Slide right on the screen to switch the mode.
-
Page 106: Gallery
when the icon turns to . And click to stop the video recording and save. Shown as below. 5.15 Gallery User can use Gallery to view photos or videos, and user can also view the picture or video downloaded from the Internet. user can edit the photo or picture and set it as wallpaper. -
Page 107: View Photo & Picture & Video
5.15.1 View Photo & Picture & Video Enter the gallery, user can view all photos, pictures in the device, as shown below. Click the icon on the upper left corner, can view photos and videos in groups in the drop-down list. Click on the folder to view all the photos. While viewing photos, user can use two fingers to press on the screen, shrinkage or expansion to shrink or enlarge the image. -
Page 108: Bluetooth
Bluetooth is a proprietary, open wireless technology standard for exchanging data over short distances from fixed and mobile devices, creating personal area networks with high levels of security. On VP-R48G, users could use Bluetooth to transfer files, share contact information with other Bluetooth portable devices by installing Bluetooth Application, or use Bluetooth headset for making calls. -
Page 109: Paring Vp-R48G With A Bluetooth Device
If the VP-R48G stops scanning before the other device is ready, turn off the R48G Bluethooth, then turn on again. l The discovered device will show in the available devices list with device ID. -
Page 110: Usb
5.17 USB The video phone supports USB connection for keyboard and USB storage devices. To use USB keyboard, simply plug it into the USB port on the right side of the video phone and it will be ready to use. To connect and access USB storage device: l Insert USB storage device into USB port at the right side of video phone. -
Page 111: Calendar
5.18 Calendar To start the calendar: In the main screen,click icon -> Calendar As shown below: If one day has activity, color will appear on the calendar to remind. -
Page 112: Add An Account
5.18.1 Add An Account While using the calendar at the first time, it will remind you to add an account. Click ”Add account” to add an account, and then synchronize all the schedules of the account to the calendar. 5.18.2 View Calendar The calendar will display weekly by default, and you can slide the calendar up and down to view the different weeks. -
Page 113: New Activities
5.18.3 New Activities While Calendar is displaying as daily or weekly, you can use the following methods to create a the new activity: l Click on the date, and then click on the time period; l Click on ; 1) Input the details of the activity, 2) Click “Done”... -
Page 114: Alarm
Description: Alarm Default real time Countdown timer Stopwatch Time zone Others Others setting 5.19.1 Alarm User can add one or multiple alarms: 1) Click... - Page 115 2) Click icon 3) To set the hour and minute, click the digit on the right side to set hour and minute.
- Page 116 4) Then user can select enable or disable repeat the alarm in some days of a week, select the ringtone of the alarm and edit display label. If not modify, will present tomorrow as default. 5.19.1.1 Enable/Disable Alarm User can click icon to enable or disable the alarm.
-
Page 117: Countdown Timer
5.19.1.3 Delete Alarm Alarm page, user click alarm,after pop-up the dialog box, select to delete the alarm. 5.19.2 Countdown Timer 1) Click Click the digit on the right side. Show as below. 2) Click to delete the digits. 3) Click icon start countdown timer. -
Page 118: Stopwatch
stop the time. The other buttons are described as followed. Click to add one minute to countdown timer Click to delete the current countdown timer Click to add another countdown timer Click to reset the countdown timer 5.19.3 Stopwatch 1) Click icon 2) Click icon to start the time. -
Page 119: Gmail
Click to stop the time. 3) In normal, click icon to remember the corresponding time. 4) When the time is on hold, click icon to reset the timer. 5.20 Gmail Email Application can let you use POP3 or IMAP service to send and receive e-mail. Start Email:... - Page 120 many accounts. Please choose one of the following methods to start: l If you haven’t added an e-mail account yet, while starting the e-mail application, you will be asked to set up your account, as shown below l If you have already set up an email account, In the main Email page, Press “Menu”...
-
Page 121: Music
5.21Music In the main screen, click icon ->Music icon . The music page is shown as below. -
Page 122: Explorer
User can click the labels of Artists, Albums or Songs to view all songs, view or play the songs from the playlists. To view the currently playing song, click the Now playing label to view . 5.22 Explorer User can use explorer to manage the files in the device. In the main screen, click icon ->... - Page 123 Click mnt to enter to show as below. If insert the USB device, will dislpayed in this layer. Shown as below.
-
Page 124: Video Player
Click to modify the sort: by name, time,size,type Click to creat a new folder or photo folder 5.23 Video Player User can use video player to play local videos. To run the video player: In the main screen, click -> Video icon After entering, user can click on the list of videos to watch. - Page 125 Screen Brightness Adjustment Click to adjust the volume Click to add into the Bookmark. The previous video, and long press to make video fast backward. Hold/Play. The next video, and long press to make video fast forward. Screen size adjustment, four type of video sizes: original size, full screen, 16:9, 4:3 Screen size adjustment, four type of video sizes: original size, full screen, 16:9.
-
Page 126: Others
5.23 Others 5.23.1 Apk Install User need open phone permission before installing. Go to the path: Settings- >Security, enable Unknown sources. In the main screen, click ->Explorer. Select the Apk you want to install, follow he prompt to operate. -
Page 127: Software Upgrade
Software Upgrade 6.1 Immediate Update Choose one way below to enter the system upgrade interface: l In the main screen, press “Menu” on board -> System Settings -> System -> About Multimedia Terminal -> System Upgrade -> System Update Now l In the main screen, tap on settings icon ->... - Page 128 Three ways to update immediately: Local Update, Select other upgrade package, Remote Upgrade, as shown below.
-
Page 129: Select Other Upgrade Package
6.1.1 Select Other Upgrade Package 1) Via USB to Upgrade Put upgrade package into USB, insert USB, then click “Select other upgrade package”, find “/mut/usb_storage”, find the upgrade package, then click “OK” to upgrade. 2) Via Internal Memory to Upgrade Use USB to copy the upgrade package into Internal Memory, then press “Select other upgrade package”, find “/mnt/sdcard”... -
Page 130: Local Update
6.1.2 Local Update 1) Via USB to Upgrade Change the name of upgrade package into upgrade.zip, then copy it into USB, insert USB, enter the upgrade interface, user will find the path of upgrade package, because video phone has searched it automatically, click “Local Update” to start upgrading. 2) Via built-in SD Card to upgrade First, change the name of upgrade package into upgrade.zip, then copy it into USB, and then use USB to copy the upgrade package into Internal Memory, enter the... - Page 131 2) Click “Remote Upgrade”, video phone will check the new version automatically. If exist a new version, it will prompt. Press “OK” to download upgrade document. 3) After finish downloading, it prompts “Download update image success! You need to restart system for update! ”, press reboot now, and then system will upgrade automatically.
-
Page 132: Auto Update Period
6.2 Auto Update Period Auto Update Period includes four modes: None, One Day, One Week, and One Month. The terminal will detect the new version automatically in time, if there is, the status bar will show “There is a new version, please update!”. Click and download the image for upgrade. -
Page 133: Upgrade On The Web
6.3 Upgrade on the web 1) Click Upgrade->Basic. 2) Click the label to select the version to upgrade. 3) Click to save. -
Page 134: Check Update After System Power On
6.4 Check Update After System Power On Click “Check Update After System Power On” . Shown as below. - Page 135 Every time user power on, the system will check the new version automatically. If there is a new one, the status bar will notice: “System has new version, please update now!”, click and download the image for upgrade.
-
Page 136: System Maintenance
7 System Maintenance 7.1 System State Inspection Mode 1: In the main screen, click -> Status info->Version info Mode 2: In the main screen, click -> -> About device It will display phone status, software version and hardware version in this item. 7.2 IP Query Mode 1: In the main screen, press, click... -
Page 137: Sip Account Registration Query
check the corresponding network information in setting interface. 7.3 SIP Account Registration Query You can choose one of the following methods to enter the SIP account registration query. If the account is successfully registered, the icon will be light up in notification area of phone. -
Page 138: Backup & Reset
7.4 Backup & Reset Mode 1: In the main screen, press "Menu" key on the hard keyboard-> System Settings-> Backup & reset Mode 2: In the main screen, click -> -> Backup & reset Select “Erase SD card”, click “RESET DEVICE”, then the phone will restore to factory settings. -
Page 139: Failure Process
7.5 Failure Process Failure 1: Power LED is off l Please check whether the adapter fits this product requirement; l Please check whether the outlet is working properly. Failure 2: No voice when pick up the handset l Please check whether the connection of handset is working properly; l Please adjust the volume + key on keyboard when off-hook the phone, Observe the display of “volume”... - Page 140 volume) separately. These two adjustments are unrelated. Adjust the volume won’t change ring volume when off-hook the phone.
-
Page 141: Web Interface
8 Web Interface 8.1 Web login 1. Open the browser on the computer. 2. Input the IP address in the address bar. password (user name: admin, password: admin), then click . 8.2 Status->Basic Click Status->Basic to check the phone information. - Page 142 Sections Description Product Information To display the device’s information such as Model name, MAC address (IP device’s physical address),Hardware Model, Firmware version and Hardware firmware. Network Information To display the device’s Networking status(LAN Port),such as...
-
Page 143: Account->Basic
Port Type(which could be DHCP/Static), Link Status, IP Address, Subnet Mask, Gateway, Primary DNS server, Secondary DNS server. Account Information To display device’s Account information and Registration status (account username, registered server’s address, Register result). 8.3 Account->Basic... - Page 144 Sections Description SIP Server 1 To display and configure Primary SIP server settings. SIP Account To display and configure the specific Account settings. Server IP: SIP server address, it could be an URL or IP Status: To display register result. address.
- Page 145 UDP: UDP is an unreliable but very efficient transport layer protocol. TCP: Reliable but less-efficient transport layer protocol. To display and configure NAT(Net Address Translator) settings. STUN: Short for Simple Traversal of UDP over NATS, a solution to solve NAT issues. Note: By default, NAT is disabled.
-
Page 146: Account->Advanced
8.4 Account->Advanced... - Page 147 Sections Description SIP Account To display current Account settings or to select which account to display. Audio Codecs To display and configure available/unavailable Audio codecs list. Codec means coder-decoder which is used to transfer analog signal to digital signal or voice versa. Familiar codecs are PCMU(G711U), PCMA(G711A), G722 (wid-bandth codecs),G729 and so on.
- Page 148 Sections Description Subscribe To display or configure session timer settings. Active: To enable or disable this feature, If enable, the ongoing call will be disconnected automatically once the session expired unless it’s been refreshed by UAC or UAS. Session Expire: Configure session expire time. Session Refresher: To configure who should be response for refreshing a session.
- Page 149 Sections Description Call To display and configure call-related features. Max Local SIP Port: To configure maximum local sip port for designated account. Min Local SIP Port: To configure minimum local sip port for designated account. Caller ID Header: To configure which Caller ID format to fetch for displaying on Phone UI.
- Page 150 rejected. Missed Call Log: To display the miss call log. Prevent SIP Hacking: Enable to prevent SIP from hacking.
- Page 151 Sections Description Session Timer To display or configure session timer settings. Active: To enable or disable this feature, If enable, the ongoing call will be disconnected automatically once the session expired unless it’s been refreshed by UAC or UAS. Session Expire: Configure session expire time. Session Refresher: To configure who should be response for refreshing a session.
-
Page 153: Network ->Advanced
Sections Description To display NAT-related settings. UDP Keep Alive message: If enabled, IP phone will send UDP keep-alive message periodically to router to keep NAT port alive. UDP Alive Msg Interval: Keepalive message interval. Rport: Remote Port, if enabled, it will add Remote Port into outgoing SIP message for designated account. -
Page 154: Phone->Time
Sections Description Local RTP To display and configure Local RTP settings. Max RTP Port: Determine the maximum port that RTP stream can use. Min RTP Port: Determine the minimum port that RTP stream can use. VLAN To display and configure VLAN settings. LAN Port/PC Port: You can configure VLAN setting for both ports respectively. -
Page 155: Phone->Preference
Sections Description Web Language To choose the web language. English by default. 8.7 Phone->Preference Sections Description Key Press Sound To configure the sound volume for key press. Volume: The valid volume range is from 0~15,by default it’s 8. Ringtone Volume To configure the sound volume for ringtone. -
Page 156: Phone ->Call Feature
8.8 Phone ->Call Feature Sections Description Mode Phone To enable or disable feature key sync. Feature Key Sync: To enable or disable feature key sync. Mode: Select the desired mode. Forward Transfer To display and configure Forward setting. Note: There are three types of forward: Always Forward, Busy Forward and No answer Forward. - Page 157 phone is busy. No answer Forward: Any incoming call will be forwarded if it’s no answer after a specific time. Sections Description DND(Do Not Disturb) allows IP phones to ignore any incoming calls. DND Emergency: Enable this function, users can still receive the call from DND Authorized number when in emergency situation.
- Page 158 incoming call if DND on. DND On Code: The Code used to turn on DND on server’s side, if configured, IP phone will send a SIP message to server to turn on DND on server side if you press DND when DND is off. DND Off Code: The Code used to turn off DND on server’s side, if configured, IP phone will send a SIP message to server to turn off DND on server side if you...
- Page 159 Sections Description Auto Redial Auto redial allows IP phones to redial an unsuccessful call for designated times within designated interval. Auto Redial: To enable or disable auto redial feature. Auto Redial Interval: Determine the interval between two consecutive attempts. Auto Redial Times: Determine how many times to redial.
- Page 160 the callee will be muted. Hot line HotLine allows user to call out a defined number automatically after hearing the dailtone without dialing any number. Active: To enable or disable HotLine feature. Number: To set a defined HotLine number. Delay Time: To set the automatically call out interval after hearing the dailtone.
-
Page 162: Phone->Audio
Sections Description Key As Send Key As Send allows you to disable send key or assign pound key as send key. SIP Config Setup the SIP protocol package interval. T2 is maximum. The interval should be larger the T1, but less then T2. UACSTA Using CSTA for SIP phone user agents. - Page 163 Sections Description Echo Canceller Echo Canceller: To remove acoustic echo from a voice communication in order to improve the voice quality . VAD(Voice Activity Detection): Allow IP phone to detect the presence or absence of human speech during a call. When detecting period of “silence”, VAD replaces that silence efficiently with special packets that indicate silence is occurring.
-
Page 164: Phone->Video
with VAD algorithms, quickly responds when periods of silence occur and inserts artificial noise until voice activity resumes. The insertion of artificial noise gives the illusion of a constant transmission stream, so that background sound is consistent throughout the call and the listener does not think the line has released. - Page 165 Sections Description Media Feedback NACK: Enabled it to filter mosaic. Tmmbr: Send the maximum temporary rate request. Disabled by default. H264 Settings H264: A video stream compression standard. Different from H263, it provides an approximately identical level of video stream quality but a half bit rate. This type of compression is sometimes called MPEG-4 part 10.
-
Page 166: Phone->Ext Key
decoding. Rate Control: Choose one H264 video rate. Others Hardware Endec Acceleration: This function is used to solve the image issue. User can enable the Hardware Endec Acceleration when you need. Hardware Decodec Acceleration: Disabled by default. Color Enhancement: To increase the phone display color. - Page 167 Sections Description Current Page R48G can support 4 pages Ext Key. 20 Ext Keys for each page. Allows user to assign specific feature to the designated key on expansion module. For keys, the available feature list: DND, Menu, MSG, Status, Book, Fwd, PickUp, Group PickUp, Intercom, Speed Dial, History, Favorites, Redial, Account,...
-
Page 168: Phone-> Tone
ACD, BLF, BLFList,Call Return, Hot Desking, Record, XML Browser, DTMF. 8.12 Phone-> Tone Sections Description Tone Allows user to select a specialized tone sets (classified by countries) or to customize own tones. Note: Available country tones sets are: China,Spain,Luxembourg,Sweden,Taiwan,Belgium,Denmark, Finland,Germany,Netherlands,Norway,Portugal. -
Page 169: Phone->Replace Rule
8.13 Phone->Replace Rule Sections Description Rules Allow user to select Replace rule or Dial-now to display or edit. Rules Modify Allow user to modify selected rules information. Once you dial prefix value, it will call out Replace number. Click Add to add new replace rules. Select account for the replace rule Input a suitable prefix value .Enter the replace number. -
Page 170: Phone->Dial Plan
They usually indicate different geographical areas within one country. If entered numbers match the predefined area code rule, the IP phone will automatically prefix outgoing number with area code. Note: There is only one area code rule supported. 8.14 Phone->Dial Plan... - Page 171 Sections Description Rules Allow user to select Replace rule or Dial-now to display or edit. Dial Now Delay Allow user configure dial now delay time for dial now. It means user can configure the IP phone to dial out the phone number automatically after the designated delay time if it match any dial now rule.
-
Page 172: Phone->Action Url
8.15 Phone->Action URL... - Page 174 Sections Description Action URL To display and configure Action URL settings. Setup Completed: When the IP phone completes startup. Registered: When the IP phone successfully registers an account. Unregistered: When the IP phone logs off the registered account. Register Failed: When the IP phone fails to register an account.
-
Page 175: Phone->Multicast
incoming call. Reject Incoming Call: When the IP phone rejects an incoming call. Answer New Call: When the IP phone answers a new call. Transfer Finished: When the IP phone completes to transfer a call. Transfer Failed: When the IP phone fails to transfer a call. - Page 176 Sections Description Multicast Setting To display and configure the Multicast setting. Paging Barge: Setup the priority quantity. Paging priority Active: Enable o disable the multicast. Priority List To setup the multicast parameters. Listening Address: Enter the IP address you need to listen Label :...
-
Page 177: Phonebook->Local Book
8.17 PhoneBook->Local Book... -
Page 178: Phonebook->Remote Book
Sections Description Contact To display and select local contact type. All Contacts: To display or edit all local contacts. Favorites: To display or edit favorites contacts. Black List: To display black list contacts. Search To search designated contacts from local phonebook. Dial To dial out a call or hangup an ongoing call from Web UI. -
Page 179: Phonebook->Call Log
Local Book Name: To configure display remote book name on Phone UI Search Remote Phonebook Name: To enable or disable search remote phonebook name Search Flash Interval: To set interval (Range from 120s to 2592000s) Note: IP phone supports at most 5 remote books. Please refer to your administrator for how to establish a remote book server and how to create remote book xml file. -
Page 180: Phonebook->Ldap
Sections Description Call History To display call history records. Available call history types are All calls, Dialed calls, Received calls, Missed calls, Forwarded calls. HangUp: To click to hangup ongoing call on the IP phone. Note: For “HangUp” feature, you need to have the remote control privilege to control IP phone via Web UI. -
Page 181: Phonebook->Broadsoft
Name Filter: The settings used to tell LDAP server what name attributes to search. Number Filter: The settings used to tell LDAP server what number attributes to search. Server: To configure LDAP server’s address. Port: To configure LDAP server’s port. Base DN: To configure searching base DN on LDAP server. -
Page 182: Upgrade->Basic
Sections Description Broadsoft PhoneBook To display and configure Broadsoft PhoneBook settings. PhoneBook Item: To select specific item to configure. Display Name: The name displayed at IP phone’s LCD screen when accessed via Phone UI. Server Address: Broadsoft PhoneBook server’s address. Server Port: Broadsoft PhoneBook server’s port. -
Page 183: Upgrade->Advanced
Upgrade To select upgrading zip file from local or a remote server automatically. Note: Please make sure it’s right file format for right model. Reset to Factory Setting To setup R48G to factory setting. Reset Config to Factory To setup the configuration file to factory setting. Setting Reboot Click the submit to reboot the device... - Page 184 Sections Description Manual AutoP To display and configure manual update server’s settings. URL: Auto provisioning server address. User name: Configure if server needs an username to access, otherwise left blank. Password: Configure if server needs a password to access, otherwise left blank. Common AES Key: Used for IP phone to decipher common Auto Provisioning configuration file.
- Page 185 oriented auto provisioning configuration file(for example, file name could be 0c1105888888.cfg if IP phone’s MAC address is 0c1105888888). Note: AES is one of many encryption, it should be configure only configure filed is ciphered with AES, otherwise left blank. Automatic AutoP To display and configure Auto Provisioning mode settings.
-
Page 186: Security->Basic
PCAP To start, stop packets capturing or to export captured Packet file. Start: To start capturing all the packets file sent or received from IP phone. Stop: To stop capturing packets. Note: IP phone will save captured packets file to a temporary file, this file maximum size is 1M(mega bytes), and will top capturing once reaching this maximum size. -
Page 187: Security->Advanced
8.25 Security->Advanced Sections Description Web Server Certificate To display or delete Certificate which is used when IP phone is connected from any incoming HTTPs request. Note: The default certificate could not be deleted. Web Server Certificate To upload a certificate file which will be used as server Upload certificate. - Page 188 Sections Description Client Certificate To display or delete Certificates which is used when IP phone is connecting to any HTTPs server. Client Certificate Upload To upload certificate files, this is used as client certificate. Only Accept trusted Certificates: If this option is enabled, only trusted certificates will be accepted.
Need help?
Do you have a question about the VP-R48G and is the answer not in the manual?
Questions and answers