Table of Contents
Advertisement
C 249 30533 1
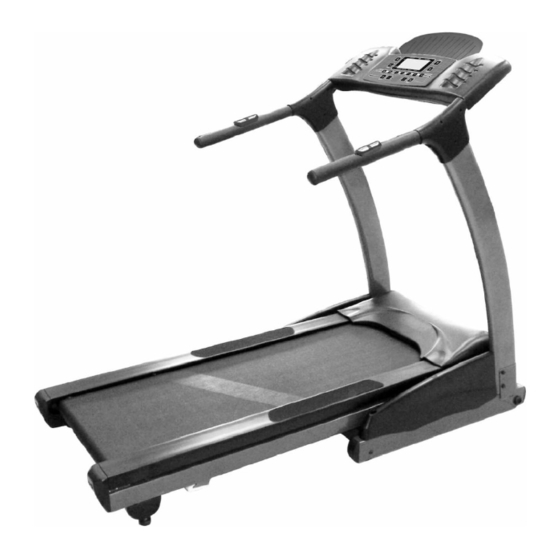
OWNER'S MANUAL
ASSEMBLY‧OPERATION‧MAINTENANCE
WARRANTY‧PART ORDERING
CAUTION:
Exercise of a strenuous nature, as is customarily done on this equipment, should not be
undertaken without first consulting a physician. No specific health claims are made or implied as they
relate to the equipment.
IMPORTANT:
Read all instructions carefully before using this product. Retain this owner's
manual for future reference.
‧
SEARS CANADA INC.
TORONTO , ONTARIO M5B 2B8
Advertisement
Table of Contents

Subscribe to Our Youtube Channel
Related Manuals for Sears Free Spirit C 249 30533 1


Summary of Contents for Sears Free Spirit C 249 30533 1
- Page 1 No specific health claims are made or implied as they relate to the equipment. IMPORTANT: Read all instructions carefully before using this product. Retain this owner’s manual for future reference. ‧ SEARS CANADA INC. TORONTO , ONTARIO M5B 2B8...
-
Page 2: Table Of Contents
TABLE OF CONTENTS Warranty……………………………... Safety Precautions…………………… Pack Assembly Check List…………... Assembly……………………………… Folding………………………………… 6 Treadmill & Monitor Operation…….. 7-11 Parts list……………………………….. 12-15 Overview Drawing……………………. 16-17 Trouble Shooting……………………… 18 Adjustment…………………………….. 19 Maintenance…………………………… 20-22 Training guidelines…………………… 23-25 Stretching……..……………………….. 26-27 Ordering Replacement parts ………… 28 Service and Parts ………………………... -
Page 3: Warranty
3 years on motor only and 10 years on the frame from date of purchase. This warranty is not transferable and is extended only to the original owner. WHAT WILL SEARS DO? Sears will provide a replacement part at no charge for any part found defective in workmanship or materials during the warranty period. - Page 4 IMPORTANT SAFETY INFORMATION THIS UNIT IS INTENDED FOR HOUSEHOLD USE ONLY READ ALL INSTRUCTIONS BEFORE USING THIS TREADMILL CAUTION: Before starting any exercise program, it is recommended that you consult your physician. WARNING: Connect this unit to a properly grounded outlet only. DANGER: To reduce the risk of electric shock, always unplug the treadmill from the electrical outlet immediately after using and before cleaning.
-
Page 5: Assembly
ASSEMBLY CHECK LIST # 135. 4 x 16m/m 22 x 1T ψ ψ # 134. Self Tapping Screw (x3) Flat Washer (x3) #139. 1/4"x13x1.0T # 112. 3/8" x 23 x 1.5T # 109. 3/8" x 19 x 1.5T Flat Washer (x2) Curve Washer (x2) Flat Washer (x2) # 103. - Page 6 STEP 1 Remove all parts from the carton. (See Fig. 1) STEP 2 Install the Left and Right Uprights (4L & 4R) into the Base Frame (1). Secure the front of the base frame using two 3/8” x 3/4” Button Head Socket Bolts (82) and two 3/8”...
-
Page 7: Folding
FOLDING AND MOVING YOUR TREADMILL Before folding the treadmill ensure the incline angle of the treadmill is at it lowest position. Turn the power switch off located on front of the motor cover and unplug the power cord. Caution: You must be able to safely lift 20 kg (45lbs) in order to raise\lower and move the treadmill To protect the floor or carpet from damage, place a mat under the treadmill. -
Page 8: Treadmill & Monitor Operation
TREADMILL OPERATION To Operate treadmill Note: Before operating your treadmill, become familiar with all operating parts and controls - their location and function see figure 4 on page 11. CAUTION: To avoid injury, hold onto Handrail while mounting and dismounting treadmill. Hold onto handrail and place feet on side rails before starting. - Page 9 *SPEED PROFILE *INCLINE PROFILE P1 SPEED PROFILE P1 INCLINE PROFILE P2 SPEED PROFILE P2 INCLINE PROFILE P3 SPEED PROFILE P3 INCLINE PROFILE P4 SPEED PROFILE P4 INCLINE PROFILE P5 INCLINE PROFILE P5 SPEED PROFILE...
- Page 10 c- User - User program (U1-U2): Press the desired “program” button to select the user (U1-U2). You can set your own profile program up to a maximum of three users. Press the “mode” button to set your speed and incline value for each of the 20 segments.
- Page 11 Stop: Press the “stop” button to stop your treadmill. Press the “up” button to raise the incline position. The maximum incline position is 10. Down: Press the “down” button to lower the incline position. The minimum incline position is 0. Mode: Press the “mode”...
- Page 12 Remarks You can stop your program at any time by pressing “stop” button. The speed will show zero and all original data will be saved. Simply press “start” button to resume your program. To clear your data, press “mode” button and all values will be set to 0. The monitor will only shut off when the safety key is removed.
-
Page 13: Parts List
Parts List – 30533-1622746 KEY NO. PART NO. DESCRIPTION Q'TY 274601 BASE FRAME 274602 INCLINE BRACKET 274603 MAIN FRAME 274604R RIGHT UPRIGHT 274604L LEFT UPRIGHT 274605 FRONT SHAFT 274606 REAR SHAFT 274607 HANDGRIP TUBE 274608 MOTOR BRACKET 274609 CONSOLE SUPPORT 274612 RUNNING DECK TUBE 274612... - Page 14 KEY NO. PART NO. DESCRIPTION Q'TY 75 WHEEL (B) 274640 ψ 30x35H CUSHION 274641 ψ 274642 FOOT PAD 274643 SENSOR W/CABLE 274644 SENSOR RACK 274645 SAFETY KEY 274646 HANDPULSE W/CABLE 274648 RUNNING BELT 274649 RUNNING DECK 274650 INCLINE MOTOR 274651-1 MOTOR 274652 POWER SOCKET...
- Page 15 KEY NO. PART NO. DESCRIPTION Q'TY 274683 5/16" x 1/2" BUTTON HEAD SOCKET BOLT 274685 5/16" x 1" BUTTON HEAD SOCKET BOLT 274686 5/16" x 2-3/4" BUTTON HEAD SOCKET BOLT 274687 M8 x 30m/m BUTTON HEAD SOCKET BOLT 274688 1/4" x 1-1/4" BUTTON HEAD SOCKET BOLT 274689 3 x 10m/m SELF TAPPING SCREW 274690...
- Page 16 KEY NO. PART NO. DESCRIPTION Q'TY 2746129 HANDGRIP SIDE CAP (R) 2746130 HANDGRIP SIDE CAP (L) 2746131 UPPER HANDPULSE WIRE 2746132 EXTENSION HANDPULSE WIRE 2746133 HANDPULSE WIRE 2746134 22x1T FLAT WASHER ψ ψ 2746135 4 x 16m/m SELF TAPPING SCREW 2746136 INCLINE COVER (L) 2746137...
- Page 17 EXPLODED VIEW...
-
Page 19: Trouble Shooting
TROUBLE SHOOTING Problem Cause Correction Treadmill will not start Treadmill not plugged in Plug into three prong (grounded) outlet On / off switch not on Push the on/off button to on House circuit breaker tripped Reset or replace Treadmill reset switch tripped Reset treadmill reset switch see reset switch resetting Treadmill motor controller fuse... -
Page 20: Maintenance
MAINTENANCE INSTRUCTIONS TREADBELT ADJUSTMENT The treadbelt has been factory pre-adjusted, however if during the operation: If Treadbelt slips If TREADMILL during use. slips during use. Treadbelt slips during use if the treadbelt is too loose: a) Tighten both rear roller adjusting bolts (100) 1/4 turn clockwise using allen wrench. - Page 21 MAINTENANCE INSTRUCTIONS CLEANING Care has been taken to assure that your treadmill has been properly adjusted and lubricated at the factory. It is not recommended that the user attempt service on the internal components instead seek service from an authorized service center. However, from time-to-time the outer surfaces may appear dull or dirty, following the instructions listed below will restore and preserve the original finish.
- Page 22 1. After the first 25 hours of use (2-3 months) apply one half bottle of lubricant 2. Every 50 hours of use (5-8 months) apply one half bottle of lubricant We recommend that you use: LUBE-N-Walk™ Treadmill Lubrication Kit, available from Sears parts and service.
- Page 23 WARNING: Always unplug your treadmill prior to cleaning or servicing your unit, in order to avoid electrical hazard or shock. RESET SWITCH RESETTING If your treadmill looses power or will not start, check the reset switch located on the front of the motor cover. If the white tab of the reset switch is not showing then the reset switch has not been tripped.
-
Page 24: Training Guidelines
TRAINING GUIDELINES Exercise is one of the most important factors in the overall health of an individual. Listed among its benefits are: Increased capacity for physical work (strength endurance) Increased cardiovascular (heart and arteries/veins) and respiratory efficiency Decreased risk of coronary heart disease Changes in body metabolism, e.g. - Page 25 Specificity Different forms of exercise produce different results. The type of exercise that is carried out is specific both to the muscle groups being used and to the energy source involved. There is little transfer of the effects of exercise, i.e. from strength training to cardiovascular fitness. That is why it is important to have an exercise program tailored to your specific needs.
- Page 26 The target is not a magic number, but a general guide. If you’re above average fitness, you may work quite comfortably a little above that suggested for your age group. The following table is a guide to those who are keeping fit. Here we are working at about 80% of maximum.
-
Page 27: Stretching
STRETCHING Stretching should be included in both your warm up and cool down, and should be performed after 3-5 minutes of low intensity aerobic activity or callisthenic type exercise. Movements should be performed slowly and smoothly, with no bouncing or jerking. Move into the stretch until slight tension, not pain, is felt in the muscle and hold for 20-30 seconds. - Page 29 Is at YOUR SERVICE Your sears merchandise takes on added value when you discover that Sears has Service Units throughout the Country. Each is staffed by Sears, Trained Technicians Sears approved methods. For assembly helps or missing parts call the factory at 1-888-707-1880...
- Page 30 _______________________________________________________________________________________________ Pour service en francais: 1-800-LE-FOYER (1-800-533-6937) www.sears.ca ®/TM Trademarks of Sears, Roebuck and Co. used under license by Sears Canada ® Marque deposée/ Marque de commerce de Sears, Roebuck and Co. utilisée en vertu d’une licence de Sears Canada...
Need help?
Do you have a question about the Free Spirit C 249 30533 1 and is the answer not in the manual?
Questions and answers