Table of Contents
Advertisement
C 249 30236 0
OWNER'S MANUAL
ASSEMBLY‧OPERATION‧MAINTENANCE
WARRANTY‧PART ORDERING
CAUTION:
Exercise of a strenuous nature, as is customarily done on this equipment, should not be
undertaken without first consulting a physician. No specific health claims are made or implied as they
relate to the equipment.
IMPORTANT:
Read all instructions carefully before using this product. Retain this owner's
manual for future reference.
‧
SEARS CANADA INC.
TORONTO , ONTARIO M5B 2B8
Advertisement
Table of Contents

Related Manuals for Sears free spirit C 249 30236 0


Summary of Contents for Sears free spirit C 249 30236 0
- Page 1 C 249 30236 0 OWNER’S MANUAL ASSEMBLY‧OPERATION‧MAINTENANCE WARRANTY‧PART ORDERING CAUTION: Exercise of a strenuous nature, as is customarily done on this equipment, should not be undertaken without first consulting a physician. No specific health claims are made or implied as they relate to the equipment.
-
Page 2: Table Of Contents
TABLE OF CONTENTS Warranty……………………………… Safety Precautions……………………. Assembly Check List…………………. Assembly……………………………… Folding………………………………… Treadmill & Monitor Operation…….. 8-14 Parts list……………………………….. 15-18 Overview Drawing……………………. 19-20 Trouble Shooting……………………… Adjustment……………………………. Maintenance…………………………... 23-25 Training guidelines…………………… 26-28 Stretching……..………………………. 29-30 Ordering Replacement parts ……….. Service and Parts ……………………. ©2007... -
Page 3: Warranty
3 years on motor only and 10 years on the frame from date of purchase. This warranty is not transferable and is extended only to the original owner. WHAT WILL SEARS DO? Sears will provide a replacement part at no charge for any part found defective in workmanship or materials during the warranty period. -
Page 4: Safety Precautions
IMPORTANT SAFETY INFORMATION THIS UNIT IS INTENDED FOR HOUSEHOLD USE ONLY READ ALL INSTRUCTIONS BEFORE USING THIS TREADMILL CAUTION: Before starting any exercise program, it is recommended that you consult your physician. WARNING: Connect this unit to a properly grounded outlet only. DANGER: To reduce the risk of electric shock, always unplug the treadmill from the electrical outlet immediately after using and before cleaning. -
Page 5: Assembly Check List
ASSEMBLY CHECK LIST #135. M3 x 18mm #130. 5/16” x ½” Button Head Bolt (3pc) Button Head Bolt (12 pcs) #30. Lubricant (1pc) #75. Safety Key (1pc) #132. M6 Allen Wrench (1pc) #131. Combo M5 Allen Wrench and Screwdriver (1pc) ©2007... -
Page 6: Assembly
ASSEMBLY ©2007... -
Page 7: Assembly
ASSEMBLY INSTRUCTIONS STEP 1 It will take two people to assemble your unit. Remove all the components from the carton. STEP 2 Connect the computer extension cable (50) to the lower computer cable (49). NOTE: Ensure that the wire is safely inserted in the upright to avoid pinching the computer wire. STEP 3 Fasten the right upright (4) into the frame base (2) securing with four button head bolts 5/16”... -
Page 8: Folding
MOVING YOUR TREADMILL Before moving the treadmill turn the power switch off located on front of the motor cover and unplug the power cord. Caution: You must be able to safely lift 20 kg (45lbs) in order to raise\lower and move the treadmill. To protect the floor or carpet from damage, place a mat under the treadmill. -
Page 9: Treadmill & Monitor Operation
Operation of Your Treadmill Getting familiar with the control panel INITIAL DISPLAY HRS: Displays the total working time accumulated in the TIME window from 0 to 99:99. If time exceeds 99:99 minutes the time accumulated will be displayed in hours up to 9999 in the TIME window. - Page 10 Monitor Operation Dot Matrix Center Display (Manual Operation): Twenty rows of Red “dots” (8 high) indicate each segment of a workout. The dots are only to show an approximate level (speed/incline) of effort. They do not necessarily indicate a specific value - only an approximate percent to compare levels of intensity.
- Page 11 player, MP3, etc) and into the jack on the side of the console. There is no volume control on the console, the volume must be controlled by the audio source. Function Buttons on monitor: Program: There are a total of 8 programs select from. Manual, P1 to P5 which are speed and incline programs and 2 user.
- Page 12 Press the “up” button to raise the incline position. The maximum incline position is 15. Down: Press the “down” button to lower the incline position. The minimum incline position is 0. HOW TO USE THE MONITOR: With the on / off button on the console display will automatically turn on. 1.
-
Page 13: User Programs
User Programs: Press the “program” button to select the user programs (U1-U2). You can set your own profile program up to a maximum of two users. STEP 1: Select User 1 or User 2 via the Program UP/Down key then press Enter key to set. STEP 2: Note the clock (Time) window is flashing. - Page 14 *SPEED PROFILE *INCLINE PROFILE P1 INCLINE PROFILE P1 SPEED PROFILE P2 SPEED PROFILE P2 INCLINE PROFILE P3 SPEED PROFILE P3 INCLINE PROFILE P4 SPEED PROFILE P4 INCLINE PROFILE P5 SPEED PROFILE P5 INCLINE PROFILE ©2007...
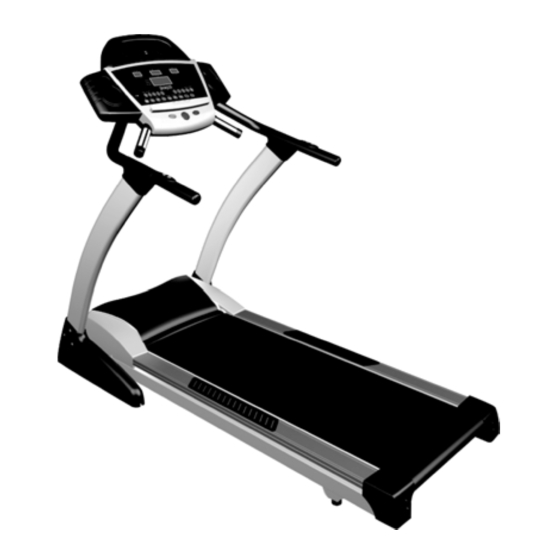
- Page 15 FIGURE 4. Fan Assembly Console Safety Key Handpulse Speed Adjustment Switch Handgrip Tube Incline Adjustment Switch Upright Running Belt Wheel Main Frame MAX. USER WEIGHT 150 KGS ©2007...
-
Page 16: Parts List
Parts List – 30236-1622766 KEY NO. PART NO. DESCRIPTION Q'TY 276601 Main Frame 276602 Frame Base 276603 Incline Bracket 276604 Right Upright 276605 Left Upright 276606 Console Support 276607 Deck Cross Brace 276608 Outer Slide 276609 Inner Slide 276610 2T Link 276611 Link Shaft 276612... - Page 17 KEY NO. PART NO. DESCRIPTION Q'TY 39~4 276639-4 Bottom Handpulse Assembly 39~5 276639-5 Handpulse End Cap 276640 Sensor W/Cable 276641 Breaker 276642 Power Socket 276643 On/Off Switch 276644 Power Cord 276645 100mm x 764 x 764_Connecting Wire (Black) 276646 300mm x 764 x 764_Connecting Wire (White) 276647 300mm x 764 x 764_Connecting Wire (Black) 276648...
- Page 18 KEY NO. PART NO. DESCRIPTION Q'TY 276675 Safety Key 276676 Belt Guide Wheel Sleeve ψ14 xψ10 x 35 276677 276678 Magnet 276679 Computer Cable Drawstring 0.8T 276680 1/2" x 1-1/4"_Carriage Bolt 276681 1/2" x 1"_Hex Head Bolt 276682 3/8" x 4-1/2"_Socket Head Cap Bolt 276683 3/8"...
- Page 19 KEY NO. PART NO. DESCRIPTION Q'TY 2766115 M5_Raised Washer 2766116 4x12m/m_Self Tapping Screw 2766117 5x16m/m_Tapping Screw 2766118 5x19m/m_Tapping Screw 2766119 3.5x12mm_Self Tapping Screw 2766120 5 x 16m/m_Tapping Screw 2766123 4 x 19 m/m_ Self Tapping Screw 2766124 3x10 m/m_ Tapping Screw 2766125 4x38m/m_Self Tapping Screw 2766126...
-
Page 20: Overview Drawing
EXPLODED VIEW ©2007... - Page 21 ©2007...
-
Page 22: Trouble Shooting
TROUBLE SHOOTING Problem Cause Correction Treadmill will not start Treadmill not plugged in Plug into three prong (grounded) outlet On / off switch not on Push the on/off button to on House circuit breaker tripped Reset or replace Treadmill reset switch tripped Reset treadmill reset switch see reset switch resetting Treadmill motor controller fuse... -
Page 23: Maintenance
MAINTENANCE INSTRUCTIONS TREADBELT ADJUSTMENT The treadbelt has been factory pre-adjusted, however If Treadbelt slips during use. If TREADMILL if during the operation: slips during use. Treadbelt slips during use if the treadbelt is too loose: a) Tighten both rear roller adjusting bolts 1/4 turn clockwise using allen wrench. - Page 24 MAINTENANCE INSTRUCTIONS CLEANING WARNING: Always unplug your treadmill prior to cleaning or servicing your unit, in order to avoid electrical hazard or shock. Care has been taken to assure that your treadmill has been properly adjusted and lubricated at the factory. It is not recommended that the user attempt service on the internal components instead seek service from an authorized service center.
- Page 25 1. After the first 25 hours of use (2-3 months) apply one half bottle of lubricant 2. Every 50 hours of use (5-8 months) apply one half bottle of lubricant We recommend that you use: LUBE-N-Walk Treadmill Lubrication Kit, available from Sears parts and service. ™ ©2007...
- Page 26 WARNING: Always unplug your treadmill prior to cleaning or servicing your unit, in order to avoid electrical hazard or shock. RESET SWITCH RESETTING If your treadmill looses power or will not start, check the reset switch located on the front of the motor cover. If the white tab of the reset switch is not showing then the reset switch has not been tripped.
-
Page 27: Training Guidelines
TRAINING GUIDELINES Exercise is one of the most important factors in the overall health of an individual. Listed among its benefits are: Increased capacity for physical work (strength endurance) Increased cardiovascular (heart and arteries/veins) and respiratory efficiency Decreased risk of coronary heart disease Changes in body metabolism, e.g. - Page 28 Specificity Different forms of exercise produce different results. The type of exercise that is carried out is specific both to the muscle groups being used and to the energy source involved. There is little transfer of the effects of exercise, i.e. from strength training to cardiovascular fitness. That is why it is important to have an exercise program tailored to your specific needs.
- Page 29 The target is not a magic number, but a general guide. If you’re above average fitness, you may work quite comfortably a little above that suggested for your age group. The following table is a guide to those who are keeping fit. Here we are working at about 80% of maximum.
-
Page 30: Stretching
STRETCHING Stretching should be included in both your warm up and cool down, and should be performed after 3-5 minutes of low intensity aerobic activity or callisthenic type exercise. Movements should be performed slowly and smoothly, with no bouncing or jerking. Move into the stretch until slight tension, not pain, is felt in the muscle and hold for 20-30 seconds. - Page 31 ©2007...
-
Page 32: Ordering Replacement Parts
All parts listed herein may be ordered through SEARS CANADA INC.RETAIL OR MANUAL CATALOG STORES AND SERVICE CENTERS. If the parts you need are not stocked locally your order will be electronically transmitted to a SEARS Parts Distribution Center for expedited handling. Model No. -
Page 33: Service And Parts
Pour service en francais: 1-800-LE-FOYER (1-800-533-6937) www.sears.ca ®/TM Trademarks of Sears, Roebuck and Co. used under license by Sears Canada ® Marque deposée/ Marque de commerce de Sears, Roebuck and Co. utilisée en vertu d’une licence de Sears Canada ©2007...
Need help?
Do you have a question about the free spirit C 249 30236 0 and is the answer not in the manual?
Questions and answers