Table of Contents
Advertisement
Quick Links
Advertisement
Table of Contents

Related Manuals for Doro 8085


Summary of Contents for Doro 8085
- Page 1 8085 English Cordless Telephone with Caller ID User guide...
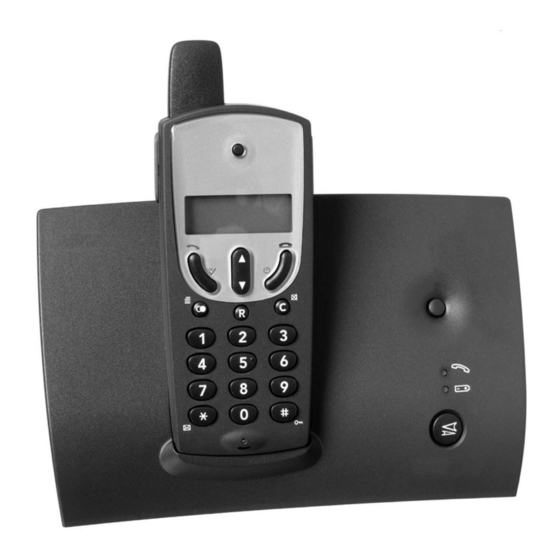
- Page 2 1 Earpiece 7 Microphone 2 Display and Key Lock 3 OK/Talk Button 9 Erase/Mute Button 4 Recall (R) Button 10 Headset Socket 5 Menu/Redial Button 11 Disconnect and On/Off Button and Caller ID Log 12 Scroll Button www.doro.com...
-
Page 3: Table Of Contents
Notes/Guarantee for UK..28 Notes/Guarantee for Australia, The Handset Ringer ... 14 New Zealand ...... 29 Button Click ......14 Declaration of conformity ... 31 Display Information..... 14 Auto - Answer ..... 15 Select Base Unit ....15 Handset PIN Code....15 www.doro.com... -
Page 4: Installation
- Base unit - Line cord - Battery - Belt clip The 8085+1 also include an additional handset and a charger with adapter. Connection 1. Connect the mains adapter to the socket of the base unit and to an electrical wall socket. -
Page 5: Belt Clips
When the telephone is installed for the first time, the battery must be charged for 12 hours before using the telephone. Use only DORO original batteries. The guarantee does not cover any damage caused due to incorrect batteries being installed. -
Page 6: Battery Charge Indicator
When a headset is connected, the microphone of the handset will automatically be disconnected. This telephone supports the use of a talk button on the headset cable. Please note! The performance of a non-original DORO headset cannot be guaranteed. www.doro.com... -
Page 7: The Display
Battery charge indicator. Base Unit Indicators On when a call is connected, flashes on incoming calls, or to indicate that new numbers have been received and stored in memory. On while battery is being charged, flashes when fully charged. www.doro.com... -
Page 8: Operation
5. The number has now been stored in the redial memory and can be automatically dialled using Temporary Silent Mode On an incoming call, press to turn the ringer temporarily off. This would be useful when in a business meeting. On the next incoming call, the handset will ring as usual. www.doro.com... -
Page 9: Volume Control
Press the recall button followed by the extension number to transfer calls when connected to a PBX (TBR only). Access to additional network services can be gained by using the recall button keys. Contact your network operator for more information. www.doro.com... -
Page 10: Menu
) Displays a list of the most recently received numbers. The button takes you here directly from standby mode. INTERCOM CALL ( ) Used to call other handsets. I nt CALL SETTINGS ( ) Settings for ring signal, PIN code, button click, etc. SEttInGS www.doro.com... -
Page 11: Memory
_ _. 2. Press , and the number is dialled. Press if you want a pause in the telephone number. In case of a number change, store the new number in the location of the old one. www.doro.com... -
Page 12: Caller Identification
It is an International call or a call from a PBX (no Out OF ArEA information received) The call is from a private or blocked number. SECrEt There is a message waiting; this information is available only InFO or tAd with compatible network service. www.doro.com... - Page 13 ), and the total ( ) number of numbers stored in the call log. 2. Scroll to preferred entry. 3. Press until a beep is heard. The display will indicate the memory location allocated before returning to numbers received. www.doro.com...
-
Page 14: Settings
) in use. 1. Press until is shown. PHOnE LISt SEt 2. Scroll to . Press SEttInGS 3. Scroll to . Press HAndSEt 4. Scroll to . Press bS-dISP HS-dISP 5. Scroll to preferred setting ( 6. Press to save settings. www.doro.com... -
Page 15: Auto - Answer
PHOnE LISt SEt 2. Scroll to . Press SEttInGS 3. Scroll to . Press HAndSEt 4. Scroll to . Press HS-PIn 5. Enter the present PIN code (0000 at default). 6. Enter the new code, twice. 7. Press to save settings. www.doro.com... -
Page 16: Base Unit
PHOnE LISt SEt 2. Scroll to . Press SEttInGS 3. Scroll to . Press HAndSEt 4. Scroll to . Press dEFAuLt SEt ErASE rEdIAL 5. Enter the handset PIN code (0000 as default). 6. Confirm by pressing www.doro.com... -
Page 17: System Settings
SEttInGS 3. Scroll to . Press bASE 4. Scroll to . Press bELL 5. Scroll to . Press rInG COunt 6. Select the preferred number of ring signals before all handsets start to ring. 7. Press to save settings. www.doro.com... -
Page 18: Pbx Function
. Press bASE 4. Scroll to . Press dIAL 5. Enter the base unit PIN code (0000 at default). 6. Scroll to . Press ACCESS COdE 7. Enter the prefix. Use to erase or change. 8. Press to save settings. www.doro.com... -
Page 19: Recall Button Timing
5. Enter the base unit PIN code (0000 at default). 6. Scroll to . Press SOS SEt 7. Scroll to selected entry. 8. Enter the emergency number (up to 12 digits). Use to erase. 9. To store more numbers, press , or press to save. www.doro.com... -
Page 20: Call Barring(Call Block)
7. Enter number to be barred (up to 8 digits). Use to erase or change. 8. To store more numbers, press , or press to save. 9. Please ensure that is activated, see desription on top of this page. bLOC nr www.doro.com... -
Page 21: Least Cost Routing
10. Store more numbers or return to menu system using Automatic network prefix using LCR Leaving the field for sequence to be replaced empty (point 7 above) causes the telephone to dial all numbers with the added sequence (point 8 above). www.doro.com... -
Page 22: Type Of Caller Id
PHOnE LISt SEt 2. Scroll to . Press SEttInGS 3. Scroll to . Press bASE 4. Scroll to . Press bS-PIn 5. Enter the present PIN code (0000 at default). 6. Enter the new code, twice. 7. Press to save settings. www.doro.com... -
Page 23: Deregister A Handset
1. Press until is shown. PHOnE LISt SEt 2. Scroll to . Press SEttInGS 3. Scroll to . Press HAndSEt 4. Press until the display shows the IPEI number. 5. Press to return to standby mode. www.doro.com... -
Page 24: Expanded System
More about placement of the base units on the next page. IMPORTANT! Automatic switching between base units (handset handover) will not occur while a call is in progress. www.doro.com... -
Page 25: Multiple Handsets
(to all handsets) or enter the handset number of the handset you wish to call. Should an external call come in while an internal call is in progress, a tone will be heard and the symbol flash. Receive the external call by pressing www.doro.com... -
Page 26: Transferring Calls Between Handsets
6. To connect all three parties in a conference call, press and hold until you hear a beep. By pressing any one of the handsets can terminate the conference and let the other continue the conversation with the external party. www.doro.com... -
Page 27: Other
Check the charge status of the handset battery. Try connecting another telephone, known to be in working order, to the line socket. If that phone works then it is likely that this equipment is faulty. www.doro.com... -
Page 28: Notes/Guarantee For Uk
9AM - 5PM Monday-Friday excluding Bank Holidays. Alternatively, You can contact us in writing: Consumer Support Group, Doro UK Ltd., 22 Walkers Road, North Moons Moat, Redditch, Worcestershire, B98 9HE, (regarding any Spares or Technical query), or Telephoning Spares: 01527 584377 E-mail on: tech@doro-uk.com... -
Page 29: New Zealand
(As a matter of precaution, we recommend disconnecting the telephone during a thunderstorm). This guarantee does not affect your statutory rights. AUSTRALIA NEW ZEALAND DORO Australia Pty Ltd Atlas Gentech (NZ) Limited PO Box 6760 Private Bag 14927 Baulkham Hills BC NSW 2153... - Page 30 Telecom’s network services. This equipment shall not be set to make automatic calls to the Telecom “111” Emergency Service. This equipment may not provide for the effective hand-over of a call to another device connected to the same line. www.doro.com...
- Page 32 www.doro.com...
Need help?
Do you have a question about the 8085 and is the answer not in the manual?
Questions and answers