Table of Contents
Advertisement
Quick Links
Advertisement
Table of Contents

Related Manuals for Crestron CT-1000


Summary of Contents for Crestron CT-1000
- Page 1 Crestron Series 1000 Wall-Mounted Touchpanel Operations Guide...
- Page 2 This document was prepared and written by the Technical Documentation department at: Crestron Electronics, Inc. 15 Volvo Drive Rockleigh, NJ 07647 1-888-CRESTRON All brand names, product names and trademarks are the property of their respective owners. ©2002 Crestron Electronics, Inc.
-
Page 3: Table Of Contents
Identity Code ... 6 Configuring the Touchpanel... 6 Hardware Hookup ... 10 Recommended Cleaning... 14 Programming Software ... 14 Programming with the Crestron AppBuilder... 15 Programming with SIMPL Windows ... 15 Programming with VisionTools “Quick” Pushbuttons ... 23 Reserved Join Numbers... 23 Uploading and Upgrading... -
Page 5: Series 1000 Wall-Mounted Touchpanels
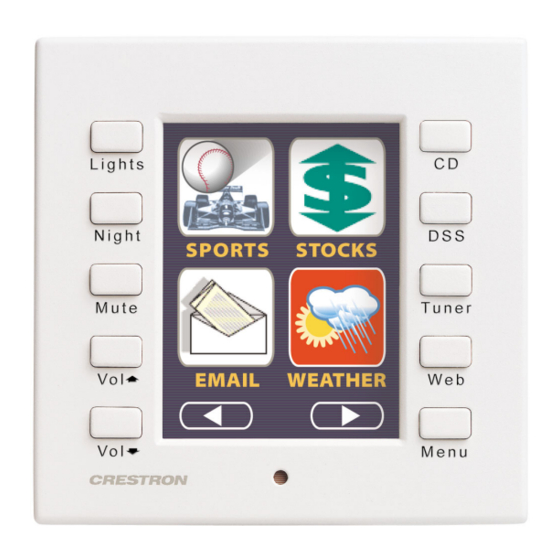
10 “quick” pushbuttons flank the LCD display for frequently used commands. Functional Summary * Custom-engraved keys can be obtained by using the Crestron Engraver software. Version 2.0.0.6 or later is available from the Downloads | Software Updates section of the Crestron website (www.crestron.com). Operations Guide – DOC. 5813B ... -
Page 6: Model Differences
There are two Series 1000 models available and selection depends whether grayscale or color touchscreen is required. Grayscale panels are referred to as the LC-1000 and color panels are known as CT-1000. Other differences between the two models are listed in the table after this paragraph. -
Page 7: Physical Description
Depth: 1.59 in (4.04 cm) - with faceplate Weight: 0.54 lb (0.25 kg) The latest versions can be obtained from the Downloads | Software Updates section of the Crestron website (www.crestron.com). Refer to NOTE after last footnote. Crestron 2-Series control systems include the AV2, CP2, CP2E, MP2, MP2E, PAC2, PRO2, and RACK2. - Page 8 Touchpanels Series 1000 Touchpanel Physical Views and Dimensions of a Series 1000 Touchpanel (CT-1000 Shown) 4.860 in (12.344 cm) 4.765 in (12.103 cm) FRONT VIEW The Series 1000 touchpanel has 10 engravable hard buttons (real buttons, not simulated hard buttons that press on the touchpanel membrane), that allow easy...
-
Page 9: Industry Compliance
Crestron CT-1000 & LC-1000 Industry Compliance As of the date of manufacture, this unit has been tested and found to comply with specifications for CE marking and standards per EMC and Radio Communications Compliance Labeling (N11785). NOTE: These devices comply with part 15 of the FCC rules. Operation is subject to... -
Page 10: Identity Code
NOTE: “SETUP MODE” may also be entered by sending the respective command from the Functions pull-down of the Crestron Viewport. Upon entering SETUP MODE, the Main Menu, shown to the left, displays four buttons: SAVE SETUP AND RUN PROGRAM, DIAGNOSTICS, TOUCH SCREEN CALIBRATION, and SETUP. -
Page 11: Calibration Menu
(for the LC-1000) and red text (for the CT-1000). When enabled, a given touchpanel maintains communication in such a way that a page change to any touchpanel on the network forces the same page change to all enabled touchpanels. - Page 12 Light Menu may be selected to manually assign brightness setting. Current brightness setting is shown in white text on dark gray background (for the LC-1000) or red text (for the CT-1000). Two image buttons, IMAGE POS and IMAGE NEG, located on the Light Menu of NOTE: The menu shown above the LC-1000 only may be selected to manually assign the screen image.
-
Page 13: Timeout Menu
Selected buttons have white text on dark gray background (for the LC-1000) or red text (for the CT-1000). Communication mode is factory set to CRESNET MODE. Select the RETURN button located on the Interface Menu to return to the Setup Menu. -
Page 14: Sound Menu
To enable this feature, verify that the KEYCLICK ON button is active (white text on dark gray background (for LC-1000) or red text (for CT-1000)). An active KEYCLICK OFF button disables the feature. NOTE: If keyclick is enabled on a touchpanel, each press of the touchpanel results in an audible click. -
Page 15: Touchpanel Mounting
Crestron CT-1000 & LC-1000 Hardware Connection for the Series 1000 (Back of the Unit is Shown) Mounting Options The Series 1000 touchpanel installs simply and cleanly into existing or newly constructed walls, with an assortment of pre- and post-construction mounting options. - Page 16 Remove Cover Plate (BB-1000L Shown as Mounting Example - Drywall Not Shown) 12 • Series 1000 Wall-Mounted Touchpanels Crestron CT-1000 & LC-1000 1. If the cover is attached, use a #1 Phillips screwdriver to loosen and remove the four screws and cover plate.
-
Page 17: Touchpanel Removal
Insert Series 1000 into Opening (Buttons Shown as Attached) Custom engraved faceplate and/or keys can be ordered separately by using the Crestron Engraver Software. Version 2.0.0.6 or later is available from the Downloads | Software Updates section of the Crestron website (www.crestron.com). -
Page 18: Recommended Cleaning
This custom template can then be used by Crestron AppBuilder to create the final project files to be loaded into the panels. Alternatively, VT Pro-e can be used to tweak projects created with the Crestron AppBuilder or develop original touchpanel screen designs. -
Page 19: Programming With The Crestron Appbuilder
Crestron CT-1000 & LC-1000 NOTE: The Series 1000 touchpanel is supplied with 10 blank pushbuttons. Custom- engraved keys can be obtained by using the Crestron Engraver software. Version 2.0.0.6 or later is available from the Downloads | Software Updates section of the Crestron website (www.crestron.com). -
Page 20: C2Net-Device Slot In Configuration Manager
Expanded PRO2 System Tree C2Net-Device Slot in Configuration Manager To incorporate the Series 1000 touchpanel into the system, drag the CT-1000 or LC-1000 from the Touchpanels | Touchpanels (Cresnet) folder of the Device Library and drop it in System Views. The PRO2 system tree displays the touchpanel in Slot 9, with a default NET ID of “03”... - Page 21 The following diagram shows the LC-1000 symbol in the SIMPL Windows’ Programming Manager. NOTE: With respect to programming in SIMPL Windows, the CT-1000 symbol is identical, except for the nomenclature. Detail View of the LC-1000 in SIMPL Windows’ Programming Manager NOTE: Pin numbers are expandable to 999 Digital, 255 Analog, and 127 Serial.
-
Page 22: Signal Types
The signal type is displayed on the Status Bar when the signal is highlighted. For additional information, refer to Doc. 6120, Crestron SIMPL Windows Symbol Guide. It may be downloaded from the Downloads | Product Manuals | Software section of the Crestron website (www.crestron.com). Digital Signals A digital signal contains one bit of information and usually takes on one of two values: 1 or 0. -
Page 23: Programming With Visiontools Pro-E
Crestron SIMPL Windows Symbol Guide (Doc. 6120), or the on-line help included with SIMPL Windows. CT/LC-1000 Example Program An example program for the Series 1000 touchpanel is available from the Crestron FTP site (ftp://ftp.crestron.com/Examples/). Search for CT_or_LC-1000_SIMPL_Windows_example_file.SMW. Programming with VisionTools... -
Page 24: Wav File Audio Messages
WAV file format: PCM, 8KHz, mono, 8 bit. Pre-recorded WAV files for voice prompts and responses are available from Crestron. These files can be stored into and programmed for use in the touchpanel directly or may be edited with the Sound Recorder. For example, the individual files can be combined to create custom messages. - Page 25 2. Each WAV file must have the correct audio format and attributes for the CT-1000 or LC-1000 target type selected in VT Pro-e. The correct audio format is PCM, 8 or 16 KHz, 8 bit, mono. 3. There are three system-wide join numbers that the designer can define.
- Page 26 Select Description to enter comments about the WAV file. 22 • Series 1000 Wall-Mounted Touchpanels Crestron CT-1000 & LC-1000 1. Use the Browse button to locate the desired WAV files. It should appear in the field adjacent to the Browse button.
-
Page 27: Quick" Pushbuttons
NOTE: A VT Pro-e sample project, LC-1000.VTP, is available from the VT Pro-e section of the Crestron FTP site (ftp://ftp.crestron.com/VTPro-E/). This project provides guides for panel designers so that they can line up objects with the 10 “quick” pushbuttons that flank the LCD display. New users are required to register in order to obtain access to the FTP site. -
Page 28: Uploading And Upgrading
Viewport can also function as a terminal emulator for generic file transfer. All of these functions are accessed through the commands and options in the Viewport menus. Therefore, for its effectiveness as a support and diagnostic tool, the Crestron 24 • Series 1000 Wall-Mounted Touchpanels... -
Page 29: Communication Settings
Typical Connection Diagram when Uploading Files Operations Guide – DOC. 5813B 1. Start SIMPL Windows or VT Pro-e. 2. From the menu bar, select Tools | Viewport to open the Crestron Viewport. 3. Refer to the figure after this step. From the Viewport menu, select Setup | Communications settings (alternatively, press Alt+D) to open the “Port Settings”... - Page 30 26 • Series 1000 Wall-Mounted Touchpanels Crestron CT-1000 & LC-1000 4. Select RS-232 as the connection type. Verify that an available COM port (COM 1 is shown after this step) is selected, and that all communication parameters and necessary options from the “Port...
-
Page 31: Uploading A Simpl Windows Program
A control system source file has The SIMPL Windows file can be uploaded to the control system using SIMPL the extension .smw. A compiled Windows or via the Crestron Viewport. SIMPL Windows file has the extension .spz for a 2-Series Upload via SIMPL Windows control system, .bin for CNX... -
Page 32: Uploading A Vt Pro-E Project
The VT Pro-e file can be uploaded to the touchpanel using VT Pro-e or via the source file has the extension Crestron Viewport. Verify the NET ID before sending the program. .vtp. A compiled VT Pro-e file has the extension .hex. - Page 33 Crestron CT-1000 & LC-1000 File Transfer | Send Touchpanel Command “Select Network ID” Window NOTE: When transferring any Cresnet file (touchpanel project/firmware), lower the port speed baud rate to 38400 to match the Cresnet bus speed. “Open” Window Operations Guide – DOC. 5813B 3.
-
Page 34: Firmware Upgrade
Therefore, please check the Crestron website (http://www.crestron.com/downloads/software_updates.asp) for the latest version of firmware. Not every product has a firmware upgrade, but as Crestron improves functions, adds new features, and extends the capabilities of its products, firmware upgrades are posted. - Page 35 Crestron CT-1000 & LC-1000 Touchpanels “Open” Window 4. Browse to the .csf file and click Open to begin the transfer. Series 1000 Wall-Mounted Touchpanels • 31 Operations Guide – DOC. 5813B...
-
Page 36: Problem Solving
Touchpanels Problem Solving Troubleshooting The table below provides corrective action for possible trouble situations. If further assistance is required, please contact a Crestron customer service representative. Series 1000 Touchpanel Troubleshooting TROUBLE Touchpanel does not function. Touchpanel is not responding and screen displays "Cresnet... -
Page 37: Further Inquiries
Future Updates As Crestron improves functions, adds new features, and extends the capabilities of the Series 1000 touchpanel, additional information may be made available as manual updates. These updates are solely electronic and serve as intermediary supplements prior to the release of a complete technical documentation revision. -
Page 38: Appendix: Early Production Units
TEMPLATE - OV40054-1 FOR LC-1000 AND CT-1000 ( NOT FOR BB-1000 BACK BOX ) CUT ALONG LINE CRESTRON REMOTE CONTROL SYSTEMS inch (109 mm) high. However, Crestron recommends that QUANTITY inch Operations Guide – DOC. 5813B... - Page 39 Crestron CT-1000 & LC-1000 Removing Template Cut Out Mounting Bracket/Touchpanel Assembly Operations Guide – DOC. 5813B 4. Cut out and remove the traced shape of the mounting surface (refer to illustration after this step). 5. Use four pan head screws, supplied, to attach two mounting brackets to the touchpanel (refer to illustration after this step).
- Page 40 Secure Mounting Bracket/Touchpanel Assembly and Add Plastic Buttons and Faceplate 36 • Series 1000 Wall-Mounted Touchpanels Crestron CT-1000 & LC-1000 7. Position the mounting bracket/touchpanel assembly (less the plastic buttons and faceplate) over the opening and apply equal pressure on the four screw heads of the touchpanel until the assembly slides into place (refer to illustration after the last step).
-
Page 41: Software License Agreement
This Agreement may only be modified by a writing signed by an authorized officer of Crestron. Updates may be licensed to You by Crestron with additional or different terms. This is the entire agreement between Crestron and You relating to the Software and it supersedes any prior representations, discussions, undertakings, communications or advertising relating to the Software. - Page 42 “applets” incorporated into the Software), the accompanying media and printed materials, and any copies of the Software are owned by Crestron or its suppliers. The Software is protected by copyright laws and international treaty provisions. Therefore, you must treat the Software like any other copyrighted material, subject to the provisions of this Agreement.
-
Page 43: Return And Warranty Policies
CRESTRON shall not be liable to honor the terms of this warranty if the product has been used in any application other than that for which it was intended, or if it has been subjected to misuse, accidental damage, modification, or improper installation procedures. - Page 44 Crestron Electronics, Inc. Operations Guide – DOC. 5813B 15 Volvo Drive Rockleigh, NJ 07647 12.02 Tel: 888.CRESTRON Fax: 201.767.7576 Specifications subject to www.crestron.com change without notice.
Need help?
Do you have a question about the CT-1000 and is the answer not in the manual?
Questions and answers