Sign In
Upload
Download
Table of Contents
Contents
Add to my manuals
Delete from my manuals
Share
URL of this page:
HTML Link:
Bookmark this page
Add
Manual will be automatically added to "My Manuals"
Print this page
×
Bookmark added
×
Added to my manuals
Manuals
Brands
Crestron Manuals
Touch Panel
TS-70 Series
Product manual
Crestron TS-70 Series Product Manual
7 in. and 10.1 in. tabletop touch screens
Hide thumbs
Also See for TS-70 Series
:
Quick start manual
(2 pages)
,
Quick start
(4 pages)
1
2
Table Of Contents
3
4
5
6
7
8
9
10
11
12
13
14
15
16
17
18
19
20
21
22
23
24
25
26
27
28
29
30
31
32
33
34
35
36
37
38
39
40
41
42
43
44
45
46
47
48
49
50
51
52
53
54
55
56
57
58
59
60
61
62
63
64
65
66
67
68
69
70
71
72
73
74
75
76
77
78
79
80
81
82
83
84
85
86
87
88
89
90
91
92
93
94
95
96
97
98
99
100
101
102
103
104
105
106
107
108
109
110
111
112
113
114
115
116
117
118
119
120
121
122
123
124
125
126
127
128
129
130
131
132
133
134
135
136
137
138
139
140
141
142
143
144
145
146
147
148
149
150
151
152
153
154
155
156
157
158
159
160
161
162
163
164
page
of
164
Go
/
164
Contents
Table of Contents
Bookmarks
Table of Contents
Table of Contents
Overview
Features
Features
TS-770-GV Features
TS-770R Features
TS-1070 Features
TS-1070-GV Features
TS-1070R Features
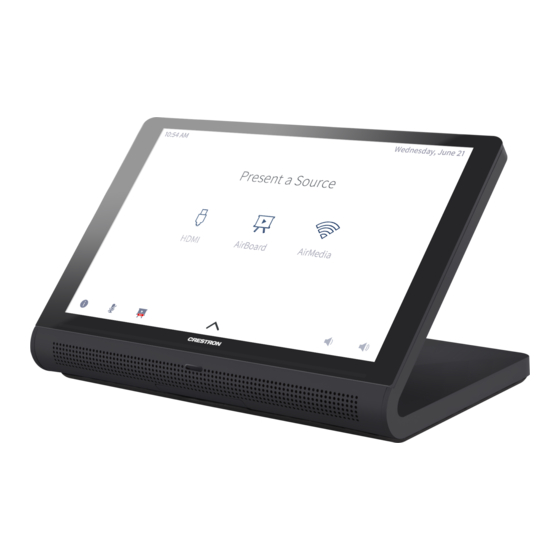
Physical Description
Specifications
TS-770 Specifications
Product Specifications
Dimension Drawings
TS-770-GV Specifications
Product Specifications
Dimension Drawings
TS-770R Specifications
Product Specifications
Dimension Drawings
TS-1070 Specifications
Product Specifications
Dimension Drawings
TS-1070-GV Specifications
Product Specifications
Dimension Drawings
TS-1070R Specifications
Product Specifications
Dimension Drawings
Installation
TS-770 and TS-1070 Installation
Place the Touch Screen
Connect the Touch Screen
Install the Cable Grommet
Configure the Touch Screen
Select an Application
TS-770-GV and TS-1070-GV Installation
Place the Touch Screen
Connect the Touch Screen
Install the Cable Grommet
Configure the Touch Screen
Select an Application
TS-770R and TS-1070R Installation
Place the Touch Screen
Connect the Touch Screen
Install the Cable Grommet
Configure the Touch Screen
Configure the Crestron Home App
Configuration
Local Configuration
Access the Setup Screens
Ethernet Setup
IP Table Setup
Audio Setup
Display Setup
Standby Timeout
Application Selection
Wi-Fi Setup
Bluetooth Beacon
Virtual Toolbar
Diagnostics & Advanced
About
Web Configuration
Actions Menu
Status
Settings
Security
802.1X Configuration
Application Selection
Connect to Xio Cloud Service
Operation
Resources
Crestron Support and Training
Programmer and Developer Resources
Related Documentation
Advertisement
Quick Links
1
Ts-1070 Features
2
Settings
3
Operation
Download this manual
TS-70 Series
7 in. and 10.1 in. Tabletop Touch Screens
Product Manual
Crestron Electronics, Inc.
Table of
Contents
Previous
Page
Next
Page
1
2
3
4
5
Advertisement
Table of Contents
Need help?
Do you have a question about the TS-70 Series and is the answer not in the manual?
Ask a question
Questions and answers
Related Manuals for Crestron TS-70 Series
Racks & Stands Crestron TS-70 Series Quick Start
Swivel mount kit (4 pages)
Racks & Stands Crestron TS-70 Series Quick Start Manual
Swivel mount kit (2 pages)
Touch Panel Crestron TS-770 Product Manual
7 in. and 10.1 in. tabletop touch screens (82 pages)
Touch Panel Crestron TS-770-GV Quick Start Manual
7 in. and 10.1 in. tabletop touch screens, government version (7 pages)
Touch Panel Crestron TS-770 Quick Start Manual
7 in. and 10.1 in. surface mount touch screens (6 pages)
Touch Panel Crestron TS-770 Getting Started
Tabletop touch screens (2 pages)
Touch Panel Crestron TS-770R Product Manual
7 in. and 10.1 in. tabletop touch screens (164 pages)
Touch Panel Crestron TSW-730 Configuration Manual
7”room scheduling touch screen (16 pages)
Touch Panel Crestron TSW-732 Supplemental Manual
7" room scheduling touch screen (18 pages)
Touch Panel Crestron TST-902 Product Manual
8.7 in. wireless touch screen (120 pages)
Touch Panel Crestron TST-600 Configuration Manual
5.7” wireless touch screen (24 pages)
Touch Panel Crestron TSW-70 Series Product Manual
Wall mount touch screens (226 pages)
Touch Panel Crestron TSW-770-GV Quick Start Manual
7 in. and 10.1 in. wall mount touch screens, government version (8 pages)
Touch Panel Crestron TSW-770R Quick Start Manual
7 in. and 10.1 in. wall mount touch screens, crestron home os version (9 pages)
Touch Panel Crestron TSS-770 Quick Start Manual
7 in. and 10.1 in. room scheduling touch screens (10 pages)
Touch Panel Crestron TSS-770 Product Manual
7 in. and 10.1 in. room scheduling touch screens (66 pages)
This manual is also suitable for:
Ts-770
Ts-770-gv
Ts-770r
Ts-1070
Ts-1070 gv
Ts-1070r
Table of Contents
Save PDF
Print
Rename the bookmark
Delete bookmark?
Delete from my manuals?
Login
Sign In
OR
Sign in with Facebook
Sign in with Google
Upload manual
Upload from disk
Upload from URL


Need help?
Do you have a question about the TS-70 Series and is the answer not in the manual?
Questions and answers