Table of Contents
Advertisement
Advertisement
Table of Contents

Related Manuals for ROE MC-7H


Summary of Contents for ROE MC-7H
- Page 1 User Manual MC-7H with Touring frame (BlackLED / No transparency) - 1 -...
-
Page 2: Table Of Contents
Contents Safety Information Specification Connection Accessories Base bar Assembly Physical Connection Control System Service and Maintance Package - 2 -... -
Page 3: Safety Information
Read this manual before installing, powering or servicing this product, follow the safety precau- tions listed below and observe all warnings in this manual and printed on the product. If you have questions about how to operate the panel safely, please contact your ROE supplier. PROTECTION FROM ELECTRIC SHOCK Connect the product to AC mains power within the range 100-240V nominal at 50 or 60 Hz only . - Page 4 Do not modify the product in any way not described in this manual. Install only genuine ROE parts in or on the product unless an alternative is described in this manual. Do not operate the product full load if the ambient temperature of power units (Ta) exceeds 45°C (113°...
- Page 5 100 m (332 feet). Avoid exposure of data cables to accidental contact with lightning or power conductors. MC-7H Panels cannot be hot swapped: Always disconnect the power cord from the control box before connecting or disconnecting the cable string or one of MC-7H Panels. - 5 -...
-
Page 6: Specification
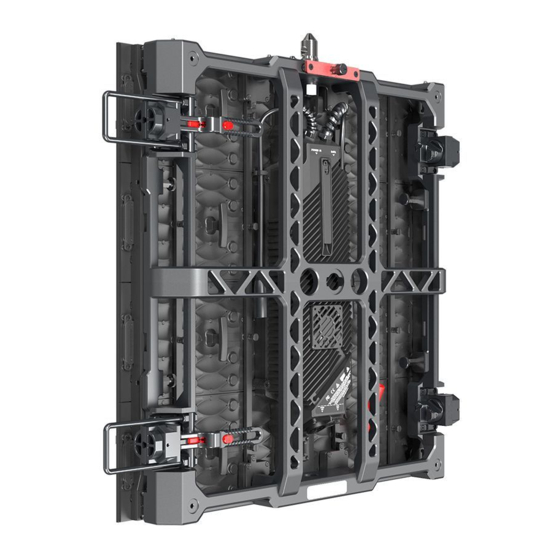
With the amazing flexibility and high density, both of them can be able to multi-angle folded, satisfy your solution for applications with long viewing distances. MC-7H Specification: MC-7H Dimensions: 600.0mm Pixel Pitch 7.5mm... -
Page 7: Connection
MC-7H MC-7H Hanging system MC-7H MC-7H MC-7H MC-7H Evision MC-7H MC-7H MC-7H MC-7H MC-7H MC-7H MC-7H MC-7H MC-7H MC-7H MC-7H MC-7H Stacking system MC-7H MC-7H MC-7H MC-7H Evision MC-7H MC-7H MC-7H MC-7H MC-7H Built in Power Supply - 7 -... -
Page 8: Accessories
L480 x W240 x H45mm Weight 2.30kg Weight 1.40kg Weight 4.60kg Max Length 100m Max Current Max Capacity 8 tiles of MC-7H(AC 220V) 4 tiles of MC-7H(AC 110V) Name CAT-5 Name CAT-5 Name Base bar Part No. 208002S0225 Part No. -
Page 9: Base Bar Assembly
Base Bar Assembly: Hanging System Base Bar 605mm 89mm Figure 1 Figure 2 A: Horizontal connector D: Vertical connection lock B: Level adjusting screw E: Lock of base truss C: Location Pin(For stacking installation) F: Ring(For hanging installation) Note: Ring and Location pin can be removed and exchange with each other. Hanging Installation Before hanging installation, please make sure the ring is on the top of the bar. - Page 10 1. Bars connection with each other. Adjust the direction of the horizontal connectors and make sure one red and one blue on the top side. 0 degree 2. Install the base bar with panels Install the base bar on the panels with touring frame. And lock the vertical connection lock before raising the screen.
- Page 11 Stacking System Rear support truss Rear bridge Base bar Base truss Before hanging installation, please make sure the location pin is on the top of the bar. Adjust the level adjusting screw and make the base bar keep horizontal on the ground Stacking Installation 1.
- Page 12 2. Base bar connection with base truss.(Two kinds of different installation.) Lock of base truss Adjust the knob and make sure the base truss horizontal. Case 1: Lock of base truss Adjust the knob and make sure the base truss horizontal. Case 2: 3.
- Page 13 4. Panel installation Touring frame Rear bridge Rear support truss Case 1 Case 2 Base bar Base truss Stacking system - 13 -...
-
Page 14: Physical Connection
5. Push handle back for locking.(pic7) Curve Installation(stacking and hanging) Our touring system can make 10 degrees curve installation horizontally. Befor installation, please adjust the horizontal connectors on base bars and panles’ touring frames. Base bar MC-7H panles - 14 -... - Page 15 0 degree stacking installation hanging installation +10 degree stacking installation hanging installation -10 degree stacking installation hanging installation - 15 -...
-
Page 16: Control System
Control System: The control system of MC-7H consist of receiving card and sending card. Receiving card is integrated with LED panels. Working v oltage 100-240V AC Power < 20W Working temperature -20°C to 45°C Input port Output ports number 4 ports... -
Page 17: Service And Maintance
Maintenance on overall installation, just replace the bad panels. 1. Remove the Power Cable. 2. Remove the Data Cable. 3. Pull out the Lock Pin. 4. Hold the handle to push the panle forward. Light status on the backside of MC-7H Series Power Data Color of Light Factors... -
Page 18: Package
Package 8pcs LED panels per Flightcase 24pcs LED panels per T Dolly Pictures Flightcase Dolly - 18 -... - Page 19 The end ROE Visual Co., Ltd No.1-3 Floor, Bldg 7,Zhong Yuntai Technology Industrial Park, Songbai Road, Shiyan Street, Baoan,Shenzhen,China Tel:+86-0755-83924892 Fax:+86-0755-83924891 E-mail:roe@roevisual.com www.roevisual.com - 19 -...
Need help?
Do you have a question about the MC-7H and is the answer not in the manual?
Questions and answers