Table of Contents
Advertisement
Quick Links
Advertisement
Table of Contents

Summary of Contents for AccuSport Vector Pro
- Page 1 L A U N C H S Y S T E M User Guide V2.1.1 KNOW THE GAME.
-
Page 2: Table Of Contents
Hardware Installation (Windows Vista) ......... 17 SETTING UP ..............19 Charging the Battery ............19 Positioning the Vector Pro, Laptop Computer, Video Camera ... 20 Starting the Software ............21 Setup Wizard ..............21 Video Camera Installation (Optional) ........24 Marking the Ball .............. - Page 3 Club Analysis ..............42 PRACTICE ................ 43 CUSTOMER SUPPORT ............44 FREQUENTLY ASKED QUESTIONS ........45 General Questions ............. 45 Using Vector Pro ............... 48 Troubleshooting ..............49 Error Messages ..............54 APPENDIX ................ 57 Appendix A: Sample Reports ..........57 Appendix B: Exporting to Microsoft Excel or a Text File ...
-
Page 4: Getting Started
To ensure trouble-free, reliable operation, read this user guide before setting up and using your Vector Pro. Please visit the AccuSport web site at www.accusport.com for advanced topics and breaking news about AccuSport products. -
Page 5: System Requirements
System Requirements The Vector Pro Launch System works with personal computers that meet the following system requirements: Windows XP Home or Professional - Service Pack 2 Intel (only) Pentium 4 with minimum 1.7 GHz processor • CPU: Intel (only) Core2 duo T5600 and above with minimum 1.83 GHz processors... -
Page 6: Video Camera Specifications
• Resolution: 640 x 480 pixels minimum • Ability to manually adjust shutter speed • Gain adjustment (light amplifier) • Wide angle lens Note: Future support will be added for high definition video camcorders. Vector Pro User Guide v2.1 Page 6 October 2008... -
Page 7: Safety Instructions
• When necessary clean the Vector Pro lenses using any photographic or eyeglass cleaning kit. Paper towels or tissue are not recommended. • The outside of the Vector Pro case can be cleaned using a damp cloth. Turn off and disconnect the Vector Pro before cleaning. Do not allow liquid to enter the case. -
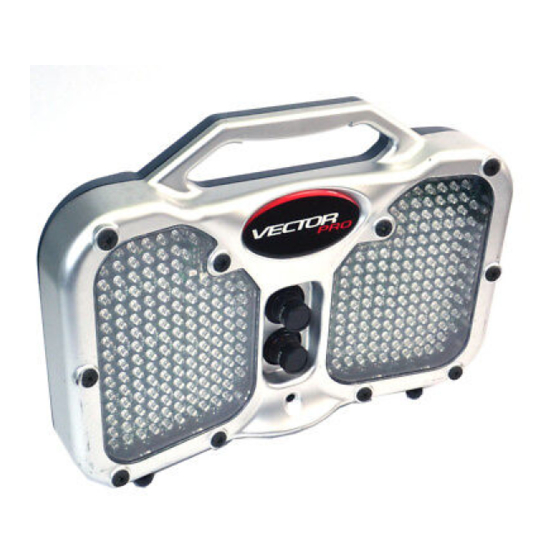
Page 8: Accusport Vector Pro Illustration
AccuSport Vector Pro Illustration Plug USB Cable here to connect to computer. Vector Pro User Guide v2.1 Page 8 October 2008... -
Page 9: Prior To Software Installation (Windows Xp)
The following steps should be taken to prevent the Windows XP Operating System from shutting down the computer’s USB ports, and to prevent the Computer from slowing down its processor speed, while the Vector Pro Launch Monitor is in use. Power Options Settings 1) Select the Windows XP Start Button... -
Page 10: Prior To Software Installation (Windows Vista)
The following steps should be taken to ensure the Power Options on a Windows Vista based computer are set correctly in order to work with the Accusport Vector Pro Launch monitor and Software. Power Options Settings 1) Select the Windows Vista Start Button 2) Select the Control Panel 3) Select Power Options (You may have to Select the “Classic View”... - Page 11 Then select the plus (+) sign next to the “Maximum Processor State” o Change settings for the “On Battery” and “Plugged In” labels to 100 percent (%) by holding down the left mouse button on the up October 2008 Page 11 Vector Pro User Guide v2.1...
-
Page 12: Disabling User Account Control (Windows Vista)
If you encounter a problem during or after the software installation, we recommend disabling the User Account Control to prevent the Windows Vista Operating System from blocking the Vector Pro software and preventing it from launching, or causing an error message on opening the application. -
Page 13: Software Installation
Software Installation (Windows XP and Vista) The following steps are for Windows XP. Though cosmetically different, the Windows Vista installation follows the same procedure. October 2008 Page 13 Vector Pro User Guide v2.1... -
Page 14: Hardware Installation (Windows Xp)
Hardware Installation (Windows XP) Vector Pro User Guide v2.1 Page 14 October 2008... - Page 15 October 2008 Page 15 Vector Pro User Guide v2.1...
- Page 16 After installing the software, you can access the Vector Pro User Guide at anytime by clicking Help in the menu bar of the Vector Pro screen. NOTE: Always use the same USB port on the computer that the drivers were initially installed on.
-
Page 17: Hardware Installation (Windows Vista)
Hardware Installation (Windows Vista) October 2008 Page 17 Vector Pro User Guide v2.1... - Page 18 Vector Pro User Guide v2.1 Page 18 October 2008...
-
Page 19: Setting Up
If you are using a fully charged battery, no AC power source is needed. If the battery is not charged, or if you will be using the Vector Pro for an extended time period, use the AC adapter to plug into an electrical outlet. -
Page 20: Positioning The Vector Pro, Laptop Computer, Video Camera
Left handed golfers, tee up in left handed hitting zone, and change software settings in the Student Information Window or click Options in the menu bar on the Vector Pro screen and select Preferences. Vector Pro User Guide v2.1 Page 20... -
Page 21: Starting The Software
Starting the Software Power on the Vector Pro and your computer. Connect the Vector Pro to your computer. Double click the Vector Pro icon on your computer desktop to start the software. VectorPro 2.0. Setup Wizard The Setup Wizard opens automatically the first time Vector Pro is started. - Page 22 There is no need for a green circle on this screen, so proceed to the focus and brightness adjustment, again making sure that the brightness number is (+/-3) 155. Vector Pro User Guide v2.1 Page 22 October 2008...
- Page 23 Otherwise, click Next. To readjust these settings later, access the Setup Wizard by clicking Options in the menu bar of the Vector Pro screen. Click Close. October 2008 Page 23 Vector Pro User Guide v2.1...
-
Page 24: Video Camera Installation (Optional)
Video Camera Installation (Optional) If you are using a video camera with Vector Pro, follow these steps for one- time installation before the first use. If you are not using a video camera, proceed to step 6.* 1. Power on the video camera and computer. -
Page 25: Marking The Ball
Marking the Ball The Vector Pro Launch System uses the marks you make on the golf ball to measure the ball flight parameters. All marks must face the Vector Pro camera lens when the ball is positioned for hitting. No other ball marks should be visible to the Vector Pro camera;... -
Page 26: Hitting Your First Shot
After hitting the ball, check the quality of the image in the lower right of the screen. Vector Pro must have a clear image of the shot in order to measure ball flight parameters. If a clear ball image does not appear, or if you receive the message, “Analysis Terminated,”... - Page 27 In this mode, Shot History appears at the top of the screen. By clicking the small navigator, you can toggle among Shot Profile, Shot Analysis and Club Analysis in the lower half of the screen. Small Navigator October 2008 Page 27 Vector Pro User Guide v2.1...
-
Page 28: Vector Pro Software Features
Navigating the User Interface Session, score, ball launch measurements, ball flight information and student data are displayed in the same manner for each Vector Pro mode of operation. That information and the menu bar are explained here, beginning in the upper left corner with the menu bar, and then moving clockwise around the screen. -
Page 29: Ball Launch Measurements
0 to 100, based on all the parameters of that shot. Ball Launch Measurements The shot dials on the right of the Vector Pro Screen convey measured information about every shot. Ball Speed: Displayed in miles per hour (MPH), feet per second (FPS), kilometers per hour (km/h) or meters per second (m/s). -
Page 30: Managing Student Information
Click to select the student. For a new session for a returning student, select the name and click Save. Vector Pro User Guide v2.1 Page 30 October 2008... -
Page 31: Managing Activities
Use the Session drop down to select a saved session. Then click View to see those shots and the stored data. As it is entered into the Session field, Vector Pro automatically posts the date with the name of the saved session. To view a saved session, select the session and click View. -
Page 32: Managing Items
For quick item entry: Double-click or highlight the item in the item field on the main Vector Pro screen, and edit the description. Or select an item from the data base, click Save, then edit the description in the item field on the main Vector Pro screen. -
Page 33: Options
Options Click Options at the top of the screen to open this window for adjusting various settings of the Vector Pro Launch System, as described below. Setup Wizard A guide for positioning and leveling Vector Pro, setting camera focus and brightness,and calibrating lenses. -
Page 34: Advanced Mode
Units: measurement for distance and ball and club head speed. Score: Vector Pro scores each shot, in a range from 0 to 100, based on the activity. Power Transfer Index (PTI), a quotient of ball speed over club speed, is an older scoring technique, first used when speed was the only information available in ball flight measurement. -
Page 35: Trigger Settings
The Vector Pro Trigger Setting will display the following: DEFAULT SETTING SHOULD BE USED FOR ALL CLUBS AND HITTING CONDITIONS. FAST DELAY SETTING IS APPROPRIATE FOR MOST CONDITIONS. SLOW IRON SHOTS MAY REQUIRE THE DELAY BE SET TO MEDIUM. BE SURE TO CHANGE THE DELAY BACK TO FAST WHEN HITTING DRIVERS. -
Page 36: Instruction
Pre Roll is the number of seconds the software tells the camera to go back and record prior to impact. Clip Length is the total number of seconds per video recording. Vector Pro User Guide v2.1 Page 36 October 2008... -
Page 37: Swing Video
2. Set to record mode on your video camera. 3. Have the golfer hit the ball. Vector Pro will record and save the image, replay it once, and then stop. 4. Shot data will appear on the Vector Pro Screen. -
Page 38: On Screen Annotation
Shot Profile Shot Profile shows an overhead and side view of the ball flight based upon the measured ball launch information and AccuSport’s best-in-the- industry flight model. Vector Pro User Guide v2.1 Page 38 October 2008... -
Page 39: Fitting
In Shot History, data is grouped and summarized by item, as shown on the top, yellow colored line of each group. Click on +/- box in the item field to collapse the data to display averages for each measurement. October 2008 Page 39 Vector Pro User Guide v2.1... -
Page 40: Exporting To Microsoft Excel
Click the arrows or click and drag the slider below Shot History to view all table columns. The first columns of the table contain information shown elsewhere on the Vector Pro screen. The last five columns contain additional information, and are explained below. -
Page 41: Shot Analysis
Launch data may be modified for a “What If” plot. Change the values and then click Analyze to see the plot of a hypothetical shot. October 2008 Page 41 Vector Pro User Guide v2.1... -
Page 42: Club Analysis
Club Analysis Club Analysis displays the angle of attack and club path for the last shot. This view does not change for a “What If” analysis. Vector Pro User Guide v2.1 Page 42 October 2008... -
Page 43: Practice
“Off”. This feature is useful when you want to display the Instruction or Fitting screen on the primary monitor and use a second monitor to see the shot shape. October 2008 Page 43 Vector Pro User Guide v2.1... -
Page 44: Customer Support
Free customer support during regular business hours. Weekend support available Saturday (10:00 am to 5:00 pm) and Sunday (1:00 to 5:00 pm). There is a per incident fee. If the Vector Pro warranty has expired, the customer is responsible for all shipping costs. Visit our website www.accusport.com... -
Page 45: Frequently Asked Questions
Free customer support during regular business hours. Weekend support available Saturday (10:00 am to 5:00 pm) and Sunday (1:00 to 5:00 pm). There is a per incident fee. If the Vector Pro warranty has expired, the customer is responsible for all shipping costs. Visit our website www.accusport.com... - Page 46 Keep in mind that the height of the Vector Pro is probably set to capture a ball hit from a tee, so Vector Pro needs to be positioned at the same level as the hitting mat.
- Page 47 Windows Vista Operating Systems. How accurate is club speed? Vector Pro club speed is accurate to within 2 mph. Club speed is the only calculated launch number. (The rest are measured.) This calculation is derived from ball speed, launch angle, back spin, side spin and push/pull.
-
Page 48: Using Vector Pro
If the battery is low and needs charging, Vector Pro will emit a beeping sound. Using Vector Pro How important is ball placement? Ball placement is crucial. If the ball is not placed in the correct hitting area or is not at the stated 14 inches, +/- 1 inch, from the launch monitor, the ball capture or launch data will be affected. -
Page 49: Troubleshooting
Mono: allows you to check the brightness setting. When the Mono button is checked, the white circle in place of the golf ball should extend to the edges of the ball. If it does not, the aperture on the Vector Pro is probably set too dim. - Page 50 How do I update the Vector Pro driver? No image appears in one or both of the Setup Wizard focus and brightness screens The Hardware Update Wizard does not appear when I turn on my Vector Pro for the first time.
- Page 51 USB device. The yellow question marks or exclamation marks indicate that these drivers need to be installed using the procedures on page 14 for Windows XP, page 17 for Windows Vista. October 2008 Page 51 Vector Pro User Guide v2.1...
- Page 52 I am getting launch data for drivers, but the system is not capturing irons. 1. Make sure that Vector Pro is on the same level as the mat and that the ball is not being hit below the cameras. Vector Pro User Guide v2.1...
- Page 53 2. Click Options on the Vector Pro screen menu bar and select Advanced Mode. Verify that the ‘Default’ box is checked for trigger sensitivity, located in the lower left corner. 3. If the ball image is cut off at the side of the screen, use the setup template to verify that you are teeing up the ball correctly.
-
Page 54: Error Messages
I cannot see the stripe/two dots on the balls. Make sure when placing the ball in front of Vector Pro that the two dots/ black plane line are horizontally facing Vector Pro. If you still cannot see the stripe on the ball, use the Setup Wizard to adjust focus and brightness. - Page 55 The ball/ tee placement is incorrect or the focus and calibration procedure has been incorrectly performed. Use the supplied template to ensure that the ball was hit at the required 14 inches from Vector Pro and from within the appropriate hitting zone. If the distance is correct, use the Setup Wizard to reset focus and brightness and calibrate the lenses.
- Page 56 Balls may not have been marked properly. Marks too Small To be sure that Vector Pro can read the marks on the ball, first check to see that the two dots or line are facing the right edge of the Vector Pro when you tee up the ball.
-
Page 57: Appendix
It lists any problems that need work, and gives space for the instructor to identify causes and note drills for practice. October 2008 Page 57 Vector Pro User Guide v2.1... - Page 58 Here the graph below the chart shows the original shot profile in yellow and a "what if" shot with greater launch angle in green. Vector Pro User Guide v2.1 Page 58 October 2008...
- Page 59 Shot History data. The plot below shows shot location for each summary line (black dots) as well as the standard deviation of each shot group (white dots). October 2008 Page 59 Vector Pro User Guide v2.1...
-
Page 60: Appendix B: Exporting To Microsoft Excel Or A Text File
To export data to a text file: Click the text file icon at the upper left corner of Shot History on the Fitting Screen. Vector Pro will save data to shot.txt, which will open automatically in notepad. Save the document to your computer.
Need help?
Do you have a question about the Vector Pro and is the answer not in the manual?
Questions and answers