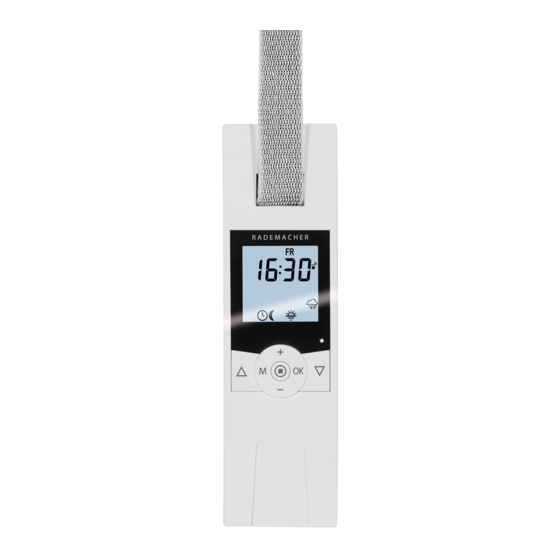
RADEMACHER RolloTron Comfort DuoFern Translation Of The Original Operating And Assembly Manual
Electronic roller shutter belt winder
Source: rademacher.de
Chapters
Table of Contents

Related Manuals for RADEMACHER RolloTron Comfort DuoFern


Summary of Contents for RADEMACHER RolloTron Comfort DuoFern
- Page 1 Electronic Roller Shutter Belt Winder RolloTron Comfort DuoFern Translation of the Original Operating and Assembly Manual Item No.: 1623 45 11 1623 60 11 (Comfort DuoFern Plus) 1615 45 11 (Small belt) VBD 590-2-1 (11.20)
-
Page 2: Dear Customer
These instructions... With your purchase of RolloTron Comfort DuoFern, you have chosen a quality product manufactured by RADEMACHER. Thank you for the trust you have placed ...describe how to install the equipment, connect the in us. electrical system and operate your roller shutter belt winder. -
Page 3: Table Of Contents
[ / ]; brief description ......48 10. Drawing in and fastening the belt ......... 22 16.2.1 Menu 2 - Configuration of opening 11. Mounting the RolloTron Comfort DuoFern ....24 and closing times [ / ] ....51... - Page 4 [ ] and sunshine 18. Carry out hardware reset ........... 74 position ............ 60 19. Removing the RolloTron Comfort DuoFern 16.5 Automatic dawn function; brief (e.g. in the event of a move) ..........75 description .............. 62 20. Removing the belt in the event of unit failure ..77 16.5.1 Menu 5 - Customising the auto-...
-
Page 5: Hazard Symbols
1. Hazard symbols Danger of fatal electric shock Danger area / dangerous situation 1.1 Levels of danger and signal words DANGER! CAUTION! This hazard will result in serious injury or death if not This hazard may result in minor or moderate injury if not avoided. -
Page 6: Safety Instructions
◆ This device may be used by children from 8 years of age For this reason, the RolloTron Comfort DuoFern has an upwards as well as by persons with reduced physical, automatic running time limit (KB) of four minutes. -
Page 7: Proper Use
◆ As the manufacturer, we provide no guarantee for the DuoFern must be flat. use of third-party components and accept no liability for consequential damage resulting from such. ◆ All repairs to the RolloTron Comfort DuoFern must be undertaken by authorised customer service personnel. -
Page 8: Improper Use
DuoFern outside. 2.3 Required expert knowledge of the installer The electrical connection, installation and commissioning of the RolloTron Comfort DuoFern must only be carried out by a qualified electrician in accordance with the instructions in this manual. -
Page 9: Scowpe Of Delivery (Item No. 1623 45 11)
3. Scowpe of delivery (item no. 1623 45 11) * * also applies to item numbers 1623 60 11 / 1615 45 11 Legend 1. Belt winder RolloTron Comfort DuoFern or Comfort DuoFern Plus 2. 2 x assembly screws (4 x 55 mm) 3. -
Page 10: General View (Item No. 1623 45 11)
4. General view (item no. 1623 45 11) * * also applies to item numbers 1623 60 11 / 1615 45 11 Front cover Fastening holes Reel compartment Deflection roller cover Belt inlet Type plate Display Reset button SET/Stop button Reel Plus button Down button... -
Page 11: Display Overall View
5. Display overall view Display symbol legend [ MO ... SO ] (MON...SUN) Week days [ AUTO ] AUTO - automatic mode Time / setting parameters Automatic mode off Rain display Timer periods Button lock Automatic dusk function [ IST ] ACTUAL value Automated solar function Direction of travel - up / down... -
Page 12: Permissible Roller Shutter Belts
ATTENTION! The specifications are intended for guidance only and apply to an ideal installation situation. The actual values The RolloTron Comfort DuoFern may be damaged if may vary due to local conditions. excessively long belts are used. Only use belts of the permissible lengths. -
Page 13: Functional Description
7. Functional description Central control of several DuoFern devices with a single The RolloTron Comfort DuoFern is a roller shutter drive designed for use inside. The unit is installed as a flush- RolloTron Comfort DuoFern. mounted device. The power supply is provided via the... -
Page 14: Description Of The Safety Functions
There is a risk of injury if the obstacle detection is not working. The RolloTron Comfort DuoFern is equipped with a Soft- ◆ The belt must be wound on as evenly as possible to start / Soft-stop function. Gentle starting and stopping ensure safe and correct functioning of the obstacle serves to protect the belt winder mechanics and the belt. - Page 15 13. Ventilation position on / off on / off ● ● ● 14. Ventilating position 1 - 99 % 80 % ● ● ● 15. Connectivity test ● ● The „WR ConfigTool“ software can be downloaded from our website at www.rademacher.de...
-
Page 16: Overview Of Local Functions
7.3 Overview of local functions ◆ Display background illumination ◆ Button lock ◆ Operational demonstrator ◆ System settings ◆ Manual operation ◆ Permanent storage of the settings ◆ Direct configuration and movement to a target posi- ◆ Automatic summer / winter changeover tion ◆... -
Page 17: General Assembly Instructions
8. General assembly instructions Poor routing of the belt can cause the belt to fail and In order to ensure optimal operation, the RolloTron leads to unnecessary loads on the RolloTron Comfort Comfort DuoFern should not be installed near metal DuoFern. -
Page 18: Preparation For Installation
RolloTron Comfort DuoFern. All dimensions in mm All dimensions in mm RolloTron Comfort DuoFern RolloTron Comfort DuoFern Plus Item no.: Item no.: 1615 45 11 (small belt) 1623 60 11 (standard belt) 1623 45 11 (standard belt) - Page 19 8.2 Preparation for installation Remove the old belt winder, if you are carrying out a con- version to an existing roller shutter system. Let the roller shutter move fully down, until the slats are completely closed. Remove the old belt winder and unreel the belt. CAUTION! There is a risk of injury from the pre-tensioned springs on the old belt winder.
-
Page 20: Safety Instructions For Electrical Connection
9. Safety instructions for electrical connection DANGER! The electrical connection for the RolloTron Comfort DuoFern can be made either with the supplied con- Danger due to electric shock when working on all necting cable or via a fixed laid cable. electrical systems. -
Page 21: Electrical Connection
9.1 Electrical connection Connect the provided connecting cable to the connecting terminals of the RolloTron Comfort DuoFern. The colour coding is irrelevant for the installation. WARNING! WARNING! Traction relief A damaged connecting cable may cause a short circuit. ◆ Pay attention that cables are laid safely. -
Page 22: Drawing In And Fastening The Belt
As no end points have been set yet, the drive will stop as soon as you release the button. Always remove the mains plug from the socket. Next, draw-in the belt into the RolloTron Comfort DuoFern from the top. - Page 23 Pull the belt tight when winding, so that the deflection roller turns at the same time. End of belt Remove the mains plug again from the socket again. Fastening Finally, place the provided reel compartment cover onto hook the reel compartment. Belt path in RolloTron Comfort DuoFern...
-
Page 24: Mounting The Rollotron Comfort Duofern
Ensure that the RolloTron Comfort DuoFern sits freely in the belt box and that it is not in contact with the mason- ry, otherwise noise will be generated during operation. Slide the RolloTron Comfort DuoFern into the belt box and screw it tight using the screws provided. WARNING! -
Page 25: Brief Description Of The Button Functions
12. Brief description of the button functions Operating buttons [Up / Down] Plus/Minus buttons ◆ Setting of parameters (more / less). ◆ Manual operation [ Up ▲ / Down t ▲ t ]. ◆ Pressing one of the buttons for an extended period SET/Stop button, [ ] causes the numbers to change more quickly in the ◆... -
Page 26: Brief Description Of The Standard Display And Main Menu
◆ Enables display and selection of the individual func- tions and menus. ◆ Displays the activated functions. ◆ Displays the respective menu number. ◆ Manual operation of the RolloTron Comfort DuoFern is only possible from the standard display. ◆ Manual operation is not possible from the main menu. -
Page 27: Introduction To Opening And Closing The Menus
12.2 Introduction to opening and closing the menus Call up the main menu. Toggle back to the stand- ard display. Pressing the [ M ]-button in 1 sec. In order to do so, press and the standard display causes hold the [ M ] button for the main menu to open. -
Page 28: Initial Commissioning With The Help Of The Installation Wizard
ATTENTION! Readiness for operation Setting the wrong upper end point may lead to over- The RolloTron Comfort DuoFern is ready for use as soon load or damage the RolloTron Comfort DuoFern or the as the installation wizard has finished. drive. - Page 29 13. Initial commissioning with the help of the installation wizard Set the upper end point. Set and confirm the time. Pressing the plus or minus In order to do so, press button for an extended and hold the [ Up ] but- period causes the numbers ton.
- Page 30 13. Initial commissioning with the help of the installation wizard Set and confirm the open- If [ ASTRO ] is selected, then the calculated ing time [ ]. opening time for the This closing time mode current day is displayed. applies to the entire week (MON...SUN) [ MO...SO ].
- Page 31 13. Initial commissioning with the help of the installation wizard NORMAL The standard display is shown as soon as the final The roller shutters close setting is confirmed. at the configured closing time. The RolloTron Comfort DuoFern is now ready for ASTRO operation.
-
Page 32: Manual Operation
14. Manual operation Manual operation is possible in any of the modes and has priority over the programmed automatic functions. Open the roller shutters. Briefly pressing the button causes the roller shutters to move to the upper end point. Causes the roller shutters to stop in the interim. -
Page 33: Moving To A Target Position
The RolloTron Comfort DuoFern is able to move to the tar- In order to do so, briefly get position and stop the roller shutters fully independently press the plus or the and automatically. -
Page 34: Displaying Weather Data
14.2 Displaying weather data If a DuoFern environmental sensor is being used on Accessing the weather site, it is possible to view the environmental sensor's data. weather data on-screen. To do so, briefly press the [ SET / Stop ] button. In the event that multiple environmental sensors are in Initially, the temperature being received, the desired environmental sensor can... -
Page 35: Duofern Settings; Brief Description
15. DuoFern settings; brief description In order for your RolloTron Comfort DuoFern to react to Menu 9.9 - DuoFern Settings control signals from the DuoFern network, it is necessary The DuoFern settings are undertaken in menu 9.9. You to log each DuoFern device (e.g. RolloTron Standard can find an overview of all menus and sub-menus for the DuoFern, DuoFern central operating unit, etc.) on to the... -
Page 36: Menu 9.9.1 - Logging Duofern Devices On/Off
15.1 Menu 9.9.1 - Logging DuoFern devices on/off Select and open menu [ On ] Registration mode 9.9.1 Log-on/off. The display flashes [ On ]. Login mode remains active for approx. 120 Approx. 120 seconds. seconds The number of logged on DuoFern devices is indi- cated on the display. - Page 37 15.1 Menu 9.9.1 - Logging DuoFern devices on/off [ OFF ] Logout mode Deleting all logged-on DuoFern devices. The display flashes Select and open menu [ OFF ]. 9.9.1 [ Log-on/off ]. Logout mode remains Approx. 120 active for approx. seconds 120 seconds.
- Page 38 Select and open menu 9.9.1 Log-on/off. This function enables you to log off all DuoFern devices from the RolloTron Comfort DuoFern that are no longer accessible via radio. All battery-operated DuoFern transmitters (e.g. the DuoFern central operating unit) cannot be logged off The number of logged on via this function.
-
Page 39: Menu 9.9.2 - Set Duofern Mode
[ 1 ] = DuoFern receiver [ 2 ] = DuoFern transmitter [ 3 ] = Local operation ◆ The RolloTron Comfort DuoFern is integrated into a central automatic DuoFern network as [receiver] (e.g. via a DuoFern central operating unit or Home- Pilot®, etc.). - Page 40 RolloTron Comfort DuoFern ◆ The RolloTron Comfort DuoFern is integrated into a ◆ The RolloTron Comfort DuoFern is operated as a local DuoFern network as a central controller [Sender] and roller shutter belt winder using its automatic functions is intended to provide automatic functions for other and timer durations.
-
Page 41: Menu 9.9.3 - Setting The Solar Mode
15.2 Menu 9.9.2 - Set DuoFern mode Select and open menu Regardless of the set mode, all manual and automatic 9.9.2 DuoFern mode. control signals received via radio will be executed lo- cally. With one exception: Select and confirm the Control commands for the automated solar functions will mode. - Page 42 RolloTron Comfort DuoFern and the other DuoFern Select mode [ 1 ] if ... devices. ** ◆ ...the RolloTron Comfort DuoFern is to be controlled by ◆ Mount the light sensor as low as possible on the win- a light sensor connected to this device.
-
Page 43: Menu 9.9.4 - Switch Weather Data On/Off
15.3 Menu 9.9.3 - Setting the solar mode Select and open menu Select and confirm the 9.9.3 solar mode. solar mode. 1 = Local light sensor 2 = Local light sensor and sunshine position 3 = Central sun shading controller 15.4 Menu 9.9.4 - Switch weather data on/off This menu enables you to switch the weather data dis- Select and open menu... -
Page 44: Menu 9.9.5 - Display Duofern Address
DuoFern network. 9.9.5 DuoFern address. If necessary, you can display the DuoFern address for In each case, two digits the RolloTron Comfort DuoFern device. of the six-digit address are shown in the form of a ticker. -
Page 45: Menu Overview / Main Menu
Standardised menu structure A standardised, cross-product menu structure has Icon Menu Page been developed for all RADEMACHER devices. Similar Automatic mode ......46 functions always have the same menu number and therefore there may be gaps in the numbering. Switching times ......48 Automatic dusk control ....55... -
Page 46: Auto ] Automatic Mode; Brief Description
16.1 [ AUTO ] Automatic mode; brief description Automatic mode on Automatic mode off Icon in standard display Icon in standard display ◆ All automatic functions are deactivated; only manual Automatic mode is active, all automatic functions are operation is possible. switched on, e.g.: ◆... -
Page 47: Menu 1- Automatic Mode On / Off
16.1.1 Menu 1- Automatic mode on / off Call up the main menu. Toggling directly to the standard display You can also directly toggle Select and open menu 1 automatic mode on and off [ AUTO ]. in the standard display. Select and confirm the de- sired setting. -
Page 48: Switching Times (Opening And Closing Times) [ / ]; Brief Description
16.2 Switching times (opening and closing times) [ / ]; brief description [ 1 ] Weekly switching times You can configure various opening [ ] and closing times [ ] in order to open or close your roller shutters at You can set two different switching times here: your preferred times. - Page 49 16.2 Switching times (opening and closing times) [ / ]; brief description Double the amount of switching times by activating a Application example for a second switching time. second switching time block: You can use a second switching time, for example, to If necessary you can double the amount of available darken a child's bedroom at midday: opening and closing times.
- Page 50 16.2 Switching times (opening and closing times) [ / ]; brief description Selecting a switching time mode. Link to the opening time [ ] ● The roller shutters open at the daily calculated A switching time mode can be selected during the set- dawn time.
-
Page 51: Menu 2 - Configuration Of Opening And Closing Times [ / ]
16.2 Switching times (opening and closing times) [ / ]; brief description ◆ SENSOR (only for closing times [ ] ) Example a: ● – In winter dusk begins, for example, at approx. The closing time is controlled by a light sensor in 17:00 hours. - Page 52 16.2.1 Menu 2 - Configuration of opening and closing times [ / ] Weekly switching times Set and confirm an open- The mode of operation ing time [ ]. and the number of open- ing and closing times that can be configured depends on the desired switching programme, Configure the switch-...
- Page 53 16.2.1 Menu 2 - Configuration of opening and closing times [ / ] Set and confirm the clos- If [ ASTRO ] is selected, ing time [ ]. then the calculated clos- ing time for the current The closing time applies to day is displayed.
- Page 54 16.2.1 Menu 2 - Configuration of opening and closing times [ / ] Set and confirm the INFORMATION ABOUT THE [ ASTRO ] SWITCHING second opening time [ ]. TIME MODE OFF = The opening time is ◆ If [ ASTRO ] is selected as the switching time mode, deactivated.
-
Page 55: Automatic Dusk Function; Brief Description
16.3 Automatic dusk function; brief description The automatic dusk function causes the roller shutters to Automatic dusk function with connected close automatically to the lower end point or configured light sensor ventilation position. You can choose between two automatic dusk func- At twilight, the roller shut- tions: ters will lower to the lower... -
Page 56: Menu 3 - Customising The Automatic Dusk Function [ ]
16.3.1 Menu 3 - Customising the automatic dusk function [ ] Call up the main menu. [ ASTRO ] Setting an offset. The offset function can be Select and open menu 3 [ used to modify the calcu- Automatic dusk function. lated Astro time by +/- 60 minutes. - Page 57 16.3.1 Menu 3 - Customising the automatic dusk function [ ] [ SENSOR ] Customisation of the twi- light limit value in switch time mode [ SENSOR ]. If the set limit value is not met due to the onset of twilight, the roller shutters will close.
-
Page 58: Automatic Solar Function; Brief Description
RolloTron Comfort DuoFern device. A central sun shading controller is used to transmit the required signals to the RolloTron Comfort DuoFern as well as to the other devices on the DuoFern network. Automatic solar function Automatic moving up and down of the roller shutter once a set limit is exceeded. - Page 59 16.4 Automatic solar function; brief description Automatic lowering Examples of a locally mounted sun If the sensor detects uninterrupted sunlight for 10 min- 10 mins. sensor. utes, the roller shutter lowers in ◆ solar mode [1] until its shadow covers the light sensor. ◆...
-
Page 60: Menu 4 - Configuring The Automatic Solar Function [ ] And Sunshine Position
16.4.1 Menu 4 - Configuring the automatic solar function [ ] and sunshine position Call up the main menu. Customisation of the local solar set limit. Select and open menu 4 [ ] Automatic solar function. ACTUAL [ IST ] value Currently measured brightness (e.g. - Page 61 16.4.1 Menu 4 - Configuring the automatic solar function [ ] and sunshine position The local sunshine position Set the local sunshine position. You can set an arbitrary sunshine position for your Rol- loTron Comfort DuoFern which your roller shutters will Move the roller shutters lower to when the automated solar function is activated.
-
Page 62: Automatic Dawn Function; Brief Description
16.5 Automatic dawn function; brief description When configuring opening times [ ] it is possible to link Configure a custom offset period them to a switch time mode, see page 51. The calculated dawn time can be customised to personal preferences by means of an offset between -60 and +60 The calculated dawn time can be customised by linking minutes. -
Page 63: Menu 5 - Customising The Automatic Dawn Time [ ]
16.5.1 Menu 5 - Customising the automatic dawn time [ ] Call up the main menu. [ ASTRO ] Setting an offset. The offset function can be Select and open used to modify the calcu- menu 5 [ ] Automatic lated Astro time by dawn function. -
Page 64: Random Function; Brief Description
16.6 Random function; brief description The random function enables a random delay of the set The corresponding icon flashes in the standard display timer periods ranging between 0 and 30 minutes. when the random function is activated, during the The random function is executed for: period that the movement command is being delayed. -
Page 65: Menu 9 - System Settings [ ]; Brief Description
16.7 Menu 9 - System settings [ ]; brief description This menu enables you to configure additional device Menu 9 - System settings and system settings in order to customise your RolloTron Icon Menu Page Comfort DuoFern to your individual preferences and local conditions. -
Page 66: Menu 9.1 - Set Time / Date [ ] And Postcode [ Plz ]
16.7.1 Menu 9.1 - Set time / date [ ] and Postcode [ PLZ ] Select and open menu Additional information about postcode 9.1 [ ] Time /date and Only the first two digits of the code are entered for postcode. -
Page 67: Menu 9.2 - End Point Configuration [ ]
16.7.2 Menu 9.2 - End point configuration [ ] Additional information about configuring the First move the blinds end points manually to the centre position. The end points must be configured in order for the roller shutters to stop at the desired upper and lower positions. It is imperative that both end points are configured, oth- erwise malfunctions may occur.. -
Page 68: Menu 9.3 - Configure Ventilation Position
16.7.3 Menu 9.3 - Configure ventilation position [ If you want your roller shut- Move the roller shutters ters to close at a different to the desired position. position to the lower end point, you can use this function to determine an arbitrary position (e.g. -
Page 69: Menu 9.4 - Configure Continuous Display Lighting
16.7.4 Menu 9.4 - Configure continuous display lighting Pressing one of the operating buttons causes the backlight- Select and open menu 9.4 ing in the standard display to switch on at full intensity. Display lighting. Subsequently the brightness gradually fades down to the configured level. -
Page 70: Menu 9.5 - Weekly Programme
16.7.5 Menu 9.5 - Weekly programme [ ] configuration The subsequent mode of operation and the number of Select and open menu opening and closing times that can be configured depends 9.5 [ ] Weekly pro- on the desired switching programme. gramme. -
Page 71: Menu 9.6 - Configure Motor Speed
16.7.6 Menu 9.6 - Configure motor speed The speed of the motor can be configured for recurring Select and open automatic functions if necessary (e.g. to reduce noise). menu 9.6 Motor speed. Recurring automatic commands are executed at the con- figured motor speed. -
Page 72: Menu 9.7 - Switch Button Lock On/Off
Activate / deactivate the You can activate the button lock in order to protect the button lock directly from RolloTron Comfort DuoFern against unintentional input. the standard display. Automatic activation after approx. two minutes. If the button lock is activated and no buttons are pressed... -
Page 73: Menu 9.9 - Duofern Settings / Overview
16.7.8 Menu 9.9 - DuoFern settings / overview We introduce and describe all of the DuoFern settings for Menu 9 - System settings configuration of the RolloTron Comfort DuoFern starting Icon Menu Page on page 35. The DuoFern settings are shown in menu order in DuoFern settings ......35... -
Page 74: Erase All Settings, Software Reset
18. Carry out hardware reset A hardware reset can be carried out in the event that the Press the Reset button using a sharp RolloTron Comfort DuoFern fails to react to commands. object (e.g. a paper clip). ATTENTION! Never press the reset button when the motor is running, as otherwise the end points will be modified. -
Page 75: Removing The Rollotron Comfort Duofern
19. Removing the RolloTron Comfort DuoFern (e.g. in the event of a move) Erase all settings. Simultaneously press and hold the buttons for 5 seconds. Fully close the roller shutters. Keep the button held down. Pull out the belt as far as possible from the top of the RolloTron Comfort DuoFern. - Page 76 19. Removing the RolloTron Comfort DuoFern (e.g. in the event of a move) Remove the belt compartment cover. Check the position of the fastening hook and move the hook into an easily accessible position if necessary. CAUTION! There is a risk of injury from the reel.
-
Page 77: Removing The Belt In The Event Of Unit Failure
20. Removing the belt in the event of unit failure In the event that the RolloTron Comfort DuoFern unit fails Release the belt from the fastening hook and pull it out and the motor no longer runs, you can use the disengaging completely from the RolloTron. -
Page 78: What To Do If
... the RolloTron Comfort DuoFern indicates no Check the power supply incl. connecting cable and plug. functions? ... the RolloTron Comfort DuoFern no longer reacts in the The electronic system switched off the drive after closing the roller morning at the configured switching time? shutters because the deflection roller stopped turning. - Page 79 21. What to do if... ? Fault Possible cause / solution ... the roller shutters stop during downward travel? a) The roller shutters may have hit an obstacle. Move the roller shutters back up and remove the obstacle. b) Slats have shifted out of alignment. If possible, move the roller shutters back up and realign the slats.
- Page 80 6. on the display? The motor is too hot. The RolloTron Comfort DuoFern will be opera- tional again in approx. 1 hour..the RolloTron Comfort DuoFern no longer reacts to a) The RolloTron Comfort DuoFern is no longer ready for operation.
-
Page 81: Information About Maintenance And Care Of Your Equipment
RolloTron Comfort DuoFern and to the roller shutter system. ◆ Please check the RolloTron Comfort DuoFern and all of your roller shutter components regularly for damage. Regularly check the RolloTron Comfort DuoFern ●... -
Page 82: Technical Specifications
Power reserve Supply voltage: 230 V / 50 Hz; 230 V / 60 Hz Nominal power: 70 W The RolloTron Comfort DuoFern has a Standby power: < 0.6 W power reserve of approx. 8 hours. Nominal torque: Data retention subsequently to... -
Page 83: Tractive Force Diagrams
Belt length [ m ] 1 Lifting weight [Kg] 2 Belt thickness 1.0 mm 3 Belt thickness 1.3 mm 4 Belt thickness 1.5 mm 5 Belt length [m] 6 Belt lengths for RolloTron Comfort DuoFern 7 Belt lengths for RolloTron Comfort DuoFern Plus... -
Page 84: Factory Settings
25. Factory settings Automatic: Timer periods: Up time: 07:00 Down time: 20:00 hours, switch time mode [Normal] Automatic solar function: random function: Time / date: 12:00 hours / 01.12.2016 Postcode: Weekly programme: 1 (weekly switching times) Maximum speed: 3 = Maximum (in automatic mode) Display backlighting: Automatic summer / winter changeover:... -
Page 85: Time Zone Table
26. Time zone table Belgium France Luxembourg 187 Kattowitz 216 Barcelona 248 Istanbul 101 Antwerp 130 Bordeaux 158 Luxembourg 188 Krakow 217 Bilbao 249 Maribor 102 Bruges 131 Brest 189 Lodz 218 Badajoz 250 Prague The Netherlands 103 Brussels 132 Dijon 190 Lublin 219 Burgos 251 Sarajevo... -
Page 86: Simplified Eu Declaration Of Conformity
RADEMACHER Geräte-Elektronik GmbH hereby declares The full text of the EU declaration of conformity is included with the that the RolloTron Comfort DuoFern complies with product and is kept on file by the manufacturers. the Directives 2006/42/EC (Machinery directive) and RADEMACHER Geräte-Elektronik GmbH... -
Page 87: Warranty Conditions
RADEMACHER shall remedy any defects, which occur within the warranty period free of charge either by repair or by Your statutory warranty claims shall remain unaffected by replacement of the affected parts or by supply of a new re- this warranty. - Page 88 RADEMACHER Geräte-Elektronik GmbH Buschkamp 7 46414 Rhede (Germany) info@rademacher.de www.rademacher.de Service: Hotline 01807 933-171* Fax +49 2872 933-253 * 30 seconds free of charge, subsequently 14 cents / minute from German fixed line networks and service@rademacher.de max. 42 cents / minute from German cellular networks.
Need help?
Do you have a question about the RolloTron Comfort DuoFern and is the answer not in the manual?
Questions and answers