
Related Manuals for HYOSUNG MONiMAX5100T


Summary of Contents for HYOSUNG MONiMAX5100T
- Page 1 Operator Manual MONiMAX5100T System V01.00.23 (2018. 9. 6) © Hyosung TNS Inc. All Rights Reserved.
- Page 2 Updated according to the specification changes V01.00.22 V01.00.23 2018/09/06 Changed the company name & specification © Hyosung TNS Inc All Rights Reserved. The content of this specification is protected by copyright laws. 2018. 9. 6. 23rd Release © Hyosung TNS Inc. All Rights Reserved.
-
Page 3: Table Of Contents
How to Empty the Reject Bin ........................4-9 How to Clear Jam ............................4-10 Chapter5. Receipt Printer ....................... 5-1 Receipt Paper ............................... 5-1 How to load the receipt paper ........................5-3 How to Clear a Receipt Jam ......................... 5-5 © Hyosung TNS Inc. All Rights Reserved. -
Page 4: Chapter1. Preface
This manual details how the customers replenish the notes and paper and how they remove the jam at the MX5100T. Audience ▶ Customers and staffs of Hyosung TNS who use and operate the MX5100T in each branches of bank. Support Information ▶... -
Page 5: Terminologies
Europay, Mastercard, Visa Elementary Program Encryption PIN Pad Hardware Interface International Standard Organization Journal Printer Liquid Crystal Display Magnetic Card Unit Operation Panel for Customers to Operate OSD board On Screen Display Board © Hyosung TNS Inc. All Rights Reserved. - Page 6 Description Power Supply Personal Identification Number Panel Control Board Printer (mainly Receipt Printer) Switch Sensor and Indications Unit Service Provider Slip Printer (Receipt Printer) Text Terminal Unit (OPL or SPL) Vacuum Fluorescent Display © Hyosung TNS Inc. All Rights Reserved.
-
Page 7: Safety Precautions
▪ Do not touch the equipment when it is running. ▪ The equipment can get extremely hot and may cause a burn. ▪ Make sure to close the cover before running the equipment. © Hyosung TNS Inc. All Rights Reserved. - Page 8 4. The equipment is to be secured to the building structure before operation 5. A security container shall be permitted to optionally be provided with a secondary lock, but improper use of the secondary lock feature will reduce the security level of the ATM. © Hyosung TNS Inc. All Rights Reserved.
-
Page 9: Related Document
▪ Service Manual ▪ Error Code Manual ▪ VDM Manual For the contact of maintenance staffs of Hyosung TNS, see the E-mail addresses and telephone numbers provided separately. © Hyosung TNS Inc. All Rights Reserved. -
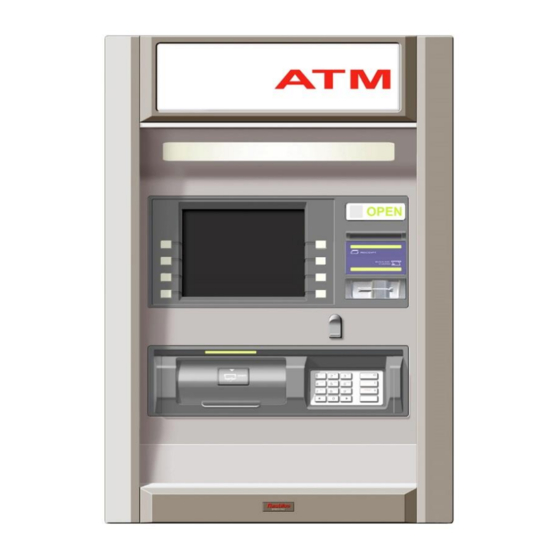
Page 10: Chapter2. Introduction
The fascia includes the following features and interfaces (all features might not be included in your system): Lighted TOP Panel Receipt Printer Slot LCD & Card Reader Customer Entrance Keypad Earphone Jack Cash Tray Encryption Pin Pad © Hyosung TNS Inc. All Rights Reserved. -
Page 11: Basic Features
Touch Screen (Resistive) Cash Sutter type Manual Shutter Dispenser Denomination US $10, $20 (CDU-M) Maximum Dispense 40 Notes/1transaction Number of cassettes 1 Cassette Maximum 4 cassettes Cassette Capacity 2,000 notes/1 cassettes Dispensing Speed 4 notes/sec © Hyosung TNS Inc. All Rights Reserved. - Page 12 Option System Heater Available (1EA) Advertisement LED Light Lamp Dimension Operational -10C ~ 40C / 32℉ ~ With Heater Option Operating & Temperature 104℉ Environment Storage -5C ~ 50C / 23℉ ~ 122℉ © Hyosung TNS Inc. All Rights Reserved.
- Page 13 Chapter2. Introduction Operator Manual Item Specification Remarks (Option) Operational Operating 25% ~ 86% Humidity Storage 10% ~ 90% © Hyosung TNS Inc. All Rights Reserved.
-
Page 14: Devices Of Mx5100T
USB HUB used to communicate with several devices such as a cash dispenser, card reader, receipt printer and EPP. ►Basic Specification & Sample Picture © Hyosung TNS Inc. All Rights Reserved. -
Page 15: Customer Display & Keypad
The 16-key keypad uses a security module and encryption PIN pad technology to secure the information entered by the customer at the keypad. ► Basic Specification & Sample Picture LCD & Customer Keypad Encryption Pin Pad © Hyosung TNS Inc. All Rights Reserved. -
Page 16: Supervisor Operation
Operator Manual Chapter2. Introduction Supervisor Operation ► Basic Specification & Sample Picture © Hyosung TNS Inc. All Rights Reserved. -
Page 17: Cash Dispenser Unit
ATM, where the cardholder can receive it. If the media is too mutilated or wrinkled to dispense, or if a multiple pick occurs, the dispenser sends the notes to the reject bin. ► Basic Specification & Sample Picture © Hyosung TNS Inc. All Rights Reserved. -
Page 18: Card Reader
ATM card in the card entry slot and then removes the card to begin the transaction. The dip card reader can read magnetic stripe cards and memory chip cards. The dip card reader cannot retract, capture, or retain cards. ► Basic Specification & Sample Picture © Hyosung TNS Inc. All Rights Reserved. -
Page 19: Receipt Printer
► The receipt printer provides a printed receipt of the customer's transaction. The transaction information can include the amount, ATM number, location and other desired information. ► Basic Specification & Sample Picture 2-10 © Hyosung TNS Inc. All Rights Reserved. -
Page 20: Power Supply
► The power supply unit converts AC power to DC power and provides the voltage to various modules within the system. The power supply unit allows the user to turn on/off the system, enter power-failure mode, and perform other sequences. ► Basic Specification & Sample Picture © Hyosung TNS Inc. All Rights Reserved. 2-11... -
Page 21: Chapter3. For The Beginning Operator
1. Repeated LED flashing and beeping during an opening indicates that the battery is low and needs immediate replacement. 2. Uses one (1) 9-Volt alkaline battery only. (Example: Duracell™ or Eveready™ alkaline batteries.) The replacement of batteries at least once annually is recommended. © Hyosung TNS Inc. All Rights Reserved. - Page 22 5. Carefully position the keypad over the mounting screws and slide the keypad Housing down. Ensure there are no wires or cables trapped between the input pad and the safe door. Pinched cables can result in a short circuit. © Hyosung TNS Inc. All Rights Reserved.
-
Page 23: Cencon Lock (Option)
CW = Clockwise; CCW = Counter Clockwise 2. Enter the factory combination of 50-25-50 by sequentially pressing those six buttons. The LCD will display the entered number. © Hyosung TNS Inc. All Rights Reserved. - Page 24 If the bolt does not retract, you can be assured the lock is secured. Helpful Hint: At any point while entering the combination during an opening sequence, if you notice that an incorrect number was pressed on the keypad, you may clear the © Hyosung TNS Inc. All Rights Reserved.
- Page 25 The best thing to do in analyzing the lock level is to write down the entire string and then pick out the portions of it that are significant to you, or if you are experiencing a problem with the lock, report the entire string to the Tech Support group. © Hyosung TNS Inc. All Rights Reserved.
- Page 26 Record the new combination and store it in a secure place. If this combination is lost or forgotten, there is no alternate way to open the lock. 12. POC Remove Change Key EOP Remove the change key. EOP (End Operation) is displayed. © Hyosung TNS Inc. All Rights Reserved.
- Page 27 15. OPr Retract Bolt Turn the Dial to the right (CW) to retract the bolt. 16. Close Door 17. Extend Bolt Turn the Dial to the left (CCW) to extend the bolt. © Hyosung TNS Inc. All Rights Reserved.
-
Page 28: System Power On/Off
3. The operating system will shut down then power will turn off. WARNING: Do NOT operate Main Switch on power supply when you would like to turn off the power. It may cause damage to operate system or destabilize control electronics in ATM. © Hyosung TNS Inc. All Rights Reserved. -
Page 29: Power Supply Status
<System Off> procedure starts, and only [AC IN] LED is turned on. ▪ In case power failure occurs during normal system operation, the system will enter <Power Failure Mode> and only [DC OUT] will be turned off. © Hyosung TNS Inc. All Rights Reserved. -
Page 30: Chapter4. Cash Dispenser
2. Bill has sufficient life or sizing to be handled easily 3. Bill which can be manually held straightly when one end is held by a hand and the bill is slightly curved vertically © Hyosung TNS Inc. All Rights Reserved. - Page 31 Operator Manual ▶ Unacceptable condition 1. Bill having serious wrinkles, torn or broken section wherein paper fiber is broken and separation begins. Wrinkle Wrinkle Torn Torn Broken section Broken Section © Hyosung TNS Inc. All Rights Reserved.
- Page 32 4. Bill ragged and cannot be held straightly when one end is supported by a hand 20mm [0.79inch] 35mm [1.38inch When the bill is held by 20mm [0.79inch] and the straightness of the bill is 35mm [1.38inch] or less, it cannot be used © Hyosung TNS Inc. All Rights Reserved.
- Page 33 Chapter4. Cash Dispenser Operator Manual 5. Bill with cellophane tape, scotch tape, etc Tape 6. Bill with folds Fold 7. Gradually curved bill (bills tied by hand seal, etc) Band seal © Hyosung TNS Inc. All Rights Reserved.
- Page 34 1. Fan the notes so that the notes are not sticking together. 2. Remove all notes with holes or notes that are torn. 3. Unfold the folded notes. 4. Place the notes correctly. © Hyosung TNS Inc. All Rights Reserved.
-
Page 35: How To Replenish The Cash Cassette
2. Place the cash cassette on a flat level platform and turn the cassette key clockwise to unlock the cassette cover. Then lift the cassette cover. 3. Pull the cash plate back until it is locked against the cash plate latch. © Hyosung TNS Inc. All Rights Reserved. - Page 36 1) Fan the notes so that the notes are not sticking together. 2) Remove all notes with holes or notes that are torn. 3) Unfold the folded notes. 4) Place the notes correctly. © Hyosung TNS Inc. All Rights Reserved.
- Page 37 7. With one hand holding the cassette handle and the other hand supporting the cassette from the bottom, place the cassette carefully on the set guide of the CDU and push it in until it is locked in place. © Hyosung TNS Inc. All Rights Reserved.
-
Page 38: How To Empty The Reject Bin
3. Take bills from the reject bin and close the bin with key. [PRECAUTION!] Don’t recycle any bill in reject bin into cassette. Doing so will cause not only the same reject problem, but other unexpected problems such as note jams on cash dispenser © Hyosung TNS Inc. All Rights Reserved. -
Page 39: How To Clear Jam
2. Lift up the cover and check bills on the transport path of cash dispenser. Turn the pulley located in left upper in order to move jammed note into a well removed position. 3. Take out the jammed note carefully. 4-10 © Hyosung TNS Inc. All Rights Reserved. - Page 40 If the belt is detached from the Roller, the lifespan of the belt can be dramatically reduced which can result in breakage. Therefore, it is extremely important to check if the belt is positioned correctly after removing the jammed bills. © Hyosung TNS Inc. All Rights Reserved. 4-11...
-
Page 41: Chapter5. Receipt Printer
Type of Paper Setting Semi-Auto loading ▶ Roll appearance (Thermal printing side is OUTSIDE, NOT INSIDE of roll paper) Beginning and ending edge of the paper should be that of the printing specifications. © Hyosung TNS Inc. All Rights Reserved. - Page 42 8. Make sure the paper is rolled evenly. 9. Miscellaneous: If the paper comes in contact with carbon copy paper or if the paper surface is scratched with a metallic object, de-coloring may occur. © Hyosung TNS Inc. All Rights Reserved.
-
Page 43: How To Load The Receipt Paper
1. Pull the receipt printer unit forward while pressing the highlighted green button at the right corner of the plate. 2. Insert the white plastic rod into the hole of the paper roll as shown in the picture. © Hyosung TNS Inc. All Rights Reserved. - Page 44 4. Roll up the receipt paper roll backward, as shown in the picture, and then pull it forward. 5. Push the receipt paper inside the supporting bracket, as shown in the picture. Then it will be set automatically if the power is turned on. © Hyosung TNS Inc. All Rights Reserved.
-
Page 45: How To Clear A Receipt Jam
1. Lift down the green lever to open the head of receipt printer. 2. Remove the receipt paper jammed inside, and set the receipt paper again. 3. Lift the printer head lever upward until it is locked. © Hyosung TNS Inc. All Rights Reserved.
Need help?
Do you have a question about the MONiMAX5100T and is the answer not in the manual?
Questions and answers