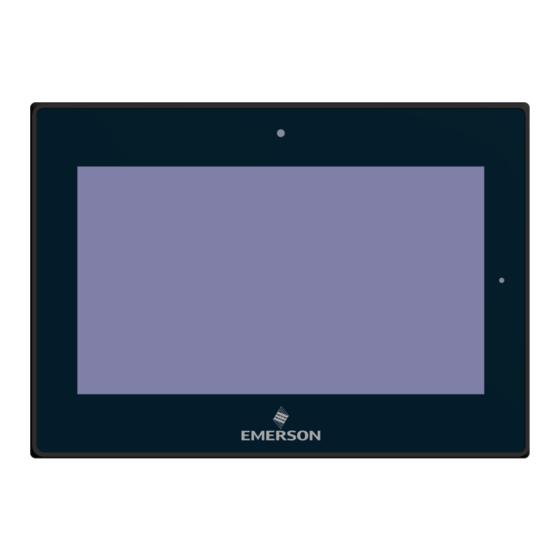
Emerson RXi Quick Start Manual
Industrial monitor
Hide thumbs
Also See for RXi:
- User manual (69 pages) ,
- Quick start manual (32 pages) ,
- User manual (43 pages)
Table of Contents
Advertisement
Quick Links
Advertisement
Table of Contents

Summary of Contents for Emerson RXi
- Page 1 Quick Start Guide GFK-3071C December 2020 RXi – Industrial Monitor...
- Page 2 It is understood that Emerson may make changes, modifications, or improvements to the equipment referenced herein or to the document itself at any time. This document is intended for trained personnel familiar with the Emerson products referenced herein.
-
Page 3: Table Of Contents
Mounting Information .............. 11 Panel Mount ....................... 11 Panel Cutout Dimensions ................. 11 Installation Steps ....................12 Mounting to Modular Display ..................13 VESA Mount ....................... 14 Technical Support & Contact Information ......... 17 RXI Industrial Monitor Quick Start Guide GFK-3071C... -
Page 4: Regulatory Information
Industry Canada requires the following to be published: CAN ICES-3 (A)/NMB-3 (A) Intended Use The RXi Industrial Monitor is intended for use in industrial environments only. Adherence to supplied documentation is part of the intended use. Installation, commissioning, and maintenance shall be carried out by qualified personnel. For more information, please consult GFK-3163, RXi2 LP/ RXI Display Installation and Maintenance Requirements. -
Page 5: I/O And Connectors
The torque for the attaching screws is 0.3 Nm (2.26 in-lb). 5. Apply dc power to the unit. During normal startup and operation, the LED status indicator displays as follows: • Solid amber while the RXi - Industrial Display unit is starting up • Solid green during normal operation 6. -
Page 6: Hdmi (Hdmi Input)
(Display Port Connector), Display Port Interface connector, provide high-quality video and audio input. Signal Name Pin# Pin# Signal Name LANE3- LANE3+ LANE2- LANE2+ LANE1- LANE1+ LANE0- LANE0+ AUX_CHP DP CAB DET AUX_CHN DP HPD RETURN DP 3.3V RXI Industrial Monitor Quick Start Guide GFK-3071C... -
Page 7: Dp2 (Display Port Output)
Pin # Signal Name USB 5V USB- USB+ CN7 (Line Out) (Diameter 3.5mm Jack), Line Out audio port. Line Out can be connected to headphones, speakers, or an amplifier. Figure 4: Line Out RXI Industrial Monitor Quick Start Guide GFK-3071C... -
Page 8: Led Indicators
LED Indicators Operation Status LEDs (Screen) All RXi Industrial Displays have a tri-color LED built into the screen that provides a visual indication of the operation status. LED State System State Amber, Solid Operating system starting Green, Solid Normal operating state... -
Page 9: Exit Burn-In Mode
(Menu) and then choose the item with the ( or +/-) key. 4. Press (Menu) and then adjust the quality with the ( or +/-) key. Virtual OSD Keypad Figure 6: Virtual OSD Keyboard RXI Industrial Monitor Quick Start Guide GFK-3071C... -
Page 10: Main Menu
Adjusts the brightness of the display Brightness Adjusts the colors levels to simulate brightness Contrast Adjusts the scale factor (gain) to the red, green, and blue signals Sharpness Adjusts the clarity of a display’s picture or text RXI Industrial Monitor Quick Start Guide GFK-3071C... -
Page 11: Display
Rotates the display orientation (landscape/portrait) Color Figure 9: Color Menu Options Menu Items Descriptions Panel Uniformity Adjusts color consistency across the screen Gamma Adjusts gamma value Temperature Adjusts temperature value Color Effect Adjusts color effect RXI Industrial Monitor Quick Start Guide GFK-3071C... -
Page 12: Input
Manually displays input from DisplayPort port HDMI Manually displays input from HDMI port Audio Figure 11: Audio Menu Options Menu Items Descriptions Volume Increases or decreases the volume level Mute Toggles volume on or off RXI Industrial Monitor Quick Start Guide GFK-3071C... -
Page 13: Other
Adjusts the time that the menu will remain on-screen after pressing the menu button. OSD H Position Moves the virtual OSD menu left or right (horizontally) OSD V Position Moves the virtual OSD menu up or down (vertically) RXI Industrial Monitor Quick Start Guide GFK-3071C... -
Page 14: Mounting Information
Panel Mount The RXi Industrial Monitor can be panel-mounted as presented in the section entitled Mounting to Modular Display. A Type 4, Type 4X, or IP 66 rating is achieved when mounted to the flat surface of a sufficiently rated enclosure. Please follow the instructions in the section entitled Installation Steps. -
Page 15: Installation Steps
3. Tighten all mounting brackets by hand until the gasket seal contacts the mounting surface uniformly. 4. In a cross pattern around the monitor tighten all mounting clip screws to a torque 13-13.9 in-lbs (15-16kgf-cm making sure not to overtighten the bracket. Figure 16: Tighten Mounting Bracket RXI Industrial Monitor Quick Start Guide GFK-3071C... -
Page 16: Mounting To Modular Display
Mounting to Modular Display Figure 17: 12” Panel Mount Figure 18: 15” Panel Mount RXI Industrial Monitor Quick Start Guide GFK-3071C... -
Page 17: Vesa Mount
Figure 19: 19”/24” Panel Mount VESA Mount The RXi Industrial Monitor can also be VESA mounted as shown in the figures below. All 7” through 24” units include VESA mount dimensions of 100mm x 100mm. All units are fastened with four M4x8 screws. - Page 18 Figure 21: 12” VESA Mount Figure 22: 15” VESA Mount RXI Industrial Monitor Quick Start Guide GFK-3071C...
- Page 19 Figure 23: 19”/24” VESA Mount RXI Industrial Monitor Quick Start Guide GFK-3071C...
-
Page 20: Technical Support & Contact Information
Note: If the product is purchased through an Authorized Channel Partner, please contact the seller directly for any support. Emerson reserves the right to modify or improve the designs or specifications of the products mentioned in this manual at any time without notice. Emerson does not assume responsibility for the selection, use or maintenance of any product.


Need help?
Do you have a question about the RXi and is the answer not in the manual?
Questions and answers