Table of Contents
Advertisement
Quick Links
Advertisement
Table of Contents

Related Manuals for Progress PCN43102X


Summary of Contents for Progress PCN43102X
- Page 1 User Manual Oven PCN43102X...
-
Page 2: Table Of Contents
2 Progress CONTENTS Safety information Automatic programmes Safety instructions Using the accessories Product description Additional functions Control panel Hints and tips Before first use Care and cleaning Daily use Troubleshooting Clock functions Energy efficiency Subject to change without notice. SAFETY INFORMATION Before the installation and use of the appliance, carefully read the supplied instructions. -
Page 3: Safety Instructions
Progress 3 Children shall not carry out cleaning and user maintenance • of the appliance without supervision. General Safety Only a qualified person must install this appliance and • replace the cable. WARNING: The appliance and its accessible parts •... - Page 4 4 Progress Electrical connection • Keep the minimum distance from other appliances and units. WARNING! Risk of fire and • Install the appliance in a safe and electric shock. suitable place that meets installation requirements. • All electrical connections should be •...
- Page 5 Progress 5 – be careful when you remove or install the accessories. WARNING! Risk of injury, • Discoloration of the enamel or stainless burns and electric shock or steel has no effect on the performance explosion. of the appliance. • Use a deep pan for moist cakes. Fruit •...
-
Page 6: Product Description
6 Progress Internal lighting • Use original spare parts only. Disposal WARNING! Risk of electric shock. WARNING! Risk of injury or • The type of light bulb or halogen lamp suffocation. used for this appliance is for household • Disconnect the appliance from the appliances only. -
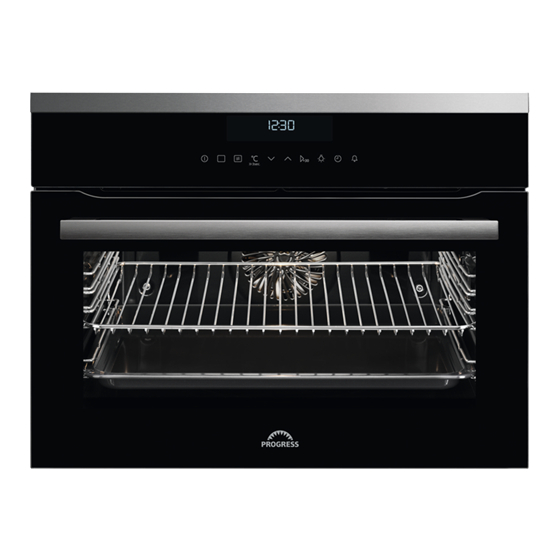
Page 7: Control Panel
Progress 7 CONTROL PANEL Electronic programmer Use the sensor fields to operate the oven. Sensor Function Description Field DISPLAY Shows the current settings of the oven. ON / OFF To turn on and turn off the oven. OPTIONS To set an oven function or an automatic pro‐... -
Page 8: Before First Use
8 Progress Display A. Oven function symbol B. Temperature / time of day display C. Clock / Residual heat display / Minute Minder D. Residual heat indicator E. Indicators for the clock functions F. Heat-up indicator / Fast Heat Up indicator G. -
Page 9: Daily Use
Progress 9 Changing the time seconds. For the subsequent few seconds the display shows the software version. You can change the time of day only when After the software version goes off, the the appliance is on. display shows h and 12:00. - Page 10 10 Progress Changing the temperature Oven func‐ Application Press to change the tion temperature in steps: 5 °C. To defrost food (vegeta‐ When the oven is at the set temperature a bles and fruit). The de‐ signal sounds and the Heat up indicator frosting time depends on disappears.
-
Page 11: Clock Functions
Progress 11 CLOCK FUNCTIONS Clock functions table Clock function Application COUNT UP TIMER To set the count up, which shows how long the appliance operates. This function has no effect on the operation of the appliance. TIME OF DAY To show the time of day. To change the time of day, refer to "Setting the time". -
Page 12: Automatic Programmes
12 Progress 5. Deactivate the appliance. 2. Use to set the MINUTE MINDER. First you set the seconds, Setting: Set + Go then the minutes and the hours. You can use the Set + Go function only 3. Touch or the MINUTE MINDER when the Duration is set. -
Page 13: Using The Accessories
Progress 13 1. Activate the appliance. The display shows and the number of the automatic programme. 2. Touch 3. Touch to choose the 3. Touch to set the weight automatic programme. programme. The display shows: the cooking time, the 4. Touch... -
Page 14: Additional Functions
14 Progress Small indentation at the top increase safety. The indentations are also anti-tip devices. The high rim around the shelf prevents cookware from slipping of the shelf. ADDITIONAL FUNCTIONS Using My Favourite Programme An acoustic signal sounds. function The display shows SAFE. -
Page 15: Hints And Tips
Progress 15 Description Value to set CLICK / BEEP / OFF KEY TONE FAULTY TONE ON / OFF DEMO MODE Activation code: 2468 BRIGHTNESS LOW / MEDIUM / HIGH SERVICE MENU RESTORE SETTINGS YES / NO 1) It is not possible to deactivate the tone of the ON / OFF sensor field. - Page 16 16 Progress Baking The temperature and baking times in the tables are Use the lower temperature the first time. guidelines only. They depend You can extend baking times by 10 – 15 on the recipes and the quality minutes if you bake cakes on more than and quantity of the ingredients one shelf position.
- Page 17 Progress 17 Baking on one oven level BAKING IN TINS (°C) (min) Flan base - short pas‐ True Fan Cook‐ 170 - 180 10 - 25 try, preheat the empty oven Flan base - sponge True Fan Cook‐ 150 - 170...
- Page 18 18 Progress CAKES / PASTRIES Preheat the empty oven unless specified otherwise. Use the baking tray. (°C) (min) Rye bread Conventional first: 230 first: 20 Cooking then: 160 - then: 30 - 60 Buttered almond cake / Conventional 190 - 210...
- Page 19 Progress 19 BISCUITS Preheat the empty oven unless specified otherwise. Use the second shelf position. (°C) (min) Short pastry biscuits, preheat‐ True Fan Cooking 150 - 160 10 - 20 ing is not needed Rolls True Fan Cooking 10 - 25...
- Page 20 20 Progress Bakes and gratins Use the first shelf position. (°C) (min) Baguettes topped with True Fan Cooking 160 - 170 15 - 30 melted cheese Vegetables au gratin, Turbo Grilling 160 - 170 15 - 30 preheat the empty...
- Page 21 Progress 21 Roast lean meat covered. Roast large meat joints directly in the tray or on the wire shelf placed above the tray. CAKES / PASTRIES / BREADS Put some water in the tray to prevent dripping fat from burning.
- Page 22 22 Progress PORK Use the function: Turbo Grilling. (kg) (°C) (min) Shoulder / Neck / Ham 1 - 1.5 160 - 180 90 - 120 joint Chops / Spare rib 1 - 1.5 170 - 180 60 - 90 Meatloaf 0.75 - 1...
- Page 23 Progress 23 GAME Use the function: Conventional Cooking. (kg) (°C) (min) Saddle / Hare leg, pre‐ up to 1 30 - 40 heat the empty oven Venison saddle 1.5 - 2 210 - 220 35 - 40 Haunch of venison 1.5 - 2...
- Page 24 24 Progress Crispy baking with Pizza Function PIZZA PIZZA Preheat the empty oven before cooking. Use the first shelf position. Use the second shelf position. (°C) (min) Tarts 180 - 200 40 - 55 (°C) (min) Spinach flan 160 - 180...
- Page 25 Progress 25 GRILL Use the first shelf position. Use the function: Grill. (°C) (min) (min) 1st side 2nd side Roast beef, medium 210 - 230 30 - 40 30 - 40 Beef fillet, medium 20 - 30 20 - 30...
- Page 26 26 Progress 1. Sear the meat for 1 - 2 minutes on °C and 150 °C for the first 10 minutes. each side in a pan over high heat. The default is 90 °C. 2. Put the meat in the roasting pan or 4.
- Page 27 Progress 27 Defrost Remove the food packaging and put the DEFROSTING food on a plate. Do not cover the food, as this can extend the defrost time. Use the second shelf position. For large portions of food place an upturned empty plate on the bottom of the oven cavity.
- Page 28 28 Progress Use the first shelf position. (kg) (min) (min) Defrosting Further de‐ time frosting time Cream, whip 2 x 0.2 80 - 100 10 - 15 Whip the cream the cream when when still slightly still slightly fro‐ frozen in places.
- Page 29 Progress 29 VEGETABLES Use the second shelf position. (min) (min) (°C) Cooking Continue Peppers 60 - 70 5 - 6 time until to cook at simmer‐ 100 °C Vegetables 60 - 70 5 - 6 for soup Carrots 50 - 60...
-
Page 30: Care And Cleaning
30 Progress Moist Fan Baking Use the first shelf position. Use the first shelf position. (°C) (min) (°C) (min) Bread pud‐ 190 - 55 - 70 ding Pasta gratin 200 - 45 - 60 Rice pudding 180 - 55 - 70... - Page 31 Progress 31 Clean all accessories after each use and let them dry. Use a soft cloth with warm water and a cleaning agent. Do not clean the accessories in a dish‐ washer. Do not clean the non-stick accessories using aggressive agents, sharp- Accessories edged objects or in a dishwasher.
-
Page 32: Troubleshooting
32 Progress When the cleaning is completed, do the above steps in the opposite sequence. Install the smaller panel first, then the larger and the door. One of the hinge-arms (normally the right one) is free to move. Make sure, that both hinge-arms are in the same position (approximately 70°... - Page 33 Progress 33 What to do if... Problem Possible cause Remedy You cannot activate or oper‐ The oven is not connected Check if the oven is correct‐ ate the oven. to an electrical supply or it is ly connected to the electrical connected incorrectly.
-
Page 34: Energy Efficiency
Serial number (S.N.) ......... ENERGY EFFICIENCY Product information according to EU 65-66/2014 Supplier's name Progress Model identification PCN43102X 944066718 Energy Efficiency Index 80.8 Energy efficiency class Energy consumption with a standard load, conventional 0.89 kWh/cycle mode Energy consumption with a standard load, fan-forced 0.59 kWh/cycle... - Page 35 Progress 35 Keep breaks between baking as short as Keep food warm possible when you prepare a few dishes Choose the lowest possible temperature at one time. setting to use residual heat and keep a meal warm. The residual heat indicator or Cooking with fan temperature appears on the display.
- Page 36 867353456-A-262019...
Need help?
Do you have a question about the PCN43102X and is the answer not in the manual?
Questions and answers