
Related Manuals for Progress PBN1310X


Summary of Contents for Progress PBN1310X
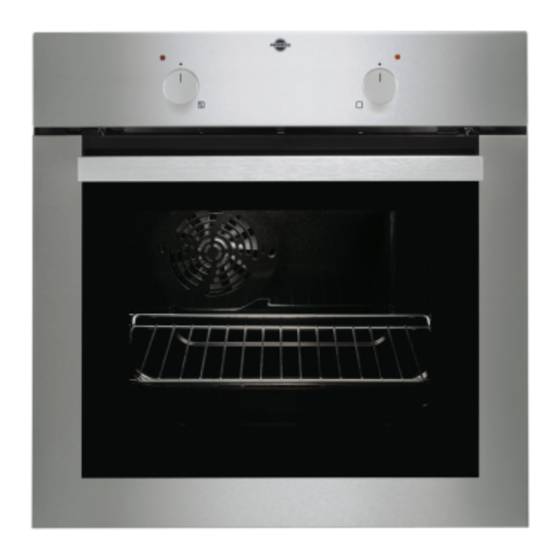
- Page 1 User Manual Istruzioni per l’uso Manual de instrucciones Oven Forno Horno PBN1310X...
-
Page 2: Table Of Contents
2 Progress CONTENTS Safety information Hints and tips Safety instructions Care and cleaning Product description Troubleshooting Before first use Installation Daily use Technical information Using the accessories Energy efficiency Additional functions Subject to change without notice. SAFETY INFORMATION Before the installation and use of the appliance, carefully read the supplied instructions. -
Page 3: Safety Instructions
Progress 3 General Safety Only a qualified person must install this appliance and • replace the cable. WARNING: The appliance and its accessible parts become • hot during use. Care should be taken to avoid touching heating elements. Children less than 8 years of age shall be kept away unless continuously supervised. - Page 4 4 Progress • Do not let mains cables touch or come • Open the appliance door carefully. The near the appliance door, especially when use of ingredients with alcohol can the door is hot. cause a mixture of alcohol and air.
-
Page 5: Product Description
Progress 5 Care and cleaning household appliances. Do not use it for house lighting. WARNING! Risk of injury, fire, WARNING! Risk of electrical or damage to the appliance. shock. • Before maintenance, deactivate the • Before replacing the lamp, disconnect appliance and disconnect the mains the appliance from the power supply. -
Page 6: Before First Use
6 Progress Accessories • Grill- / Roasting pan To bake and roast or as pan to collect • Wire shelf fat. For cookware, cake tins, roasts. • Aluminium baking tray For cakes and biscuits. BEFORE FIRST USE 1. Set the function... -
Page 7: Using The Accessories
Progress 7 Oven Functions Oven function Application Off position The appliance is off. Fan Cooking To roast or roast and bake food with the same cooking temperature, on more than 1 shelf position, without flavour transference. Conventional To bake and roast food on 1 shelf position. -
Page 8: Additional Functions
8 Progress ADDITIONAL FUNCTIONS Cooling fan dangerous overheating. To prevent this, the oven has a safety thermostat which When the appliance operates, the cooling interrupts the power supply. The oven fan activates automatically to keep the activates again automatically when the surfaces of the appliance cool. - Page 9 Progress 9 Baking and roasting table Cakes Food Conventional Cooking Fan Cooking Time Com- (min) ments Temper- Shelf po- Temper- Shelf po- ature sition ature sition (°C) (°C) Whisked 2 (1 and 45 - 60 In a cake recipes mould...
- Page 10 10 Progress Food Conventional Cooking Fan Cooking Time Com- (min) ments Temper- Shelf po- Temper- Shelf po- ature sition ature sition (°C) (°C) 3 (1 and 30 - 35 In a bak- Biscuits ing tray Merin- 35 - 40 In a bak-...
- Page 11 Progress 11 Food Conventional Cooking Fan Cooking Time Com- (min) ments Temper- Shelf po- Temper- Shelf po- ature sition ature sition (°C) (°C) Bread 2 (1 and 25 - 40 6 - 8 rolls in a bak- rolls ing tray...
- Page 12 12 Progress Meat Food Conventional Cooking Fan Cooking Time Com- (min) ments Temper- Shelf po- Temper- Shelf po- ature sition ature sition (°C) (°C) Beef 50 - 70 On a wire shelf and a deep Pork 90 - 120 On a wire...
- Page 13 Progress 13 Food Conventional Cooking Fan Cooking Time Com- (min) ments Temper- Shelf po- Temper- Shelf po- ature sition ature sition (°C) (°C) Hare 150 - 200 Cut in pieces Pheasant 90 - 120 Whole Fish Food Conventional Cooking Fan Cooking...
-
Page 14: Care And Cleaning
14 Progress Food Quantity Temper- Time (min) Shelf po- ature sition Pieces 1st side 2nd side (°C) Hambur- 20 - 30 Fish fillet 12 - 14 10 - 12 Toasted 4 - 6 5 - 7 sand- wiches Toast 4 - 6... - Page 15 Progress 15 • To clean metal surfaces, use a usual cleaning agent. • Clean the appliance interior after each use. Fat accumulation or other food remains may result in a fire. The risk is higher for the grill pan. • Clean stubborn dirt with a special oven cleaner.
- Page 16 16 Progress 4. Put the door on a soft cloth on a stable surface. 5. Release the locking system to remove the internal glass panel. 2. Lift and turn the levers on the two hinges. 6. Turn the two fasteners by 90° and remove them from their seats.
-
Page 17: Troubleshooting
Progress 17 Replacing the lamp 8. Clean the glass panel with water and soap. Dry the glass panel carefully. Put a cloth on the bottom of the interior of When the cleaning is completed, install the the appliance. It prevents damage to the glass panel and the oven door. -
Page 18: Installation
18 Progress Service data the front frame of the appliance cavity. Do not remove the rating plate from the If you cannot find a solution to the problem appliance cavity. yourself, contact your dealer or an Authorised Service Centre. The necessary data for the service centre is on the rating plate. -
Page 19: Technical Information
Progress 19 Electrical installation For the section of the cable refer to the total power on the rating plate and to the table: The manufacturer is not responsible if you do not follow Total power (W) Section of the ca- the safety precautions from the ble (mm²) - Page 20 20 Progress Energy saving minutes before the end of the cooking time, depending on the The appliance contains features which help duration of the cooking. The residual you save energy during everyday cooking. heat inside the oven will continue to •...
- Page 21 Progress 21 INDICE Informazioni per la sicurezza Consigli e suggerimenti utili Istruzioni di sicurezza Pulizia e cura Descrizione del prodotto Risoluzione dei problemi Preparazione al primo utilizzo Installazione Utilizzo quotidiano Dati tecnici Utilizzo degli accessori Efficienza energetica Funzioni aggiuntive Con riserva di modifiche.
-
Page 22: Istruzioni Di Sicurezza
22 Progress Avvertenze di sicurezza generali L'installazione dell'apparecchiatura e la sostituzione dei cavi • deve essere svolta unicamente da personale qualificato. AVVERTENZA: L'apparecchiatura e le parti accessibili si • riscaldano molto durante l'uso. Abbiate cura di non toccare gli elementi riscaldanti. Tenere lontani i bambini al di sotto dei 8 anni se non costantemente supervisionati. - Page 23 Progress 23 Utilizzo • L'apparecchiatura deve disporre di una messa a terra. AVVERTENZA! Rischio di • Verificare che i dati elettrici riportati sulla lesioni, ustioni, scosse elettriche targhetta dei dati corrispondano a quelli o esplosioni. dell'impianto. In caso contrario, contattare un elettricista.
- Page 24 24 Progress – Non appoggiare la pellicola di • Sostituire immediatamente i pannelli in alluminio direttamente sulla vetro della porta nel caso in cui siano superficie inferiore danneggiati. Contattare il Centro di dell'apparecchiatura. Assistenza autorizzato. – Non mettere direttamente acqua •...
-
Page 25: Descrizione Del Prodotto
Progress 25 • Utilizzare esclusivamente ricambi originali. DESCRIZIONE DEL PRODOTTO Panoramica Pannello dei comandi Spia/simbolo/indicatore della temperatura Manopola della temperatura Manopola delle funzioni forno Spia di accensione/simbolo/indicatore Fessure di ventilazione per la ventola di raffreddamento Resistenza Lampadina Ventola Posizioni dei ripiani Accessori •... -
Page 26: Utilizzo Quotidiano
26 Progress UTILIZZO QUOTIDIANO 1. Ruotare la manopola delle funzioni del AVVERTENZA! Fare riferimento forno per selezionare una funzione del ai capitoli sulla sicurezza. forno. 2. Ruotare la manopola della temperatura Attivazione e disattivazione per selezionare una temperatura. dell'apparecchiatura 3. Per disattivare l'apparecchiatura,... -
Page 27: Funzioni Aggiuntive
Progress 27 Spingere il ripiano fra le guide di estrazione Spingere la leccarda tra le guide del e verificare che i piedini siano rivolti verso il supporto ripiano. basso. Leccarda: FUNZIONI AGGIUNTIVE Ventola di raffreddamento possono provocare un surriscaldamento pericoloso. Per evitare che questo accada, Quando il forno è... - Page 28 28 Progress facendo si possono alterare i risultati di • Per evitare la formazione di fumo cottura e danneggiare lo smalto. eccessivo nel forno durante la cottura arrosto, aggiungere dell'acqua nella Cottura di dolci leccarda. Per evitare la condensa di fumo, aggiungere acqua ogni volta che •...
- Page 29 Progress 29 Alimenti Cottura tradizionale Cottura ventilata Tempo Com- (min.) menti Tempe- Posizio- Tempe- Posizio- ratura ne della ratura ne della (°C) griglia (°C) griglia Crostata 2 (1 e 3) 30 - 40 In uno stampo per dolci da 26 cm...
- Page 30 30 Progress Alimenti Cottura tradizionale Cottura ventilata Tempo Com- (min.) menti Tempe- Posizio- Tempe- Posizio- ratura ne della ratura ne della (°C) griglia (°C) griglia Crostatine 25 - 35 In uno stampo per dolci da 20 cm Pan di 1 o 2...
- Page 31 Progress 31 Alimenti Cottura tradizionale Cottura ventilata Tempo Com- (min.) menti Tempe- Posizio- Tempe- Posizio- ratura ne della ratura ne della (°C) griglia (°C) griglia 10 – 20 In una la- Scones miera dol- 1) Preriscaldare il forno per 10 minuti.
- Page 32 32 Progress Alimenti Cottura tradizionale Cottura ventilata Tempo Com- (min.) menti Tempe- Posizio- Tempe- Posizio- ratura ne della ratura ne della (°C) griglia (°C) griglia Maiale 90 - 120 Su un ri- piano a fi- lo e una leccarda Vitello...
- Page 33 Progress 33 Pesce Alimenti Cottura tradizionale Cottura ventilata Tempo Com- (min.) menti Tempe- Posizio- Tempe- Posizio- ratura ne della ratura ne della (°C) griglia (°C) griglia Trota/ 2 (1 e 3) 40 - 55 3 - 4 pe- Orata Tonno/...
- Page 34 34 Progress Doppio grill ventilato Utilizzare questa funzione con una temperatura massima di 200°C. Alimenti Quantità Tempe- Tempo (min.) Posizio- ratura ne della Parti 1° lato 2° lato (°C) griglia Rollé (tac- 1000 30 - 40 20 - 30 chino)
- Page 35 Progress 35 Apparecchiature in acciaio inox o in alluminio Pulire la porta del forno esclusivamente con una spugna umida. Asciugarla con un panno morbido. Evitare l’uso di lane di acciaio, acidi o prodotti abrasivi, che potrebbero danneggiare la superficie del forno. Pulire il 2.
- Page 36 36 Progress 4. Appoggiare la porta su una superficie stabile e coperta da un panno morbido. 5. Sganciare il sistema di bloccaggio per rimuovere il pannello interno in vetro. 2. Alzare e ruotare le levette poste sulle due cerniere. 6. Ruotare di 90° le due chiusure e sfilarle dalle loro sedi.
- Page 37 Progress 37 Sostituzione della lampadina 8. Pulire il pannello in vetro con dell'acqua saponata. Asciugare il pannello in vetro Mettere un panno sulla parte inferiore facendo attenzione. interna dell'apparecchiatura. Evita di Al termine della pulizia, rimontare il pannello danneggiare la calotta di vetro della in vetro e la porta del forno.
- Page 38 38 Progress Problema Causa possibile Soluzione Vapore e acqua di condensa Le pietanze sono state la- Non lasciare le pietanze nel si depositano sugli alimenti e sciate nel forno troppo a lun- forno per più di 15 - 20 minu- nella cavità...
- Page 39 Progress 39 Fissaggio nel mobile Cavo Tipi di cavi disponibili per l'installazione o la sostituzione: H07 RN-F, H05 RN-F, H05 RRF, H05 VV-F, H05 V2V2-F (T90), H05 BB-F Per la sezione del cavo fare riferimento alla potenza totale riportata sulla targhetta dei...
- Page 40 40 Progress Volume 53 l Tipo di forno Forno a incasso Massa 27.5 kg EN 60350-1 - Apparecchiature elettriche – Se possibile, sistemare il cibo nel per la cottura per uso domestico - Parte 1: forno senza riscaldarlo. Cucine, forni, forni a vapore e grill - Metodi –...
-
Page 41: Información Sobre Seguridad
Progress 41 CONTENIDO Información sobre seguridad Consejos Instrucciones de seguridad Mantenimiento y limpieza Descripción del producto Solución de problemas Antes del primer uso Instalación Uso diario Información técnica Uso de los accesorios Eficacia energética Funciones adicionales Salvo modificaciones. INFORMACIÓN SOBRE SEGURIDAD Antes de instalar y utilizar el aparato, lea atentamente las instrucciones facilitadas. -
Page 42: Instrucciones De Seguridad
42 Progress Los niños de 3 años o menos deben mantenerse alejados • de este aparato en todo momento mientras funciona. Seguridad general Solo un electricista cualificado puede instalar este aparato y • sustituir el cable. ADVERTENCIA: El aparato y las piezas accesibles se •... - Page 43 Progress 43 • Los laterales del aparato deben • La instalación eléctrica debe tener un colocarse junto a otros aparatos o dispositivo de aislamiento que permita muebles de la misma altura. desconectar el aparato de todos los polos de la red. El dispositivo de Conexión eléctrica...
- Page 44 44 Progress • Asegúrese de que el aparato esté frío. ADVERTENCIA! Podría dañar Los paneles de cristal pueden romperse. el aparato. • Cambie inmediatamente los paneles de cristal de la puerta que estén dañados. • Para evitar daños o decoloraciones del Póngase en contacto con el servicio...
-
Page 45: Descripción Del Producto
Progress 45 Asistencia • Utilice solamente piezas de recambio originales. • Para reparar el aparato, póngase en contacto con un centro de servicio autorizado. DESCRIPCIÓN DEL PRODUCTO Descripción general Panel de control Piloto/símbolo/indicador de temperatura Mando de temperatura Mando de las funciones del horno Piloto/símbolo/indicador de... -
Page 46: Uso Diario
46 Progress humos. Esto es totalmente normal. Asegúrese de que haya una buena ventilación en la habitación. USO DIARIO 1. Gire el mando del horno hasta la ADVERTENCIA! Consulte los función deseada. capítulos sobre seguridad. 2. Gire el mando del termostato para seleccionar una temperatura. -
Page 47: Uso De Los Accesorios
Progress 47 USO DE LOS ACCESORIOS Bandeja honda: ADVERTENCIA! Consulte los Inserte la bandeja honda entre las guías de capítulos sobre seguridad. uno de los carriles. Inserción de los accesorios Parrilla: Inserte la parrilla entre las guías del carril y asegúrese de que las hendiduras apuntan... - Page 48 48 Progress Carnes y pescados mínimo el tiempo de cocción y el consumo de energía. • Utilice una bandeja honda con los • La humedad puede llegar a alimentos muy grasos para evitar que el condensarse en el aparato o en los horno quede manchado de forma paneles de cristal.
- Page 49 Progress 49 Alimento Calor superior + infe- Turbo Tiempo Suge- rior (min) rencias Tempe- Posición Tempe- Posición ratura de la pa- ratura de la pa- (°C) rrilla (°C) rrilla Tarta o 2 (1 y 3) 80 - 100 En dos...
- Page 50 50 Progress Alimento Calor superior + infe- Turbo Tiempo Suge- rior (min) rencias Tempe- Posición Tempe- Posición ratura de la pa- ratura de la pa- (°C) rrilla (°C) rrilla Masa de 3 (1 y 3) 15 - 20 En ban-...
- Page 51 Progress 51 Alimento Calor superior + infe- Turbo Tiempo Suge- rior (min) rencias Tempe- Posición Tempe- Posición ratura de la pa- ratura de la pa- (°C) rrilla (°C) rrilla Paneci- 2 (1 y 3) 25 - 40 6 - 8 pa-...
- Page 52 52 Progress Carne Alimento Calor superior + infe- Turbo Tiempo Suge- rior (min) rencias Tempe- Posición Tempe- Posición ratura de la pa- ratura de la pa- (°C) rrilla (°C) rrilla Ternera 50 - 70 En una bandeja honda en una parri-...
- Page 53 Progress 53 Alimento Calor superior + infe- Turbo Tiempo Suge- rior (min) rencias Tempe- Posición Tempe- Posición ratura de la pa- ratura de la pa- (°C) rrilla (°C) rrilla Pollo 70 - 85 Entero Pavo 210 - 240 Entero Pato...
- Page 54 54 Progress Alimento Cantidad Tempe- Tiempo (min) Posición ratura de la pa- Piezas 1ª cara 2ª cara (°C) rrilla Chuletas 12 - 16 12 - 14 de cerdo Pollo (cor- 1000 30 - 35 25 - 30 tado en 2)
-
Page 55: Mantenimiento Y Limpieza
Progress 55 Alimento Cantidad Tempe- Tiempo (min) Posición ratura de la pa- Piezas 1ª cara 2ª cara (°C) rrilla Caballa 2 - 4 15 - 20 10 - 15 Pescado 4 - 6 12 - 15 8 - 10 en roda-... - Page 56 56 Progress 1. Retire el tornillo que sujeta la resistencia. Utilice un destornillador la primera vez. 2. Desplace con cuidado la resistencia hacia abajo. 2. Levante y gire las palancas de las dos 3. Limpie el techo del horno con un paño bisagras.
- Page 57 Progress 57 90° 7. Levante con cuidado primero y retire después el panel de cristal. 4. Coloque la puerta sobre una superficie estable y protegida por un paño suave. 8. Limpie el panel de cristal con agua y jabón. Seque el panel de cristal con cuidado.
-
Page 58: Solución De Problemas
58 Progress Cambio de la bombilla 1. Apague el aparato. 2. Retire los fusibles de la caja de fusibles Coloque un paño en el fondo del interior del o desconecte el disyuntor. horno. Así evitará que se dañe la tapa de vidrio de la lámpara y la cavidad. -
Page 59: Instalación
Progress 59 Es conveniente que anote los datos aquí: Número de serie (S.N.) ......... INSTALACIÓN Fijación del horno al mueble ADVERTENCIA! Consulte los capítulos sobre seguridad. Empotrado min. 550 Instalación eléctrica El fabricante declina toda min. 560 responsabilidad si la instalación no se efectúa siguiendo las... -
Page 60: Información Técnica
60 Progress INFORMACIÓN TÉCNICA Datos técnicos Voltaje 230 V Frecuencia 50 Hz EFICACIA ENERGÉTICA Ficha de producto e información según EU 65-66/2014 Nombre del proveedor Progress Identificación del modelo PBN1310X Índice de eficiencia energética 105.2 Clase de eficiencia energética Consumo de energía con carga estándar, modo conven- 0.83 kWh/ciclo... - Page 61 Progress 61 los alimentos, seleccione el ajuste de temperatura más bajo posible. ASPECTOS MEDIOAMBIENTALES deseche los aparatos marcados con el Recicle los materiales con el símbolo símbolo junto con los residuos Coloque el material de embalaje en los domésticos. Lleve el producto a su centro contenedores adecuados para su reciclaje.
- Page 62 62 Progress...
- Page 63 Progress 63...
- Page 64 867310370-B-182016...
Need help?
Do you have a question about the PBN1310X and is the answer not in the manual?
Questions and answers