Advertisement
Quick Links
Advertisement

Subscribe to Our Youtube Channel
Related Manuals for Sebart Aermacchi MB339 XS


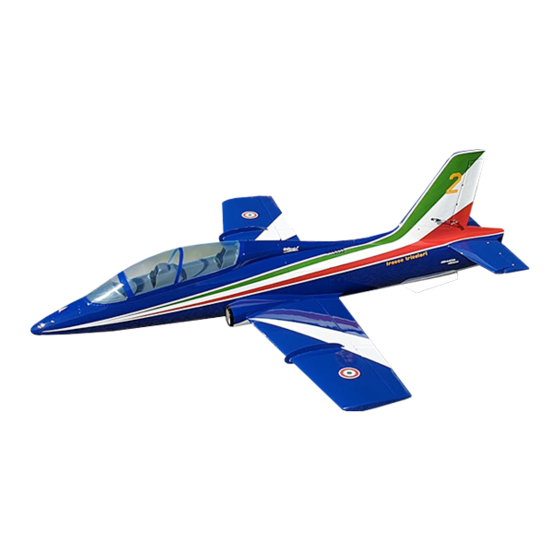
Summary of Contents for Sebart Aermacchi MB339 XS
- Page 1 FOTO MANUAL – MB339 XS 1,9m AILERON & FLAP step 01 FLAP step 02...
- Page 2 FLAP step 03 EPOXY 20 min. step 04 Flap...
- Page 3 Epoxy 20 min. FLAP step 05 step 06 AILERON...
- Page 4 AILERON step 07 EPOXY 20 min AILERON step 08...
- Page 5 EPOXY 20 min AILERON step 09 AILERON step 10...
- Page 6 FLAP step 11 step 12 AILERON & FLAP...
- Page 7 AILERON step 13 AILERON step 14...
- Page 8 AILERON step 15 AILERON step 16...
- Page 9 Flap step 17 step 18 Flap...
- Page 10 Flap step 19 step 20 Flap...
- Page 11 AILERON SERVO step 21 step 22 AILERON SERVO...
- Page 12 AILERON SERVO step 23 step 24 AILERON SERVO...
- Page 13 AILERON SERVO step 25 step 26 AILERON SERVO...
- Page 14 AILERON SERVO step 27 step 28 FLAP SERVO...
- Page 15 FLAP SERVO step 29 step 30 FLAP SERVO...
- Page 16 FLAP SERVO step 31 FLAP SERVO step 32...
- Page 17 FLAP SERVO step 33 FLAP SERVO step 34...
- Page 18 L. GEAR step 35 SILCONE L.GEAR L.GEAR step 36 step 36...
- Page 19 L.GEAR step 37 step 38 L.GEAR...
- Page 20 CUT SPACE FOR THE BRAKE CABLE L.GEAR step 39 THIS SPACE ON BACK OF THE WHEEL IS NORMAL L.GEAR step 40...
- Page 21 L.GEAR step 42 step 43 L.GEAR...
- Page 22 MEDIUM WING FAN ON TOP step 43 MEDIUM WING FANS ON BOTTOM step 44...
- Page 23 MEDIUM step 45 WING FANS ON BOTTOM RUDDER step 46...
- Page 24 RUDDER step 47 EPOXY 20 min RUDDER step 48...
- Page 25 RUDDER step 49 RUDDER step 50...
- Page 26 RUDDER step 51 RUDDER step 52...
- Page 27 RUDDER step 53 Medium RUDDER step 54...
- Page 28 RUDDER step 55 RUDDER step 56...
- Page 29 RUDDER FIXING step 57 RUDDER FIXING step 58...
- Page 30 RUDDER / ELEVATOR CABLES step 59 ALUMINUM TAPE RUDDER / ELEVATOR CABLES step 60...
- Page 31 FUSELAGE FINS step 61 FUSELAGE FINS step 62...
- Page 32 EPOXY 20 min ELEVATOR step 63 step 64 ELEVATOR...
- Page 33 EPOXY 20 min ELEVATOR step 65 ELEVATOR step 66...
- Page 34 ELEVATOR step 67 ELEVATOR step 68...
- Page 35 Medium ELEVATOR step 69 ELEVATOR step 70...
- Page 36 ELEVATOR step 71 ELEVATOR FIXING step 72...
- Page 37 ELEVATOR FIXING step 73 step 74 ELEVATOR FIXING...
- Page 38 ELEVATOR FIXING step 75 ELEVATOR FIXING step 76...
- Page 39 ELEVATOR FIXING step 77 FRONT L.GEAR step 78...
- Page 40 FRONT L.GEAR step 79 FRONT L.GEAR step 80...
- Page 41 FRONT L.GEAR step 81 FRONT DOOR SERVO step 82...
- Page 42 FRONT DOOR SERVO step 83 FRONT DOOR SERVO step 84...
- Page 43 FRONT DOOR SERVO step 85 BATTERY SUPPORT step 86...
- Page 44 2 RX BATTERY SUPPORT step 87 TURBINE BATTERY SUPPORT step 88...
- Page 45 TRUST TUBE – to buy as OPTION TURBINE INSTALLATION step 89 TURBINE INSTALLATION step 90...
- Page 46 TURBINE INSTALLATION step 91 step 92 TURBINE INSTALLATION...
- Page 47 10 mm SILICON TURBINE INSTALLATION step 93 TURBINE INSTALLATION step 94 25 mm...
- Page 48 KERO TANK – to buy as OPTION TURBINE INSTALLATION step 95 TURBINE INSTALLATION step 96...
- Page 49 Tank overflow TURBINE INSTALLATION step 97 TURBINE INSTALLATION step 98...
- Page 50 ECU electric L.Gear Power Box Mercury SRS – to buy as OPTION TURBINE INSTALLATION step 99 TURBINE INSTALLATION step 100...
- Page 51 COCKPIT step 101 COCKPIT step 102...
- Page 52 SILICON COCKPIT step 99 COCKPIT step 100...
- Page 53 WINGS FIXING Thin step 101 step 102...
- Page 54 step 103 step 104...
- Page 55 Step 105 step 106...
- Page 56 Step 107 step 108...
- Page 57 Step 109 step 110...
- Page 58 160-170 mm Step 111 NOTE: Turbine version may need 250-300g of lead in the nose to glue with 5 min. epoxy Step 112...
Need help?
Do you have a question about the Aermacchi MB339 XS and is the answer not in the manual?
Questions and answers