
Related Manuals for Crestron DM-NAX-8ZSA


Summary of Contents for Crestron DM-NAX-8ZSA
- Page 1 DM-NAX-8ZSA DM NAX™ 8-Zone Streaming Amplifier Product Manual Crestron Electronics, Inc.
- Page 2 Certain Crestron products contain open source software. For specific information, visit www.crestron.com/opensource. Crestron, the Crestron logo, Crestron Toolbox, DM NAX and DM NVX are either trademarks or registered trademarks of Crestron Electronics, Inc. in the United States and/or other countries. Dante is either a trademark or a registered trademark of Audinate Pty Ltd.
-
Page 3: Table Of Contents
Contents Introduction Physical Description Front Panel Rear Panel Application Web Interface Configuration Access the Web Interface Action Rebooting the DM-NAX-8ZSA Restoring to Factory Default Settings Updating Firmware Download Logs Managing Certificates To Add Certificates To Delete Certificates Save Changes Revert... - Page 4 Update User Details Groups Create Local Group Add Active Directory Group Delete a Group View Group Details 802.1x Configuration To Configure DM-NAX-8ZSA for 802.1X Authentication Access the Web Interface With the Crestron Toolbox™ Application ii • Contents Product Manual — Doc. 9045A...
-
Page 5: Introduction
Introduction The Crestron DM-NAX-8ZSA is a next generation DM NAX™ Audio-over-IP (AoIP) amplifier that puts Crestron multiroom audio distribution on the network. It provides eight amplified stereo zone (16-channel) outputs. Four stereo line-level outputs mirror speaker zone outputs 1-4. A dedicated streaming service player for each of the eight zones enables complete freedom to stream different content in every zone. -
Page 6: Physical Description
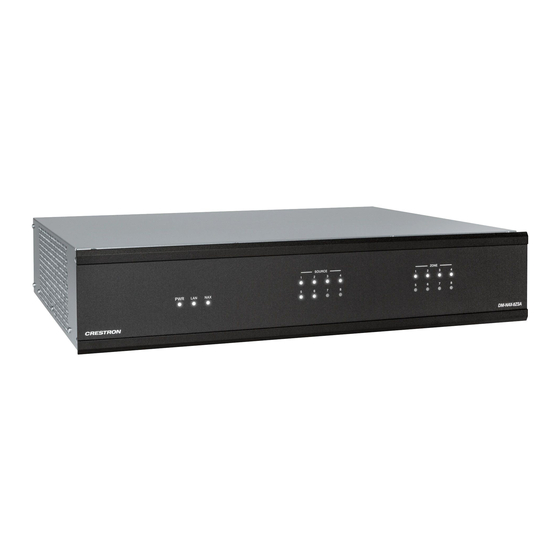
DM-NAX-8ZSA device. Front Panel The following illustration shows the front panel of the DM-NAX-8ZSA. PWR: (1) LED, indicates operating power is supplied; illuminates amber while booting, white when powered on, red when in standby (no audio or LAN connection), and off when no power is supplied. -
Page 7: Rear Panel
Rear Panel The following illustration shows the rear panel of the DM-NAX-8ZSA. DM-NAX-8ZSA Rear Panel DIGITAL INPUTS: (2) JIS F05 female (TOSLINK®) optical fiber connectors, S/PDIF optical digital audio inputs; (2) RCA female; S/PDIF coaxial digital audio inputs; Input Impedance: 75... - Page 8 CONSOLE: (1) Standard USB 2.0 Type B connector, female GROUND: 6-32 screw, chassis ground lug 11 10A Fuse: 10 Ampere Fuse POWER OUTLET: (1) 100-240V~50/60Hz Universal AC; IEC 60320 C14 Main power inlet, mates with removable power cord (included) 4 • DM-NAX-8ZSA Product Manual — Doc. 9045A...
-
Page 9: Application
Application This section shows DM-NAX-8ZSA device in multizone applications. This application diagram shows the following setup: Up to 8 zones of amplification and audio distribution Local line level input Local line level output to an Audio Video Receiver (AVR) mirroring a zone of amplification ... - Page 10 Available music streaming services on up to 8 NAX zones The DM-NAX-16AIN is used to carry audio from the DM chassis’ video sources to the NAX network for routing to non-video zones 6 • DM-NAX-8ZSA Product Manual — Doc. 9045A...
- Page 11 This application diagram shows different 2.1 configurations and how they affect the zone count of an DM-NAX-8ZSA. By default, a zone comprises two speaker outputs (a left and a right). The 2.1 configuration at the left of the diagram comprises two speaker outputs, with an additional line output that feeds the subwoofer.
- Page 12 For example, if you have a single bridged 2.1 configuration on an DM-NAX-8ZSA, it will lower the maximum zone count to six, as the bridged 2.1 consumes three zones worth of speaker outputs on its own.
- Page 13 For example, in a hotel, each room can receive a cast from a third-party device. The Lobby and Pool zones can exist on another DM-NAX-8ZSA unit that is on the same LAN or on a separate VLAN or WAP to cast to/control those zones.
- Page 14 5-8 feed low-impedance indoor spaces without overlap of signals. The LAN cloud shows that any individual applications can exist as part of a large NAX system. 10 • DM-NAX-8ZSA Product Manual — Doc. 9045A...
-
Page 15: Web Interface Configuration
Web Interface Configuration The DM-NAX-8ZSA web interface allows you to view status information and configure network and device settings. Access the Web Interface To access the web interface, do either of the following: Access the Web Interface with a Web Browser (on the next page) ... - Page 16 Access the Web Interface with a Web Browser 1. Enter the IP address of the DM-NAX-8ZSA into a web browser. NOTE: To obtain the IP address, press the Setup button on the rear panel of the device to display the IP address on the connected output. The IP address is displayed for 20 seconds.
- Page 17 3. Enter the username in the Username field. 4. Enter the password in the Password field. 5. Click Sign In. Product Manual — Doc. 9045A DM-NAX-8ZSA • 13...
-
Page 18: Action
The Action drop-down menu is displayed at the top right side of the interface and provides quick access to common device functionalities: Reboot Restore Update Firmware Download Logs Manage Certificates Save Changes Revert 14 • DM-NAX-8ZSA Product Manual — Doc. 9045A... -
Page 19: Rebooting The Dm-Nax-8Zsa
Rebooting the DM-NAX-8ZSA Certain changes to the settings may require the DM-NAX-8ZSA to be rebooted to take effect. To reboot the device, do the following: 1. Click Reboot in the Actions drop-down menu. The Confirmation message box appears. 2. Click Yes, Reboot Now to reboot the device. The Reboot message box appears. -
Page 20: Updating Firmware
Download Logs 1. Click Download Logs in the Actions drop-down menu to download the device message logs for diagnostic purposes. The log file is downloaded to the Downloads folder of the PC. 16 • DM-NAX-8ZSA Product Manual — Doc. 9045A... -
Page 21: Managing Certificates
1. Click Manage Certificates in the Actions drop-down menu. The following certificate tabs are displayed: Root: The Root certificate is used by the DM-NAX-8ZSA to validate the network's authentication server. The DM-NAX-8ZSA has a variety of Root certificates, self- signed by trusted CAs (Certificate Authorities) preloaded into the device. Root certificates must be self-signed. -
Page 22: To Add Certificates
3. Click Yes when prompted to delete the certificate or No to cancel the deletion. Save Changes Click Save Changes to save any changes made to the configuration settings. Revert Click Revert to revert the device back to the last saved configuration settings. 18 • DM-NAX-8ZSA Product Manual — Doc. 9045A... -
Page 23: Status
Serial Number), current network settings (such as Host Name and IP Address, etc.), and input and output ports' current status. The Status tab can be accessed at any time by clicking the Status tab of the DM-NAX-8ZSA interface. Information displayed on the Status tab is organized into different sections. -
Page 24: Network
The Network section displays network-related information about the DM-NAX-8ZSA, including the Hostname, Domain Name, and DNS Servers. NOTE: By default, the host name of the DM-NAX-8ZSA consists of the model name followed by the MAC address of the device. For example, DM-NAX-8ZSA-00107FB58088. 20 • DM-NAX-8ZSA... -
Page 25: Control System
Click + Adapter 1 to display an expanded section that shows additional information. If + Adapter 1 is selected, click - Less details to collapse the section. NOTE: The + Adapter 2 option appears when the dual Ethernet ports on the DM-NAX-8ZSA are set to isolate traffic. Control System The Control System section displays connection information, consisting of the following: ... -
Page 26: Settings
Settings The Settings tab enables you to configure the DM-NAX-8ZSA settings. The Settings page can be accessed at any time by clicking the Settings tab of the DM-NAX-8ZSA interface. Information displayed on the Settings tab is organized into different sections. -
Page 27: Date/Time
Date/Time Use the Date/Time section to configure the date and time settings of the DM-NAX-8ZSA. Time Synchronization 1. Move the Time Synchronization slider to specify whether time synchronization will be enabled (right) or disabled (left). By default, time synchronization is enabled. -
Page 28: Auto Update
The DM-NAX-8ZSA can be automatically updated with the latest firmware at scheduled intervals. 1. Using the Crestron Auto Update Tool, generate a manifest file. The file is placed on an FTP (File Transfer Protocol) or SFTP (Secure File Transfer Protocol) server. -
Page 29: Network
Adapter 1 Displays DHCP, IP Address, Subnet Mask, and Default Gateway. NOTE: The + Adapter 2 option appears when the dual Ethernet ports on the DM-NAX-8ZSA are set to isolate traffic. Configure DHCP Set the DHCP slider to enabled (right) or disabled (left) to specify whether the IP address of the DM-NAX-8ZSA is to be assigned by a DHCP (Dynamic Host Configuration Protocol) server. -
Page 30: Control System
3. Enter the password in the Control System Password field. 4. Enter the Room ID in the Room ID field. 5. Enter the IP ID of the DM-NAX-8ZSA in the IP ID field. 6. Enter the IP address or hostname of the control system in the IP Address/Hostname field. -
Page 31: Chimes
To view all available chimes, use arrows at the left of the matrix to change pages. To configure the chime volume of a zone: 1. Click the icon corresponding to the zone. The Configure dialog appears. Product Manual — Doc. 9045A DM-NAX-8ZSA • 27... -
Page 32: Zones
3. To mute the chime sound, move the Do Not Disturb slider to the right. To unmute the chime sound, move the Do Not Disturb slider to the left. 4. Click OK to apply the new settings. Zones The Zones section enables configuration of the zones settings. 28 • DM-NAX-8ZSA Product Manual — Doc. 9045A... -
Page 33: Zone Settings
3. To mute the zone sound, click the Mute button. To unmute the zone sound, click the Muted button. Zone Settings To configure zone settings, click the configure button ( ). The Edit Zone window appears. Click Zone to configure Tone (Autosaved), Balance (Autosaved), and Delay (Autosaved). Product Manual — Doc. 9045A DM-NAX-8ZSA • 29... - Page 34 Move the Balance slider to the right to increase or to the left to decrease the balance. Click the arrows to increase or decrease the balance. Values range from -50 to 50, adjustable in 1 increments. Manually enter a value in the Balance field. 30 • DM-NAX-8ZSA Product Manual — Doc. 9045A...
- Page 35 Manually enter a value in the Delay field. Click Output to configure Minimum/Maximum (Autosaved), Stereo/Mono (Autosaved), Signal (Autosaved), Bussing Volume Offset (Autosaved), Speaker Configuration (Autosaved), Test Tone (Autosaved), Speaker/Faults (Autosaved), Line Out (Autosaved), and Equalizer Settings (Autosaved). Product Manual — Doc. 9045A DM-NAX-8ZSA • 31...
- Page 36 Click the % arrows to increase or decrease the default volume. Values range from 0 to 50%, adjustable in 1% increments. Manually enter a value in the Default field. 32 • DM-NAX-8ZSA Product Manual — Doc. 9045A...
- Page 37 Standard, Bridged, Bridged 2.1, Bridged Sub 2.1, and Bridged Mono. NOTE: The Stereo/Mono field is disabled for the Bridge Mono, Bridged 2.1, and Bridged Sub 2.1 zone configurations. Stereo - Standard Mono - Standard Product Manual — Doc. 9045A DM-NAX-8ZSA • 33...
- Page 38 Bridged Mono Mono - Bridged 34 • DM-NAX-8ZSA Product Manual — Doc. 9045A...
- Page 39 Bridged 2.1 Product Manual — Doc. 9045A DM-NAX-8ZSA • 35...
- Page 40 Stereo - Bridged Bridged Sub 2.1 36 • DM-NAX-8ZSA Product Manual — Doc. 9045A...
- Page 41 Click the db arrows to increase or decrease the bussing volume offset. Values range from -12 db to 12 db, adjustable in 1 db increments. Manually enter a value in the Bussing Volume Offset field. Product Manual — Doc. 9045A DM-NAX-8ZSA • 37...
- Page 42 The test tone volume is independent of the zone volume and is not affected by the Minimum/Maximum volume settings. 2. To enable the test tone, click the Inactive button. To disable the test tone, click the Active button. By default, Test Tone is disabled. 38 • DM-NAX-8ZSA Product Manual — Doc. 9045A...
- Page 43 Volume control for the Zone. If the Line Out EQ Bypass setting is enabled, the Line Out Volume slider can be used to set a level for the Line Output that will not be affected by the speaker output Volume controls. Product Manual — Doc. 9045A DM-NAX-8ZSA • 39...
- Page 44 Click the arrows to increase or decrease the bandwidth. Values range from 0.1 octaves to 4.0 octaves, adjustable in 0.1 octave increments. Manually enter a value in the Bandwidth field. 40 • DM-NAX-8ZSA Product Manual — Doc. 9045A...
-
Page 45: Bussing
2. Select the zone from the Included Zones drop-down menu. Values are Zone1, Zone2, Zone3, Zone4, Zone5, Zone6, Zone7, and Zone8. NOTE: Each zone can be a member of only one Bus. Product Manual — Doc. 9045A DM-NAX-8ZSA • 41... -
Page 46: Inputs
The Inputs menu is used to configure Name, Compensation, and Mute, and of the available analog, digital, and media streaming inputs on the DM-NAX-8ZSA. A total of 16 inputs are spread across an array of connectors. Only the first 8 inputs are related to physical connectors. -
Page 47: Dm Nax Streams
Device is Master PTP Clock Source indicates whether the device is the master for PTP on the network. Yes will be displayed in green when the local DM-NAX-8ZSA is the PTP clock master and No will be displayed in red when another PTP clock on the network is operating as the master clock. -
Page 48: Configure Transmitters
Multicast stream on your network at the specified address. If Auto Initiation is disabled for the input, the stream will not begin until it is manually initiated. 44 • DM-NAX-8ZSA Product Manual — Doc. 9045A... -
Page 49: Configure Receivers
If Auto Initiation is enabled, the stream will begin automatically, and will be available as a Multicast stream on your network at the specified address. If Auto Initiation is disabled, the stream will not begin until it is manually initiated. Product Manual — Doc. 9045A DM-NAX-8ZSA • 45... -
Page 50: Routing
Zone corresponding to that row in the matrix. Use arrows at the top of the matrix to change pages to view all available inputs. To break a given route click 46 • DM-NAX-8ZSA Product Manual — Doc. 9045A... - Page 51 Click OK to save or click Cancel to cancel the changes. To route a single input to all the zones, click on the Input icon. Product Manual — Doc. 9045A DM-NAX-8ZSA • 47...
-
Page 52: Streaming Services
Streaming Services Multiple profiles can be created with discrete credentials to enable multiple users access to media streaming services on the same DM-NAX-8ZSA without interfering with other users' recommendations, favorites, or playlists. To configure Streaming Services: 1. To enable end user access, move the End User Access slider to the right position. To disable end user access, move the slider to the left position. -
Page 53: Port Selection
Internal VLANs are used to route different traffic types to specific external Ethernet ports, and external Ethernet ports can then be assigned to various traffic types. AES67 or Dante audio can be separated from the primary video and control network resulting in a dedicated audio network. Product Manual — Doc. 9045A DM-NAX-8ZSA • 49... - Page 54 3. With the port selection enabled, select an Ethernet port from the Audio/NAX drop-down menu to assign traffic type. 4. Click Save changes to apply the new settings. 50 • DM-NAX-8ZSA Product Manual — Doc. 9045A...
-
Page 55: Security
Click the Security tab to configure security for users and groups and to allow different levels of access to the DM-NAX-8ZSA functions . By default security is disabled. Select Encrypt and Validate, Encrypt, or OFF in the SSL Mode drop-down menu, to specify whether to use encryption. -
Page 56: Current User
2. In the Change Password dialog, enter the current password in the Current Password field, the new password in the Password field, and then re-enter the same new password in the Confirm Password field. 3. Click OK to save or click Cancel to cancel the changes. 52 • DM-NAX-8ZSA Product Manual — Doc. 9045A... -
Page 57: Users
AD User: Displays whether the user requires authentication using Active Directory. Click the corresponding button in the Actions column to view detailed user information or to delete the user. To create a new user, click the Create User button. Product Manual — Doc. 9045A DM-NAX-8ZSA • 53... -
Page 58: Create A New Local User
c. Assign the access level by selecting one or more groups from the Groups drop-down list. NOTE: Make sure that the Active Directory User slider is disabled. 3. Click OK to save or click Cancel to cancel the changes. 54 • DM-NAX-8ZSA Product Manual — Doc. 9045A... -
Page 59: Add An Active Directory User
Active Directory server. To grant access to an Active Directory user, you can either add the user to a local group on the DM-NAX-8ZSA, or add the Active Directory group(s) that they are a member of to the DM-NAX- 8ZSA. -
Page 60: View User Details
The Update User dialog also displays the following read-only information for the selected user. Name: Displays the name of the user. Active Directory User: Displays whether the user is an Active Directory user. 56 • DM-NAX-8ZSA Product Manual — Doc. 9045A... -
Page 61: Groups
Click the corresponding button in the Actions column to view detailed group information ( ) or to delete ( ) selected group. Click on the Create Group button in the Groups tab to create new group. Product Manual — Doc. 9045A DM-NAX-8ZSA • 57... -
Page 62: Create Local Group
A group cannot be created or removed from the Active Directory server, but access can be granted to an existing group in Active Directory. Once the group is added, all members of that group will have access to the DM-NAX-8ZSA. 1. Click the Create Group button. -
Page 63: Delete A Group
Access Level: Displays the access level of the group and its users. Active Directory Group: Displays whether the group is an Active Directory group. Click OK to close the Group Details dialog and to return to the Groups tab. Product Manual — Doc. 9045A DM-NAX-8ZSA • 59... -
Page 64: 802.1X Configuration
802.1x Configuration The DM-NAX-8ZSA has built-in support for the 802.1X standard (an IEEE network standard designed to enhance the security of wireless and Ethernet LANs. The standard relies on the exchange of messages between the device and the network's host, or authentication server), allowing communication with the authentication server and access to protected corporate networks. -
Page 65: To Configure Dm-Nax-8Zsa For 802.1X Authentication
4. If you enabled the Enable Authentication Server Validation option, this will enable the Select Trusted Certificate Authoritie(s) list box which contains signed Trusted Certificate Authorities (CAs) preloaded into the DM-NAX-8ZSA. Select the check box next to each CA whose certificate can be used for server validation, as specified by the network administrator. -
Page 66: Access The Web Interface With The Crestron Toolbox™ Application
Discovery Tool by clicking the Device Discovery Tool button ( ) in the Crestron Toolbox toolbar. The DM-NAX-8ZSA is discovered and listed in the device list on the left side of the screen. The associated host name, IP address, and firmware version are also displayed. - Page 67 This page is intentionally left blank. Product Manual — Doc. 9045A DM-NAX-8ZSA • 63...
- Page 68 Product Manual — Doc. 9045A Crestron Electronics, Inc. 15 Volvo Drive, Rockleigh, NJ 07647 06/14/21 Tel: 888.CRESTRON Specifications subject to Fax: 201.767.7656 change without notice. www.crestron.com...
Need help?
Do you have a question about the DM-NAX-8ZSA and is the answer not in the manual?
Questions and answers