
Subscribe to Our Youtube Channel
Related Manuals for Crestron DM-NAX-8ZSA


Summary of Contents for Crestron DM-NAX-8ZSA
- Page 1 DM NAX™ Audio-over-IP Distribution Platform Product Manual Crestron Electronics, Inc.
- Page 2 Crestron disclaims any proprietary interest in the marks and names of others. Crestron is not responsible for errors in typography or photography.
-
Page 3: Table Of Contents
Contents Overview Features Products DM-NAX-8ZSA Physical Description Applications DM-NAX-16AIN Physical Description Application DM-NAX-4ZSP Physical Description DM-NAX-AMP-X300 Specifications DM-NAX-8ZSA Specifications Specifications Dimension Drawing DM-NAX-4ZSP Specifications Specifications Dimension Drawing DM-NAX-16AIN Specifications Specifications Dimension Drawing DM-NAX-AMP-X300 Specifications Specifications Dimension Drawings Installation DM-NAX-8ZSA Installation... - Page 4 In the Box Install the Device Connect the Device Speaker Mode Selection Switch Lo-Z Modes Selection Switch Observe the LED Indicators Reset the Device Configuration DM-NAX-8ZSA Web Interface Configuration Action Status Settings Security 802.1x Configuration ii • Contents Product Manual — Doc. 9045H...
- Page 5 Access the Web Interface With the Crestron Toolbox™ Application DM-NAX-4ZSP Web Interface Configuration Action Status Settings Security 802.1x Configuration Access the Web Interface With the Crestron Toolbox™ Application DM-NAX-16AIN Web Interface Configuration Action Status Settings Security 802.1x Configuration Access the Web Interface With the Crestron Toolbox™ Application...
-
Page 6: Overview
Interoperability: DM NAX is built on AES67 AoIP standards and is compatible with any third-party AES67 solution Products The following products are described in this product manual: DM-NAX-8ZSA (on the next page) DM-NAX-16AIN (on page 13) DM-NAX-4ZSP (on page 17) DM-NAX-AMP-X300 (on page 21) Product Manual —... -
Page 7: Dm-Nax-8Zsa
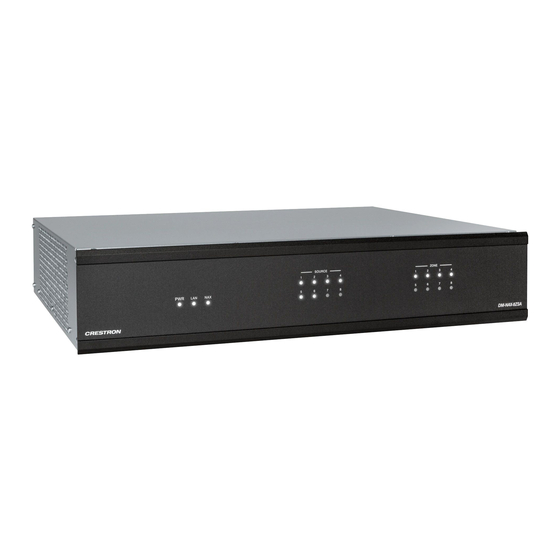
DM-NAX-8ZSA The Crestron DM-NAX-8ZSA is a next generation DM NAX™ Audio-over-IP (AoIP) amplifier that puts Crestron multiroom audio distribution on the network. It provides eight amplified stereo zone (16-channel) outputs. Four stereo line-level outputs mirror speaker zone outputs 1-4. A dedicated streaming service player for each of the eight zones enables complete freedom to stream different content in every zone. - Page 8 PWR: (1) LED, indicates operating power is supplied; illuminates amber ❶ while booting, white when powered on, red when in standby (no audio or LAN connection), and off when no power is supplied. LAN: (1) LED, illuminates white when the amplifier is connected to a ❷...
- Page 9 Rear Panel The following illustration shows the rear panel of the DM-NAX-8ZSA. DIGITAL INPUTS: (2) JIS F05 female TOSLINK® optical fiber connectors, ❶ S/PDIF optical digital audio inputs; (2) RCA female; S/PDIF coaxial digital audio inputs; Input Impedance: 75 Ω...
- Page 10 Ethernet 1: (1) 8-pin RJ-45 connector, female; ❼ 100BASE-TX/1000BASE-T Ethernet port; Green LED indicates Ethernet link status; Flashing amber LED indicates Ethernet activity Ethernet 2: (1) 8-pin RJ-45 connector, female; 100BASE-TX/1000BASE-T Ethernet port; Green LED indicates Ethernet link status; Flashing amber LED indicates Ethernet activity SETUP: (1) Push button: Pressing and holding the SETUP button for ❽...
-
Page 11: Applications
Applications This section shows DM-NAX-8ZSA device in multizone applications. 6 • DM NAX™ Product Manual — Doc. 9045H... - Page 12 NOTES: DM NAX devices generate multicast traffic on the network. Even a single DM NAX device connected to an unmanaged network can cause communication issues with other devices connected to the same network. For information on system installation, refer to the DM NAX™...
- Page 13 Available music streaming services on up to eight DM NAX zones The DM-NAX-16AIN is used to transmit audio from the DM chassis’ video sources onto the DM NAX network for routing to the non-video zones on the DM-NAX-8ZSA 8 • DM NAX™...
- Page 14 This application diagram shows different 2.1 configurations and how they affect the zone count of an DM-NAX-8ZSA. By default, a zone comprises two speaker outputs (a left and a right). The 2.1 configuration at the left of the diagram comprises two speaker outputs, with an additional line output that feeds the subwoofer.
- Page 15 For example, if you have a single bridged 2.1 configuration on an DM-NAX-8ZSA, it will lower the maximum zone count to six, as the bridged 2.1 consumes three zones worth of speaker outputs on its own.
- Page 16 For example, in a hotel, each room can receive a cast from a third-party device. The Lobby and Pool zones can exist on another DM-NAX-8ZSA unit that is on the same LAN or on a separate VLAN or WAP to cast to/control those zones.
- Page 17 This application diagram shows zones using only the line outputs. Line outputs 1 and 2 feed high impedance amplifiers driving speakers for large outdoor spaces and speaker zone outputs 5-8 feed low-impedance indoor spaces without overlap of signals. The LAN cloud shows that any individual applications can exist as part of a large DM NAX system.
-
Page 18: Dm-Nax-16Ain
The Crestron DM NAX™ Audio-over-IP (AoIP) encoder (DM-NAX-16AIN) provides 16 local stereo audio inputs to a DM NAX Crestron multiroom audio distribution network. It provides 8 digital inputs comprised of 4 SPDIF TOSLINK® connectors and 4 SPDIF coaxial connectors. Each digital input supports 2-channel PCM audio. - Page 19 DIGITAL SOURCE: (8) LEDs, illuminates white when a signal is detected ❺ on the specified input/source, red when there is bitstream audio detected on a digital input, and off when there is no signal detected on the specified input/source. Rear Panel The following illustration shows the rear panel of the DM-NAX-16AIN.
- Page 20 SETUP: (1) Push button: Pressing and holding the SETUP button for ❹ 15 seconds with power supplied clears network settings and restores the default DHCP mode; Press and hold the SETUP button with power disconnected then connect the power supply and continue to hold SETUP button for 30 seconds will perform a factory restore;...
-
Page 21: Application
Available music streaming services on up to eight DM NAX zones The DM-NAX-16AIN is used to transmit audio from the DM chassis’ video sources onto the DM NAX network for routing to the non-video zones on the DM-NAX-8ZSA 16 • DM NAX™... -
Page 22: Dm-Nax-4Zsp
DM-NAX-4ZSP The Crestron DM-NAX-4ZSP is a next generation Audio-over-IP (AoIP) preamplifier that puts Crestron multiroom audio distribution on the network. It provides four stereo zone (8-channel) line-level outputs. A dedicated streaming service player enables streaming different content in each of the four zones. - Page 23 PWR: (1) LED, indicates operating power is supplied; illuminates white ❶ when powered on, red when in standby (no audio or LAN connection), and off when no power is supplied. LAN: (1) LED, illuminates white when the amplifier is connected to a ❷...
- Page 24 Rear Panel The following illustration shows the rear panel of the DM-NAX-4ZSP. DIGITAL INPUTS: (2) JIS F05 female TOSLINK® optical fiber connectors, ❶ S/PDIF optical digital audio inputs; (2) RCA female; S/PDIF coaxial digital audio inputs; Input Impedance: 75 Ω ANALOG INPUTS: (8) RCA female comprising (4) unbalanced stereo ❷...
- Page 25 SETUP: (1) Push button: Pressing and holding the SETUP button for ❼ 15 seconds with power supplied clears network settings and restores the default DHCP mode; Press and hold the SETUP button with power disconnected then connect the power supply and continue to hold SETUP button for 30 seconds will perform a factory restore;...
-
Page 26: Dm-Nax-Amp-X300
Dante devices Supports mic/line level analog inputs and balanced/unbalanced line level outputs Individual zone power control and global standby Seamless Crestron system integration with Crestron Home® OS and SIMPL Windows programming Audio-over-IP DM NAX takes audio distribution to a whole new level by putting it on the network. The DM-NAX-AMP-X300 sends and receives DM NAX, Dante, and AES67 encoded audio over a Product Manual —... - Page 27 The amplifier is high-density stackable with other Crestron modular amps, allowing multiple units to be installed vertically in an equipment rack without needing extra ventilation space. Rack and surface mount parts are included, so no additional mounting accessories or rack shelves are required.
- Page 28 Fully Protected The DM-NAX-AMP-X300 features protection against overheating, shorted or overloaded speaker lines, excessive input signals, and other faults. In the case of a shorted speaker line or overheating condition, paired outputs mute automatically until the fault condition is resolved. In the event of a prolonged fault, all outputs mute and the amplifier shuts down.
-
Page 29: Specifications
Specifications Refer to the following sections for more information on the specifications for various DM NAX devices. DM-NAX-8ZSA DM-NAX-4ZSP DM-NAX-16AIN DM-NAX-AMP-X300 Product Manual — Doc. 9045H DM NAX™ • 24... -
Page 30: Dm-Nax-8Zsa Specifications
DM-NAX-8ZSA Specifications Product specifications for the DM-NAX-8ZSA are provided below. Specifications Audio Input Signal Types 4 stereo analog (RCA); 4 digital S/PDIF (2 TOSLINK® and 2 Coaxial) Output Signal Types 4 stereo analog outputs (mirrors speaker zone outputs 1-4), Outputs 1 and 2... - Page 31 Power Limiting Configurable 5 to 150 Watts @ 8 Ohms; 5 to 300 Watts @ 4 Ohms; 5 to 500 Watts @ 8 Ohms bridged Tone Profiles Flat, Classical, Jazz, Pop, Rock, Spoken Word EQ Filter Types EQ, High Pass, Low Pass, Treble Shelf, Bass Shelf, Notch EQ Center Frequency 10 to 20,000 Hz per band EQ Gain...
- Page 32 SPEAKER OUTPUTS L/R (16) 2-pin 7.62mm 15A detachable terminal blocks; 1 – 8 Power amplifier outputs; Wire Size: Terminals accept up to 12AWG Controls and Indicators (1) LED. Amber indicates that the device is booting. White indicates that the device is switched on with audio passing. Red indicates that the device is in standby mode.
-
Page 33: Dimension Drawing
Compliance Regulatory Model: M1845004 FCC Part 15 Class B digital device, IC Class B, CE, ETL listed Dimension Drawing Product Manual — Doc. 9045H DM NAX™ • 28... -
Page 34: Dm-Nax-4Zsp Specifications
DM-NAX-4ZSP Specifications Product specifications for the DM-NAX-4ZSP are provided below. Specifications Audio Input Signal Types 4 stereo analog (RCA); 4 digital S/PDIF (2 TOSLINK® and 2 Coaxial) Output Signal Types 4 stereo analog outputs, Outputs 1 and 2 have a balanced 5-pin stereo Phoenix connection and an unbalanced RCA connection Sampling Rates and Bit Digital Input (Coaxial): Up to 192 kHz,... - Page 35 Communications Ethernet For control, AoIP, and or console, 100/1000 Mbps, auto-switching, auto-negotiating, auto-discovery, full/half duplex, DHCP For configuration management Connectors SPDIF SOURCES 1 – 2 (2) JIS F05 female (TOSLINK) optical fiber connector; S/PDIF optical digital audio input SPDIF SOURCES 3 – 4 (2) RCA female;...
- Page 36 Controls and Indicators (1) LED. White indicates that the device is switched on with audio passing. Red indicates that the device is in standby mode. Off indicates that there is no power from the power supply. (1) LED. White indicates that the device is switched on and has a valid IP address.
-
Page 37: Dimension Drawing
Weight 8.06 lb (3.65 kg) Compliance Regulatory Model: M1845004 FCC Part 15 Class B digital device, IC Class B, CE, ETL listed Dimension Drawing Product Manual — Doc. 9045H DM NAX™ • 32... -
Page 38: Dm-Nax-16Ain Specifications
DM-NAX-16AIN Specifications Product specifications for the DM-NAX-16AIN are provided below. Specifications Audio Input Signal Types 8 stereo unbalanced analog (RCA) includes (4) 5-pin phoenix balanced connector; 8 digital SPDIF (4 TOSLINK® and 4 Coaxial) Source Compensation ±10.0 dB per input Input Monitoring Source Signal Detect 0.002%... - Page 39 Controls and Indicators (1) LED. Amber indicates that the device is booting. White indicates that the device is switched on with audio passing. Red indicates that the device is in standby mode. Off indicates that there is no power from the power supply. (1) LED.
-
Page 40: Dimension Drawing
Dimension Drawing 35 • DM NAX™ Product Manual — Doc. 9045H... -
Page 41: Dm-Nax-Amp-X300 Specifications
DM-NAX-AMP-X300 Specifications Product specifications for the DM-NAX-AMP-X300 are provided below. Specifications Audio Input Signal Types Balanced/unbalanced analog line/mic-level and AoIP streams. Balanced Analog Input Maximum signal level: +21 dBu (8.7 Vrms) Impedance: >10k Ohms ƒ Response: 20 Hz to 20 kHz±0.5 dB THD+N: <0.005% @ 1 KHz S/N Ratio: 105 dB A-weight Channel Separation: 100 dB @ 1 KHz... - Page 42 Output Power Per Channel Mode 1 Channel Driven 2 Channels Driven 3 Channels Driven 4 Channels Driven Lo-Z, 8 Ω (single ended) 150 W 150 W 75 W 75 W Lo-Z, 4 Ω (single ended) 200 W 150 W 75 W 75 W Lo-Z, 8 Ω...
- Page 43 (1) LED; White indicates amplifier is on and ready for use; Amber indicates the amplifier is booting; Red indicates amplifier is in standby HI-Z (1) White LED; Indicates when Hi-Z mode is enabled (70V or 100V) (1) White LED; Indicates that the device has a valid IP address AoIP (1) White LED;...
-
Page 44: Dimension Drawings
Dimensions Height 1.74 in. (44 mm) Width 9.38 in. (238 mm) Depth 11.03 in. (280 mm) Weight 5.3 lb (2.4 kg ) Compliance Regulatory Model: M1845004 UL® Listed for US & Canada, CE, IC, FCC Part 15 Class B digital device Note: 1. -
Page 45: Installation
Installation Refer to the following sections for instructions on how to install the various DM NAX devices. DM-NAX-8ZSA DM-NAX-4ZSP DM-NAX-16AIN DM-NAX-AMP-X300 Product Manual — Doc. 9045H DM NAX™ • 40... -
Page 46: Dm-Nax-8Zsa Installation
DM-NAX-8ZSA Installation Refer to the following sections to install the DM-NAX-8ZSA. In the Box (below) Install the Device (on the facing page) Connect the Device (on page 43) Apple® AirPlay® Setup (on page 47) Spotify® Setup (on page 48) Reset (on page 49) Observe the LED Indicators (on page 49) -
Page 47: Install The Device
Install the Device Refer to the Safety Instructions (Doc. 6607) prior to installation. The device can be placed on a table or installed in a rack. Place on a Table Place the device on a table or stack on top of another device. Rack Installation This device occupies 2 RU of rack space. -
Page 48: Connect The Device
Rack Mounting Safety Precautions Elevated Operating Ambient Temperature: If installed in a closed or multi-unit rack assembly, the operating ambient temperature of the rack environment may be greater than room ambient temperature. Therefore, consideration should be given to installing the equipment in an environment compatible with the maximum ambient temperature (Tma) specified by the manufacturer. - Page 49 Rear Panel Product Manual — Doc. 9045H DM NAX™ • 44...
-
Page 50: Digital Inputs
Digital Inputs Refer to the following illustration when connecting digital audio sources. NOTE: Only 2-channel PCM digital audio is supported at the digital inputs. Analog Inputs Refer to the following illustration when connecting analog audio sources. 45 • DM NAX™ Product Manual —... -
Page 51: Speaker Connections
NOTE: The Line Outputs 1-4 mirror their respective Speaker Outputs 1-4. These outputs can feed another amplifier or an active subwoofer. Conventional Wiring Connect speakers to the DM-NAX-8ZSA as shown in the following illustration. Bridged Wiring Connect speaker outputs as shown in the following illustration to deliver more power to the speakers (8 ohm speakers only). -
Page 52: Balanced/Unbalanced Audio Output
To stream media from an iOS device to a speaker zone in your distributed audio system: 1. Ensure that the iOS device and DM-NAX-8ZSA are on the same network. 2. On the DM-NAX-8ZSA, enable AirPlay for the built-in media player you would like to stream to, either using the web UI or programming. -
Page 53: Spotify® Setup
To stream media from a device to a speaker zone in your distributed audio system: 1. Ensure that the device and DM-NAX-8ZSA are on the same network. 2. On the DM-NAX-8ZSA, enable Spotify for the built-in media player you would like to stream to, either using the web UI or programming. -
Page 54: Reset
After the Spotify streaming begins, you will be able to control the volume of the streaming DM- NAX-8ZSA speaker zones directly from your device. Reset A network reset or factory restore may be performed when troubleshooting. Network Reset 1. Ensure the device is powered on. 2. - Page 55 LED Indicator Color Meaning SOURCE 1-8 White Signal is detected on the specified input/source. There is clipping on an analog input or bitstream audio detected on a digital input. There is no signal detected on the specified input/source. ZONE 1-8 White There is audio output on the indicated zone.
-
Page 56: Dm-Nax-4Zsp Installation
DM-NAX-4ZSP Installation Refer to the following sections to install the DM-NAX-4ZSP. In the Box (below) Install the Device (on the facing page) Connect the Device (on page 53) Observe the LED Indicators (on page 55) Reset the Device (on page 56) Front Panel In the Box Qty. -
Page 57: Install The Device
Install the Device Refer to the Safety Instructions (Doc. 6607) prior to installation. The device can be placed on a table or installed in a rack. Place on a Flat Surface Place the device on a flat surface such as a table. Install in a Rack This device occupies 1U of rack space. -
Page 58: Connect The Device
Rack Mounting Safety Precautions Elevated Operating Ambient Temperature: If installed in a closed or multi-unit rack assembly, the operating ambient temperature of the rack environment may be greater than the room ambient temperature. Therefore, consideration should be given to installing the equipment in an environment compatible with the maximum ambient temperature (Tma) specified by the manufacturer. -
Page 59: Digital Inputs
Rear Panel Digital Inputs Refer to the following illustration when connecting digital audio sources. NOTE: Only 2-channel PCM digital audio is supported at the digital inputs. Analog Inputs Refer to the following illustration when connecting analog audio sources. Product Manual — Doc. 9045H DM NAX™... -
Page 60: Balanced/Unbalanced Audio Output
Balanced/Unbalanced Audio Output Refer to the following table and illustration for analog audio output pin assignments and connection information. Signal Name Balanced Audio Output Unbalanced Audio Output L− L Shield Shield/ground G, L Shield, and R Shield R Shield Observe the LED Indicators Refer to the following table for information about the LED indicators on the device. -
Page 61: Reset The Device
LED Indicator Color Meaning SOURCE 1-8 White Signal is detected on the specified input/source. There is clipping on an analog input or bitstream audio detected on a digital input. There is no signal detected on the specified input/source. ZONE 1-4 White There is audio output on the indicated zone. -
Page 62: Dm-Nax-16Ain Installation
DM-NAX-16AIN Installation Refer to the following sections to install the DM-NAX-16AIN. In the Box (below) Install the Device (on the facing page) Connect the Device (on page 60) Reset the Device (on page 62) Observe the LED Indicators (on page 63) Front Panel In the Box Qty. -
Page 63: Install The Device
Install the Device Refer to the Safety Instructions (Doc. 6607) prior to installation. The device can be placed on a flat surface or installed in a rack. Place on a Flat Surface Place the device on a flat surface such as a table. Product Manual —... -
Page 64: Install In A Rack
Install in a Rack This device occupies 1U of rack space. 1. Use a Phillips screwdriver (not included) to remove the three screws from each side of the device as shown in the illustration. 2. Use the screwdriver and the six screws (removed earlier) to attach the included rack ears to the device. -
Page 65: Connect The Device
Rack Mounting Safety Precautions Elevated Operating Ambient Temperature: If installed in a closed or multi-unit rack assembly, the operating ambient temperature of the rack environment may be greater than the room ambient temperature. Therefore, consideration should be given to installing the equipment in an environment compatible with the maximum ambient temperature (Tma) specified by the manufacturer. -
Page 66: Digital Inputs
Rear Panel Digital Inputs Refer to the following illustration when connecting digital audio sources. NOTE: Only 2-channel PCM digital audio is supported at the digital inputs. Analog Inputs Refer to the following illustration when connecting analog audio sources. 61 • DM NAX™ Product Manual —... -
Page 67: Balanced/Unbalanced Audio Input
Balanced/Unbalanced Audio Input Refer to the following table and illustration for analog audio input pin assignments and connection information. Signal Name Balanced Audio Input Unbalanced Audio Input L− Open Shield/ground Open Open Reset the Device A network reset or factory restore may be performed when troubleshooting. Network Reset 1. -
Page 68: Observe The Led Indicators
The device will reboot, and all the factory default settings will be restored, such as Zone settings, names, multicast addressing, etc. CAUTION: Performing a factory restore will clear all settings from the device configuration. Observe the LED Indicators Refer to the following table for information about the LED indicators on the device. LED Indicator Color Meaning... -
Page 69: Dm-Nax-Amp-X300 Installation
DM-NAX-AMP-X300 Installation Refer to the following sections to install the DM-NAX-AMP-X300. In the Box (on the next page) Install the Device (on page 66) Connect the Device (on page 70) Speaker Mode Selection Switch (on page 70) Lo-Z Modes Selection Switch (on page 71) Reset the Device (on page 72) Observe the LED Indicators (on page 71) Product Manual —... -
Page 70: In The Box
In the Box Qty. Description DM-NAX-AMP-X300 Additional Items Plate, Joining (2055198) Screw, 8-32 x 5/16 in., Flat Head, Philips, Black (2055195) Screw, 6-32 x 3/8 in., Undercut Head, Philips (2055196) Foot, Adhesive, Black (2055200) Rack Ear Assembly, 1U, Quarter-width (2055197), includes Bracket, Rack Ear, 1U (2055199) Connector, Speaker (2055026) Connector, input, output (2055207) Connector, 2-Pin (2003574) -
Page 71: Install The Device
Install the Device The DM-NAX-AMP-X300 can be placed or mounted on a flat surface or installed in a rack. Place on a Flat Surface Place the DM-NAX-AMP-X300 on a table or other flat surface. Attach the four adhesive feet as shown below. - Page 72 2. Position the device as desired and use screws (not included) and anchors (not included) to mount it. Rack Installation The DM-NAX-AMP-X300 occupies one half of 1RU of rack space. Two DM-NAX-AMP-X300 units can be placed together and only occupy 1 RU of rack space. Single Amp To install the included rack ears on a single DM-NAX-AMP-X300: 1.
- Page 73 1. On a flat surface, place the amplifiers upside-down and adjacent to each other. 2. Using a Philips screwdriver and the eight included 8-32 x 5/16 in. screws, gang the amplifiers together with two of the joining plates. 3. Use a wrench or M5.5 socket to remove the nuts from the rack ears. 4.
- Page 74 room ambient temperature. Therefore, consideration should be given to installing the equipment in an environment compatible with the maximum ambient temperature (Tma) specified by the manufacturer. Reduced Airflow: Installation of the equipment in a rack should be such that the amount of airflow required for safe operation of the equipment is not compromised.
-
Page 75: Connect The Device
Connect the Device Make the necessary connections as called out in the following illustration. CAUTION: Keep the device unplugged until all of the input, network, output, and speaker wiring is complete. Check the speaker cables for shorts and frayed wiring around the speaker output connectors. -
Page 76: Lo-Z Modes Selection Switch
70V: Set the switch to 70V to use the amplifier in a 70V distributed audio system. 100V: Set the switch to 100V to use the amplifier in a 100V distributed audio system. Lo-Z Modes Selection Switch When operating in Lo-Z mode, the DM-NAX-AMP-X300 outputs can operate in stereo, as summed outputs or as bridged outputs. -
Page 77: Reset The Device
The LEDs provide the following information: LED Indicator Color Meaning White The device is operating normally. Amber The device is booting. The device has entered Standby (Power Saver) mode. Hi-Z mode is enabled (70V or 100V); Hi-Z White Channels 1-2 and 3-4 are bridged and set to 70V or 100V operation. White The device has a valid IP address. -
Page 78: Configuration
Configuration The following products can be configured: DM-NAX-8ZSA (on page 74) DM-NAX-16AIN (on page 194) DM-NAX-4ZSP (on page 133) DM-NAX-AMP-X300 (on page 226) Product Manual — Doc. 9045H DM NAX™ • 73... -
Page 79: Dm-Nax-8Zsa
DM-NAX-8ZSA This section describes how to configure the DM-NAX-8ZSA. Web Interface Configuration The DM-NAX-8ZSA web interface allows you to view status information and configure network and device settings. Access the Web Interface To access the web interface, do either of the following: Access the Web Interface with a Web Browser (on the facing page) Access the Web Interface With the Crestron Toolbox™... - Page 80 Access the Web Interface with a Web Browser 1. Enter the IP address of the DM-NAX-8ZSA into a web browser. NOTE: To obtain the IP address, use the Device Discovery Tool option in Crestron Toolbox™ application or an IP scanner application.
- Page 81 3. Enter the username in the Username field. 4. Enter the password in the Password field. 5. Click Sign In. 76 • DM NAX™ Product Manual — Doc. 9045H...
-
Page 82: Action
Action The Action drop-down menu is displayed at the top right side of the interface and provides quick access to common device functionalities: Save Changes Revert Reboot Restore Update Firmware Download Logs Manage Certificates Manage Audio Profiles Product Manual — Doc. 9045H DM NAX™... - Page 83 Click Revert to revert the device back to the last saved configuration settings. Reboot the DM-NAX-8ZSA Certain changes to the settings may require the DM-NAX-8ZSA to be rebooted to take effect. To reboot the device, do the following: 1. Click Reboot in the Actions drop-down menu. The Confirmation message box appears.
- Page 84 You can also restore to factory settings by pressing and holding the SETUP button on the rear panel of the device with power disconnected then connect the power supply and continue to hold SETUP button for 30 seconds. Update Firmware 1.
- Page 85 1. Click Manage Certificates in the Actions drop-down menu. The following certificate tabs are displayed: Root: The Root certificate is used by the DM-NAX-8ZSA to validate the network's authentication server. The DM-NAX-8ZSA has a variety of Root certificates, self-signed by trusted CAs (Certificate Authorities) preloaded into the device. Root certificates must be self-signed.
- Page 86 To Add Certificates 1. Click the corresponding certificate tab. 2. Click the Add Root Certificate button. 3. Click the + Browse button. 4. Locate and select the file, and then click the Open button. NOTE: If the certificate is a Machine Certificate, enter the password provided by the network administrator.
- Page 87 Manage Audio Profiles Use the Manage Audio Profiles dialog to add, remove, and manage the audio profiles of speakers. Click Manage Audio Profiles in the Actions drop-down menu. The following audio profiles tabs are displayed, providing information such as Model, Manufacturer, and Type of the speaker profiles: Default Profiles: Lists the default library of included speaker profiles.
- Page 88 To Add a Speaker Profile 1. Click the User Profiles tab. 2. Click the + Add Profiles button. 3. Click the + Browse button. 4. Locate and select the .prof file, and then click the Open button. 5. Click the Upload button. 6.
-
Page 89: Status
Serial Number), current network settings (such as Host Name and IP Address, etc.), and input and output ports' current status. The Status tab can be accessed at any time by clicking the Status tab of the DM-NAX-8ZSA interface. Information displayed on the Status tab is organized into different sections. - Page 90 The Network section displays network-related information about the DM-NAX-8ZSA, including the Hostname, Domain Name, and DNS Servers. NOTE: By default, the host name of the DM-NAX-8ZSA consists of the model name followed by the MAC address of the device. For example, DM-NAX-8ZSA-00107FB58088.
- Page 91 NOTE: The + Adapter 2 option appears when the dual Ethernet ports on the DM-NAX-8ZSA are set to isolate traffic using the Port Selection feature. Control System The Control System section displays connection information, consisting of the following: Encrypt Connection: ON or OFF...
-
Page 92: Settings
Settings The Settings tab enables you to configure the DM-NAX-8ZSA settings. The Settings page can be accessed at any time by clicking the Settings tab of the DM-NAX-8ZSA interface. Information displayed on the Settings tab is organized into different sections. - Page 93 Date/Time Use the Date/Time section to configure the date and time settings of the DM-NAX-8ZSA. Time Synchronization 1. Move the Time Synchronization slider to specify whether time synchronization will be enabled (right) or disabled (left). By default, time synchronization is enabled.
- Page 94 The DM-NAX-8ZSA can be automatically updated with the latest firmware at scheduled intervals. 1. Using the Crestron Auto Update Tool, generate a manifest file. The file is placed on an FTP (File Transfer Protocol) or SFTP (Secure File Transfer Protocol) server.
- Page 95 The Network section displays network-related information about the DM-NAX-8ZSA, including the Host Name, Domain, Primary Static DNS, and Secondary Static DNS. NOTE: By default, the host name of the DM-NAX-8ZSA consists of the model name followed by the MAC address of the device. For example, DM-NAX-8ZSA-00107FB58088.
- Page 96 3. Enter the password in the Control System Password field. 4. Enter the Room ID in the Room ID field. 5. Enter the IP ID of the DM-NAX-8ZSA in the IP ID field. 6. Enter the IP address or hostname of the control system in the IP Address/Hostname field.
- Page 97 Chimes The Chimes section allows the built-in chime files to be assigned to any of the output zones on the device. Click the cells corresponding to the desired Zones for playback of that specific chime sound. You can select multiple chimes for the same zone. The maximum supported chime length is 10 seconds.
- Page 98 2. To set the volume, do one of the following: Move the Volume slider to the right to increase or to the left to decrease the chime volume. Click the % arrows to increase or decrease the chime volume. Values range from 0 to 100%, adjustable in increments of 1%.
- Page 99 To configure the zone volume: 1. If needed, edit the name of the zone in the Name field. 2. To set the zone volume, do one of the following: Move the Volume slider to the right to increase or to the left to decrease the zone volume.
- Page 100 Configure Balance (Autosaved) 1. To set the balance, do one of the following: Move the Balance slider to the right to increase or to the left to decrease the balance. Click the arrows to increase or decrease the balance. Values range from -50 to 50, adjustable in increments of 1.
- Page 101 Configure Minimum/Maximum Volume (Autosaved) 1. To set the minimum volume, do one of the following: Move the Minimum slider to the right to increase or to the left to decrease the minimum volume. Click the % arrows to increase or decrease the minimum volume. Values range from 0 to 50%, adjustable in increments of 1%.
- Page 102 Configure Stereo/Mono (Autosaved) 1. Select either Stereo or Mono from the Stereo/Mono field. 2. Select the zone configuration from the Zone Configuration drop-down menu. Values are Standard, Bridged, Bridged 2.1, Bridged Sub 2.1, and Bridged Mono. NOTE: The Stereo/Mono field is disabled for the Bridge Mono, Bridged 2.1, and Bridged Sub 2.1 zone configurations.
- Page 103 Bridged Mono Mono - Bridged 98 • DM NAX™ Product Manual — Doc. 9045H...
- Page 104 Bridged 2.1 Product Manual — Doc. 9045H DM NAX™ • 99...
- Page 105 Stereo - Bridged Bridged Sub 2.1 100 • DM NAX™ Product Manual — Doc. 9045H...
- Page 106 Signal (Autosaved) The Signal (Autosaved) section displays the Signal and Clipping status. If the signal is present but not clipping, then the Signal status changes to Present in green and Clipping status changes to None in green. If both signal and clipping are present, then the Signal status changes to Present in green and Clipping status changes to Present in red.
- Page 107 Configure Speaker Profile (Autosaved) A speaker profile is used to optimize speaker performance by adjusting equalizer bands, speaker protection, maximum amp output wattage, and impedance values to match the speaker's specific characteristics. In the Global Filter field, enter the speaker's profile name to search for the profile. The speaker profile matching the search criteria is displayed.
- Page 108 Speaker Configuration (Autosaved) 1. To enable the peak limiter on the zone output, move the Enable Speaker Protect slider to the right position. To disable the peak limiter, move the slider to the left position. By default, Enable Speaker Protect is set to the left position. 2.
- Page 109 Casting (Autosaved) Casting is used to enable or disable streaming services, as well as set the casting volume and name. To configure Casting: 1. The maximum casting volume is an alternate (to the maximum volume set in the Configure Minimum/Maximum Volume (Autosaved) (on page 96)) setting applied to the zone when a casting service is routed to it.
- Page 110 1. Move the Spotify slider to the right to enable Spotify. To stream media from an iOS device or Spotify app to a speaker zone in your distributed audio system, refer to the DM-NAX-8ZSA Quick Start. Speaker/Faults (Autosaved) The Speaker/Faults section displays the status of DC Offset Fault, Over Current Fault, Clipping Detected, Over or Under Voltage, and Over Temperature.
- Page 111 Configure Signal Generator (Autosaved) The signal generator is a troubleshooting function that allows an integrator to send an audio test signal out to the selected zone to check output functionality. 1. To enable the Signal Generator output, click the Signal Generator Inactive button. To disable the Signal Generator output, click the Signal Generator Active button.
- Page 112 Configure Equalizer Settings (Autosaved) 1. Move the Speaker EQ Enabled slider to the right position to enable the speaker EQ. Move the slider to the left position to disable the speaker EQ. NOTE: When the Speaker EQ Enabled is disabled, all bands of the equalizer will be bypassed to allow for A/B testing of the entire EQ curve.
- Page 113 e. The individual Bypass controls allow you to bypass a single band of EQ at a time for a more granular A/B testing of a single filter. To enable the bypass, move the Bypass slider to the right position. To disable the bypass, move the slider to the left position. By default, Bypass is disabled.
- Page 114 The Inputs menu is used to configure Name, Compensation, and Mute, attributes of the available analog, digital, and media streaming inputs on the DM-NAX-8ZSA. A total of 16 inputs are spread across an array of connectors. Only the first 8 inputs are related to physical connectors.
- Page 115 Device is Master PTP Clock Source indicates whether the device is the master for PTP on the network. Yes will be displayed in green when the local DM-NAX-8ZSA is the PTP clock master and No will be displayed in red when another PTP clock on the network is operating as the master clock.
- Page 116 Configure Transmitters NOTE: To configure the transmitter banks not shown on the first page, click the icon to display the next eight transmitters. To configure a DM NAX transmit stream for any of the available inputs, do the following. 1. Enter a validated Multicast address in the NAX Stream Address field. 2.
- Page 117 Configure Receivers Click Receivers to display the following information: 1. Enter the multicast address of a transmitting stream to connect the receiver in the Requested Stream Address field. 2. Click the configure button ( ) in the Actions column. The Configure dialog appears. 3.
- Page 118 Routing The Routing page is used to route a local input, media player, or AES67 stream to a Zone on the DM-NAX-8ZSA.. NOTE: To receive an AES67 stream from Dante devices, see 1001151. To route an input to the zones, click the box under the name of the corresponding input.
- Page 119 To select a specific NAX/AES67 stream when AES67 is selected as the source for a Zone, do the following: Click to display the list of streams available and select the desired stream to be routed to the specific zone. Click OK to save or click Cancel to cancel the changes. To route a single input to all the zones, click on the Input icon.
- Page 120 Streaming Services Profiles can be created with discrete credentials to enable multiple users access to media streaming services without interfering with other users' recommendations, favorites, or playlists. To configure Streaming Services: 1. To enable end user access, move the End User Access slider to the right position. To disable end user access, move the slider to the left position.
- Page 121 5. Select from the available Streaming Services: TIDAL™, Deezer®, Qobuz®, Spotify Connect™, SiriusXM®, Pandora®, Internet Radio, and Podcasts. 6. Click to add or delete the desired streaming services for each user profile. User Authentication User authentication is required for TIDAL, Deezer, Qobuz, SiriusXM and Pandora. Click authorize the user.
- Page 122 To authenticate Deezer streaming: 1. Click on the link to log in to the Deezer portal. NOTE: The link is valid for one minute. After one minute, the link expires, and the Authorize URL is shown as blank. The user needs to be reauthorized. 2.
- Page 123 To authenticate Pandora streaming: 1. Copy the activation code by clicking the icon. 2. Click the link to register the device. The Device Activation page is displayed. NOTE: The link is valid for one minute. After one minute, the link expires, and the Authorize URL and Enter Code are shown as blank.
- Page 124 User Profile Authentication Spotify Connect supports user profiles. A user profile is used to save or recall presets from a Spotify Connect account. Click to authorize the user profile. NOTE: While casting, use the same Spotify account to save presets to the user profile. Enter the user profile credentials and click OK.
- Page 125 NOTE: Ports 1 and 2 correspond to the Ethernet Adapters 1 and 2 on the rear panel of the DM-NAX-8ZSA, respectively. 2. With the port selection enabled, select an Ethernet port from the Management drop- down menu to assign traffic type.
-
Page 126: Security
Click the Security tab to configure security for users and groups and to allow different levels of access to the DM-NAX-8ZSA functions. By default, security is disabled. Select Encrypt and Validate, Encrypt, or OFF in the SSL Mode drop-down menu, to specify whether to use encryption. - Page 127 Current User Click the Current User tab to view read-only information or to change the password for the current user. 1. Click the Change Current User Password button to provide a new password for the current user. 2. In the Change Password dialog, enter the current password in the Current Password field, the new password in the Password field, and then re-enter the same new password in the Confirm Password field.
- Page 128 Users Click the Users tab to view and edit user settings. The Users tab can be used to add or remove local and Active Directory users and preview information about users. Use the Search Users field to enter search term(s) and display users that match the search criteria.
- Page 129 Create a New Local User 1. Click the Create User button in the User tab. 2. In the Create User dialog, enter the following: a. Enter a user name in the Name field. A valid user name can consist of alphanumeric characters (letters a-z, A-Z, numbers 0-9) and the underscore “_”...
- Page 130 Active Directory server. To grant access to an Active Directory user, you can either add the user to a local group on the DM-NAX-8ZSA, or add the Active Directory group(s) that they are a member of to the DM-NAX-8ZSA.
- Page 131 View User Details Click the information button ( ) in the Actions column to view information for the selected user. The User Details dialog displays the following information for the selected user. Name: Displays the name of the selected user. Active Directory User: Displays whether the user is an Active Directory user.
- Page 132 Groups Click the Groups tab to view and edit group settings. The Groups tab can be used to add local and Active Directory groups, remove local and Active Directory groups, and preview information about a group. Use the Search Groups field to enter search term(s) and display groups that match the search criteria.
- Page 133 A group cannot be created or removed from the Active Directory server, but access can be granted to an existing group in Active Directory. Once the group is added, all members of that group will have access to the DM-NAX-8ZSA. 1. Click the Create Group button.
- Page 134 3. Assign the group access level by selecting a predefined access level (Administrator, Connect, Operator, Programmer, User) from the Access Level drop-down list. NOTE: Make sure that the Active Directory Group slider is enabled. 4. Click OK to save. Click Cancel to cancel the changes. Delete a Group Click the trashcan button ( ) in the Actions column to delete a group.
-
Page 135: 802.1X Configuration
802.1x Configuration The DM-NAX-8ZSA has built-in support for the 802.1X standard (an IEEE network standard designed to enhance the security of wireless and Ethernet LANs. The standard relies on the exchange of messages between the device and the network's host, or authentication server), allowing communication with the authentication server and access to protected corporate networks. - Page 136 To Configure DM-NAX-8ZSA for 802.1X Authentication 1. Move the IEEE 802.1X Authentication slider to enabled. This will enable all options on the 802.1X dialog. 2. Select the Authentication method: EAP-TLS Certificate or EAP-MSCHAP V2 Password according to the network administrator's requirement.
-
Page 137: Access The Web Interface With The Crestron Toolbox™ Application
Discovery Tool by clicking the Device Discovery Tool button ( ) in the Crestron Toolbox toolbar. The DM-NAX-8ZSA is discovered and listed in the device list on the left side of the screen. The associated host name, IP address, and firmware version are also displayed. -
Page 138: Dm-Nax-4Zsp
To access the web interface, do either of the following: Access the Web Interface with a Web Browser (on the next page) Access the Web Interface With the Crestron Toolbox™ Application (on page 225) The web interface is accessed from a web browser. The following table lists operating systems and their corresponding supported web browsers. - Page 139 Access the Web Interface with a Web Browser 1. Enter the IP address of the DM-NAX-4ZSP into a web browser. NOTE: To obtain the IP address, use the Device Discovery Tool option in Crestron Toolbox™ application or an IP scanner application.
- Page 140 3. Enter the username in the Username field. 4. Enter the password in the Password field. 5. Click Sign In. Product Manual — Doc. 9045H DM NAX™ • 135...
-
Page 141: Action
Action The Action drop-down menu is displayed at the top right side of the interface and provides quick access to common device functionalities: Save Changes Revert Reboot Restore Update Firmware Download Logs Manage Certificates Manage Audio Profiles 136 • DM NAX™ Product Manual —... - Page 142 Save Changes Click Save Changes to save any changes made to the configuration settings. Revert Click Revert to revert the device back to the last saved configuration settings. Reboot the DM-NAX-4ZSP Certain changes to the settings may require the DM-NAX-4ZSP to be rebooted to take effect. To reboot the device, do the following: 1.
- Page 143 You can also restore to factory settings by pressing and holding the SETUP button on the rear panel of the device with power disconnected then connect the power supply and continue to hold SETUP button for 30 seconds. Update Firmware 1.
- Page 144 Manage Certificates Use the Manage Certificates dialog to add, remove, and manage certificates used in 802.1x and other protected networks. 1. Click Manage Certificates in the Actions drop-down menu. The following certificate tabs are displayed: Root: The Root certificate is used by the DM-NAX-4ZSP to validate the network's authentication server.
- Page 145 To Add Certificates 1. Click the corresponding certificate tab. 2. Click the Add Root Certificate button. 3. Click the + Browse button. 4. Locate and select the file, and then click the Open button. NOTE: If the certificate is a Machine Certificate, enter the password provided by the network administrator.
- Page 146 In the Search field, enter the speaker's profile name to search for the profile. The speaker profile matching the search criteria is displayed. NOTE: To create a custom speaker profile, see 1001820. To Add a Speaker Profile 1. Click the User Profiles tab. 2.
-
Page 147: Status
Status The Status tab is the first page displayed when opening the interface of the DM-NAX-4ZSP. It displays general information about the DM-NAX-4ZSP (such as Model Name, Firmware Version, and Serial Number), current network settings (such as Host Name and IP Address, etc.), and input and output ports' current status. - Page 148 Click + More Details to review additional information about the DM-NAX-4ZSP. Network The Network section displays network-related information about the DM-NAX-4ZSP, including the Hostname, Domain Name, and DNS Servers. NOTE: By default, the host name of the DM-NAX-4ZSP consists of the model name followed by the MAC address of the device.
- Page 149 Click + Adapter 1 to display an expanded section that shows additional information. If + Adapter 1 is selected, click - Less details to collapse the section. NOTE: The + Adapter 2 option appears when the dual Ethernet ports on the DM-NAX-4ZSP are set to isolate traffic.
-
Page 150: Settings
Settings The Settings tab enables you to configure the DM-NAX-4ZSP settings. The Settings page can be accessed at any time by clicking the Settings tab of the DM-NAX-4ZSP interface. Information displayed on the Settings tab is organized into different sections. System Setup The System Setup section displays information about the Date/Time, Auto Update, Network, and Control System. - Page 151 Date/Time Use the Date/Time section to configure the date and time settings of the DM-NAX-4ZSP. Time Synchronization 1. Move the Time Synchronization slider to specify whether time synchronization will be enabled (right) or disabled (left). By default, time synchronization is enabled. 2.
- Page 152 The DM-NAX-4ZSP can be automatically updated with the latest firmware at scheduled intervals. 1. Using the Crestron Auto Update Tool, generate a manifest file. The file is placed on an FTP (File Transfer Protocol) or SFTP (Secure File Transfer Protocol) server.
- Page 153 Network The Network section displays network-related information about the DM-NAX-4ZSP, including the Host Name, Domain, Primary Static DNS, and Secondary Static DNS. NOTE: By default, the host name of the DM-NAX-4ZSP consists of the model name followed by the MAC address of the device. For example, DM-NAX-4ZSP-00107FB58088. Adapter 1 Displays DHCP, IP Address, Subnet Mask, and Default Gateway.
- Page 154 Control System 1. Move the Encrypt Connection slider to specify whether the encryption will be enabled (right) or disabled (left). By default, Encrypt Connection is enabled. 2. Enter the username in the Control System Username field. 3. Enter the password in the Control System Password field. 4.
- Page 155 Chimes The Chimes section allows the built-in chime files to be assigned to any of the output zones on the device. Click the cells corresponding to the desired Zones for playback of that specific chime sound. You can select multiple chimes for the same zone. The maximum supported chime length is 10 seconds.
- Page 156 1. Click the icon corresponding to the zone. The Configure dialog appears. 2. To set the volume, do one of the following: Move the Volume slider to the right to increase or to the left to decrease the chime volume. Click the % arrows to increase or decrease the chime volume.
- Page 157 To configure the zone volume: 1. If needed, edit the name of the zone in the Name field. 2. To set the zone volume, do one of the following: Move the Volume slider to the right to increase or to the left to decrease the zone volume.
- Page 158 Product Manual — Doc. 9045H DM NAX™ • 153...
- Page 159 Configure Balance (Autosaved) 1. To set the balance, do one of the following: Move the Balance slider to the right to increase or to the left to decrease the balance. Click the arrows to increase or decrease the balance. Values range from -50 to 50, adjustable in increments of 1.
- Page 160 Product Manual — Doc. 9045H DM NAX™ • 155...
- Page 161 Configure Minimum/Maximum Volume (Autosaved) 1. To set the minimum volume, do one of the following: Move the Minimum slider to the right to increase or to the left to decrease the minimum volume. Click the % arrows to increase or decrease the minimum volume. Values range from 0 to 50%, adjustable in increments of 1%.
- Page 162 Configure Stereo/Mono (Autosaved) 1. Select either Stereo or Mono from the Stereo/Mono field. 2. Select the zone configuration from the Zone Configuration drop-down menu. Values are Standard, Bridged, Bridged 2.1, Bridged Sub 2.1, and Bridged Mono. NOTE: The Stereo/Mono field is disabled for the Bridge Mono, Bridged 2.1, and Bridged Sub 2.1 zone configurations.
- Page 163 Bridged Mono Mono - Bridged 158 • DM NAX™ Product Manual — Doc. 9045H...
- Page 164 Bridged 2.1 Product Manual — Doc. 9045H DM NAX™ • 159...
- Page 165 Stereo - Bridged Bridged Sub 2.1 160 • DM NAX™ Product Manual — Doc. 9045H...
- Page 166 Signal (Autosaved) The Signal (Autosaved) section displays the Signal and Clipping status. If the signal is present but not clipping, then the Signal status changes to Present in green and Clipping status changes to None in green. If both signal and clipping are present, then the Signal status changes to Present in green and Clipping status changes to Present in red.
- Page 167 Configure Bussing Volume Offset (Autosaved) 1. To set the bussing volume offset, do one of the following: Move the Bussing Volume Offset slider to the right to increase or to the left to decrease the bussing volume offset. Click the db arrows to increase or decrease the bussing volume offset. Values range from -12 db to 12 db, adjustable in increments of 1 db.
- Page 168 Configure Speaker Profile (Autosaved) A speaker profile is used to optimize speaker performance by adjusting equalizer bands, speaker protection, maximum amp output wattage, and impedance values to match the speaker's specific characteristics. To apply a speaker profile: 1. Select the speaker manufacturer from the Select Manufacturer drop-down menu. 2.
- Page 169 Speaker Configuration (Autosaved) 1. To enable the peak limiter on the zone output, move the Enable Speaker Protect slider to the right position. To disable the peak limiter, move the slider to the left position. By default, Enable Speaker Protect is set to the left position. 2.
- Page 170 Casting (Autosaved) Casting is used to enable or disable streaming services, as well as set the casting volume and name. To configure Casting: 1. The maximum casting volume is an alternate (to the maximum volume set in the Configure Minimum/Maximum Volume (Autosaved) (on page 156)) setting applied to the zone when a casting service is routed to it.
- Page 171 To enable Apple AirPlay®: 1. Move the AirPlay slider to the right to enable AirPlay. To enable Spotify Connect™: 1. Move the Spotify slider to the right to enable Spotify. To stream media from an iOS device or Spotify app to a speaker zone in your distributed audio system, refer to the DM-NAX-4ZSP Quick Start.
- Page 172 Configure Signal Generator (Autosaved) The signal generator is a troubleshooting function that allows an integrator to send an audio test signal out to the selected zone to check output functionality. 1. To enable the Signal Generator output, click the Signal Generator Inactive button. To disable the Signal Generator output, click the Signal Generator Active button.
- Page 173 Configure Equalizer Settings (Autosaved) 1. Move the Speaker EQ Enabled slider to the right position to enable the speaker EQ. Move the slider to the left position to disable the speaker EQ. NOTE: When the Speaker EQ Enabled is disabled, all bands of the equalizer will be bypassed to allow for A/B testing of the entire EQ curve.
- Page 174 e. The individual Bypass controls allow you to bypass a single band of EQ at a time for a more granular A/B testing of a single filter. To enable the bypass, move the Bypass slider to the right position. To disable the bypass, move the slider to the left position. By default, Bypass is disabled.
- Page 175 Inputs The Inputs menu is used to configure Name, Compensation, and Mute, attributes of the available analog, digital, and media streaming inputs on the DM-NAX-4ZSP. A total of 16 inputs are spread across an array of connectors. Only the first 8 inputs are related to physical connectors.
- Page 176 To configure the DSP settings, see Zone Settings. Click NAX Streams to display the following information. Device is Master PTP Clock Source indicates whether the device is the master for PTP on the network. Yes will be displayed in green when the local DM-NAX-4ZSP is the PTP clock master and No will be displayed in red when another PTP clock on the network is operating as the master clock.
- Page 177 Configure Transmitters NOTE: To configure the transmitter banks not shown on the first page, click the icon to display the next eight transmitters. To configure a DM NAX transmit stream for any of the available inputs, do the following. 1. Enter a validated Multicast address in the NAX Stream Address field. 2.
- Page 178 Configure Receivers Click Receivers to display the following information: 1. Enter the multicast address of a transmitting stream to connect the receiver in the Requested Stream Address field. 2. Click the configure button ( ) in the Actions column. The Configure dialog appears. 3.
- Page 179 Routing The Routing page is used to route a local input, media player, or AES67 stream to a Zone on the DM-NAX-4ZSP.. NOTE: To receive an AES67 stream from Dante devices, see 1001151. To route an input to the zones, click the box under the name of the corresponding input. To route inputs to zones on the device: Click the cells corresponding to the desired zone that are to be paired for routing.
- Page 180 To select a specific NAX/AES67 stream when AES67 is selected as the source for a Zone, do the following: Click to display the list of streams available and select the desired stream to be routed to the specific zone. Click OK to save or click Cancel to cancel the changes. To route a single input to all the zones, click on the Input icon.
- Page 181 Streaming Services Profiles can be created with discrete credentials to enable multiple users access to media streaming services without interfering with other users' recommendations, favorites, or playlists. To configure Streaming Services: 1. To enable end user access, move the End User Access slider to the right position. To disable end user access, move the slider to the left position.
- Page 182 5. Select from the available Streaming Services: TIDAL™, Deezer®, Qobuz®, Spotify Connect™, SiriusXM®, Pandora®, Internet Radio, and Podcasts. 6. Click to add or delete the desired streaming services for each user profile. User Authentication User authentication is required for TIDAL, Deezer, Qobuz, SiriusXM and Pandora. Click authorize the user.
- Page 183 To authenticate Deezer streaming: 1. Click on the link to log in to the Deezer portal. NOTE: The link is valid for one minute. After one minute, the link expires, and the Authorize URL is shown as blank. The user needs to be reauthorized. 2.
- Page 184 To authenticate Pandora streaming: 1. Copy the activation code by clicking the icon. 2. Click the link to register the device. The Device Activation page is displayed. NOTE: The link is valid for one minute. After one minute, the link expires, and the Authorize URL and Enter Code are shown as blank.
- Page 185 User Profile Authentication Spotify Connect supports user profiles. A user profile is used to save or recall presets from a Spotify Connect account. Click to authorize the user profile. NOTE: While casting, use the same Spotify account to save presets to the user profile. Enter the user profile credentials and click OK.
- Page 186 To configure port selection: 1. To enable the port selection, move the Port Selection slider to the right position. To disable the port selection, move the slider to the left position. By default, Port Selection is disabled. NOTE: Ports 1 and 2 correspond to the Ethernet Adapters 1 and 2 on the rear panel of the DM-NAX-4ZSP, respectively.
-
Page 187: Security
Security Click the Security tab to configure security for users and groups and to allow different levels of access to the DM-NAX-4ZSP functions. By default, security is disabled. Select Encrypt and Validate, Encrypt, or OFF in the SSL Mode drop-down menu, to specify whether to use encryption. - Page 188 Current User Click the Current User tab to view read-only information or to change the password for the current user. 1. Click the Change Current User Password button to provide a new password for the current user. 2. In the Change Password dialog, enter the current password in the Current Password field, the new password in the Password field, and then re-enter the same new password in the Confirm Password field.
- Page 189 Users Click the Users tab to view and edit user settings. The Users tab can be used to add or remove local and Active Directory users and preview information about users. Use the Search Users field to enter search term(s) and display users that match the search criteria.
- Page 190 Create a New Local User 1. Click the Create User button in the User tab. 2. In the Create User dialog, enter the following: a. Enter a user name in the Name field. A valid user name can consist of alphanumeric characters (letters a-z, A-Z, numbers 0-9) and the underscore “_”...
- Page 191 Add an Active Directory User Users cannot be created or removed from the Active Directory server, but access can be granted to an existing user in the Active Directory server. To grant access to an Active Directory user, you can either add the user to a local group on the DM-NAX-4ZSP, or add the Active Directory group(s) that they are a member of to the DM-NAX-4ZSP.
- Page 192 View User Details Click the information button ( ) in the Actions column to view information for the selected user. The User Details dialog displays the following information for the selected user. Name: Displays the name of the selected user. Active Directory User: Displays whether the user is an Active Directory user.
- Page 193 Groups Click the Groups tab to view and edit group settings. The Groups tab can be used to add local and Active Directory groups, remove local and Active Directory groups, and preview information about a group. Use the Search Groups field to enter search term(s) and display groups that match the search criteria.
- Page 194 Create Local Group 1. Click the Create Group button. 2. In the Create Group dialog, enter the following: a. Enter the group name in the Name field. b. Assign the group access level by selecting a predefined access level (Administrator, Connect, Operator, Programmer, User) from the Access Level drop-down list.
- Page 195 3. Assign the group access level by selecting a predefined access level (Administrator, Connect, Operator, Programmer, User) from the Access Level drop-down list. NOTE: Make sure that the Active Directory Group slider is enabled. 4. Click OK to save. Click Cancel to cancel the changes. Delete a Group Click the trashcan button ( ) in the Actions column to delete a group.
-
Page 196: 802.1X Configuration
802.1x Configuration The DM-NAX-4ZSP has built-in support for the 802.1X standard (an IEEE network standard designed to enhance the security of wireless and Ethernet LANs. The standard relies on the exchange of messages between the device and the network's host, or authentication server), allowing communication with the authentication server and access to protected corporate networks. - Page 197 To Configure DM-NAX-4ZSP for 802.1X Authentication 1. Move the IEEE 802.1X Authentication slider to enabled. This will enable all options on the 802.1X dialog. 2. Select the Authentication method: EAP-TLS Certificate or EAP-MSCHAP V2 Password according to the network administrator's requirement. 3.
-
Page 198: Access The Web Interface With The Crestron Toolbox™ Application
Access the Web Interface With the Crestron Toolbox™ Application To access the web interface by opening a web browser within the Crestron Toolbox™ application, do the following: 1. Open the Crestron Toolbox application. 2. From the Tools menu, select Device Discovery Tool. You can also access the Device... -
Page 199: Dm-Nax-16Ain
To access the web interface, do either of the following: Access the Web Interface with a Web Browser (on the facing page) Access the Web Interface With the Crestron Toolbox™ Application (on page 225) The web interface is accessed from a web browser. The following table lists operating systems and their corresponding supported web browsers. - Page 200 Access the Web Interface with a Web Browser 1. Enter the IP address of the DM-NAX-16AIN into a web browser. NOTE: To obtain the IP address, use the Device Discovery Tool option in Crestron Toolbox™ application or an IP scanner application.
- Page 201 3. Enter the username in the Username field. 4. Enter the password in the Password field. 5. Click Sign In. 196 • DM NAX™ Product Manual — Doc. 9045H...
-
Page 202: Action
Action The Action drop-down menu is displayed at the top right side of the interface and provides quick access to common device functionalities: Reboot Restore Update Firmware Download Logs Manage Certificates Save Changes Revert Product Manual — Doc. 9045H DM NAX™ • 197... - Page 203 Reboot the DM-NAX-16AIN Certain changes to the settings may require the DM-NAX-16AIN to be rebooted to take effect. To reboot the device, do the following: 1. Click Reboot in the Actions drop-down menu. The Confirmation message box appears. 2. Click Yes, Reboot Now to reboot the device. The Reboot message box appears. Wait for the device reboot to complete before attempting to reconnect to the device.
- Page 204 Update Firmware 1. Click Update Firmware in the Actions drop-down menu. 2. In the Firmware Upgrade dialog, click + Browse. 3. Locate and select the desired firmware file, and then click Open. The selected firmware file name is displayed in the Firmware Upgrade dialog. 4.
- Page 205 Manage Certificates Use the Manage Certificates dialog to add, remove, and manage certificates used in 802.1x and other protected networks. 1. Click Manage Certificates in the Actions drop-down menu. The following certificate tabs are displayed: Root: The Root certificate is used by the DM-NAX-16AIN to validate the network's authentication server.
- Page 206 To Add Certificates 1. Click the corresponding certificate tab. 2. Click the Add Root Certificate button. 3. Click the + Browse button. 4. Locate and select the file, and then click the Open button. NOTE: If the certificate is a Machine Certificate, enter the password provided by the network administrator.
-
Page 207: Status
Status The Status tab is the first page displayed when opening the interface of the DM-NAX-16AIN. It displays general information about the DM-NAX-16AIN (such as Model Name, Firmware Version, and Serial Number) and current network settings (such as Host Name and IP Address, etc.). The Status tab can be accessed at any time by clicking the Status tab of the DM-NAX-16AIN interface. - Page 208 Click + More Details to review additional information about the DM-NAX-16AIN. Network The Network section displays network-related information about the DM-NAX-16AIN, including the Hostname, Domain Name, and DNS Servers. NOTE: By default, the host name of the DM-NAX-16AIN consists of the model name followed by the MAC address of the device.
- Page 209 Control System The Control System section displays connection information, consisting of the following: Encrypt Connection: ON or OFF IP ID: Reports the currently used IP ID of the DM-NAX-16AIN IP Address/Hostname: The IP address of the control system Room ID: Displays the room ID Status: OFFLINE or ONLINE 204 •...
-
Page 210: Settings
Settings The Settings tab enables you to configure the DM-NAX-16AIN settings. The Settings page can be accessed at any time by clicking the Settings tab of the DM-NAX-16AIN interface. Information displayed on the Settings tab is organized into different sections. System Setup The System Setup section displays information about the Date/Time, Auto Update, Network, and Control System. - Page 211 Date/Time Use the Date/Time section to configure the date and time settings of the DM-NAX-16AIN. Time Synchronization 1. Move the Time Synchronization slider to specify whether time synchronization will be enabled (right) or disabled (left). By default, time synchronization is enabled. 2.
- Page 212 The DM-NAX-16AIN can be automatically updated with the latest firmware at scheduled intervals. 1. Using the Crestron Auto Update Tool, generate a manifest file. The file is placed on an FTP (File Transfer Protocol) or SFTP (Secure File Transfer Protocol) server.
- Page 213 Network The Network section displays network-related information about the DM-NAX-16AIN, including the Host Name, Domain, Primary Static DNS, and Secondary Static DNS. NOTE: By default, the host name of the DM-NAX-16AIN consists of the model name followed by the MAC address of the device. For example, DM-NAX-16AIN-00107FF41E53. Adapter 1 Displays DHCP, IP Address, Subnet Mask, and Default Gateway.
- Page 214 Control System 1. Move the Encrypt Connection slider to specify whether the encryption will be enabled (right) or disabled (left). By default, Encrypt Connection is enabled. 2. Enter the username in the Control System Username field. 3. Enter the password in the Control System Password field. 4.
- Page 215 Inputs The Inputs menu is used to configure Name, Compensation, and Mute attributes of the available analog and digital inputs on the DM-NAX-16AIN. Configure Inputs 1. If needed, edit the name of the input in the Name field. 2. To configure the compensation, do one of the following: Move the Compensation slider to the right to increase or to the left to decrease the compensation.
- Page 216 DM NAX Streams DM NAX AoIP supports the AES67 standard. AES67 support allows an audio source to be transmitted as an AES67 source. Click NAX Streams to display the following information. Device is Master PTP Clock Source indicates whether the device is the master for PTP on the network.
- Page 217 Configure Transmitters To configure a DM NAX transmit stream for any of the available inputs, do the following. 1. Enter a validated Multicast address in the NAX Stream Address field. 2. Enter a name in the NAX Stream Name field by which the stream can be identified, as it is associated with the Multicast/NAX Stream Address by other NAX or AES67 devices.
- Page 218 Port Selection Port selection enables network traffic to be managed and segregated based on traffic type. Internal VLANs are used to route different traffic types to specific external Ethernet ports, and external Ethernet ports can then be assigned to various traffic types. AES67 or Dante audio can be separated from the primary video and control network, resulting in a dedicated audio network.
-
Page 219: Security
Security Click the Security tab to configure security for users and groups and to allow different levels of access to the DM-NAX-16AIN functions . By default, security is disabled. Select Encrypt and Validate, Encrypt, or OFF in the SSL Mode drop-down menu, to specify whether to use encryption. - Page 220 Current User Click the Current User tab to view read-only information or to change the password for the current user. 1. Click the Change Current User Password button to provide a new password for the current user. 2. In the Change Password dialog, enter the current password in the Current Password field, the new password in the Password field, and then re-enter the same new password in the Confirm Password field.
- Page 221 Users Click the Users tab to view and edit user settings. The Users tab can be used to add or remove local and Active Directory users and preview information about users. Use the Search Users field to enter search term(s) and display users that match the search criteria.
- Page 222 Create a New Local User 1. Click the Create User button in the User tab. 2. In the Create User dialog, enter the following: a. Enter a user name in the Name field. A valid user name can consist of alphanumeric characters (letters a-z, A-Z, numbers 0-9) and the underscore “_”...
- Page 223 Add an Active Directory User Users cannot be created or removed from the Active Directory server, but access can be granted to an existing user in the Active Directory server. To grant access to an Active Directory user, you can either add the user to a local group on the DM-NAX-16AIN, or add the Active Directory group(s) that they are a member of to the DM-NAX-16AIN.
- Page 224 View User Details Click the information button ( ) in the Actions column to view information for the selected user. The User Details dialog displays the following information for the selected user. Name: Displays the name of the selected user. Active Directory User: Displays whether the user is an Active Directory user.
- Page 225 Groups Click the Groups tab to view and edit group settings. The Groups tab can be used to add local and Active Directory groups, remove local and Active Directory groups, and preview information about a group. Use the Search Groups field to enter search term(s) and display groups that match the search criteria.
- Page 226 Create Local Group 1. Click the Create Group button. 2. In the Create Group dialog, enter the following: a. Enter the group name in the Name field. b. Assign the group access level by selecting a predefined access level (Administrator, Connect, Operator, Programmer, User) from the Access Level drop-down list.
- Page 227 3. Assign the group access level by selecting a predefined access level (Administrator, Connect, Operator, Programmer, User) from the Access Level drop-down list. NOTE: Make sure that the Active Directory Group slider is enabled. 4. Click OK to save. Click Cancel to cancel the changes. Delete a Group Click the trashcan button ( ) in the Actions column to delete a group.
-
Page 228: 802.1X Configuration
802.1x Configuration The DM-NAX-16AIN has built-in support for the 802.1X standard (an IEEE network standard designed to enhance the security of wireless and Ethernet LANs. The standard relies on the exchange of messages between the device and the network's host, or authentication server), allowing communication with the authentication server and access to protected corporate networks. - Page 229 To Configure DM-NAX-16AIN for 802.1X Authentication 1. Move the IEEE 802.1X Authentication slider to enabled. This will enable all options on the 802.1X dialog. 2. Select the Authentication method: EAP-TLS Certificate or EAP-MSCHAP V2 Password according to the network administrator's requirement. 3.
-
Page 230: Access The Web Interface With The Crestron Toolbox™ Application
Access the Web Interface With the Crestron Toolbox™ Application To access the web interface by opening a web browser within the Crestron Toolbox™ application, do the following: 1. Open the Crestron Toolbox application. 2. From the Tools menu, select Device Discovery Tool. You can also access the Device... -
Page 231: Dm-Nax-Amp-X300
To access the web interface, do either of the following: Access the Web Interface with a Web Browser (on the next page) Access the Web Interface With the Crestron Toolbox™ Application (on page 291) The web interface is accessed from a web browser. The following table lists operating systems and their corresponding supported web browsers. - Page 232 Access the Web Interface with a Web Browser 1. Enter the IP address of the DM-NAX-AMP-X300 into a web browser. NOTE: To obtain the IP address, use the Device Discovery Tool option in Crestron Toolbox™ application or an IP scanner application.
-
Page 233: Action
Action The Action drop-down menu is displayed at the top right side of the interface and provides quick access to common device functionalities: Save Changes Revert Reboot Restore Update Firmware Download Logs Manage Certificates Save Changes Click Save Changes to save any changes made to the configuration settings. Revert Click Revert to revert the device back to the last saved configuration settings. - Page 234 1. Click Reboot in the Actions drop-down menu. The Confirmation message box appears. 2. Click Yes, Reboot Now to reboot the device. The Reboot message box appears. Wait for the device reboot to complete before attempting to reconnect to the device. Restore to Factory Default Settings 1.
- Page 235 3. Locate and select the desired firmware file, and then click Open. The selected firmware file name is displayed in the Firmware Upgrade dialog. 4. Click Load and wait for the progress bar to complete and for the OK button in the message to become clickable.
- Page 236 1. Click Manage Certificates in the Actions drop-down menu. The following certificate tabs are displayed: Root: The Root certificate is used by the DM-NAX-AMP-X300 to validate the network's authentication server. The DM-NAX-AMP-X300 has a variety of Root certificates, self-signed by trusted CAs (Certificate Authorities) preloaded into the device.
-
Page 237: Status
Status The Status tab is the first page displayed when opening the interface of the DM-NAX-AMP- X300. It displays general information about the DM-NAX-AMP-X300 (such as Model Name, Firmware Version, and Serial Number), current network settings (such as Host Name and IP Address, etc.), and input and output ports' current status. - Page 238 Click + More Details to review additional information about the DM-NAX-AMP-X300. 233 • DM NAX™ Product Manual — Doc. 9045H...
- Page 239 Network The Network section displays network-related information about the DM-NAX-AMP-X300, including the Hostname, Domain Name, and DNS Servers. NOTE: By default, the host name of the DM-NAX-AMP-X300 consists of the model name followed by the MAC address of the device. For example, DM-NAX-AMP-X300- 00107FB58088.
- Page 240 Encrypt Connection: ON or OFF IP ID: Reports the currently used IP ID of the DM-NAX-AMP-X300 IP Address/Hostname: The IP address of the control system Room ID: Displays the room ID Status: OFFLINE or ONLINE 235 • DM NAX™ Product Manual — Doc. 9045H...
-
Page 241: Settings
Settings The Settings tab enables configuration of the DM-NAX-AMP-X300 settings. The Settings page can be accessed at any time by clicking the Settings tab of the DM-NAX-AMP-X300 interface. Many options in the Settings tab are exclusive to a specific device mode: Residential or Commercial. - Page 242 Commercial Mode This section provides the following information: System Setup (on the next page) Commissioning (on page 243) Output Channels (on page 243) Input Channels (on page 250) NAX Streams (on page 251) Port Selection (on page 253) Mixing (on page 254) Product Manual — Doc. 9045H DM NAX™...
- Page 243 System Setup The System Setup section displays information about the Date/Time, Auto Update, Network, Control System, Cloud Settings, and Device Modes. Date/Time Use the Date/Time section to configure the date and time settings of the DM-NAX-AMP-X300. 238 • DM NAX™ Product Manual —...
- Page 244 The DM-NAX-AMP-X300 can be automatically updated with the latest firmware at scheduled intervals. 1. Using the Crestron Auto Update Tool, generate a manifest file. The file is placed on an FTP (File Transfer Protocol) or SFTP (Secure File Transfer Protocol) server.
- Page 245 a. Select the desired Day of Week and Time of Day (24-hour format) values. b. Set the Poll Interval by entering a value from 60 to 65535 minutes. A value of 0 disables the Poll Interval. 5. Click Save Changes. Clicking Update Now causes the firmware to be updated at the current time;...
- Page 246 Primary Static DNS: Enter a primary DNS IP address. Secondary Static DNS: Enter a secondary DNS IP address. IP Address: Enter a unique IP address for the DM-NAX-8ZSA. Subnet Mask: Enter the subnet mask that is set on the network. Default Gateway: Enter the IP address that is to be used as the network’s gateway.
- Page 247 Application Mode: The Application Mode determines which options and controls are available. Select Residential (Standard) or Commercial (Advanced). The Confirmation message box appears. Click Yes, Reboot Now to reboot the device into the selected mode. The Reboot message box appears. Wait for the device reboot to complete before attempting to reconnect to the device.
- Page 248 Standby Mode: Select the DM-NAX-AMP-X300's standby behavior. Always On: The device remains fully powered. Power Saver: If no signal is detected for 25 minutes, the device enters a low power state. Upon detecting a signal, the device will wake. Channel 1/2 Output Drive: Set Channel 1/2 to Standard or Bridged. This option is only selectable when the Output Mode is set to Lo-Z.
- Page 249 Zones (Autosaved) In the Zones (Autosaved) section, the properties of each zone can be viewed and configured. Signal Presence indicates whether or not a signal is detected in that zone. Signal Level indicates if the signal is Clipping or Nominal (non-clipping). Nominal: The signal level is within normal operating bounds and below the clipping threshold.
- Page 250 Zone Use the Zone section to configure Tone and Delay. Tone (Autosaved) Set the bass and treble for the zone. Bass: To set the bass, do one of the following: Move the Bass slider to the right to increase or to the left to decrease the bass db. Click the db arrows to increase or decrease the db.
- Page 251 Delay Time(ms): To set the delay, do one of the following: Move the Delay Time(ms) slider to the right to increase or to the left to decrease the delay time. Click the ms arrows to increase or decrease the delay time. Values range from 0 ms to 250 ms, adjustable in increments of 1 ms.
- Page 252 1. To set the minimum volume, do one of the following: Move the Minimum slider to the right to increase or to the left to decrease the minimum volume. Click the % arrows to increase or decrease the minimum volume. Values range from 0 to 50%, adjustable in increments of 1%.
- Page 253 1. To enable the peak limiter on the zone output, move the Enable Speaker Protect slider to the right position. To disable the peak limiter, move the slider to the left position. By default, Enable Speaker Protect is set to the left position. 2.
- Page 254 Equalizer Settings (Autosaved) 1. Move the Speaker EQ Enabled slider to the right position to enable the speaker EQ. Move the slider to the left position to disable the speaker EQ. NOTE: When the Speaker EQ Enabled is disabled, all bands of the equalizer will be bypassed to allow for A/B testing of the entire EQ curve.
- Page 255 d. To set the bandwidth, do one of the following: Click the arrows to increase or decrease the bandwidth. Values range from 0.1 octaves to 4.0 octaves, adjustable in increments of 0.1 octave. Manually enter a value in the Bandwidth field. e.
- Page 256 If needed, edit the name of the input in the Name field. To set the compensation, do one of the following: Move the Compensation slider up to increase or down to decrease the compensation. Compensation increases the level of the high and low frequencies. Compensation is used while listening to low volume levels because as the volume is decreased, the ear’s sensitivity to extreme high and low frequencies may cause these signals to fall below the hearing threshold.
- Page 257 Device is Master PTP Clock Source indicates whether the device is the master for PTP on the network. Yes will be displayed in green when the local DM-NAX-AMP-X300 is the PTP clock master and No will be displayed in red when another PTP clock on the network is operating as the master clock.
- Page 258 1. Enter the multicast address of a transmitting stream to connect the receiver in the Requested Stream Address field. 2. Click the configure button ( ) in the Actions column. The Configure dialog appears. 3. To enable auto initiation, move the Auto Initiation slider to the right position. To disable auto initiation, move the slider to the left position.
- Page 259 To configure port selection: 1. To enable the port selection, move the Port Selection slider to the right position. To disable the port selection, move the slider to the left position. By default, Port Selection is disabled. NOTE: Ports 1 and 2 correspond to the Ethernet Adapters 1 and 2 on the rear panel of the DM-NAX-AMP-X300, respectively.
- Page 260 Mixing (Autosaved) The Mixing (Autosaved) page is used to route a local input, media player, or AES67 stream to an output on the DM-NAX-AMP-X300. To route inputs to outputs on the device: Click the cells corresponding to the desired output that are to be paired for routing. Once a route is made, appears.
- Page 261 Move the slider up to increase or down to decrease the mix level. Click the arrows to increase or decrease the mix level. Manually enter a value in the field. Ducking (Autosaved) The Ducking (Autosaved) page is used to configure ducking routes. These routes override the Mixing routes for an output whenever it exceeds the ducking threshold.
- Page 262 Click the cells corresponding to the desired zone that are to be paired for routing. Once a route is made, appears. The input that you have selected for a given row will route to the Zone corresponding to that row in the matrix. Use arrows at the top of the matrix to change pages to view all available inputs.
- Page 263 Logic Out: This indicator turns blue when the ducker is active. Bypass: To enable the ducker, move the Bypass slider to the right position. To disable it, move the Bypass slider to the left position. Threshold: Set the db value at which the ducker engages. Use the arrows or enter a number to set the db value for the Threshold.
- Page 264 Residential Mode This section provides the following information: System Setup (on the next page) Commissioning (on page 264) Zones (on page 265) Bussing (on page 275) Inputs (on page 275) NAX Streams (on page 276) Routing (on page 279) Port Selection (on page 279) Product Manual — Doc. 9045H DM NAX™...
- Page 265 System Setup The System Setup section displays information about the Date/Time, Auto Update, Network, Control System, Cloud Settings, and Device Modes. Date/Time Use the Date/Time section to configure the date and time settings of the DM-NAX-AMP-X300. 260 • DM NAX™ Product Manual —...
- Page 266 The DM-NAX-AMP-X300 can be automatically updated with the latest firmware at scheduled intervals. 1. Using the Crestron Auto Update Tool, generate a manifest file. The file is placed on an FTP (File Transfer Protocol) or SFTP (Secure File Transfer Protocol) server.
- Page 267 a. Select the desired Day of Week and Time of Day (24-hour format) values. b. Set the Poll Interval by entering a value from 60 to 65535 minutes. A value of 0 disables the Poll Interval. 5. Click Save Changes. Clicking Update Now causes the firmware to be updated at the current time;...
- Page 268 Primary Static DNS: Enter a primary DNS IP address. Secondary Static DNS: Enter a secondary DNS IP address. IP Address: Enter a unique IP address for the DM-NAX-8ZSA. Subnet Mask: Enter the subnet mask that is set on the network. Default Gateway: Enter the IP address that is to be used as the network’s gateway.
- Page 269 Application Mode: The Application Mode determines which options and controls are available. Select Residential (Standard) or Commercial (Advanced). The Confirmation message box appears. Click Yes, Reboot Now to reboot the device into the selected mode. The Reboot message box appears. Wait for the device reboot to complete before attempting to reconnect to the device.
- Page 270 Click Assign Addresses to give each DM NAX transmitter in the DM-NAX-AMP-X300 a unique multicast address beginning with the specified Starting Multicast Address. The valid range is 239.8.0.0 to 239.127.255.255. NOTE: This will begin transmitting multicast traffic on your network, refer to the General Network Requirements document for details.
- Page 271 Tone Profile: Select Classical, Jazz, Pop, Rock, or SpokenWord to utilize a tone profile. Select Off to use the default settings. Bass: To set the bass, do one of the following: Move the Bass slider to the right to increase or to the left to decrease the bass db. Click the db arrows to increase or decrease the db.
- Page 272 Delay Time(ms): To set the delay, do one of the following: Move the Delay Time(ms) slider to the right to increase or to the left to decrease the delay. Click the ms arrows to increase or decrease the delay. Values range from 0 ms to 250 ms, adjustable in increments of 1 ms.
- Page 273 1. To set the minimum volume, do one of the following: Move the Minimum slider to the right to increase or to the left to decrease the minimum volume. Click the % arrows to increase or decrease the minimum volume. Values range from 0 to 50%, adjustable in increments of 1%.
- Page 274 Stereo - Standard Mono - Standard Bridged Mono Product Manual — Doc. 9045H DM NAX™ • 269...
- Page 275 Mono - Bridged Stereo - Bridged 270 • DM NAX™ Product Manual — Doc. 9045H...
- Page 276 Bridged Sub 2.1 Signal (Autosaved) The Signal (Autosaved) section displays the Signal and Clipping status. If the signal is present and clipping is not occurring, the Signal status changes to Present in green and the Clipping status changes to None in green. If the signal is present and clipping is occurring, the Signal status changes to Present in green and the Clipping status changes to Present in red.
- Page 277 1. To set the bussing volume offset, do one of the following: Move the Bussing Volume Offset slider to the right to increase or to the left to decrease the bussing volume offset. Click the db arrows to increase or decrease the bussing volume offset. Values range from -12 db to 12 db, adjustable in increments of 1 db.
- Page 278 Line Out 1. Line Out Volume controls the volume level of the individual Line Outputs. To set the line out volume, do one of the following: Move the Line Out Volume slider to the right to increase or to the left to decrease the line out volume.
- Page 279 The advanced signal generator controls can be set to output audio test signals to all device zones. The signal type can be set, and the left/right channels can be enabled/disabled to pass the signal generator output. 1. To enable the left channel, move the Left Channel slider to the right position. To disable the left channel, move the slider to the left position.
- Page 280 a. To set the gain, do one of the following: Move the Gain slider up to increase or down to decrease the gain. Click the arrows to increase or decrease the gain. Values range from -40 to 20, adjustable in increments of 0.1. Manually enter a value in the Gain field.
- Page 281 If needed, edit the name of the input in the Name field. To set the compensation, do one of the following: Move the Gain slider up to increase or down to decrease the gain. Click the db arrows to increase or decrease the gain. Values range from -10 db to 10 db, adjustable in increments of .1 db.
- Page 282 Device is Master PTP Clock Source indicates whether the device is the master for PTP on the network. Yes will be displayed in green when the local DM-NAX-AMP-X300 is the PTP clock master and No will be displayed in red when another PTP clock on the network is operating as the master clock.
- Page 283 5. To enable auto initiation, move the Auto Initiation slider to the right position. To disable auto initiation, move the slider to the left position. If Auto Initiation is enabled for the input, the stream will begin automatically, and will be available as a Multicast stream on your network at the specified address. If Auto Initiation is disabled for the input, the stream will not begin until it is manually initiated.
- Page 284 4. To set the port number, do one of the following: Click the arrows to increase or decrease the port number. Manually enter a port number in the Port field. The default port number is 5004. 5. Click OK to save or click Cancel to cancel the changes. Routing To route an input to the zones, click the box under the name of the corresponding input.
- Page 285 To configure port selection: 1. To enable the port selection, move the Port Selection slider to the right position. To disable the port selection, move the slider to the left position. By default, Port Selection is disabled. NOTE: Ports 1 and 2 correspond to the Ethernet Adapters 1 and 2 on the rear panel of the DM-NAX-AMP-X300, respectively.
-
Page 286: Security
Security Click the Security tab to configure security for users and groups and to allow different levels of access to the DM-NAX-AMP-X300 functions. By default, security is disabled. Select Encrypt and Validate, Encrypt, or OFF in the SSL Mode drop-down menu, to specify whether to use encryption. - Page 287 3. Click OK to save or click Cancel to cancel the changes. Users Click the Users tab to view and edit user settings. The Users tab can be used to add or remove local and Active Directory users and preview information about users. Use the Search Users field to enter search term(s) and display users that match the search criteria.
- Page 288 Create a New Local User 1. Click the Create User button in the User tab. 2. In the Create User dialog, enter the following: a. Enter a user name in the Name field. A valid user name can consist of alphanumeric characters (letters a-z, A-Z, numbers 0-9) and the underscore “_”...
- Page 289 a. Enter a user name in the Name field in the format “Domain\UserName”, for example “crestronlabs.com\JohnSmith”. Valid user names can contain alphanumeric characters (letters a-z, A-Z, numbers 0-9) and the underscore “_” character. b. Select one or more groups from the Groups drop-down list. NOTE: Make sure that the Active Directory User slider is set to enabled.
- Page 290 Update User Details 1. Click the edit button ( ) in the Actions column to update information for the selected user. 2. Enter a password in the Password field; re-enter the same password in the Confirm Password field. 3. Select one or more groups to assign the user to from the Groups drop-down list. 4.
- Page 291 If groups listed in the Groups table span across multiple pages, navigate through the groups by clicking a page number or by using the left or right arrows at the bottom of the Groups pane to move forward or backward through the pages. Additionally, each page can be set to display 5, 10, or 20 groups by using the drop-down menu to the right of the navigation arrows.
- Page 292 Once the group is added, all members of that group will have access to the DM-NAX-AMP-X300. 1. Click the Create Group button. 2. In the Create Group dialog enter the following: a. Enter the group name in the Name field, for example “Engineering Group”. Note that group names are case sensitive;...
- Page 293 Name: Displays the name of the group. Access Level: Displays the access level of the group and its users. Active Directory Group: Displays whether the group is an Active Directory group. Click OK to close the Group Details dialog and to return to the Groups tab. 288 •...
-
Page 294: 802.1X Configuration
802.1x Configuration The DM-NAX-AMP-X300 has built-in support for the 802.1X standard (an IEEE network standard designed to enhance the security of wireless and Ethernet LANs. The standard relies on the exchange of messages between the device and the network's host, or authentication server), allowing communication with the authentication server and access to protected corporate networks. - Page 295 6. If required, type the domain name of the network in the Domain field. 7. When the 802.1X settings are configured as desired, click Save Changes to save the changes to the device and reboot it. Click Revert to cancel any changes. 290 •...
-
Page 296: Access The Web Interface With The Crestron Toolbox™ Application
Access the Web Interface With the Crestron Toolbox™ Application To access the web interface by opening a web browser within the Crestron Toolbox™ application, do the following: 1. Open the Crestron Toolbox application. 2. From the Tools menu, select Device Discovery Tool. You can also access the Device... -
Page 297: Resources
Resources The following resources are provided for the DM NAX™. NOTE: You may need to provide your Crestron.com web account credentials when prompted to access some of the following resources. Crestron Support and Training Crestron True Blue Support Crestron Resource Library Crestron Online Help (OLH) Crestron Training Institute (CTI) Portal... - Page 298 This page is intentionally left blank. Product Manual — Doc. 9045H DM NAX™ • 293...
- Page 299 Product Manual — Doc. 9045H Crestron Electronics, Inc. 15 Volvo Drive, Rockleigh, NJ 07647 02/15/23 Tel: 888.CRESTRON Specifications subject to Fax: 201.767.7656 change without notice. www.crestron.com...
Need help?
Do you have a question about the DM-NAX-8ZSA and is the answer not in the manual?
Questions and answers