Advertisement
Quick Links
Advertisement

Related Manuals for German pool SGV-7030


Summary of Contents for German pool SGV-7030
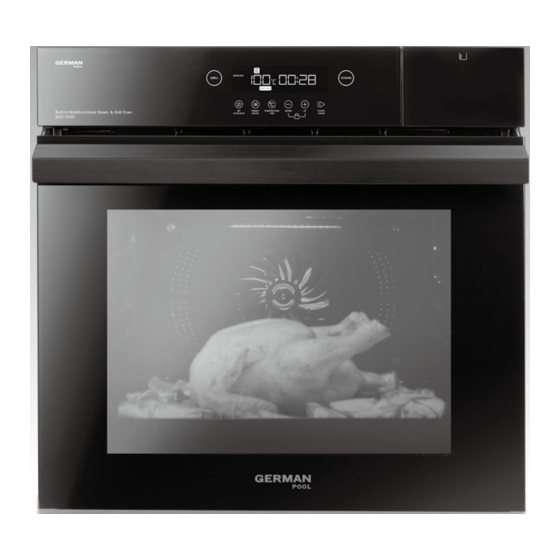
- Page 1 GPU-6SSL 2-in-1 Free Standing Steam Oven Built-In Multifunctional Steam & Grill Oven SGV-7030 GPNB-6SSL Online Warranty Registration Please read these instructions and warranty information carefully before use and keep them handy for future reference. U S E R M A N U A L...
-
Page 2: Table Of Contents
Safety Instructions Contents 1. Please read all instructions carefully before using this product, in order to avoid property damage and personal injury due to improper use. Safety Instructions 2. This product must be installed and repaired by manufacturer’s authorized after-sales per- sonnel only;... -
Page 3: Safety Instructions
Safety Instructions Product Structure 14. After cooking is completed, wait until the product completely cools down before cleaning to avoid scalding. 15. The steam vent located between the control panel and oven door will emit steam when Steam generator Upper heating element Cross flow fan Water pump product is in use. -
Page 4: Installation Instructions
Installation Instructions Installation Instructions INSTALLATION REQUIREMENTS INSTALLATION PROCEDURE 1. In order to ensure that the product can be used safely for a long time, the product must be 1. Open the oven door and use the self-tapping screws to fix the product onto the kitchen installed on a perfectly sturdy surface, and the electronic components must be isolated to cabinet (there are self-tapping screw holes on both sides of the front panel of the product). -
Page 5: Operating Instructions
Air Inlet ≥550 Installation Instructions Air Inlet Operating Instructions Low cabinet installation Remove back BEFORE INITIAL USE panel for ventilation 1. Remove the special film covering the door glass. 2. Thoroughly clean the interior of the product (use moist cloth to wipe the product’s exterior). 3. - Page 6 Operating Instructions Operating Instructions LED DISPLAY ICONS CONTROL KEYS ICON FUNCTIONS ICON FUNCTION Temperature Display When product is not in operation, or when product is paused, if product does not receive any command in 5 Sleep Mode/Standby minutes, it will automatically enter Sleep Mode, will Time Display Mode...
- Page 7 Operating Instructions Operating Instructions 1. Enter into Standby Mode 3. Set Temperature & Time When the product is connected to the power source, press to enter into Standby Mode. Note: If using Preset Recipe Function, skip this step and proceed directly to Step 4. After selecting desired cooking mode, press to enter into Temperature Setting, press to adjust temperature, then press...
- Page 8 Operating Instructions Operating Instructions 5. When Cooking Is Finished STEAM & GRILL FUNCTION GUIDE After cooking is finished, buzzer will buzz for 5 seconds, LED Display will alternately show the DEFAULT ADJUSTABLE DEFAULT Suggested current cooking temperature/time & “End”. If user wishes to save the current setting, press FUNCTION MODE TEMPERATURE...
- Page 9 Operating Instructions Operating Instructions PRESET RECIPES PRESET RECIPES CLASSIFICATION CODE RECIPE TEMPERATURE TIME CLASSIFICATION CODE RECIPE TEMPERATURE TIME Ferment 38℃ 20 min Fish cake 100℃ 15 min Defrost 58℃ 30 min Spare rib 100℃ 25 min Yoghurt 38℃ 480 min Spicy fish head 100℃...
- Page 10 Operating Instructions Operating Instructions PRESET RECIPES PRESET RECIPES CLASSIFICATION CODE RECIPE TEMPERATURE TIME CLASSIFICATION CODE RECIPE TEMPERATURE TIME Cream puff 160℃ 25 min Pork knuckle 190℃ 55 min Bacon pizza 200℃ 13 min Char-siu 200℃ 35 min Shrimp pizza 200℃ 13 min Cajun chicken wing 180℃...
-
Page 11: Cleaning & Maintenance
Troubleshooting Cleaning & Maintenance WARNING! WARNING! Before maintenance and repair, turn off the product, unplug the power source, and wait till • Before maintenance work, turn off the product and unplug product from power source. the product has completely cool down. •... -
Page 12: Technical Specification
Technical Specifications 目錄 Model SGV-7030 Rated Voltage/Frequency 220V / 50Hz 警告及注意事項 Rated Power 3,000W Product Dimensions (H) 595 (W) 595 (D) 563 mm 產品結構 Oven Cavity Volume Net Weight 34kg 安裝說明 • All information in this manual is for reference only. If there are any errors or omissions, the specifications produced by the factory shall prevail. - Page 13 警告及注意事項 警告及注意事項 1. 請嚴格按照本說明書規定使用本產品,以免因使用不當造成財產損失、人身傷害。 注意 2. 為保障人身財產安全和正確使用本產品,本產品必須由本公司指派的售後人員進行安 1. 當手濕時,禁止插拔電源插頭,以免觸電。 裝、維修等,如果消費者委託非本公司指派的人員或者消費者自行進行以上操作,可能 2. 產品需安裝在強度足夠的平台表面上。請勿在塑料照明設備或塑料架下安裝產品,以免 存在造成人身損害或財產損失的風險。 發生變形或爆炸危險。 3. 本說明書的各項規定若有與法律強制性規定相衝突,以法律規定為準。 3. 禁止以產品門負載重物或靠、坐在產品門上,以免損壞產品。 4. 不能使用蒸氣清潔器。 危險 5. 為防止可能的危害,產品的控制面板只能連接到規定的發熱單元。 1. 本產品在使用期間會發熱,注意避免接觸產品內部的發熱單元,從產品內提取食物與器 6. 不要使用粗糙的抹布或鋒利的金屬刮刀清潔產品門玻璃,以免擦傷玻璃表面,導致玻璃 皿時,需戴上隔熱手套,以免燙傷。 破碎。 2. 產品在使用時,可觸及部份可能會發熱,兒童應遠離。 7. 搬運放置時從產品底部抬起,輕搬輕放,切勿將產品拉手作為搬運的支撐點,以免受力 3. 產品在清潔、安裝維修服務前,必須先斷開電源,以免觸電。 過大而損壞。 4. 禁止在產品內放置雜物,以免發生火災。 8. 本器具不能在外接定時器或獨立的遙控控制系統的方式下運行。 5.
- Page 14 產品結構 安裝說明 安裝注意事項 1. 為保證產品能夠長期安全使用,必須用絕對堅固的方法固定產品,並且隔離電子元件以 防止和金屬配件接觸的可能。 蒸氣產生器 上發熱線 貫流風機 水泵組件 2. 安裝產品的廚櫃以及所有使用的黏合劑必須能承受不低於90° C的溫度,以避免變形和塗 料斷裂。 爐燈 3. 在連接電源之前,請確保: 顯示板 電源板 • 根據規定,應有接地的供給系統。電源連接的插座和電路必須可靠接地。 • 產品安裝後,開關是易於操作的。 後發熱線 • 產品連接電源後,請檢查電源線是否接觸易受熱的配件,如有接觸,須遠離到安全距 離。 • 不要使用會導致過熱或自燃的減速器、分流器及適配器。製造商對於任何電子錯誤安 控制面板 裝或連接所造成的直接或間接損失,概不承擔任何責任。因此,所有的安裝和連接操 作都須由遵循當地實施規定的專業人士進行。 • 不得將地線連接在煤氣管、自來水管、避雷針及電話線上,避免因接地不良造成觸電 下發熱線 而引發意外事故。插座不能裝在受潮、被水淋濕或靠近熱源的地方。 4. 進行電器安裝時,務必等安裝完畢後再通電。 水箱 爐腔 爐門...
- Page 15 ≥562 通風口 ≥550 安裝說明 安裝說明 通風口 低櫃安裝 安裝方法 後壁敞開通風 1. 打開產品門,用附贈的自攻螺絲將產品固定在廚櫃上(產品前板的兩側有自攻螺絲孔)。 要確保產品固定牢靠,以免使用過程中產品前傾損壞機內物品。 2. 安裝產品時請參照以下示意圖,為保證產品有足夠的安裝空間以及周圍的空氣流通,建議 安裝時去掉廚櫃背板。 插 座 可 ≥560 通風口 選 位 安裝尺寸 置 ≥ 20 後壁敞開通風 高櫃安裝 安裝俯視圖 安裝側視圖 ≥590 廚櫃開孔尺寸 (單位:毫米) ≥ 15 通風口 ≥562 自攻螺絲固定位置 ≥590 ≥562 通風口...
- Page 16 使用說明 使用說明 首次使用產品 LED顯示屏圖標說明 1. 移去覆蓋在爐門玻璃上的特殊薄膜。 圖示 功能 2. 仔細清洗產品內部(用濕布將產品外部擦拭乾淨)。 3. 水箱加滿水後,以蒸模式100° C 及45分鐘(或以上),將產品空蒸以去除新品初次使用 溫度顯示 的氣味。 時間顯示 預熱中 控制面板 LED顯示屏 烹飪中 PREHEAT FAV 1 加水提示 FAV 2 OPERATING 童鎖 GRILL STEAM WATER FAV 3 自訂烹飪設置1 STEAM GRILL CRISPY GRILL STEAM RECIPE FAVOURITE LOCK...
- Page 17 使用說明 使用說明 1. 進入待機狀態 控制按鍵說明 接通電源後,按 進入待機狀態。 按鍵 功能 當本產品處於未工作狀態或工作暫停狀態,如5 分鐘內未有任何操作,本產品將自動進入休眠狀 休眠/待機 態, 常亮;按 進入待機狀態,此時 常亮。 在烹飪過程中按 開始或暫停烹飪,長按 開始/暫停/取消 3秒取消烹飪並返回待機狀態。 2.1. 蒸煮功能及預設食譜 在待機狀態下,按 或 可選擇所需功 按 選擇蒸煮功能後: 能;重複按 循環選擇蒸或蒸烤功能;重複按 蒸煮功能/烤焗功能 • 重複按 可循環選擇3種蒸煮模式。 循環選擇8種烤焗功能。 • 或按 選擇預設食譜S1-S28(詳見P.37預設食譜一覽)。 在待機狀態下,長按 3秒進入蒸氣清潔功 蒸氣清潔功能 能,默認時間為25分鐘。...
- Page 18 使用說明 使用說明 3. 設定溫度及時間 5. 完成烹飪 注意: 烹飪完成後,蜂嗚器發出提示聲響5秒,LED顯示屏交替顯示當前烹飪所設置的時間與溫度及 如使用預設食譜功能,此步驟不適用,請直接跳往步驟4。 「End」,按 儲存當前設定(詳見步驟6),或按 返回待機狀態。 選擇好烹飪模式後,按 進入溫度設定,然後按 調整溫度,再按 進 入時間設定,然後按 調整時間。 6. 儲存烹飪設置 當LED顯示屏交替顯示烹飪設置及「End」時,按 後按 選擇儲存位置(FAV1 、FAV2、FAV3、FAV4),選擇完成後按 確認即可。 如需使用已儲存的烹飪設置,在待機狀態下按 後按 選擇(FAV1、FAV2 、FAV3、FAV4),選擇完成後按 開始烹飪。 4. 開始烹飪 設定好溫度及時間,或選擇好預設食譜後,按 開始烹飪,產品進入預熱狀態。預熱完 成後,蜂嗚器發出提示聲響, 閃爍: • 如使用蒸煮功能,此時打開爐門放入食材,關爐門後自動開始烹飪。 • 如使用烤焗功能,此時打開爐門放入食材,關爐門後按 開始烹飪。...
- Page 19 使用說明 使用說明 預設食譜一覽 蒸烤功能一覽 菜式分類 代碼 菜式 溫度 時間 可調溫 功能 模式 預設溫度 預設時間 常用菜譜 度範圍 發酵 38℃ 20分鐘 100°C 蒸氣 20分鐘 肉丸 110°C 解凍 58℃ 30分鐘 200°C 蒸氣脆烤 30分鐘 乳鴿 100- 蒸煮 酸奶 38℃ 480分鐘 250°C 180°C 蒸氣嫩烤 20分鐘 牛扒...
- Page 20 使用說明 使用說明 預設食譜一覽 預設食譜一覽 菜式分類 代碼 菜式 溫度 時間 菜式分類 代碼 菜式 溫度 時間 蒸魚糕 100℃ 15分鐘 奶油泡芙 160℃ 25分鐘 南瓜蒸排骨 100℃ 25分鐘 蘑菇煙肉薄餅 200℃ 13分鐘 彩椒蒸魚頭 100℃ 18分鐘 烘焙 鮮蝦薄餅 200℃ 13分鐘 蒸茄子 100℃ 22分鐘 芝士焗紅薯 180℃ 15分鐘 蒸臘味 100℃...
- Page 21 使用說明 清潔與保養 預設食譜一覽 警告 維護與保養產品前務必先關機並拔下電源插頭,待產品冷卻後再進行清潔。 菜式分類 代碼 菜式 溫度 時間 德國咸豬手 190℃ 55分鐘 1. 每次使用後,請將水箱餘水倒盡,避免水箱形成凝結物或滋生細菌。 2. 每次使用後,請用溫水擦拭爐門密封條,再用乾布擦乾。 蜜汁叉燒 200℃ 35分鐘 3. 密封條可能因長時間使用出現穿孔、裂開,如出現此情況,請更換新的密封條。 4. 每次使用後,請先用濕布擦去爐腔的凝結物,再用乾布擦乾。 奧爾良雞翼 180℃ 20分鐘 5. 大部份烹飪殘餘物都可用抹布及溫和清潔劑、溫水清潔。 黑椒烤牛扒 180℃ 10分鐘 6. 每次使用後,請用乾布或其他工具將水槽(內腔前板下部)內的水清潔乾淨。 醬香烤肋扒 200℃ 20分鐘 拆卸爐門 1. 把爐門完全打開,提起鉸鏈卡位片,將之向外拉倒到末端。 蒸烤...
-
Page 22: Warranty Terms & Conditions
- 產品經非認可之技術人員改裝或加裝任何配件; - the serial number is modified, damaged or removed from the product. - 機身編號被擅自塗改、破壞或刪除。 爐腔容積 4. German Pool will, at its discretion, repair or replace any defective part. 4. 總代理有權選擇維修或更換配件或其損壞部份。 34kg 淨重 5. This warranty will be void if there is any transfer of 5. - Page 23 Fax:+86 757 2980 8318 香港卓越品牌 香港服務名牌 香 港 名 牌 十 年 成就 獎 © All rights reserved. Copying, reproducing or using the contents of this manual is not allowed without prior authorization from German Pool, violators will be prosecuted. www.germanpool.com SGV-7030-M-20(1)