Table of Contents
Advertisement
Available languages
Available languages
Quick Links
Advertisement
Chapters
Table of Contents

Subscribe to Our Youtube Channel
Related Manuals for Riello Gulliver BGK3


Summary of Contents for Riello Gulliver BGK3
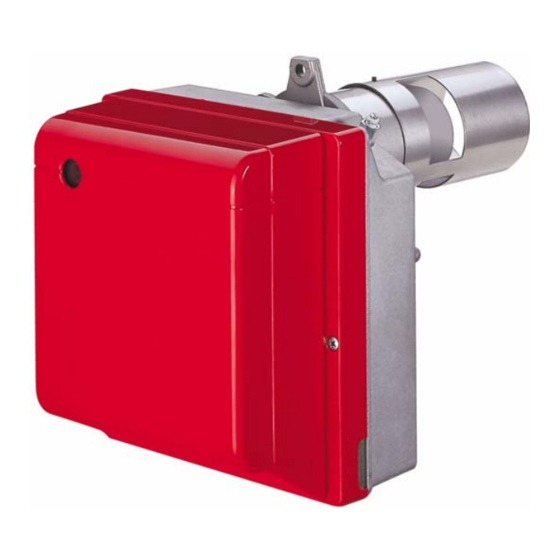
- Page 1 Installation, use and maintenance instructions Instrucciones de instalación, montaje y funcionamiento Light oil burners Quemadores de gasóleo One stage operation Funcionamiento a 1 llama CODE MODEL TYPE CODIGO MODEL0 TIPO 20012189 - 20015628 BGK3 375T1 20013962 (7) - 01/2012...
-
Page 3: Table Of Contents
Contents Declaration....................................3 Information and general instructions............................4 Information about the instruction manual........................4 2.1.1 General dangers ................................4 2.1.2 Danger: live components ..............................4 Guarantee and responsibility ............................5 Safety and prevention................................6 Introduction ..................................6 Personnel training................................6 Technical description of the burner ............................ - Page 4 Contents Maintenance ....................................21 Notes on safety for the maintenance..........................21 Maintenance programme ..............................21 9.2.1 Maintenance frequency ..............................21 9.2.2 Checking and cleaning ..............................21 Maintenance position ..............................22 Control box visual diagnostics............................23 9.4.1 Led colour code of the control box reset button ......................23 9.4.2 Block types and intervention times if the burner fails ....................24 9.4.3 Resetting the control box...............................24 9.4.4 Recycle function ................................24 9.4.5 Logging of burner operating parameters ........................24...
-
Page 5: Declaration
Measured value: CO max: 31 mg/kWh NOx max: 70 mg/kWh Manufacturer's Declaration RIELLO S.p.A. declares that the following products comply with the NOx emission limits specified by German standard “1. BImSchV reliese 26.01.2010”. Product Type Model Power Light oil burners... -
Page 6: Information And General Instructions
Information and general instructions Information and general instructions Information about the instruction manual Introduction 2.1.2 Danger: live components The instruction manual supplied with the burner: This symbol indicates operations which, if not car- is an integral and essential part of the product and must not ried out correctly, lead to electric shocks with le- be separated from it;... -
Page 7: Guarantee And Responsibility
Information and general instructions Guarantee and responsibility guarantees its new products from the installation date, in accordance with the regulations in force and/or the sales con- tract. At the moment of the first start-up, check that the burner is integral and complete. Failure to observe the information given in this manual, operating negligence, incorrect installa- tion and the carrying out of non authorised modifi-... -
Page 8: Safety And Prevention
Safety and prevention Safety and prevention Introduction Personnel training burners have been designed and built in compliance The user is the person, body or company that has acquired the with current regulations and directives, applying the known tech- machine and intends to use it for the specific purpose. He is re- nical rules of safety and envisaging all the potential danger situ- sponsible for the machine and for the training of the people work- ations. -
Page 9: Technical Description Of The Burner
Technical description of the burner Technical description of the burner Burner designation Series : Low NOx burner Fuel : Light oil Variation : Cone shaped head Size Electrical supply to the system : 1/230V/50Hz 1/230/50 Models available Designation Electrical supply Code BGK3 1/230V/50Hz... -
Page 10: Overall Dimensions
Technical description of the burner Overall dimensions The burner and flange dimensions are indicated in Fig. 1. ø 89 D7217 Fig. 1 Firing rate The burner delivery must be selected within area of the diagrams The firing rate area values have been obtained (Fig. -
Page 11: Burner Description
Technical description of the burner Burner description One stage light oil burner with low pollutant emissions (Nitric Oxide NOx, Carbon monoxide CO and unburnt Hydrocarbons). D9577 Fig. 3 Oil pump Amplified photoresistance Air damper adjustment assembly Combustion head Nozzle holder assembly Recirculation pipe Flange with insulating gasket 10 Motor... -
Page 12: Installation
Installation Installation Notes on safety for the installation Preliminary checks After carefully cleaning all around the area where the burner will Checking the consignment be installed, and arranging the correct lighting of the environ- ment, proceed with the installation operations. After removing all the packaging, check the integ- rity of the contents. -
Page 13: Operation Position
Installation Operation position The burner is designed for operation in positions Note that any other installation position is likely to 1 and 2 only. hinder the unit’s proper operation. Installations 3, Installation 1 is the preferred option as it is the 4 and 5 are prohibited as safety is compromised. - Page 14 Installation Fix the flange 4) (Fig. 8) to the boiler door 6) using screws 7) and (if necessary) the nuts 8) interposing the insulating Boiler door must have a max. thickness of gasket 5). 80 mm, refractory linig included. WARNING S7708 Fig.
-
Page 15: Hydraulic System
Hydraulic system Hydraulic system Pressurised one pipe systems The burner is designed to allow installation of the oil-lines on either side of the burner. Pressurised one pipe systems (Fig. 10) have a positive fuel pres- It is necessary to install a filter on the fuel supply sure on intake to the burner. -
Page 16: Depressurised Systems
Hydraulic system Depressurised systems L meters Depressurised systems (Fig. 11 and Fig. 12) have a negative fuel Øi Øi meters pressure (depression) on intake to the burner. 8 mm 10 mm Usually the tank is lower than the burner. D9550 = difference of level;... -
Page 17: Electrical System
Electrical system Electrical system Notes on safety for the electrical wiring The electrical wiring must be carried out with the electrical supply disconnected. Electrical wiring must be carried out by qualified personnel and in compliance with the regulations currently in force in the country of destination. -
Page 18: Electrical Connections
Electrical system Electrical connections Black Blue Brown Black White Blue D7240 CARRIED-OUT IN FACTORY TO BE DONE BY THE INSTALLER Main switch 230V ~ 50Hz Fig. 14 – Capacitor The section of the conductors must be at least – Electrode –... -
Page 19: Operation
In order to guarantee that emissions do not vary, recommended The manufacturing company shall not be liable for and/or alternative nozzles specified by Riello in the Instruction any such damage arising from nonobservance of and warning booklet should be used. -
Page 20: Pump Pressure
Operation Pump pressure Electrodes adjustment The pump leaves the factory set at 12 bar. To reach the electrodes, proceed as described in the paragraph 9.3 “Maintenance position” page 22. To change it act on pump pressure adjust screw 5) (Fig. 9). Do the following make the regulation: ... -
Page 21: Operation Programme
Operation Operation programme 8.9.1 Normal operation with preheating Key to lay-out – Flame detector – Ignition transformer – Enabling switch thermostat for start up after preheating – Signal of operation status from reset button – Fan motor – Diesel oil heater –... -
Page 22: Block Due To Non-Ignition
Operation 8.9.2 Block due to non-ignition Key to lay-out – Flame detector – Ignition transformer – Enabling switch thermostat for start up after preheating – Signal of operation status from reset button – Fan motor – Diesel oil heater – Limit thermostat –... -
Page 23: Maintenance
Maintenance Maintenance Notes on safety for the maintenance Check to make sure that no dust has accumulated inside the fan The periodic maintenance is essential for the good operation, or on its blades, as this condition will cause a reduction in the air safety, yield and duration of the burner. -
Page 24: Maintenance Position
Maintenance Maintenance position Accessibility to the nozzle, the diffuser disc and the electrodes is made easy in 2 ways, see Fig. 21 and Fig. 23: Pull the wires 2) (Fig. 21) from the control box and the pho- toresistance 8) and undo the nut 9) from the pump. ... -
Page 25: Control Box Visual Diagnostics
Maintenance Control box visual diagnostics The control box features a diagnostics function through which any causes of malfunctioning can be identified (indicator: RED LED). To use this function, you must press and hold the reset button for at least 3 seconds once it has entered the safety condition (lockout). The control box generates a sequence of led pulses, which is repeated at constant 2-second intervals. -
Page 26: Block Types And Intervention Times If The Burner Fails
Maintenance 9.4.2 Block types and intervention times if the burner fails DESCRIPTION OF THE FAILURE TYPES BLOCK Oil heater failure: the start up thermostat (K) does not make the switch After max. 6 minutes Presence of extraneous light on the ignition or the turning off of the burner After max. -
Page 27: Continuous Purging Function, (Only For Applications In Which This Is Provided For)
Maintenance 9.5.2 Continuous purging function, (only for 9.5.3 Long pre-purging (t7) operation applications in which this is provided for) The long pre-purging makes it possible too lengthen the purging of the air by the switching of the limit thermostat (TL) on the igni- Continuous purging is an operation that maintains the air purging tion of the flame for up to two minutes. -
Page 28: Faults / Solutions
Faults / Solutions Faults / Solutions Here below you can find some causes and the possible solutions for some problems that could cause a failure to start or a bad working of the burner. A fault usually makes the lockout lamp light come on which is situated inside the reset button of the control box 6) (Fig. 3). When lock out lamp lights the burner will attempt to light only after pushing the reset button. -
Page 29: 10.2 Operating Faults
Faults / Solutions 10.2 Operating faults FAULT POSSIBLE CAUSES SOLUTION Burner locks out during Flame disappears 4 times. Clean or replace photoresistance. operation. Replace dirty or deteriorated nozzle. Does not shut down. Check efficiency of photoresistance. Check efficiency of pressure regulator’s piston. Check efficiency of pump’s on-off valve. - Page 31 Indice Declaración ....................................3 Informaciones y advertencias generales ..........................4 Informaciones sobre el manual de instrucción ....................... 4 2.1.1 Peligros generales ................................4 2.1.2 Peligro componentes con tensión........................... 4 Garantía y responsabilidad............................. 5 Seguridad y prevención................................6 Introducción ..................................6 Formación del personal ..............................
- Page 32 Indice Mantenimiento...................................21 Notas sobre la seguridad para el mantenimiento ......................21 Programa de mantenimiento ............................21 9.2.1 Frecuencia del mantenimiento ............................21 9.2.2 Control y limpieza ................................21 Posición de mantenimiento ............................22 Diagnosis visual caja de control ............................23 9.4.1 Código de color del led indicador del pulsador de desbloqueo de la caja de control............23 9.4.2 Tipos de bloqueo y tiempos de intervención en caso de desperfecto del quemador............24 9.4.3 Desbloqueo de la caja de control ..........................24 9.4.4 Función de reciclado ..............................24...
-
Page 33: Declaración
CO max: 31 mg/kWh NOx max: 70 mg/kWh Declaración del fabricante RIELLO S.p.A. declara que los siguientes productos respetan los valores límite de emisión de los NOx impuestos por la legislación alemana “1. BImSchV versión 26.01.2010”. Producto Tipo Modelo Potencia Quemadores de gasóleo... -
Page 34: Informaciones Y Advertencias Generales
Informaciones y advertencias generales Informaciones y advertencias generales Informaciones sobre el manual de instrucción Introducción 2.1.2 Peligro componentes con tensión El manual de instrucción suministrado juntamente al quemador: Este símbolo distinguirá las operaciones que si no constituye parte integrante y fundamental del producto y no se ejecutan correctamente causarán descargas se debe separar del quemador;... -
Page 35: Garantía Y Responsabilidad
Informaciones y advertencias generales Garantía y responsabilidad garantiza sus productos nuevos a partir de la fecha de instalación según las normativas vigentes y/o de acuerdo con el contrato de venta. Verificar, en el momento de la primera puesta en funcionamiento, que el quemador esté en buen estado y com- pleto. -
Page 36: Seguridad Y Prevención
Seguridad y prevención Seguridad y prevención Introducción Formación del personal Los quemadores fueron diseñados y fabricados en con- El usuario es la persona, entidad o empresa que compra la má- formidad con las normas y directivas vigentes, aplicando las re- quina y que la usa con el fin para el cual fue concebida. -
Page 37: Descripción Técnica Del Quemador
Descripción técnica del quemador Descripción técnica del quemador Designación quemadores Serie : Quemadores Low NOx Combustible : Gasóleo Variación : Cabezal cónico Tamaños Alimentación eléctrica del sistema : 1/230V/50Hz 1/230/50 Modelos disponibles Designación Tensión Código BGK3 1/230V/50Hz 20012189 - 20015628 Datos técnicos Tipo 375T1... -
Page 38: Dimensiones Máximas
Descripción técnica del quemador Dimensiones máximas Las dimensiones del quemador y de la brida se muestran en la Fig. 1. ø 89 D7217 Fig. 1 Campo de trabajo El caudal del quemador debe seleccionarse dentro de la zona del Estos gráficos se han determinado considerando gráfico (Fig. -
Page 39: Descripción Del Quemador
Descripción técnica del quemador Descripción del quemador Quemador de gasóleo de una sola llama de funcionamiento con bajas emisiones contaminantes (Óxido de Nitrógeno NOx, Óxido de carbono CO e hidrocarburos no quemados). D9577 Fig. 3 Bomba de combustible Fotoresistencia amplificada Conjunto regulación registro de aire Cabezal de combustión Conjunto portaboquilla... -
Page 40: Instalación
Instalación Instalación Notas sobre la seguridad para la instalación Controles preliminares Seguir con las operaciones de instalación solo después de haber Control del suministro realizado una cuidadosa limpieza en toda el área de la instala- Después de quitar todo el embalaje, asegurarse ción del quemador y haber provisto de una correcta iluminación de que el contenido esté... -
Page 41: Posición De Funcionamiento
Instalación Posición de funcionamiento El quemador está preparado exclusivamente para Otra posición se debe considerar comprometente el funcionamiento en las posiciones 1 y 2 (Fig. 5). para el funcionamiento correcto del aparato. Las Es conveniente escoger la instalación 1 puesto instalaciones 3, 4 y 5 están prohibidas por moti- que es la única que permite el mantenimiento tal vos de seguridad. - Page 42 Instalación Fijar a la puerta de la caldera 6) (Fig. 8) la brida 4) con los tornillos 7) y (si es necesario) las tuercas 8) interponiendo La puerta de la caldera debe tener un espesor la junta aislante 5). máx.
-
Page 43: Instalación Hidráulica
Instalación hidráulica Instalación hidráulica Instalaciones de un tubo bajo presión El quemador está preajustado para conectar los tu- bos de alimentación del gasóleo de ambos lados. Las instalaciones de un tubo bajo presión (Fig. 10) presentan Es necesario instalar un filtro en la línea de ali- una presión del combustible positiva en la entrada del quemador. -
Page 44: Instalaciones Bajo Vacío
Instalación hidráulica Instalaciones bajo vacío Las instalaciones bajo vacío (Fig. 11 y Fig. 12) presentan una L metros presión del combustible negativa (vacío) en la entrada del que- mador. Por lo general el depósito está más abajo que el quema- Øi Øi metros... -
Page 45: Instalación Eléctrica
Instalación eléctrica Instalación eléctrica Notas sobre la seguridad para las conexiones eléctricas Las conexiones eléctricas se deben realizar sin alimentación eléctrica. Las conexiones eléctricas deben ser realizadas por personal calificado y según las normas vigentes en el país de destino. -
Page 46: Conexiones Eléctricas
Instalación eléctrica Conexiones eléctricas Negro Azul Marrón Negro Blanco Azul D7240 REALIZADA EN FÁBRICA A CARGO DEL INSTALADOR Interruptor general 230V ~ 50Hz Fig. 14 – Condensador – Electrodo La sección de los conductores debe ser de mín. – Fotoresistencia 1 mm . -
Page 47: Funcionamiento
Para garantizar la regularidad de las emisiones se deben utilizar La Sociedad fabricante no se responsabilizará de boquillas aconsejadas y/o alternativas indicadas por Riello en las ninguna manera por los daños causados debido a instrucciones y advertencias. -
Page 48: Presión Bomba
Funcionamiento Presión bomba Regulación electrodos La bomba se calibra en fábrica a 12 bar. Para acceder a los electrodos, realizar las operaciones indicadas en el apartado 9.3 “Posición de mantenimiento” pág. 22. Para realizar las variaciones, intervenir en el tornillo 5) (Fig. 9). Para realizar la regulación proceder de la siguiente manera: ... -
Page 49: Programa De Funcionamiento
Funcionamiento Programa de funcionamiento 8.9.1 Funcionamiento normal con pre- Leyenda – Detector de llama calentamiento – Transformador de encendido – Termostato para permitir el arranque después del pre- calentamiento – Señalización de funcionamiento desde le pulsador de desbloqueo – Motor del ventilador –... -
Page 50: Bloqueo Por Falta De Encendído
Funcionamiento 8.9.2 Bloqueo por falta de encendído Leyenda – Detector de llama – Transformador de encendido – Termostato para permitir el arranque después del pre- calentamiento – Señalización de funcionamiento desde le pulsador de desbloqueo – Motor del ventilador – Calentador de gasóleo –... -
Page 51: Mantenimiento
Mantenimiento Mantenimiento Notas sobre la seguridad para el mantenimiento Conexiones eléctricas Comprobar que las conexiones eléctricas del quemador sean co- El mantenimiento periódico es fundamental para el buen funcio- rrectas (pág. 16). namiento, la seguridad, el rendimiento y la duración del quema- dor. -
Page 52: Posición De Mantenimiento
Mantenimiento Posición de mantenimiento Se puede acceder a la boquilla, al disco estabilizador y a los electrodos de dos modos, ver Fig. 21 y Fig. 23: extraer los cables 2) (Fig. 21) de la caja de control y la foto- rresistencia 8), y desenroscar la tuerca 9) de la bomba. -
Page 53: Diagnosis Visual Caja De Control
Mantenimiento Diagnosis visual caja de control La caja de control tiene su propia función de diagnosis mediante la cual es posible detectar fácilmente las posibles causas de mal funcionamiento. (indicador LED ROJO). Para usar dicha función es necesario presionar el pulsador de desbloqueo por lo menos durante 3 segundos desde el instante de puesta en seguridad (bloqueo). -
Page 54: Tipos De Bloqueo Y Tiempos De Intervención En Caso De Desperfecto Del Quemador
Mantenimiento 9.4.2 Tipos de bloqueo y tiempos de intervención en caso de desperfecto del quemador DESCRIPCIÓN DE LOS TIPOS DE DESPERFECTOS BLOQUEO Desperfecto en el calentador de aceite: el contacto del termostato de encendido (K) Después de 6 minutos como máx. no conmuta Presencia de luz extraña durante el encendido o al apagarse el quemador Después de 30 segundos como máx. -
Page 55: Función De Ventilación Continua, (Sólo Para Aplicaciones Instaladas)
Mantenimiento 9.5.2 Función de ventilación continua, (sólo para 9.5.3 Función de pre-ventilación larga (t7) aplicaciones instaladas) La pre-ventilación larga permite extender el tiempo de ventilación del aire de la conmutación del termostato límite (TL) al encender La ventilación continua es una función que mantiene la ventila- la llama hasta los 2 minutos. -
Page 56: Anomalías / Soluciones
Anomalías / Soluciones Anomalías / Soluciones Se enumeran algunas causas y posibles remedios a una serie de anomalías que podrían producirse y provocar el no funcionamiento o funcionamiento irregular del quemador. Una anomalía del funcionamiento en la mayor parte de los casos, provoca el encendido de la señal dentro del pulsador de desbloqueo de la caja de control y de mando 6) (Fig. -
Page 57: 10.2 Anomalías En El Funcionamiento
Anomalías / Soluciones 10.2 Anomalías en el funcionamiento ANOMALÍAS POSIBLE CAUSA SOLUCIONES El quemador se bloquea Desaparición de la llama durante 4 veces. Limpiar o sustituir el revelador de llama. durante funciona- Sustituir la boquilla sucia o deteriorada. miento. No se apaga. Comprobar la eficiencia del revelador de llama. - Page 58 Notes - Notas ................................................................................................................................................................................................................................................................................................................................................................................................................................................................................................................................................................................................................................................................................................................................................................................................
- Page 59 Notes - Notas ................................................................................................................................................................................................................................................................................................................................................................................................................................................................................................................................................................................................................................................................................................................................................................................................
- Page 60 RIELLO S.p.A. I-37045 Legnago (VR) Tel.: +39.0442.630111 http:// www.riello.it http:// www.rielloburners.com Subject to modifications - Con la posibilidad de modificación...
Need help?
Do you have a question about the Gulliver BGK3 and is the answer not in the manual?
Questions and answers