Table of Contents
Advertisement
Quick Links
Owner's Instruction and Operation Manual
Model Number:
BH23
Report Number: F20-633
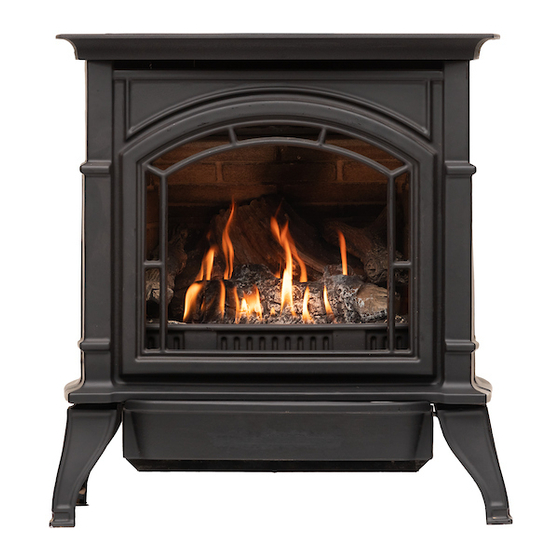
* All Pictures In This Manual Are For Illustrative Purposes Only. Actual Product May Vary.
Failure to follow safety warnings exactly could result in serious injury, death, or property damage.
Do not store or use gasoline or other flammable vapors and liquids in the vicinity of this or any other appliance.
WHAT TO DO IF YOU SMELL GAS:
• Do not try to light any appliance.
• Do not touch any electrical switch; do not use any phone in your building.
• Leave the building immediately.
• Immediately call your gas supplier from a neighbor's phone. Follow the gas supplier's instructions.
• If you cannot reach your gas supplier, call the fire department.
Installation and service must be performed by a qualified installer, service agency or the gas supplier.
Please read this manual BEFORE installing and
operating this unit.
INSTALLER: Leave this manual with the appliance.
CONSUMER: Retain this manual for future reference.
© 2021 Breckwell Hearth, South Pittsburg, TN 37380
R
Save These Instructions In A Safe Place For Future Reference.
FIRE OR EXPLOSION HAZARD
THIS MANUAL IS SUBJECT TO CHANGE WITHOUT NOTICE.
WARNING:
CALIFORNIA PROPOSITION 65 WARNING:
This product can expose you to chemicals including carbon
monoxide, which is known to the State of California to cause
cancer, birth defects, and/or other reproductive harm. For
more information, go to
www.breckwell.com
853844-4501K
www.P65warnings.ca.gov
PH. 423-403-4031
Advertisement
Table of Contents

Related Manuals for Breckwell BH23


Summary of Contents for Breckwell BH23
- Page 1 INSTALLER: Leave this manual with the appliance. cancer, birth defects, and/or other reproductive harm. For more information, go to www.P65warnings.ca.gov CONSUMER: Retain this manual for future reference. THIS MANUAL IS SUBJECT TO CHANGE WITHOUT NOTICE. © 2021 Breckwell Hearth, South Pittsburg, TN 37380 www.breckwell.com PH. 423-403-4031...
-
Page 2: Code Approval
• After-market: Completion of sale, not for purpose of resale, from the manufacturer. RETAIN YOUR ORIGINAL RECEIPT FOR ANY WARRANTY CLAIMS. CONTACT YOUR DEALER OR INSTALLER IF YOU NEED TO FILE A CLAIM. © 2021 Breckwell Hearth... -
Page 3: Installation Checklist
Your Gas Stove should be installed by a qualified installer only. An NFI qualified Installer can be found at www.nficertified. org/public/find-an-nfi-pro/ For customer service, please contact your Breckwell dealer or visit www.Breckwell.com COMMISSIONING CHECKLIST This Checklist is to be completed in full by the qualified person who installs this unit. Keep this page for future reference. -
Page 4: Safety Label
See installation and operating instructions accompanying appliance. CAUTION: Do not operate the appliance with glass removed, cracked, or broken. Replacement of the panel(s) should be done by a licensed or qualified service person. 853069B DIMENSIONS Width 26-9/16 Height 28-3/4 Depth 25-5/8 © 2021 Breckwell Hearth... -
Page 5: Massachusetts Residents Only
In addition, the installing plumber or gas fitter shall observe © 2021 Breckwell Hearth... - Page 6 Product Approved side wall horizontally vented gas fuelled equipment does not provide the parts for venting the flue gases, but identifies “special venting systems,” the following requirements shall be satisfied by the manufacturer: © 2021 Breckwell Hearth...
-
Page 7: Safety Information
• immediately call your gas supplier from a neighbor’s 12. Do not use this stove to cook food or burn paper or phone. Follow the gas supplier’s instructions. other objects. © 2021 Breckwell Hearth... - Page 8 20. Do not operate the stove with the glass door removed, cracked, or broken. Do not strike the front of the appliance. Possible damage to the glass can occur. © 2021 Breckwell Hearth...
-
Page 9: Product Features
(5.9 kW) THE VENTING SYSTEM MUST NEVER BE ATTACHED TO A Orifice Size CHIMNEY SERVING A SEPARATE SOLID FUEL BURNING APPLIANCE. EACH GAS APPLIANCE MUST USE A SEPARATE VENT SYSTEM. DO NOT USE COMMON VENT SYSTEMS. © 2021 Breckwell Hearth... - Page 10 Do not install any damaged, incomplete, or substitute parts. Check your packing list to verify that all listed parts have been received. AA BATTERIES (4 PACK) BATTERY BOX © 2021 Breckwell Hearth...
-
Page 11: Clearances To Combustibles
ALCOVE H Height From Hearth 48” 1219 mm Depth 48” 1219 mm K Width 36” 914 mm NOTE: Maintain minimum side and back clearances when placing stove in alcove. © 2021 Breckwell Hearth... -
Page 12: Installation Information
• Minimum clearances to combustibles, side-wall, ceiling, woodwork, and windows must be maintained. • This stove may be installed along a wall, across a corner, or use an exterior chase. Refer to the figure below for suggested locations. © 2021 Breckwell Hearth... -
Page 13: Stove Installation
NATURAL GAS. ONE - OR TWO - POUND PER SQUARE INCH (PSI) SYSTEMS WILL DAMAGE THIS APPLIANCE AND MAY CAUSE FIRE HAZARD. When using copper or flex connectors use only fittings approved for gas connections. The gas control inlet is 3/8” NPT. © 2021 Breckwell Hearth... - Page 14 A sediment trap traps moisture and contaminants. This keeps them from going into the burner system gas controls. If sediment trap/drip leg is not installed or is installed wrong, burner system may not run properly. © 2021 Breckwell Hearth...
-
Page 15: Installation Planning
1”. • Horizontal Termination • Vertical Termination It is important to select the proper length of vent pipe for the type of termination you choose. It is also important to note the wall thickness. © 2021 Breckwell Hearth... -
Page 16: Vertical Vent Cap Termination
NOTES: Wall thimble products that comply with the required 1” (25 mm) clearance to combustibles must be installed for H - MINIMUM HEIGHT FROM ROOF all horizontal vent runs that pass through interior or exterior TO LOWEST DISCHARGE OPENING © 2021 Breckwell Hearth... -
Page 17: Wall Thickness
A high temperature black silicone length, when terminating through the wall may be graded sealant may be used in the outer joints as a substitute to foil downwards slightly to prevent water migration. © 2021 Breckwell Hearth... -
Page 18: Venting Installation
3. We assumes no responsibility for the improper ‡ only permitted if veranda, porch, deck or balcony is fully open on a performance of the appliance when the venting system minimum 2 sides beneath the floor: does not meet these requirements. © 2021 Breckwell Hearth... -
Page 19: Termination Clearances
9’ (2.7 m) 2/3 x D Actual 12’ (3.7 m) 1/2 x D Actual = # of Termination caps x 3 Min. = (2 / # termination caps) x D Max. Actual Combustible & Noncombustible 12" (305 mm) © 2021 Breckwell Hearth... -
Page 20: Restrictor Adjustment
UNIT IF ONE OR BOTH SCREWS ARE NOT IN POSITION! SET POSITION SCREW DO NOT REMOVE THIS SCREW Note: Restricter settings may vary, depending on unique venting configurations beyond that described in this manual DO NOT REMOVE 30° Setting Indicator Set Position Screw © 2021 Breckwell Hearth... -
Page 21: Installation For Horizontal Termination
The center of the hole should line up with the center line of the horizontal rigid vent pipe. Cut a 9-1/2” x 9-1/2” (241 x 241 mm) square hole through combustible exterior wall (7-1/2” [190 mm] diameter hole if noncombustible). Frame as necessary. © 2021 Breckwell Hearth... -
Page 22: Horizontal Termination Configurations
Cut Vinyl Siding Away to Fit Standoff Interior Wall Apply Mastic Surface to All Four Sides Vent Cap Standoff (Horizontal Decorative Termination) Wall Thimble Vent Bolt Horizontal Connect Vent Cap with Vent Pipe Screw Wood Screw Horizontal Vent Pipe © 2021 Breckwell Hearth... - Page 23 90° Elbows Horizontal Venting with Two (2) 90° Elbows Maximum Horizontal Vertical Minimum H + H¹ 24” (610 mm) 54-1/2” (1384) 20” (6m) 102-1/4” (2597 mm) NOTE: Add 1/4” rise per 12” horizontal length of pipe. © 2021 Breckwell Hearth...
-
Page 24: Vertical Terminations
NG/LPG - 90° ELBOW + 6” (152mm) H 0 2 4 6 8 10 12 14 16 18 20 4ft (1.3m) H Restricteur 10 ° Ouvert Restrictor 30° Open Restrictor Fully Open NG/LPG - TOP VENT COMBINATION VENTING (V/H) © 2021 Breckwell Hearth... -
Page 25: Installation For Vertical Termination
There must be a 1” minimum clearance NOTE: Add 1/4” rise per 12” horizontal length of pipe. from the vent pipe to combustible materials. Frame the NOTE: V + V1 = 20’ (6 m) maximum. opening as shown in this manual. © 2021 Breckwell Hearth... -
Page 26: Cathedral Ceiling Installation
5. Complete the cathedral ceiling installation by following REVIEW ALL INFORMATION ON PREVIOUS PAGE BEFORE the same procedures outlines in Steps 2 through 6 for PLANNING THIS INSTALLATION. CATHEDRAL CEILING Flat Ceiling Installation. INSTALLATIONS CAN BE VERY TRICKY © 2021 Breckwell Hearth... - Page 27 No Horizontal Run Venting with Two (2) 90° Elbows Maximum Horizontal (H Minimum Vertical (V) + H¹) 24” (610 mm) 44-3/4” (1137 mm) 20” (6m) 98-3/4” (2508 mm) Vertical Rigid Venting Configuration using Two (2) 90° Elbows © 2021 Breckwell Hearth...
-
Page 28: Stove Installation
STEP 1 STEP 2 & 3 NOTE: When properly installed the side panel is designed to hold the top panel in place. STEP 2 STEP 3 STEP 2 STEP 4 STEP 4 © 2021 Breckwell Hearth... -
Page 29: Safety Barrier
MANUFACTURER’S BARRIER FOR THIS APPLIANCE. • ONLY THE BARRIER CERTIFIED WITH THIS UNIT SHALL BE USED. • ONLY DOORS CERTIFIED WITH THE APPLIANCE SHALL BE USED. • DO NOT OPERATE THIS UNIT WITHOUT THE SAFETY BARRIER © 2021 Breckwell Hearth... - Page 30 2. Pull the spring-loaded latches out and down to secure the top of the glass to the top of the appliance. HERE HERE © 2021 Breckwell Hearth...
-
Page 31: Operation Information
Locate the four function buttons on the MANUAL NORMAL SMART remote control: MODE THERMOSTAT MODE 1. On/Off Button: This button turns the appliance on or off. When this button is depressed, and the system is © 2021 Breckwell Hearth... - Page 32 6 speeds and off. To activate this function, press the Mode Your remote control displays and controls the following button until it displays the fan icon. Use the up/down arrow functions. See below for detailed control icon explanations. © 2021 Breckwell Hearth...
-
Page 33: Safety Information
4. There will be an audible beep and then the igniter will trapped inside the firebox. begin to spark. After the pilot lights and is established, © 2021 Breckwell Hearth... -
Page 34: Turning Off
Canada: 0 à 4 500 pieds (0 à 1372m) Report # F20-633 Breckwell Hearth 227 Industrial Park Road, South Pittsburg, TN 37380 • Web: www.breckwell.com • Phone: 423-403-4031 Natural Gas / Gaz Naturel LP Gas / Gaz Propane 853859 fronts, doors, facing materials, and their applications. - Page 35 WHEN IT HAS COOLED TO ROOM TEMPERATURE. if used incorrectly will cause odor issues. Breckwell is not responsible for any odor issues caused by materials used. If you have any additional questions or concerns, contact HOW DO I CLEAN THE GLASS? your authorized dealer or email www.breckwell.com.
- Page 36 LCD display of the remote control before brought to their attention. all battery power is lost. When the batteries are replaced, this icon will disappear. WHY DID MY THERMOSTAT DISAPPEAR FROM © 2021 Breckwell Hearth...
-
Page 37: Pressure Testing
4. Light burner. Check manometer reading. pressure testing of the system at test pressures in excess of 5. Turn burner and pilot off. 1/2 psi (3.5 kPa). © 2021 Breckwell Hearth... -
Page 38: Burner Flame Adjustments
LP Gas Closed as specified below. Adjustments should only be made by a qualified installer. NOTE: For altitudes above 5,000 ft., some variations may be required. © 2021 Breckwell Hearth... -
Page 39: Troubleshooting
Adjust if necessary. off burner Blockage or leakage of the vent Check the vent pipes for leaks, and the vent cap for debris. Repair system the vent pipes or remove debris from vent cap, if necessary. © 2021 Breckwell Hearth... - Page 40 No communication between No reaction to remote control and ignition Reprogram remote control to the ignition module. command module A maximum number of failed ignitions or flame restorations Reset ignition module. has been reached © 2021 Breckwell Hearth...
-
Page 41: Maintenance
(see Installation section). Performed by: Qualified Service Person Frequency: Annually Action: • Examination of the vent system is required. • The flow of combustion and ventilation air must not be Burner Orifice obstructed. Burner Ports © 2021 Breckwell Hearth... -
Page 42: Electrical Installation
OF LOCAL CODES, WITH THE NATIONAL ELECTRICAL CODE ANSI/NFPA 70 (LATEST EDITION) AND CANADIAN ELECTRICAL CODE, CSA C22.1. FEMALE PILOT FLAME SENSOR IGNITER BATTERY PACK MAIN ON/OFF SWITCH 885 PROFLAME PILOT BURNER (OPTIONAL) VARIABLE SPEED FANS SW1 BUTTON (RED) © 2021 Breckwell Hearth... -
Page 43: How To Order Repair Parts
Other information that may be needed would be the part number and part description of the item(s) in question. Part numbers and descriptions can be found in the “Repair Parts” section of this manual. Once this information has been gathered you can contact your Breckwell dealer or visit www.Breckwell.com Model Information Model Number Dealer’s Name... - Page 44 REPLACEMENT PARTS & SERVICES © 2021 Breckwell Hearth...
- Page 45 NOTES © 2021 Breckwell Hearth...
Need help?
Do you have a question about the BH23 and is the answer not in the manual?
Questions and answers