Table of Contents
Advertisement
1
APPLICATION .................................................................................. 4
2
DESCRIPTION ................................................................................. 4
3
PACKAGE CONTENT LIST ............................................................. 5
4
SYMBOLS ........................................................................................ 5
5
GENERAL POWER TOOL SAFETY WARNINGS .......................... 6
5.1
Work area ................................................................................................................ 6
5.2
Electrical safety ....................................................................................................... 6
5.3
Personal safety ....................................................................................................... 6
5.4
Power tool use and care ......................................................................................... 7
5.5
Service ..................................................................................................................... 7
5.6
Additional general safety instructions for power tools ........................................ 7
6
6.1
For both Mitre saw mode and table saw (bench saw) mode: ............................... 8
6.2
When using in Mitre saw mode: ............................................................................. 9
6.3
When using in the table saw (bench saw) mode: .................................................. 9
7
INSTALLATION .............................................................................. 10
7.1
Bench mounting (Fig. 1 & 3) ................................................................................. 10
7.1.1
For the fully-extended feet set up as the high table. ................................................ 10
7.1.2
For the folded feet set up as the low table ............................................................... 10
8
FUNCTIONAL DESCRIPTION ....................................................... 10
8.1
Blade guard (Fig. 4, 5 & 6) .................................................................................... 10
8.2
Maintaining maximum cutting capacity (Fig. 7) .................................................. 11
8.3
Adjusting the Mitre angle (Fig. 9 & 10) ................................................................. 12
8.4
Adjusting the bevel angle (Fig. 11 & 12) .............................................................. 12
8.4.1
In the Mitre saw mode ............................................................................................. 12
8.4.2
In the table saw mode (Fig. 13) ............................................................................... 12
8.5
Switch action (Fig. 14) .......................................................................................... 12
8.5.1
packaging as table saw) .......................................................................................... 12
8.6
Switch for table saw mode (B) ............................................................................. 12
8.7
Adjusting the depth of cut (Fig. 15 - 20) .............................................................. 12
Copyright © 2017 VARO NV
POWX07587
P a g e
| 1
EN
www.varo.com
Advertisement
Table of Contents

Subscribe to Our Youtube Channel
Related Manuals for Powerplus POWX07587


Summary of Contents for Powerplus POWX07587
-
Page 1: Table Of Contents
POWX07587 APPLICATION .................. 4 DESCRIPTION ................. 4 PACKAGE CONTENT LIST ............. 5 SYMBOLS ..................5 GENERAL POWER TOOL SAFETY WARNINGS ......6 Work area ........................ 6 Electrical safety ....................... 6 Personal safety ....................... 6 Power tool use and care ..................7 Service ........................ - Page 2 POWX07587 ASSEMBLY ..................13 Table height two way set up ................. 13 9.1.1 High table set up (Fig. 17) ..................13 9.1.2 Low table set up ...................... 13 Installing or removing saw blade ................. 13 Adjusting riving knife (fig 23,24 & 25) ..............14 Installing and adjusting rip fence (43)(Fig.
- Page 3 POWX07587 10.1 Cutting as mitre saw ..................... 18 10.1.1 Press cutting ...................... 18 10.1.2 Mitre cutting ....................... 18 10.1.3 Bevel cut ......................19 10.1.4 Compound cutting ....................19 10.1.5 Cutting aluminum extrusion (Fig. 53) ..............19 10.2 Cutting as table saw (bench mode) ..............19 10.2.1...
-
Page 4: Application
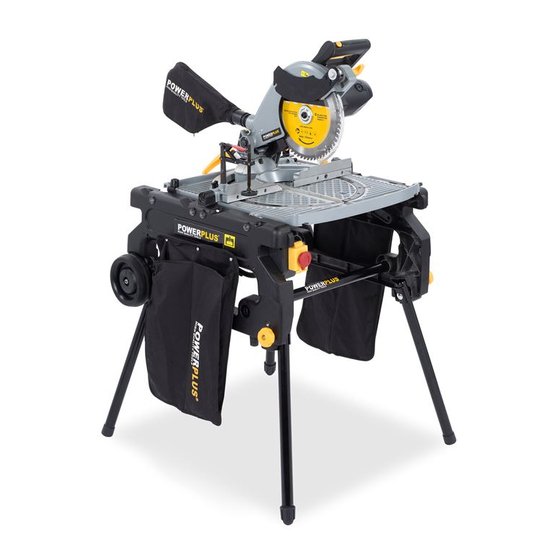
POWX07587 FLIP OVER SAW 2000W POWX07587 1 APPLICATION The tool is intended for accurate straight and Mitre cutting in wood. The tool can be used both in Mitre saw mode and in table saw mode by turning over the table around its axis. -
Page 5: Package Content List
POWX07587 3 PACKAGE CONTENT LIST ▪ Remove all packing materials ▪ Remove remaining packaging and transit supports (if existing) ▪ Check the completeness of the packing content ▪ Check the appliance, the power cord, the power plug and all accessories for transportation damages. -
Page 6: General Power Tool Safety Warnings
POWX07587 5 GENERAL POWER TOOL SAFETY WARNINGS Read all safety warnings and all instructions. Failure to follow all warnings and instructions may result in electric shock, fire and/or serious injury. Save all warnings and instructions for future reference. The term "power tool" in the warnings refers to your mains operated (corded) power tool or battery operated (cordless) power tool. -
Page 7: Power Tool Use And Care
POWX07587 Power tool use and care ▪ Do not force the power tool. Use the correct power tool for your application. The correct power tool will do the job better and safer at the rate for which it was designed. -
Page 8: Additional Safety Instructions For Table Saws
POWX07587 ▪ This power tool complies with the relevant safety regulations. Repairs may only be carried out by a qualified electrician using original spare parts; otherwise there is a risk of accidents for the user. 6 ADDITIONAL SAFETY INSTRUCTIONS FOR TABLE SAWS For both Mitre saw mode and table saw (bench saw) mode: ▪... -
Page 9: When Using In Mitre Saw Mode
POWX07587 ▪ Unplug tool before changing blade, servicing or not in use. ▪ Some dust created from operation contains chemicals known to cause cancer, birth defects or other reproductive harm. Some examples of these chemicals are: lead from lead-based-painted material and, ... -
Page 10: Installation
POWX07587 ▪ Make sure that the turn table is fixed securely. ▪ Make sure that the arm is securely fixed in the working position. Tighten the lever clockwise to fix the arm. ▪ Use push stick or push block to avoid working with the hands and fingers close to the saw blade. -
Page 11: Maintaining Maximum Cutting Capacity (Fig. 7)
POWX07587 When lowering the handle while pushing the lever to the left, the lower blade guard A rises automatically. The lower blade guard B rises as it contacts a workpiece. The lower blade guards are spring loaded so it returns to its original position when the cut is completed and the handle is raised. -
Page 12: Adjusting The Mitre Angle (Fig. 9 & 10)
POWX07587 Adjusting the Mitre angle (Fig. 9 & 10) Loosen the clamping screw (16) on the guide fence (13) by turning counterclockwise. Turn the turn table by handle. When you have moved the handle to the position where the pointer points to the desired angle on the Mitre scale, securely tighten the clamping screw clockwise. -
Page 13: Assembly
POWX07587 CAUTION: ▪ The stopper pin cannot be turned with the tool head at fully lowered position. At this time, turn the knob counterclockwise slightly and the stopper pin can be released. (Fig. 16) 9 ASSEMBLY CAUTION: ▪ Always be sure that the tool is switched off and unplugged before carrying out any work on the tool. -
Page 14: Adjusting Riving Knife (Fig 23,24 & 25)
POWX07587 CAUTION: ▪ The ring 30 mm in outer diameter is factory-installed between the inner and outer flanges. Return the lower blade guard (7) to its original position. Lower the handle to make sure that the lower blade guards move properly. Make sure shaft lock has released spindle before making cut. -
Page 15: Installing And Adjusting Mitre Gauge (Fig. 33)
POWX07587 The rip fence is factory adjusted so that it is parallel to the blade surface. Make sure that it is parallel. To check to be sure that the rip fence is parallel with the blade, adjust the blade height with the cutting depth adjusting knob so that the blade appears at the topmost position from the table. -
Page 16: Setting Up The Tool In Table Saw Mode
POWX07587 Setting up the tool in table saw mode CAUTION: ▪ Before use in the table saw mode, make sure that the turn table has been secured at 0° Mitre angle with the clamping screw on the guide fence. Remove vise rod (58) ▪... -
Page 17: Turning Over The Tool (Fig. 45)
POWX07587 9.8.7 Turning over the tool (Fig. 45) WARNING: ▪ Make sure that the tool is switched off and unplugged before turning over. ▪ When pushing down the lever (62), be sure to place your hand/finger away from the lever- table fitting area. -
Page 18: Tilting The Saw Table
POWX07587 9.9.8 Tilting the saw table 9.9.9 Unlocking the tool head in the lowest position 9.9.10 Installing or removing the sub fences R and L (Fig. 49) CAUTION: When cutting a workpiece over 20 mm thick, make sure that the sub fences R and L are securely installed with a screw. -
Page 19: Bevel Cut
POWX07587 10.1.3 Bevel cut Loosen the lever (19) and tilt the saw blade to set the bevel angle (Refer to the previously covered “Adjusting the bevel angle” 8.4). Be sure to retighten the lever (19) firmly to secure the selected bevel angle safely. Secure the workpiece against guide fence and turn table. -
Page 20: Work Helpers
POWX07587 ▪ Always use “work helpers” such as push sticks and push blocks when cutting small or narrow workpieces, or when the ado head is hidden from view while cutting. 10.2.1 Work helpers Push sticks, push blocks or auxiliary fence are types of “work helpers”. Use them to make safe, sure cuts without the need for the operator to contact the blade with any part of the body. -
Page 21: Auxiliary Wood Facing (Mitre Gauge) (Fig. 60)
POWX07587 10.2.8 Auxiliary wood facing (Mitre gauge) (Fig. 60) To prevent a long board from wobbling, fit the Mitre gauge with an auxiliary fence board. Fasten with bolts/ nuts after drilling holes, but fasteners must not protrude from the face board. -
Page 22: Technical Data
POWX07587 12 TECHNICAL DATA Type POWX07587 voltage - Frequency 230V - 50Hz Power 2000W S6 No load speed 4200 min-1 TCT - 254 x 30 x 2.8 mm – 60T Blade tabel height 800mm Net weight 30kg Safety class II / double insulated Mitre Saw : Max. -
Page 23: Warranty
We also disclaim all liability for any bodily injury resulting from inappropriate use of the tool. ▪ Repairs may only be carried out by an authorised customer service centre for Powerplus tools. ▪ You can always obtain more information at the number 00 32 3 292 92 90. -
Page 24: Declaration Of Conformity
POWX07587 17 DECLARATION OF CONFORMITY VARO N.V. - Joseph Van Instraat 9 - BE2500 Lier - BELGIUM, declares that, product: Flip over saw 2000W trade mark: POWERplus model: POWX07587 is in conformity with the essential requirements and other relevant provisions of the applicable European Directives, based on the application of European harmonized standards.
Need help?
Do you have a question about the POWX07587 and is the answer not in the manual?
Questions and answers
Unfortunately, the Figures (diagrams) are not included in the Manual. Where or how can I find them?
The diagrams for the Powerplus POWX07587 manual can be found in the installation section, specifically in Figure 1 & 3 for bench mounting and Figure 4, 5 & 6 for the blade guard.
This answer is automatically generated