Grundfos CUE Installation And Operating Instructions Manual
Hide thumbs
Also See for CUE:
- Installation and operating instructions manual (46 pages) ,
- Safety instructions and other important information (26 pages) ,
- Instructions manual (26 pages)

Subscribe to Our Youtube Channel
Related Manuals for Grundfos CUE


Summary of Contents for Grundfos CUE
- Page 1 GRUNDFOS INSTRUCTIONS Installation and operating instructions Data booklet Safety instructions English (all available languages) http://net.grundfos.com/qr/i/96706948 http://net.grundfos.com/qr/i/99674140...
- Page 3 English (GB) Installation and operating instructions ............4 Български...
-
Page 4: Table Of Contents
Receiving the product ..... . . 5 The symbols and hazard statements below may appear in Grundfos Transporting the product ..... . 5 installation and operating instructions, safety instructions and Inspecting the product. -
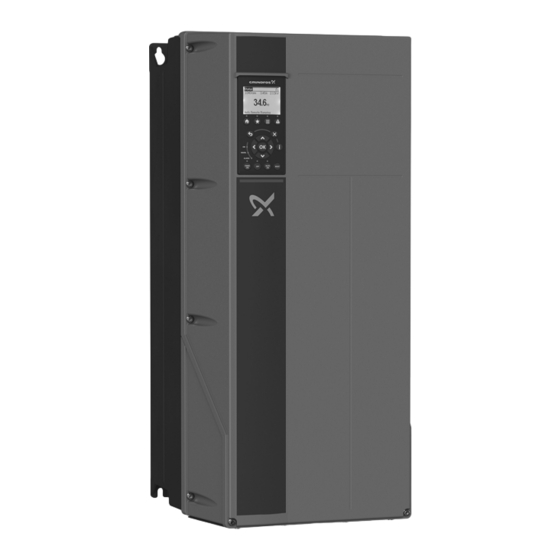
Page 5: Product Introduction
Tamb. Maximum ambient temperature be overloaded. 2.4.2 Packaging label CUE can also be identified by means of the label on the packaging. 2.2 Intended use CUE frequency converters can be used in both new and existing 3. Receiving the product installations. -
Page 6: Installation Requirements
0.55 - 7.5 kW 11 - 90 kW 110 - 250 kW 380-500 V At low air pressure, the cooling capacity of air is reduced, and CUE (0.75 - 10 hp) (15 - 125 hp) (150 - 350 hp) automatically reduces the performance to prevent overload. -
Page 7: Mechanical Installation
5.2 Space requirements and air circulation Crushing of feet Death or serious personal injury The CUE units can be mounted side by side, but as sufficient air ‐ circulation is required for cooling, these requirements must be met: CUE is very heavy and may fall over if the pedestal is not anchored to the floor. -
Page 8: Electrical Connection
[mm] [mm] 6.1.2 Protection against short circuit, fuses CUE and the supply system must be protected against short circuit. Grundfos requires that the backup fuses mentioned in section "Cable cross-section to signal terminals" are used for protection against short circuit. -
Page 9: Emc-Correct Installation
The total leakage current of all the electrical equipment in the installation must be taken into account. The leakage current of CUE in normal operation can be seen in the electrical data section. During startup and in asymmetrical supply systems, the leakage current can be higher than normal and may cause the ELCB/RCD to trip. -
Page 10: Motor Cable
Applications with requirements. desired reduction of dU/dt, voltage peaks 0-300 m The supply voltage and frequency are marked on the CUE and noise emission, nameplate. Make sure that CUE is suitable for the power supply of high reduction the installation site. - Page 11 6.8.3.1 Enclosures A2, A3 and B3 6.8.3.2 Enclosures A5, B1, B2, B4, C1, C2, C3, C4, D1 and D2 6.5.1 Main switch A main switch can be installed before the CUE cabinet according to local regulations. See the figure in the EMC-correct installation section.
- Page 12 6.5.4 Motor connection, enclosures A2 and A3 1. Connect the earth conductor to terminal 99 (PE) on the For single-phase connection, use L1 and L2. mounting plate. 2. Connect the motor conductors to terminals 96 (U), 97 (V) and 98 6.5.6 Motor connection, enclosures A4 and A5 (W) of the motor plug.
- Page 13 For single-phase connection, use L1 and L2. 6.5.8 Motor connection, enclosures B1 and B2 1. Connect the earth conductor to terminal 99 (PE). See the figure below. 2. Connect the motor conductors to terminals 96 (U), 97 (V) and 98 (W).
- Page 14 6.5.15 Gland plate, enclosures D1h, D2h, D5h and D7h Cables are connected through the gland plate from the bottom. The gland plate must be fitted to CUE to ensure the specified protection 2. Connect the mains conductors to terminals 91 (L1), 92 degree as well as to ensure sufficient cooling.
- Page 15 1. Connect the earth conductor to terminal 99 (PE). See the figures below. 2. Connect the motor conductors to terminals 96 (U), 97 (V) and 98 (W). 3. Fix the screened cable with a cable clamp. CUE viewed from the bottom [mm] [9.5] [1.7] [4.8] Gland plate, enclosure D5h [13.3]...
-
Page 16: Sto Installation, Optional
1. Remove the jumper wire between control terminals 37 and 12 or 13. Cutting or breaking the jumper is not sufficient to avoid short-circuiting. 1. Connect an external safety-monitoring relay via a NO safety function to terminal 37 (STO) and either terminal 12 or 13, 24 V Select and apply the components in the safety control system appropriately to achieve the desired level of operational safety. -
Page 17: Connecting The Signal Terminals
6.6.2 Restart settings • Remove the 24 V DC voltage supply to terminal 37 using the interrupt device while the frequency converter drives the motor, that is the mains supply is not interrupted. • Check that the motor coasts and that the alarm Safe Stop displays in the local operating panel, if mounted. - Page 18 6.7.2.1 Accessing the signal terminals All signal terminals are behind the terminal cover on the front side of CUE. Remove the terminal cover as shown in the figures below. 61 68 69 61 68 69 39 42 50 53 54 55...
- Page 19 Access to signal terminals, D1h and D2h Setting contact A54 to current signal "I" 6.7.2.4 RS-485 GENIbus network connection One or more CUE units can be connected to a control unit via GENIbus. The reference potential, GND, for RS-485 (Y) communication must be connected to terminal 61.
-
Page 20: Connecting The Signal Relays
BUS TER Terminals for relay connection, A2 and A3 Setting the termination contact to ON 6.8 Connecting the signal relays As a precaution, signal cables must be separated from other cable groups by reinforced insulation in their entire lengths. Terminals for relay connection, A4, A5, B1 and B2 Terminals for signal relays in normal state (not activated) Terminal Function... - Page 21 Terminals 10, 11 and 12 are not used. 6.8.3 Fitting MCB 114 in CUE 6.8.3.1 Enclosures A2, A3 and B3 1. Switch off the power to CUE. See the section regarding mains and motor connection. 2. Remove the operating panel, the terminal cover and the frame Terminals for relay connection, C3, C4, D1h, D2h, D5h and D7h, from CUE.
-
Page 22: Starting Up The Product
37 of the frequency converter. By connecting the frequency converter to external safety devices providing a safe delay, an 2. Remove the operating panel and the cradle from CUE. See the installation for a Safe Stop 1 is obtained. External safety devices figure below. -
Page 23: Control Functions
8. Control functions Pos. Buttons Description AUTO ON: puts the system in remote The display contrast can be adjusted by pressing [Status] operating mode. and then pressing [Up] or [Down]. AUTO • Responds to an external start command by control terminals or serial communication. -
Page 24: Menu Structure
8.3 Menu structure 1(1) Main Menu Groups 0-** to 203-** Group 0 Group x Group 203 Selection Selection Selection Parameter group Parameter group Parameter group 0-0* to 0-8* x-x* to x-x* 203-0* to 203-8* Parameter Parameter Parameter Selection Selection Selection Parameter Parameter Parameter... -
Page 25: Operating Modes
202-1* Temperature Input Sensor Setup 8-8* FC Port Diagnostics 22-3* No-Flow Power Tuning 203 - Status Monitor 8-9* Bus Jog / Feedback 22-4* Sleep Mode 203-0* Grundfos Readouts 13-** Smart Logic 22-5* End of Curve 203-1* GENIbus 13-1* Comparators 23-** Timer-based Functions... -
Page 26: Setting The Product
English Constant flow rate The flow rate is kept constant, Language independently of the head. 3. Select the unit type depending on the region where CUE is installed. Start-up Guide 1(1) Constant Please select units used temperature for setup... - Page 27 5. Select the required motor type (Asynchronous motor, PM 10. The direction of rotation is set for CUE by default. If needed, Assisted Sync. Reluctance motor, IPM motor, SPM motor) and double-check the direction of rotation by selecting "Yes", and follow the startup guide.
-
Page 28: Uploading Or Downloading Data
You cannot cross platforms between CUE 202 (old model) parallel? and CUE 203 (new model). CUE 203 is not compatible with the keypad, storing and uploading settings of CUE202. 1. Navigate to 0-5* Copy/Save, and press OK. -
Page 29: Setting A Synchronous Reluctance Motor
4. 1-39 Motor Poles RPM as follows: Back EMF = (Voltage / RPM) × 1000 = (320 / 1800) × 1000 = 178. This is the value that must be 5. 1-30 Stator Resistance (Rs). Enter the line-to-common stator programmed for 1-40 Back EMF at 1000 RPM. winding resistance (Rs). -
Page 30: Servicing The Product
‐ Touching the electrical parts may be fatal, even after CUE has been switched off. Conduct a functional test every 12 months to detect any failure or malfunction of the STO functionality. To conduct the functional test, perform the following steps: •... -
Page 31: Fault Finding The Product
11. Fault finding the product 11.1 Overview of warnings and alarms Type LED indicator Warning Yellow Alarm Flashing red Trip lock Yellow and red Number Description Warning Alarm Alarm, trip lock 10 V low ● Live zero error (●) (●) No motor (●) Mains phase loss... - Page 32 Number Description Warning Alarm Alarm, trip lock AMA calibration failed ● AMA check U and I ● AMA low I ● AMA motor too large ● AMA motor too small ● AMA parameter out of range ● AMA interrupted by user ●...
- Page 33 Number Description Warning Alarm Alarm, trip lock 2004 External fault ● 2007 Too high bearing temperature ● ● 2008 Too high bearing temperature ● ● 2010 Setpoint signal is outside range ● 2011 Sensor 1 is outside range ● 2012 Sensor 2 is outside range ●...
-
Page 34: Technical Data
5. Mechanical installation 12.3.1 Cable glands Select standard gland holes for CUE frequency converters used 12.2 Operating conditions outside USA and Canada. Select imperial gland holes for CUE frequency converters used in Relative humidity 5-95 % USA and Canada. Max. 50 °C Ambient temperature (122 °F) - Page 35 12.3.2 Cable requirements Maximum length, screened 150 m (500 ft) motor cable Maximum length, unscreened 300 m (1000 ft) motor cable Maximum length, signal cable 300 m (1000 ft) Always comply with local regulations on cable cross- sections. 12.3.3 Cable cross-sections to signal terminals Maximum cable cross-section to 1.5 mm signal terminals, rigid conductor...
- Page 36 12.3.4 Non-UL fuses and conductor cross-sections to mains and motor, for installations outside North America Typical shaft power P2 Maximum fuse size Fuse type Maximum conductor cross-section [kW (hp)] 1 x 200-240 V 1.1 (1.5) 1.5 (2) 2.2 (3) 3 (4) 3.7 (5) 5.5 (7.5) 7.5 (10)
- Page 37 Typical shaft power P2 Maximum fuse size Fuse type Maximum conductor cross-section 3 x 525-600 V 0.75 (1) 1.1 (1.5) 1.5 (2) 2.2 (3) 3 (4) 4 (5) 5.5 (7.5) 7.5 (10) 11 (15) 15 (20) 18.5 (25) 22 (30) 30 (40) 37 (50) 45 (60)
- Page 38 12.3.5 UL fuses and conductor cross-sections to mains and motor, for installations in North America Fuse type Maximum Typical shaft conductor Bussmann SIBA Littel Fuse Ferraz-Shawmut cross- power P2 RK1/ section RK1/SIBA RK1/E1958/ J/E4273 T/ T/E4274 H/ Bussmann CC/Littel Fuse RK1/E60314 E180276 RKI/ JFHR2...
- Page 39 Fuse type Maximum conductor Typical shaft Bussmann SIBA Littel Fuse Ferraz-Shawmut power P2 cross- RK1/ section RK1/SIBA RK1/E1958/ J/E4273 T/ T/E4274 H/ Bussmann CC/Littel Fuse RK1/E60314 E180276 RKI/ JFHR2 JDDZ JDDZ E125085 E71611 JFHR2 JFHR2 [kW (hp)] [AWG] JDDZ JFHR2 200 (300) FWH-500 JJS-500...
-
Page 40: Electrical Data
Max. 1 time/min and C Maximum fault 0.5 % of full scale The factory setting is voltage signal "U". Do not use the power supply for switching CUE on and off. Analog input 2, terminal number 54 Current signal A54 = "I"... -
Page 41: Dimensions And Weights
12.5 Dimensions and weights 12.5.1 Enclosures A2-A5, B1-B4 and C1-C4 Dimensions for enclosures A2 and A3 Dimensions for enclosures A2 and A3 Max. height [mm] Max. width [mm] Max. depth [mm] Screw holes [mm] Enclosure Weight [kg] ∅d ∅e IP21/NEMA1 IP21/NEMA1 IP21/NEMA1 23.5... - Page 42 12.5.2 Enclosures D1h, D2h, D5h and D7h Dimensions for enclosures D1h and D2h...
- Page 43 DETAIL A ø d DETAIL B ø e Dimensions for enclosure D5h...
-
Page 44: Miscellaneous Data
Related information 6.3 RFI filters 12.6.1 Sound pressure level The sound pressure level of CUE is maximum 70 dB(A). The sound pressure level of a motor controlled by a frequency converter may be higher than that of a corresponding motor which... -
Page 45: Disposing Of The Product
EN ISO 13849-1 1. Use the public or private waste collection service. Machinery Directive EN IEC 62061 2. If this is not possible, contact the nearest Grundfos company or (2006/42/EC) service workshop. EN IEC 61800-5-2 EN 50011 3. Dispose of the waste battery through the national collective... - Page 46 Tel.: +387 33 592 480 Centre Turkey Fax: +387 33 590 465 29-33 Wing Hong Street & 68 King Lam GRUNDFOS Pumper A/S GRUNDFOS POMPA San. ve Tic. Ltd. Sti. www.ba.grundfos.com Street, Cheung Sha Wan Strømsveien 344 Gebze Organize Sanayi Bölgesi E-mail: grundfos@bih.net.ba...
- Page 47 96780034 05.2021 ECM 1310502...
Need help?
Do you have a question about the CUE and is the answer not in the manual?
Questions and answers